Diary of a novice scale model maker and his adventures in the wacky world of Braille Scale.
Tuesday, 25 November 2014
1/72 Steyr RSO - Part 2
As I mentioned in the first part of this project thread I have two main modelling jobs to do on this diecast RSO. The first is to make a driver figure and the second is to make a canvas tilt cover.
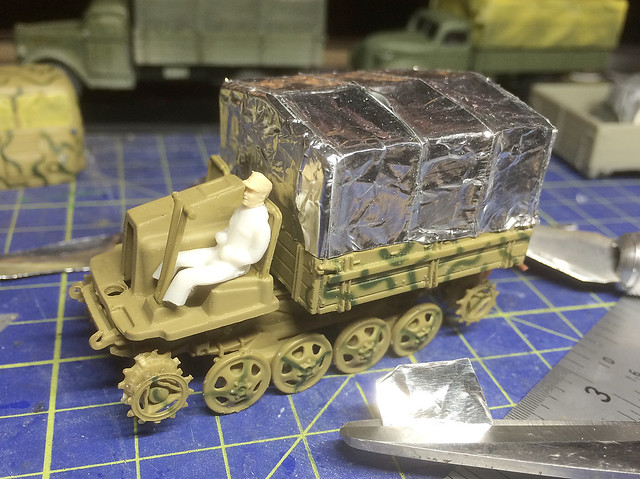
The figure is very straight forward, I've done this three or four times now. I use a 1/76 seated model railway model figure's body - as full-sized 1/72 figures look too big inside 1/72 model vehicle cabs for some reason - and cut off it's head, replacing it with a 1/72 military figure's head.
Even with the 'smaller' body I still had to cut off the feet to squeeze him into the very cramped cab! Still, you won't see this when the cab body is re-attached.
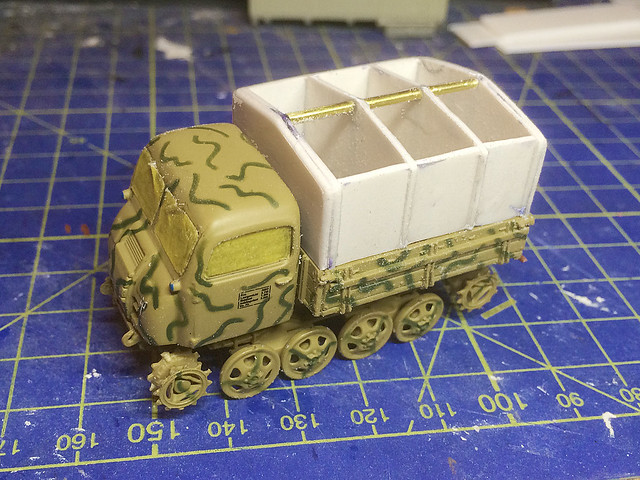
I then made a start on the canvas tilt cover. I began by making a set of 'ribs' to denote where the canvas support rods would be - the idea being that I drape my tarp material over this to give the impression of the supports with some 'droop' in between them.
Next I created some walls for support, recessing them just a tiny bit so I can create the slackness in the canvas that I am after.
I left the top of this support open but added a longitudinal support rod down the middle so the canvas material could drape over it, giving a natural droop in-between the 'spines' of the tilt. If that makes sense? (I'm making this up as I go along!)
For the material itself I am experimenting with a sandwich of two materials. I'm starting with the foil tape that I have used before on other canvas tilts - because it's foil it wrinkles and keeps it shape, making nice little folds. But foil is a bitch to paint (paint is apt to chip and flake off it I have found) so...
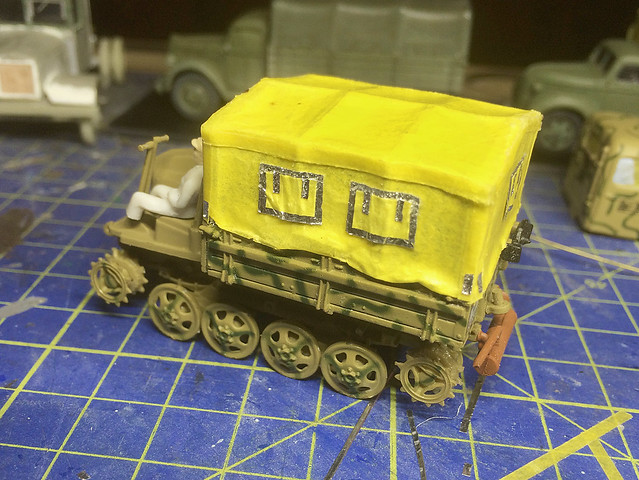
On top of my foil tape base I will stick some masking tape. This not only takes paint better - being a little absorbent - but creates a nice textured surface giving the impression of a fabric based material. (In theory!)
Note: You could just use the foil on it's own, depending if you want a lot of wrinkles. I wanted a subtler effect. Whether it has worked will depend on how it looks after the paint has been applied.
Using more pieces of masking tape I add some of the tarp details, like extra seams and the window flaps, etc. Working with tape for modelling fabric is nice as you can create natural looking folds and wrinkles - but for extra hold you can coat the masking tape with a thin coating of super-glue.
Note: The masking tape I used was a bit too thick, to really get the benefit of the foil wrinkles below you ned to use very thin modellers masking tape instead of the decorators tape I used. The next time I try something like this I might try gluing PVA soaked tissue paper over the foil instead.
And finally...
There is one more modelling job that I *could* do but haven't decided whether I should or shouldn't as it is an optional item.
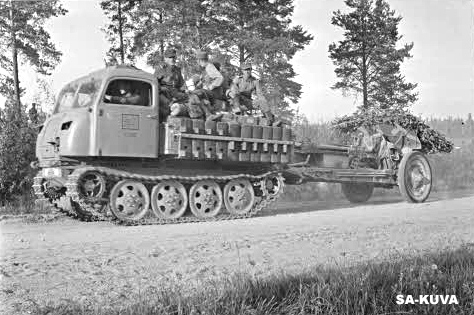
The Steyr RSO came with a set of winter/soft ground track shoes (or grousers). They are clearly seen in many reference photos and were included because the RSO was originally designed with the 'Russian Front' in mind (RSO stood for Raupenschlepper Ost, which is literally "Caterpillar Tractor East"). So all RSOs came from the factory with a set of wooden 'slats' which could be fitted to the narrow tracks should the ground be boggy or snow very deep.
My Finnish photo of an RSO has them fitted, and I suppose when you bear in mind teh geography and climate of the Finnish theatre - with boggy forests and harsh winters - it kinda makes sense for them to be a 'non-optional' item really.
...I'll think about it!
Subscribe to:
Post Comments (Atom)


By jingos Stephen you are a clever fellow. Thats a cracking idea about the ribs. Consider it copied!
ReplyDeleteGreat progress.
Hi Paul, it was a bit of an experiment - I think the masking tape I used was too thick and hide some of the nice wrinkles in the foil layer. I should have used a very thin paper layer instead...Maybe tissue paper glued on.
Delete