Having weathered the underneath of the trucks it's time to work topside and add some character by means of dirt and scratches. I started with a light airbrushing of dust (Vallejo's Model Air Yellow Sand)...
 |
| Light dusting of...er...'dust', then onto the pin washing. |
I then used Vellejo's German Grey (995) for the 'chips'. It's a dark slate grey which should give the impression of unpainted steel showing through the scratched top coat of paint. Now this part is open to interpretation and I would suggest you use a good reference photo when weathering and chipping or - like me - you may be tempted to go a little over the top (I like the heavily weathered look, but I am aware it can look a little gimmicky). So, sorry if my chipping isn't to your tastes!


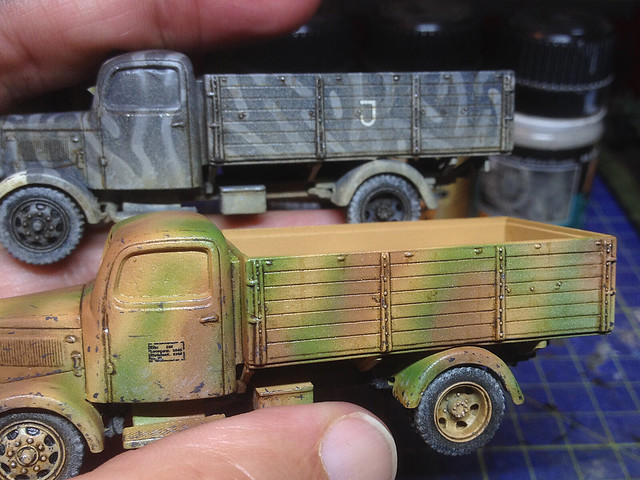
Now, obviously, this dark chipping works great on light or medium coloured vehicles, less so though where the vehicle colour scheme is predominantly dark - as in the case of my second truck. There didn't seem much point in trying to paint on dark grey scratches on a dark grey truck! But where there are light patches and white decals I did add few grazes and spots.
The wood panels on the flatbed were next to get some attention.
 |
| Pin washing between the planks of the cargo flatbed. It makes them stand out. |
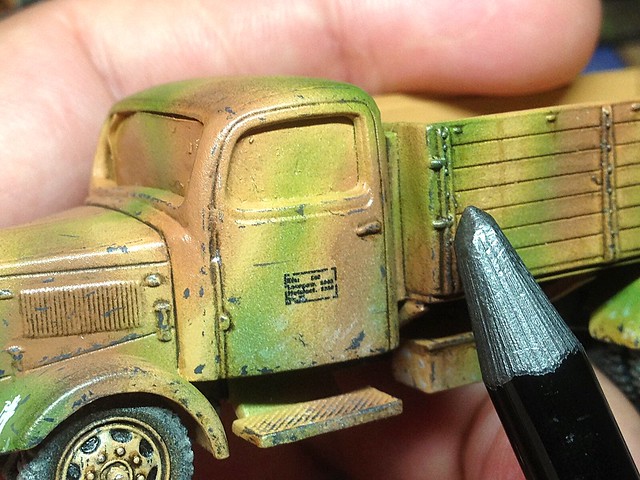 |
| Just finishing the wear & tear on the drivers step. The graphite pencil gives the impression of the top paint being worn away. |
...Taking stock as we approach the final hurdle...
The last part of this project will be the painting of the canvas tilt cover and the fitting of the windshields. This will be the next - and hopefully the last - instalment of this blog tutorial.
As I have said in this post though, weathering and chipping are very much a personal thing. More than any other part of the model-making process this is your chance to be creative and express your own tastes. Yes, you can adhere strictly to historical photo reference but - in effect - in the weathering of a model you are trying to tell a story about that model.
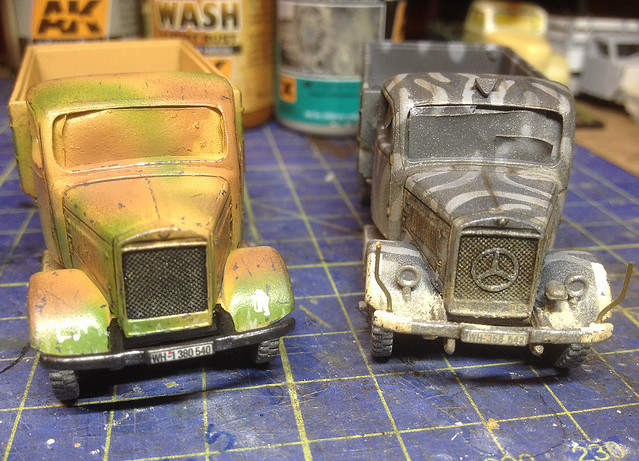 |
| I think I forgot to mention, the Mercedes badge on the right is simply made out of paper! I printed out the shape and then cut it out and stuck it on with PVA! |
In effect, you are actually being a little 'artistic' (with a small 'a') - and I like that.
A+ Stephen.
ReplyDeleteBloody impressive all around.
Many thanks Paul, I really appreciate the feedback. I sometimes get carried away...Which is why I complete so few models! :D
Delete