 |
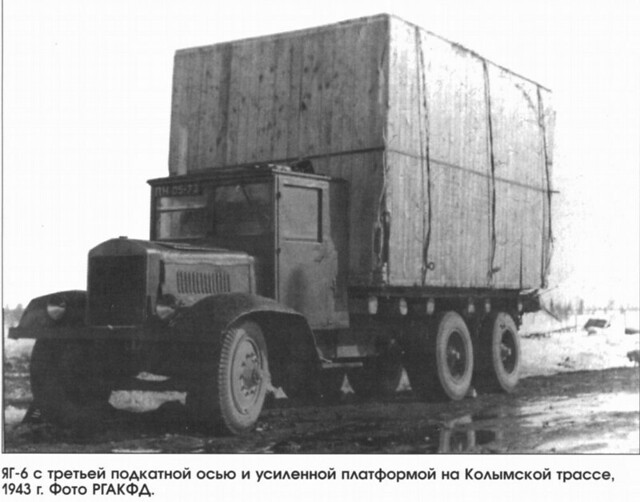
| The mighty YaG! Here a YaG-6 has had an extra rear axel fitted to help it deal with extra large loads! This 3-axel model is not to be confused with the YaG-10 which came with a third axel as standard. Kolyma area, 1943. Source: www.armchairgeneral.com |
To re-cap, this is my very first attempt at making an 'advanced' level short-run resin kit, so it's with some trepidation that I take the first few steps (nervous, as I am, of making a mess of this expensive display quality model). And right away I encountered some of the challenges of working with delicate resin parts.
The cab - a tricky start!
Step 1 in the construction of a model truck is usually the cab, this has duel challenges as - unlike tanks - you are modelling a vehicle interior that will be on display. So you have to plan a bit as you will be reaching for the paint brushes early (in this I guess trucks are a bit more like model aircraft where you paint the cockpit early on).
Step 1 in the construction of a model truck is usually the cab, this has duel challenges as - unlike tanks - you are modelling a vehicle interior that will be on display. So you have to plan a bit as you will be reaching for the paint brushes early (in this I guess trucks are a bit more like model aircraft where you paint the cockpit early on).
Aside from the painting there is the issue of the driver figure. The Zebrano YaG-6 does not come with a driver figure so you have to source a suitable model and paint that in the appropriate uniform colours (in my case although the YaG is a Soviet truck I am modelling a captured Finnish example so my driver will be in a Finnish field grey uniform).
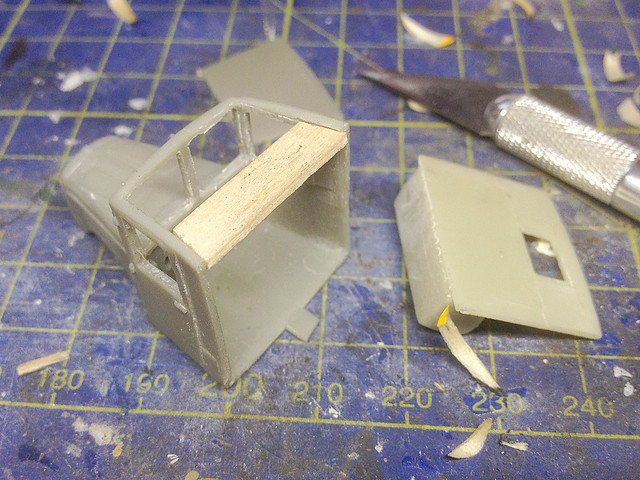
So, while I think about that I crack on with the cab's major components and begin to remove superfluous resin casting 'flash'. Resin kit 'flash' isn't like that of a plastic injection moulded kit, resin casting 'flash' can be rather large 'blocks' of resin attached directly to components, they are an integral bi-product of the casting process and are not as easily removed - in some cases - as traditional 'flash'.
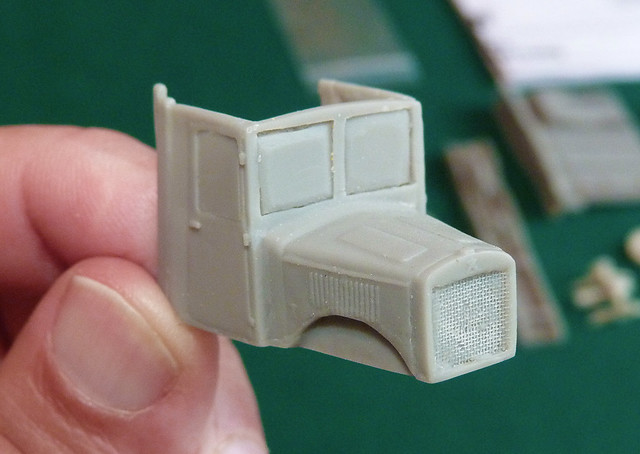
This is what I found when it came to the YaG's cab. Not only were there tow rectangular slabs of 'flash' attached to the back of the cab but also the windows were blanked off by resin too. And this stuff isn't as easy to get rid of as plastic flash either - it's thicker and the resin has a strange quality to it that make cutting it - even with the sharpest scalpel - a tricky job.
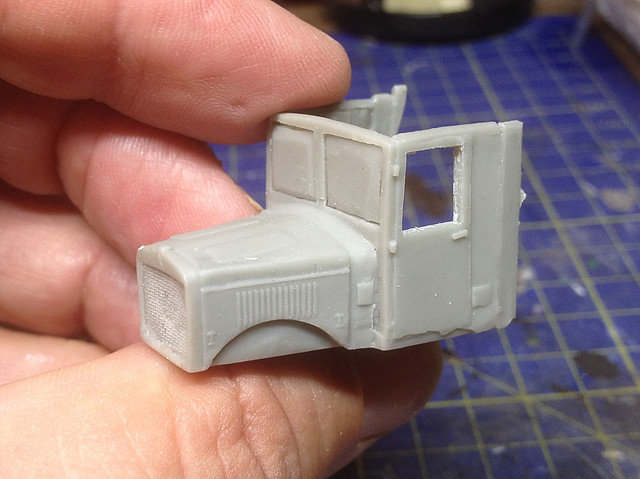 |
| Cutting out the windows: You would not believe how long it took me to saw my way through just this one window! Resin is horrible stuff - brittle and yet at the same time somehow elastic. |
Note: The greatest care has to be exercised when cutting this sort of integral resin flash. The temptation is to press harder on the craft knife to cut the infuriating material but this can lead to 'skipping' where your knife jumps because of the pressure and skips across bits of the kit you don't want cutting...Or worse, finds fingers! I found the best techniques was to use a new sharp blade and cut carefully and repeatedly to 'saw' through the resin.

Gluing items is done with super-glue and not poly. The resin doesn't melt in the same way plastic does - I find - but super glue seems to make a nice strong join. I'm not attaching the windshield transparencies yet, I like to fit windows last.
 |
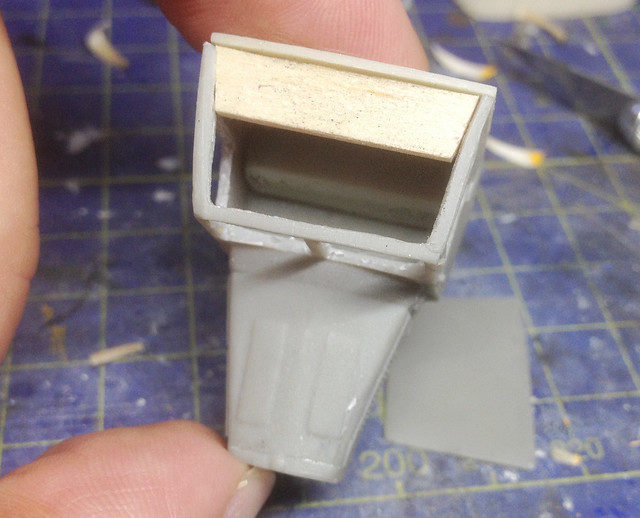
| This shows what you are up against. Look how thick the 'windows' are! You can also make out the basic dashboard detail. Otherwise the interior is quite spartan. |
There is some interior detail. There's a steering wheel, a couple of gear sticks and attached to the cab's rear wall there is the bench seat. The steering wheel and gear sticks a small, fiddly and quite brittle and I'm putting off gluing these in until I source an appropriate driver figure so I can make sure everything fits in OK.
Cab interior aside it's the shape of the cab structure that presents the greatest modelling challenge. The resin cab is severely bowed which makes the fitting together of the various parts - like the roof and rear wall - a bit tricky...
Cab interior aside it's the shape of the cab structure that presents the greatest modelling challenge. The resin cab is severely bowed which makes the fitting together of the various parts - like the roof and rear wall - a bit tricky...


It looks like I will have to make some sort of frame to straighten out the walls of the cab and make it square again. But even so there will still have to be a reasonable amount of filing to get things to fit, and maybe even some filler to get rid of any gaps. Not a promising start.
I can't help being a little disappointed because of the price of the kit, but I suppose these are some of the quirks of short-run resin kits. What I have to do is bear in mind that if I persevere, take my time and make a good job of this kit I will end up with a vehicle that is pretty unique as it does not exist in any other form in 1/72.
Next: Painting the cab interior
 |
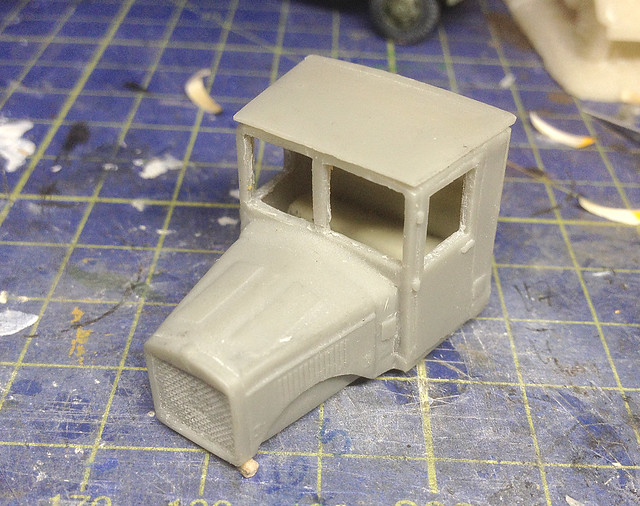
| I decided to buttress the warped cab walls to straighten them out with a length of a cut-down wooden coffee stirrer! |
 |
| This seemed to have sorted out the deformed cab nicely, and now the rear wall section - with it's integral bench seat - fits into the cab snuggly. |
Next: Painting the cab interior
Bottom of the page trivia: A historical note by Stanislav Kiriletz, (www.kiriletz.de) from Germany: Ya-4 truck was manufactured by Daimler's official license, they had Mercedes engines and radiators bought in Germany. A total of 182 chassis were made. The frame was used from an older Ya-3 (White chassis from WWI period). Later the "Yashka" (as the truck was nicknamed by Russians) had American-made engines (Continental and Hercules) and had very little to do with Mercedes. In 1937 Stalin has decided to stop spending hard currency on these and YaGAZ factory went back to ZIS engines. [Source: Scale43.com]
No comments:
Post a Comment