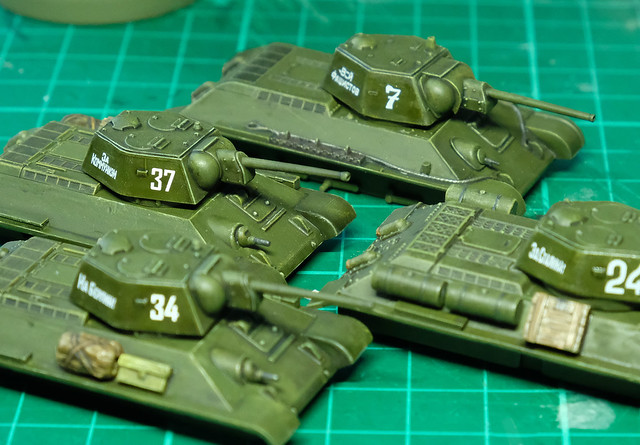
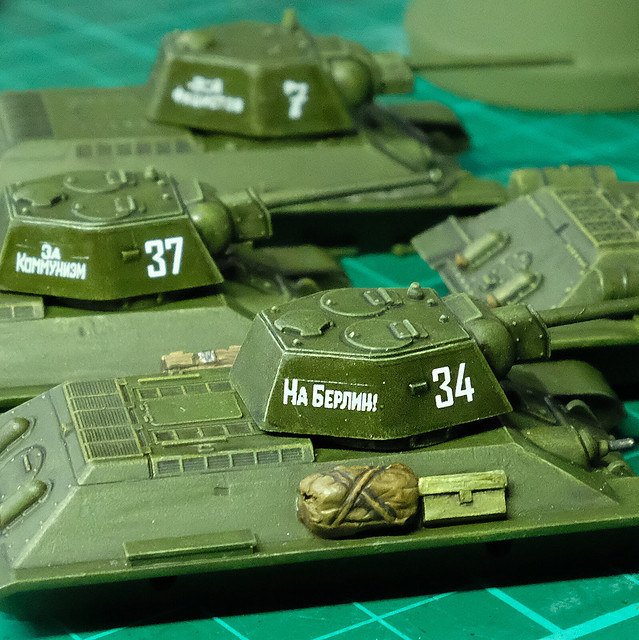
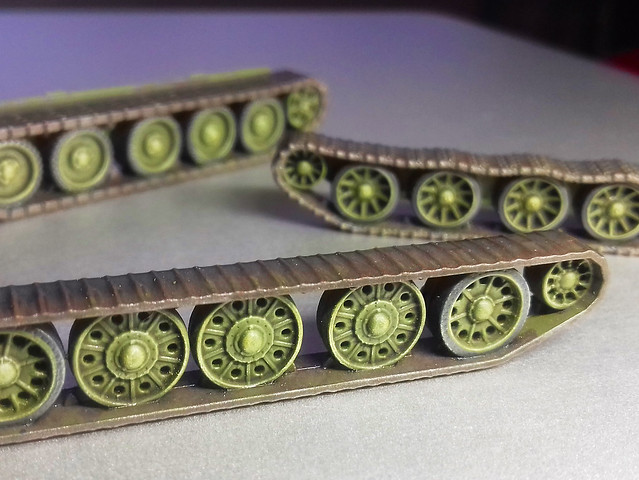
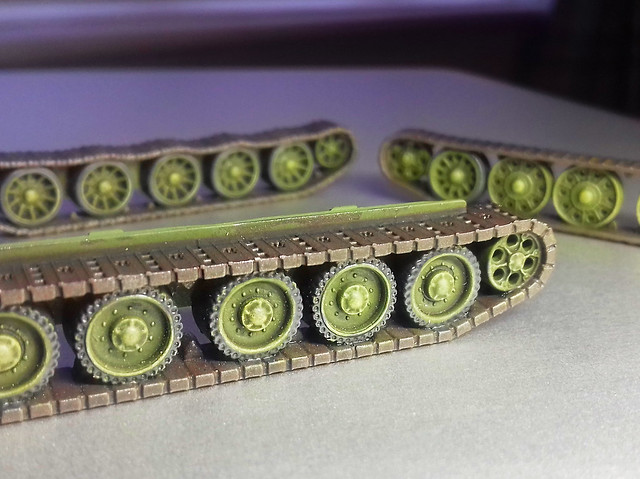
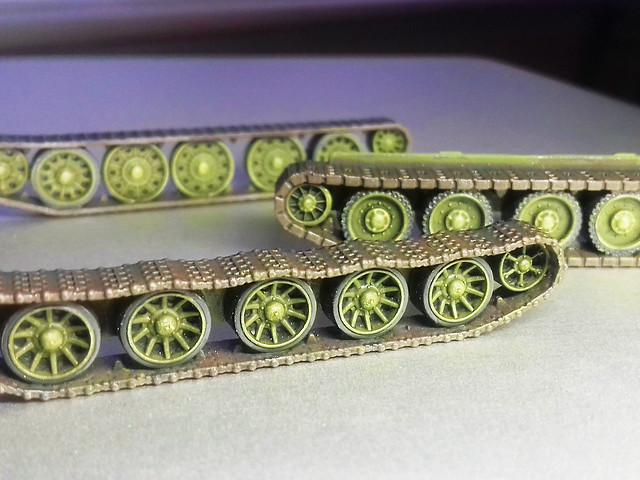
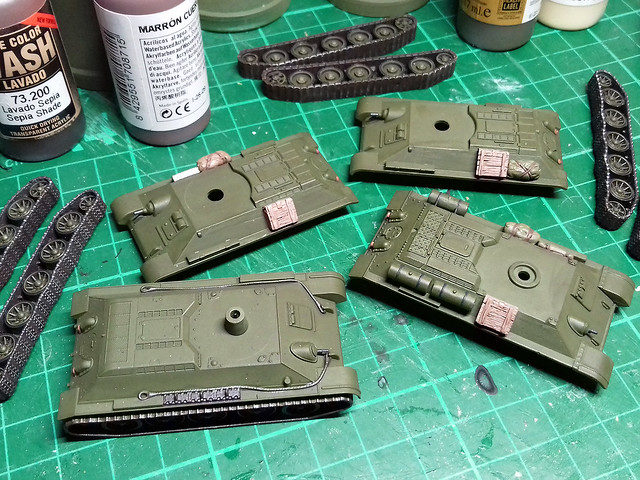
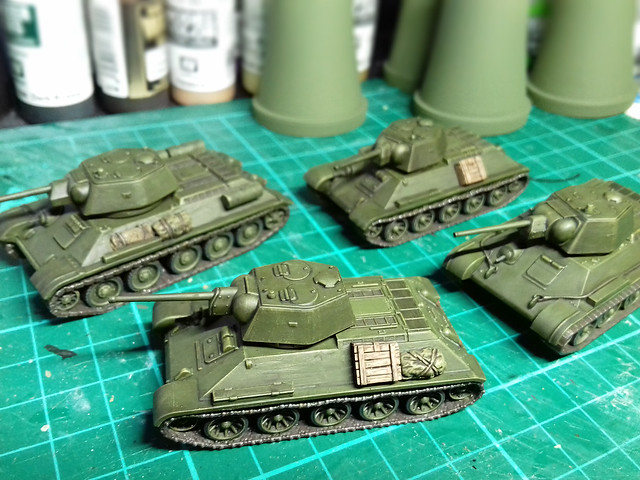
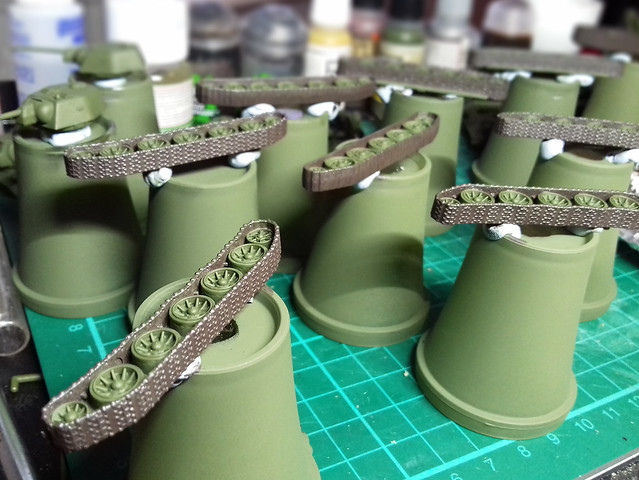
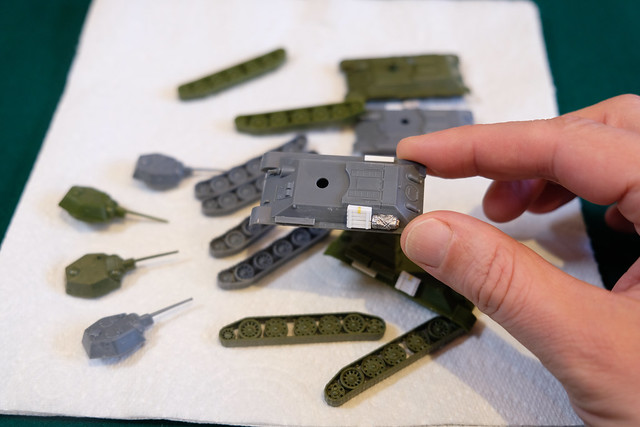
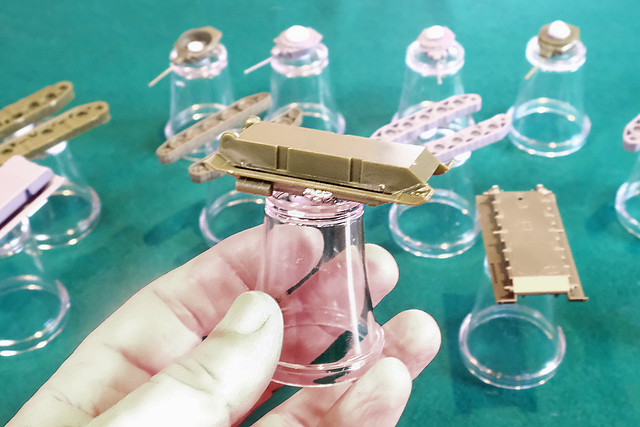
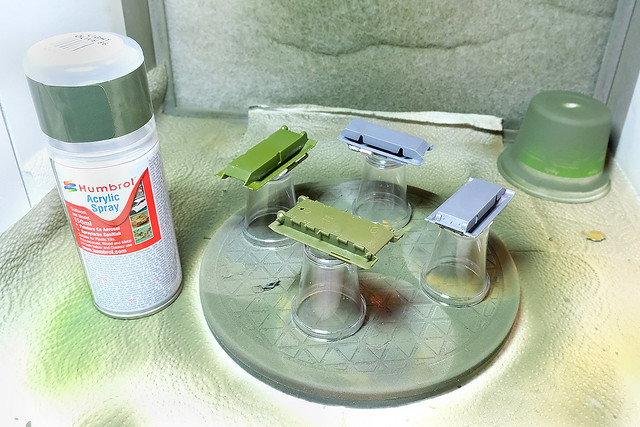
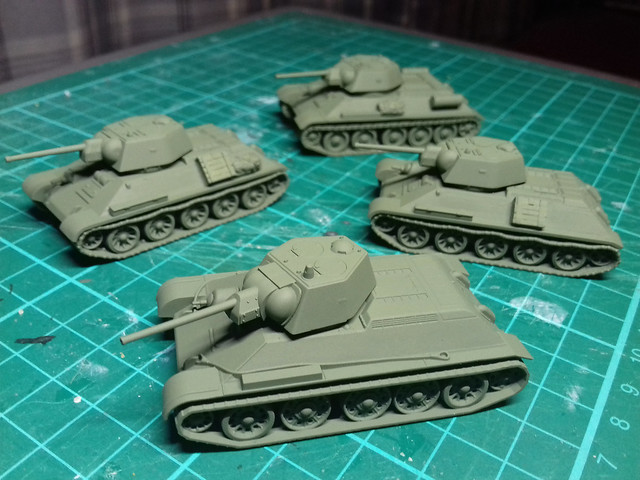
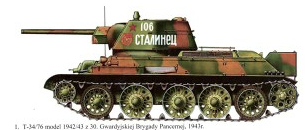
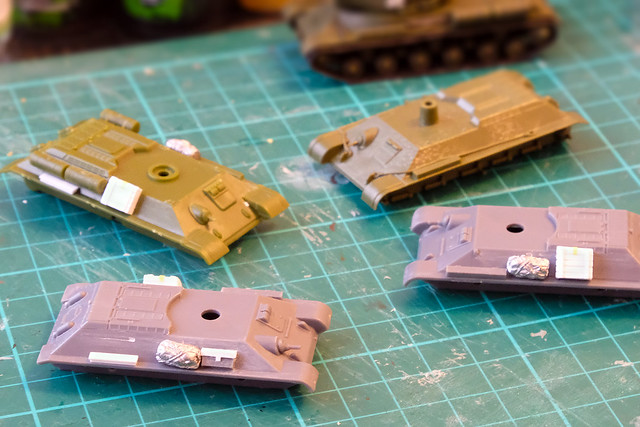
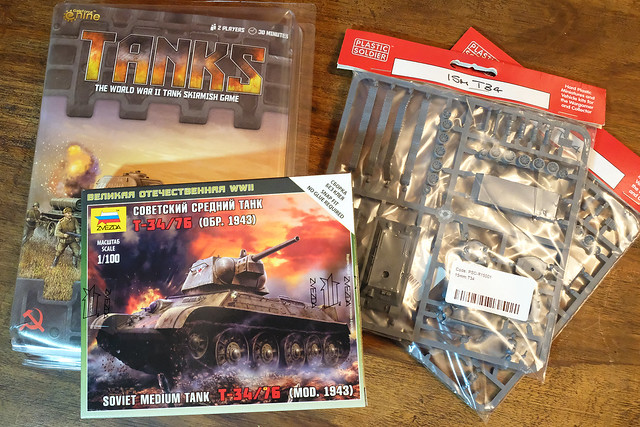
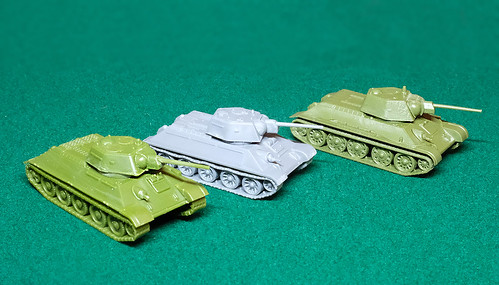
Curiosity got the better of me and instead of just buying four 1/100 T-34s of the same make for my 'Project Kursk' I decided to buy different makes of model so I could compare them (I did something similar when I made some 1/72 wargame T-34 models). The models I bought were by Zvezda, Plastic Soldier Company (PSC) and Battlefront.
Note: As my project is a Battle of Kursk (July/August 1943) themed game, the Mod. 43 (Model 1943) T-34/76 (76mm gunned version) tank would make the most appropriate choice, so my purchases were based on this fact...
When reading about these various kits I noticed each seemed to have their own pros and cons and from my point of view, not one of them seemed to be the 'killer' T-34 kit that would make me plump for just that one manufacturer. So here's my overview of the three makes I decided to try out...
Sprue Review
I noticed immediately that each manufacturer had it's own ideas about what was necessary to make an acceptable wargame tank model. Zvezda takes a minimalist approach based on a strict budget, while PSC and Battlefront take the view that 'extras' and optional parts are what the gamer is after.
Both Zvezda (£3.15) and Battlefront (£5.95) supply a single tank in their packs, while PSC is more specifically geared towards the troop level game and their models usually come in a multipack (5 tanks for £18.64). However, a single PSC T-34 model is available if you go onto their website and look for their
'reinforcement' pack, which is an individual sprue of their T-34 tank set for just £5.99.
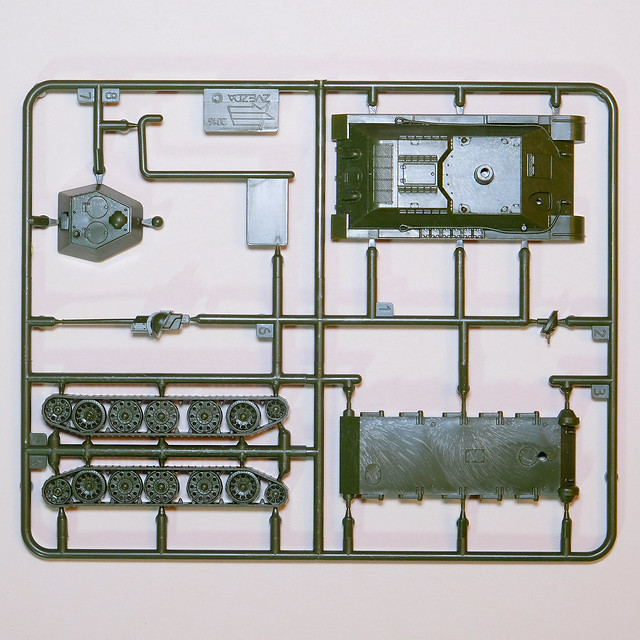
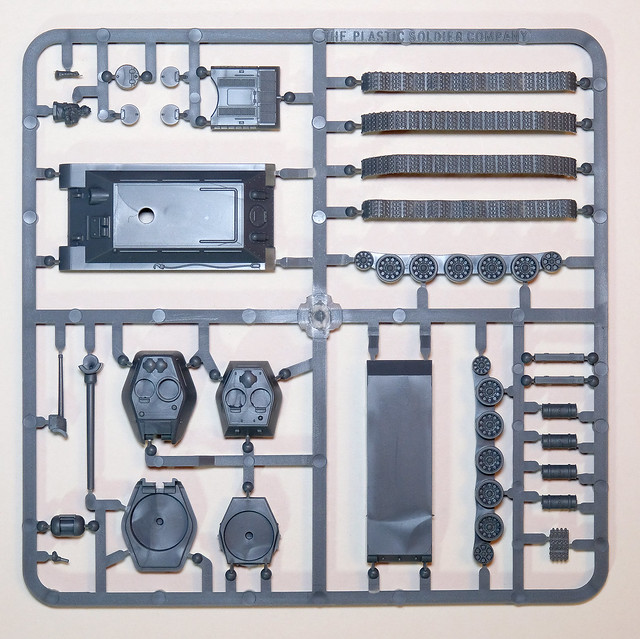
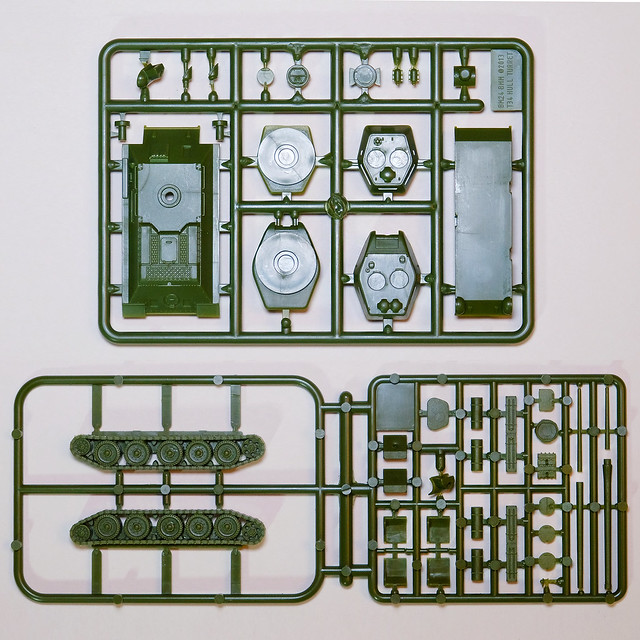
And here is what you get...
ZVEZDA
PLASTIC SOLDIER COMPANY
BATTLEFRONT
As you can see the amount of parts tends to escalate relative to the cost, even so Battlefront's two sprue set seems to offer very good value for money. While Zvezda does win the cost battle hands down you do have to bear in mind that with both PSC and Battlefront you are really getting two tanks for the price of one as they included the extra parts to make a T-34/85 variant turret which you can swap out. A nice option.
If, like me, all you want is the T-34 76mm gunned version the Zvezda budget kit makes sense. But having the ability to 'upgrade' your model by swapping turrets means that with PSC and Battlefront you can play games which are set from 1943 to the end of WW2 in Europe. The Zvezda tank is generally more suited to games set in 1943 to early 1944, the Soviets having accelerated the upgrade process from T-34s to T-34/85s in earnest in 1944
(the final version of the 76mm gunned T-34 was designated the 'Mod 44' - or Model 1944' - and was called the T-34/76E by the Germans).
 |
A Model 1943 76mm gunned T-34 on display in Gdansk, Poland
Source: Wikipedia |
And so, on to the quality and technical authenticity of the kits. Let's start with those turrets...
T-34 Turret Components
All three turrets for the T-34/76 models are the late production
Hexagonal Turret of the 'hard edge' (flat panel) versions equipped with the 76.2mm F-34 gun. This was indicative of the penultimate 76mm gunned T-34 version which was built from May 1942 to 1944, but is generally known as the
Model 1943 (or the 'T-34/76D' by the Germans).
For complete list of the evolution of the 76mm gunned T-34 see: T-34 variants on Wikipedia.
Aside from the 'hexagonal' shape, this turret was an improvement over the original (model 1940-1942) T-34 turret principally because of it's two crew hatches in the roof. Amusingly, when these hatches were open, their side-by-side arrangement prompted the Germans to give the Model 1943 the nickname
'Micky Mouse'!
 |
| Top to bottom: Zvezda, PSC and Battlefront. |
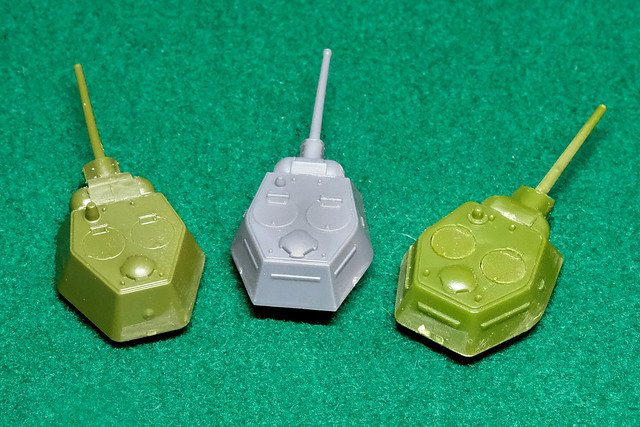
The Zvezda hatches are moulded into the turret component, but both the PSC and the Battlefront turrets have separate hatch components. Because you have to glue these hatches in they are slightly more raised than the Zvezda's, which I think looks a little better (generally the Zvezda's surface detail, while crisp and accurate, can be a little too subtle at times, at 1/100 scale).
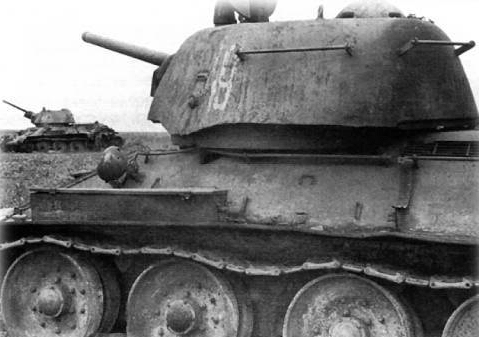 |
Picture of a T-34/76 'Mod. 42' (known to the Germans as the T-34/76C) which
clearly shows the distinctive 'hand rails' which attached to the hull and the turret
so that infantry had something to hold onto when riding atop the tank. This '1942'
version of the T-34 featured a new shaped turret which were either of a welded
or - as in this case - slightly rounder 'stamp cast' made by the Ural or 'UTZM'
factory. Also note the 'Early Dish Wheels'. |
One prominent point of detail that's a bit 'iffy' is the implementation of the turret's
hand-rails, which were arranged around the turret's sides. Zvezda decided not to include these at all at this scale, while PSC and Battlefront simplified the rails to mere plastic 'bumps'. I can understand why they chose this very superficial means of embellishment at 1/100 scale, but I personally prefer Zvezda's approach of omitting these details altogether...
 |
| Left to right: Zvezda, PSC and Battlefront. |
Finally, there is a bit of a problem with dimensions. The PSC and Battlefront turrets are a little too wide at the back, while the Zvezda's rear panel is the correct width.
T-34 Hull Components
Further dimensional problems are obvious in the difference in sizes between the three makes of hull. While the Zvezda and the Battlefront are similar in overall length, the PSC hull is shorter by a couple of millimetres...
 |
Left to right: Battlefront, Zvezda and PSC. Note how shorter in length the
PSC T-34 model is. |
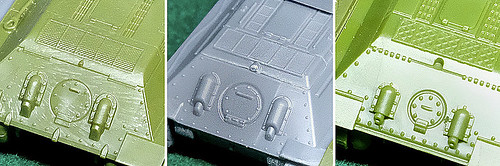
Other differences - placement and size of detail - are relatively minor, though they do vary significantly stylistically. This is most easily illustrated by the differences in how the various tank's engine decks have been modelled.
As is becoming clear, the Zvezda model is the most historically accurate, while PSC and Battlefront have employed some 'artistic licence' in the way they have simplified certain detail...
 |
| Left to right: Zvezda, PSC and Battlefront. |
The Zvezda detail is historically accurate, dimensionally correct and is also stylistically faithful to the original T-34 design. This is most evident in the engine's mesh grills on the rear hull, Zvezda's is a delicate criss-cross design, with PSC has gone for a very simple slatted design and Battlefront has a rather horrible over-scaled 'diamond' hatch.
(I should also note that Zvezda was the only manufacturer to get the slightly rounded rear slope of the engine deck looking right, the other two went for a more angular look.)
 |
Short to long, PSC, Zvezda and the Battlefront (though the difference
between the Zvezda and the BF isn't quite as noticeable). |
However, I should mention that - in my initial builds of the three models - I have omitted a lot of the extra optional extras from the PSC and Battlefront kits that come already moulded onto the Zvezda model. Things like storage boxes and external fuel tanks (which, incidentally, the Zvezda kit does not come with at all) are separate components in the PSC and BF kits.
I left them off so all three tanks looked externally similar, for comparison purposes.
The Battlefront kit, in particular, comes with a very good amount of 'extras', which allow you to vary the look of tank models - if you make a troop - or make slightly different versions of the basic tank.
(Interestingly, it also looks like they include some extra parts not intended for the T-34 at all, but rather T-34 variants, such as the SU-100 tank destroyer. Presumably they utilise a common sprue?)
T-34 Tracks and Wheel Components
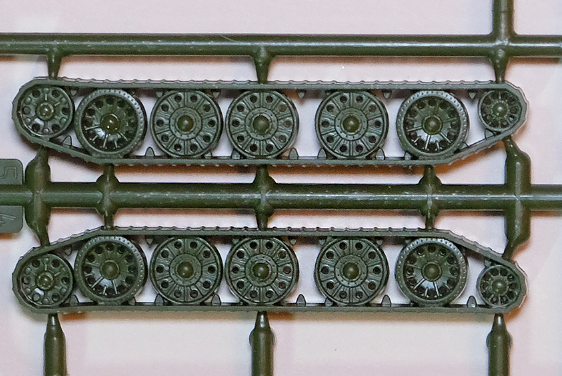
The Zvezda kit come swith a beautiful set of mixed
‘Half Spider Wheels’ and
full steel perforated wheels. On the real tank, the Half Spider wheels were added at the front and rear to negate the vibration and wear and tear caused by the full steel wheels. These wheels are characteristic of late 1943 T-34s *only* (T-34/85s were not equipped with solid steel wheels).
Though I should mention - on a historical note - that 'Early Dished Wheels' (solid steel with rubber 'tyres') were also used on T-34 throughout their deployment, it just seems to have depended what was available in whichever factory that the T-34 was manufactured.
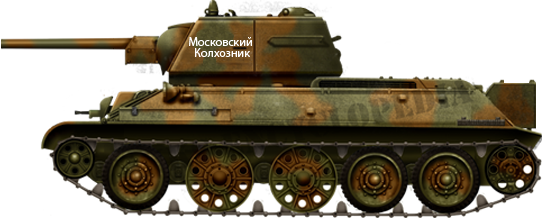 |
T-34/76 model 1942 at Kharkov. Note the mixture of all steel perforated wheels
and solid 'dish' style wheels with rubber tyres. The all steel wheels were originally
brought in when material shortages (particularly rubber) were at their height. As
the war progressed rubber became more widely available so all steel wheels were
withdrawn. By the advent of the T-34/85 all steel wheels were no longer used.
Picture source: Tank-Encyclopaedia.com |
The PSC T-34 kit is equipped with the spoked type
‘Full Spider Wheels’. These came into use in late 1943 and so are suitable for late variant WW2 T-34s and very late war and post-war T-34/85s. The moulding is characteristically ‘chunky’ (for PSC) and the perforations in the wheels are not ‘drilled out’.
And Finally, the Battlefront kit comes with a full set of
‘Early Dished Wheels’, which were solid steel wheels but with perforated rubber ‘tyres’. Once again, these are common for both T-34s and T-34/85s from late 1943.
Summary: The PSC wheels, while adequate, are the least satisfying of the three makes (being a bit 'chunky'). The Battlefront wheels are nice and even show the correct perforations in the ‘tyres’. But the Zvezda wheels are magnificent (for the scale) and their only drawback is that they are specific to the T-34 *only*, while PSC and Battlefront have chosen wheel designs that are suitable for both the T-34 and the T-34/85.
(Though Zvezda makes a separate T-34/85 kit with the appropriate wheels.)
1/100 T-34 models - Tracks
Without getting too technical, one of the most characteristic aspects of the T-34 series was it’s wide ‘waffle pattern’ tracks. Unfortunately, as is fairly common in 1/100 plastic wargaming kits this feature simplified to various degrees...
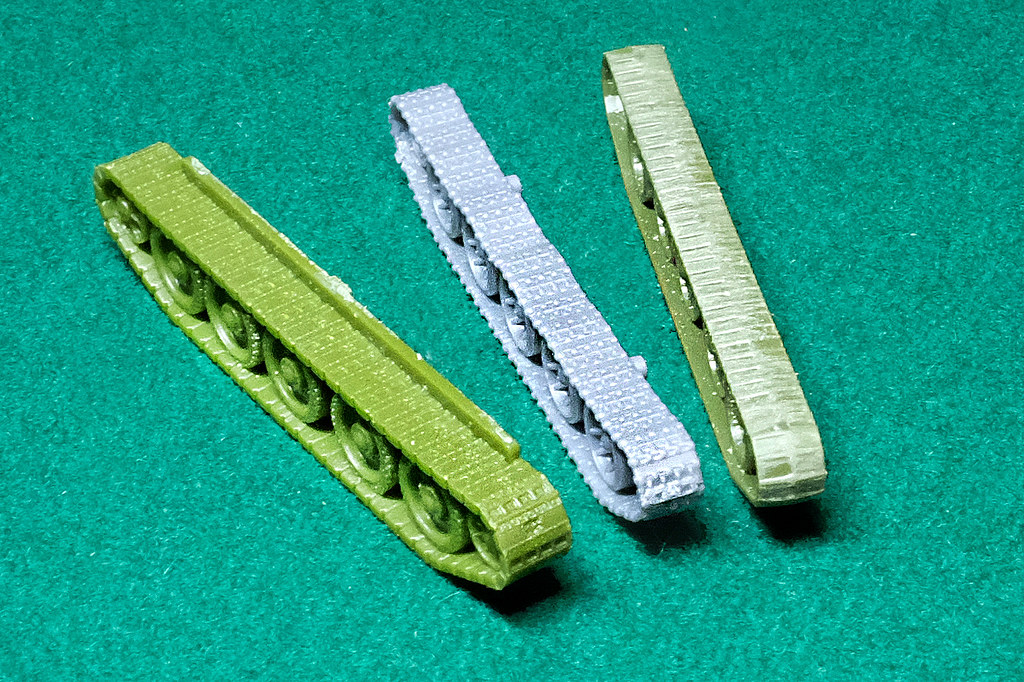 |
The Zvezda tracks (right) look even worse than they actually are because I
had to sand down an obvious moulding seam that runs down the middle! |
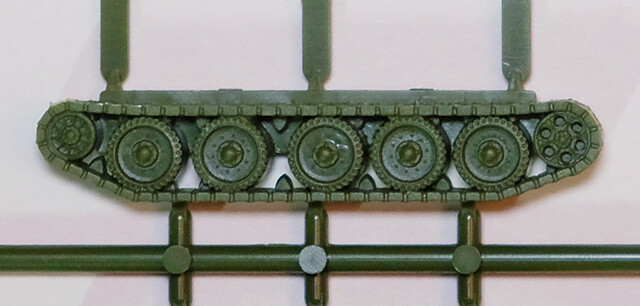
Of all the makes, PSC does the most commendable job of trying to recreate the texture of the T-34's track links. They do this by providing you with three separate parts to make one track set - a 'wheels' component, an upper track part and a lower track part. Once glued together, this multi-part unit makes a very nice representation of the T-34's excellent tracks...
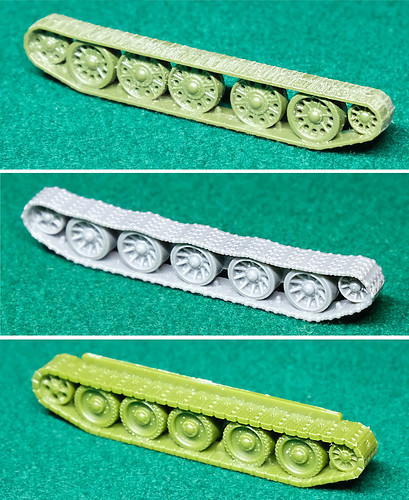 |
| Top to bottom: Zvezda, PSC and Battlefront. |
Both Battlefront and Zvezda got for a 'one piece' track component, with integrated tracks and wheels. The way they have gone about this has its pros and cons, for while both have nicely done wheels (the Zvezda has, again, terrific wheels) both tracks have differing problems.
The Battlefront has had a stab at creating a track link pattern (inside and outside of the track), but it's a lot less detailed as PSC's. However, perhaps in order to tick all these boxes, the tracks are excessively and unattractively
thick (which the T-34's tracks were not).
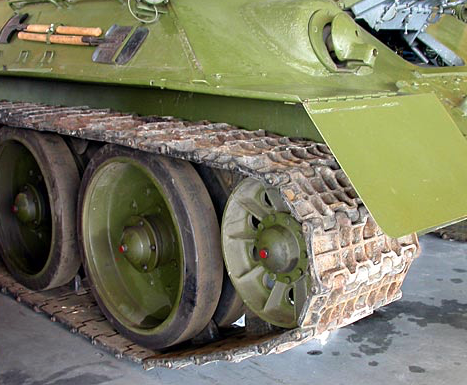 |
| A nice shot of the real T-34's 'waffle' tracks. Source: Bill Maloney |
Zvezda, on the other hand, has the thickness of the track correct
but then have abandoned any attempt at trying to model the track pattern at all! Instead they have settled for a very unsatisfactory slatted pattern on just the outside of their track, perhaps in the hope that at 1/100 and on a table nobody would notice. Well, I noticed!
Summary: I'd love to have seen Zvezda compliment it's lovely wheels with lovely tracks, but it wasn't to be. Zvezda's 1/100 tanks have a poor track record (!) in providing an acceptable link pattern on their models. Battlefront has made a spirited attempt at good tracks in a one-piece format, but don't really pull it off. PSC, I have to admit, have taken the best approach to a satisfactory final product by making a three-part track system. OK, their wheels aren't the best, but out of the two - good wheels or good tracks - I prefer to have the acceptable tracks.
Overall Summary and Conclusions
Well, every manufacturers' set of components seems to have pros and cons, and my overall conclusion is that - perhaps - the 'perfect' 1/100 T-34/76 model doesn't quite exist. However, having said that - bearing in mind that these models are for gaming and are not display quality scale models - being too critical over details that will not effect the effectiveness of these models purpose as game markers would be a
little unfair.
Still, even though much of the detail may not be fully appreciable at 1/100 scale at tabletop distance it's satisfying to have a model that's an accurate representation of a historically important tank. And so, which of the three models did justice to the legendary T-34?
It's actually easier to say which of the three that is least satisfying, and that is the Battlefront T-34. After building a couple of their rather nice M4 Sherman models I was a bit disappointed that their T-34s weren't of a similar standard. The main problem, from my point of view, is the level of simplification and how ham-fisted they have stylised some of the signature features of the T-34, like the engine deck and the tracks.
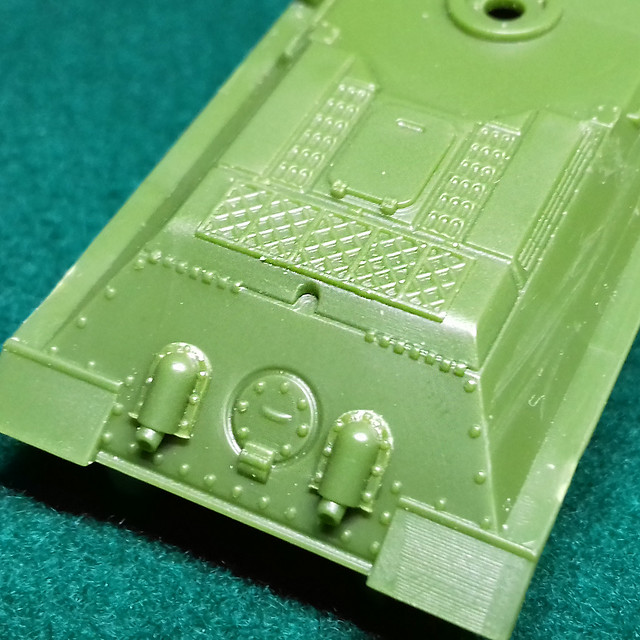 |
| Battlefront's detailing can be a little clumsy looking on occasion. |
While, PSC's T-34 - like the Battlefront one - seems a little 'chunky' (and occasionally over-scaled) in it's depiction of certain features, the moulding does seem a little cleaner and crisper. In fact, this reminds me of one of my main niggles with the Battlefront model - the sprue attachment points are far too thick and can cause problems when trying to separate the part from the sprue cleanly!
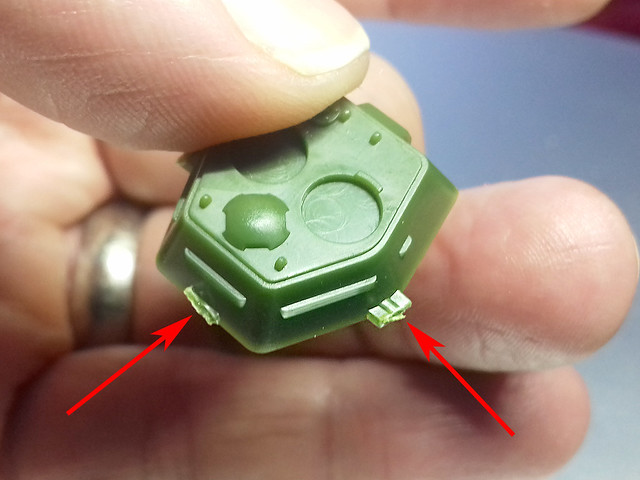 |
| Battlefront sprue attachment points - lots to trim off! |
It's not a huge deal, but is a bit annoying as not matter how careful you try to be when trimming the tabs off they sometime leave a bit of a mark on the model surfaces. I only mention it as both Zvezda and PSC managed to use thinner and more discrete sprue attachment points that did not impact the model themselves.
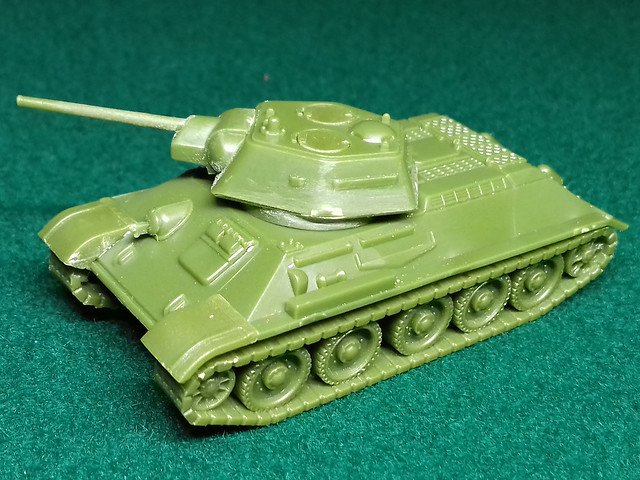 |
In the end, just a little too untidy for me. Even all Battlefront's extras couldn't
win me over! |
So, third place to Battlefront, but out of Zvezda and PSC is the best 1/100 plastic T-34 kit?
Well, I'd
love to say Zvezda. It has so much going for it, undoubtedly it is the most
technically authentic looking. I love it...
But those tracks! If I could have the Zvezda turret and hull, but the PSC's tracks incorporating Zvezda's Half Spider Wheels I really think you would have a fantastic 1/100 Mod. 43 T-34/76. But, that's not the case. 😭
What I think people really want to know is
if I could only buy just one make, which one would it be?
I would have to plump for the PSC T-34 set as the best all-rounder, with the caveat that if cost is your primary concern then the Zvezda is the best alternative choice.
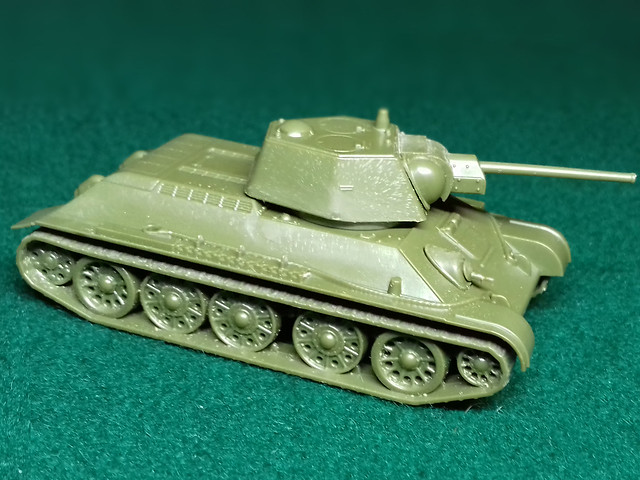 |
| Isn't she lovely! (Just don't look at the tracks, this is her best angle.) |
The PSC is a chunky monkey - though ironically the smallest of the models of the group - but the detail is crisp and
over-scaled with a purpose. Given the small scale the slightly exaggerated detail is great for war-game painters, allowing salient features to be picked out even at tabletop distance.
One cannot ignore the extras one gets with the PSC sprue, it may not be as much as Battlefront gives you but it is a nice little selection of parts and even comes with a commander figure. (One thing I do like about Battlefront's options is that it does come with the Mod. 44 raised commander's cupola allowing you to make the final version of the T-34/76.)
Battlefront and PSC both give you optional parts to make open turret hatches and both BF & PSC give you the option to build a T-34/85 turret with which you can alternatively equip your tank. Very handy.
(Though, here is one area PSC falls down - with it's famously horrendous 85mm T-34/85 gun which is grossly over-sized, looking much more like a 120mm gun.)
The bottom line is that as a war gamer you will probably want to buy several models of the T-34 to play with - to make up a tank troop - and with PSC offering a five tank box set (with the cost working out at just £3.75 a tank) the extra variety made available with the optional parts is an attractive feature. Whereas the simple - although beautiful - Zvezda's lack of options means that you would have to make your own extras to provide a bit of variety.
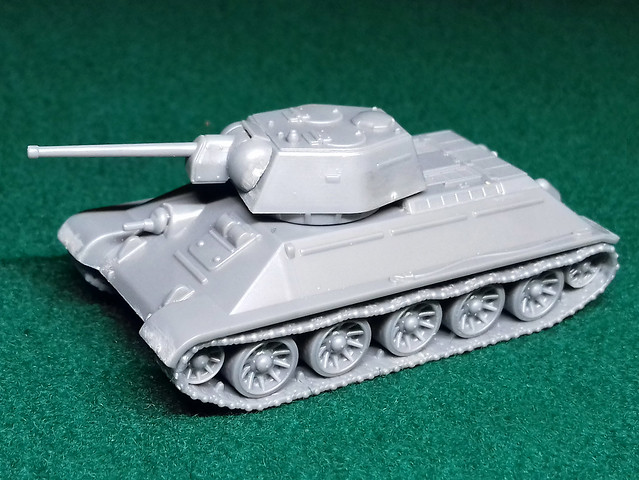 |
| Not outstanding, but a competent all-rounder. Just like the real T-34 really! |
...It's tempting to just ignore Zvezda's pathetic tracks for the price. But, PSC's overall package of tidy detailing and ability to add some extras should you want them ultimately wins the day (in 1/100 scale at least).
In Part 2: I see what these little beasts look like painted.