Showing posts with label X-Ref: CON/MTV3000/0714. Show all posts

Saturday, 10 January 2015

ModellTrans V3000 debrief

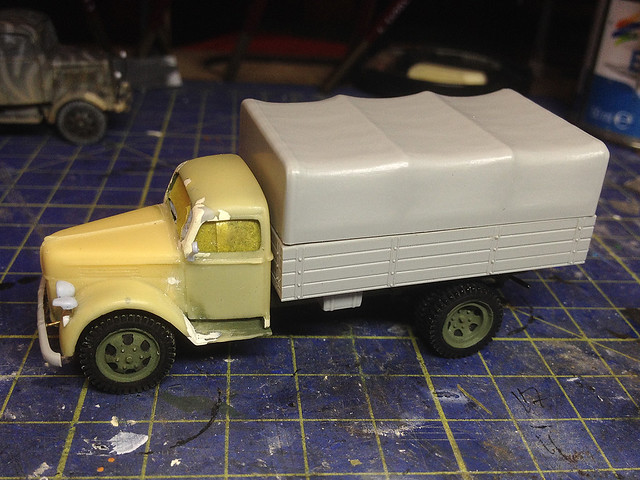
After building a dozen of so kits I feel that this ModellTrans based model is perhaps my first acceptable display quality model, all my others were - to varying degrees - experiments and practise models. As such I thought it would be nice to do a proper project debrief and discuss some of the issue concerning the building of this Modelltrans conversion.

In the beginning...
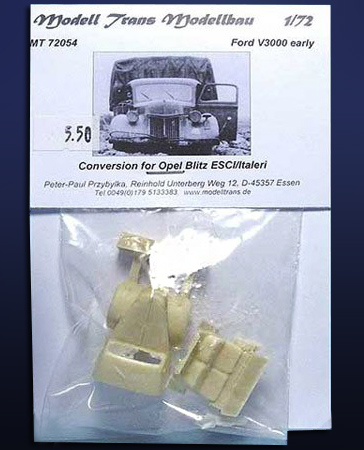
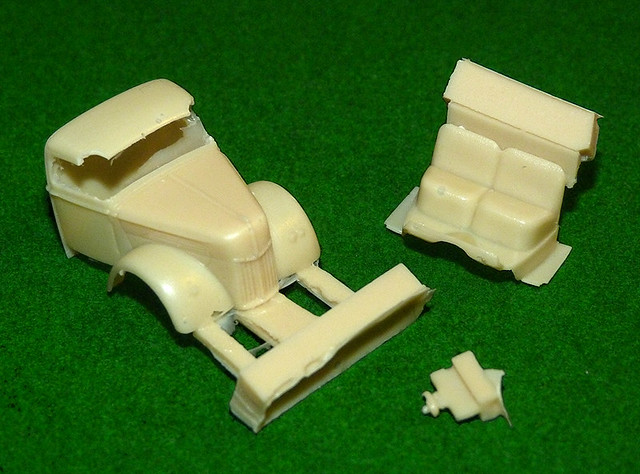
My first impression of the Modelltrans was one of disappointment. When it arrived the cab component was broken and the broken parts were missing, this complicated what I was hoping would be a fairly straight-forward conversion.

Left: How the MT V3000 conversion kit was supposed to have been delivered to me. It wasn't, mine came in just a small plastic bag - no labelling - and was broken to boot.

The next disappointment was that I couldn't accurately identify exactly which version of the Ford V3000 this model was supposed to be. My MT V3000 came without the package label, which points out that this is supposed to be a 'Ford V3000 early'. This - as it turned out - was an important omission.

(This is likely NOT ModellTran's fault - I get the feeling that my example was on the back of someone's shelf and I was the unlucky sucker who got the short end of the stick! As it was from Eastern Europe I wasn't going to send it back.)

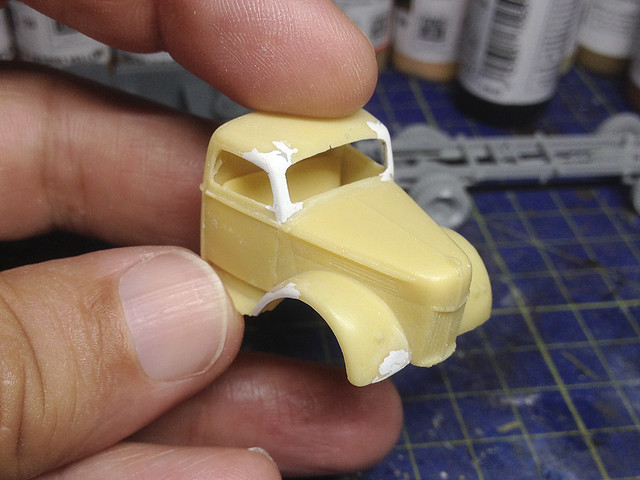
First job, repair the broken MT cab. A frustrating start...
The build - MT meets Italeri...
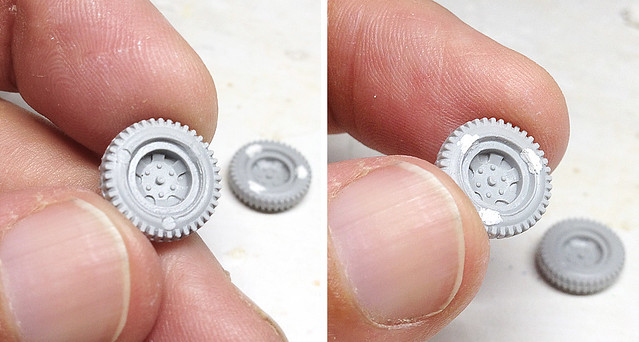
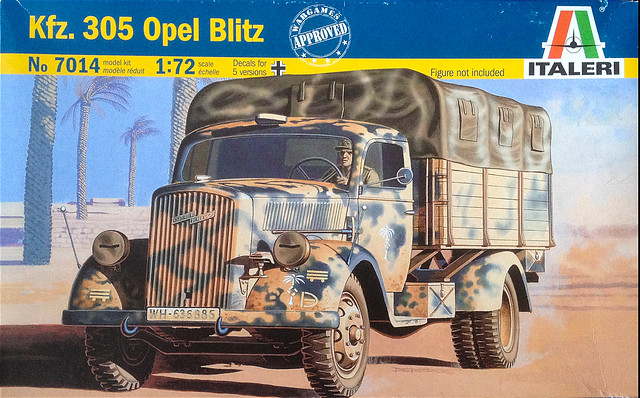
I easily located the cheap Italeri Opel Blitz (kit #7014) needed to complete this conversion on eBay. It isn't the best Opel Blitz model out there, but it's not the worst either - the chassis is particularly nice and fairly well detailed. However, two parts that you need for this conversion that aren't so well done are the canvas tilt, which lacks detail or character, and the wheels, which have some noticeable mould impressions in them.


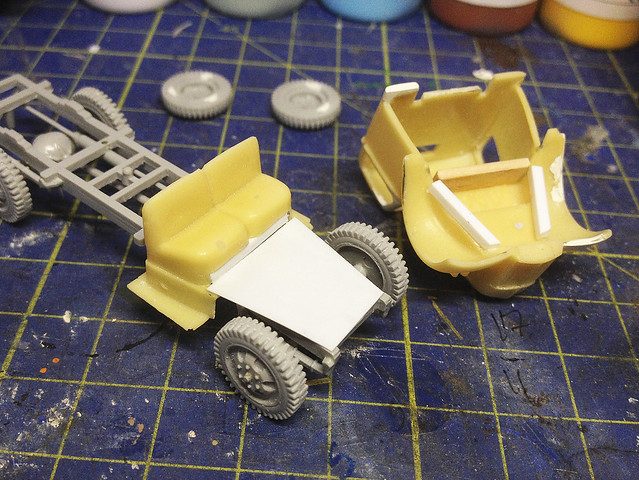
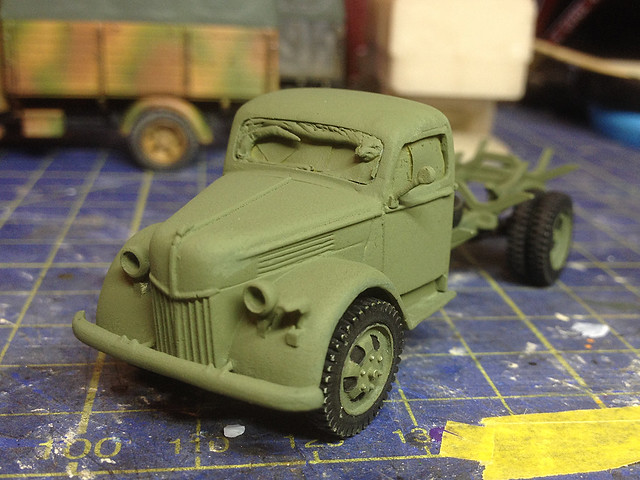
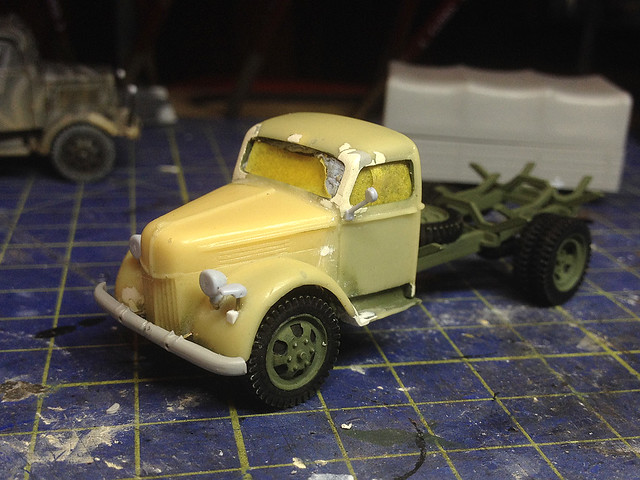
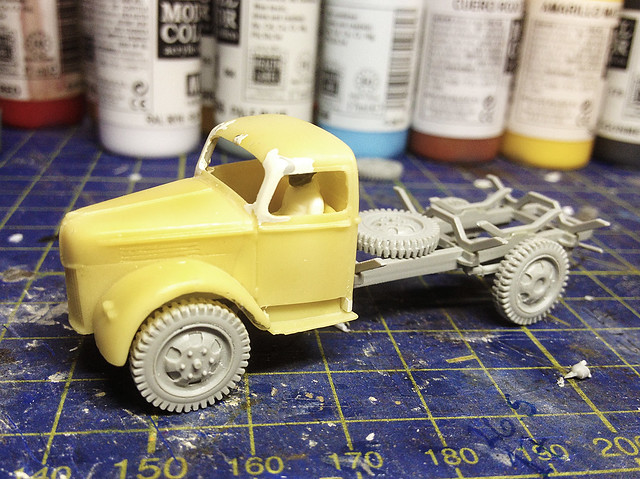
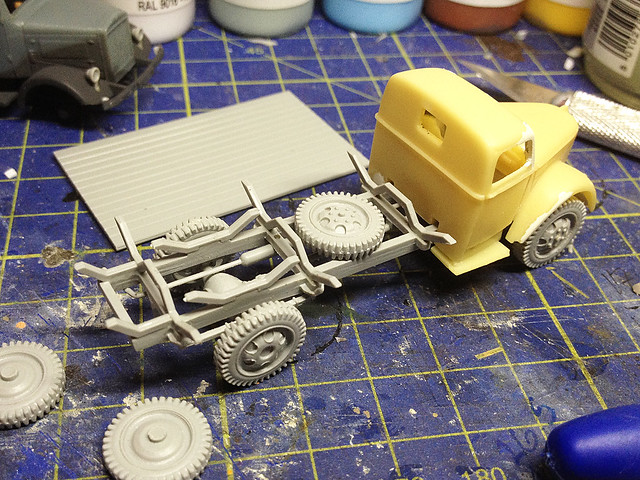
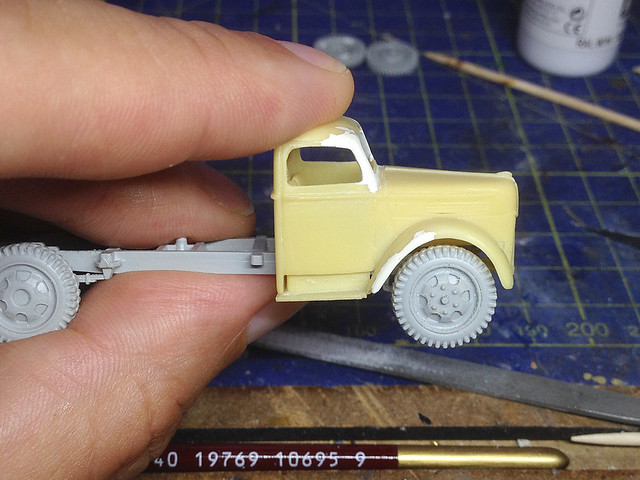
The conversion process is pretty straight forward in theory, the MT kit only has two main parts (and some minor ones). These are the MT V3000 cab which consists of the cab exterior and a cab floor and seating. Sadly there were not instructions - I guess MT thought its should be so obvious that it didn't need directions - but the mating of the MT cab to the Italeri chassis was not as easy as expected and needed some amount of tinkering to achieve a secure fit...

You have to work out how best to mount the MT cab sections on the Italeri
chassis yourself. I constructed a platform and frame solution.
Important! At this point I made a important mistake. In short, I felt the cab sat too high on the chassis, this idea was due to my thinking that the MT V3000 was based on the American pre-war model. So, I lowered the cab...Bad move as it turned out. The MT V3000 is, in fact, supposed to be the early model German Ford Werkes V3000, and therefore does sit higher with more space between the front wheels and the mudguards.

One step forward, one step back
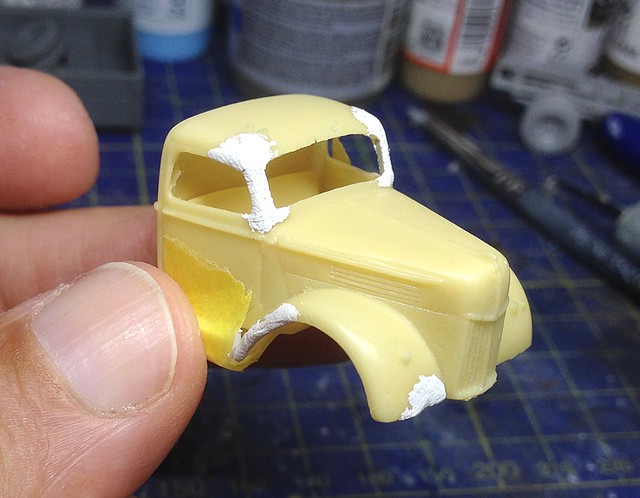
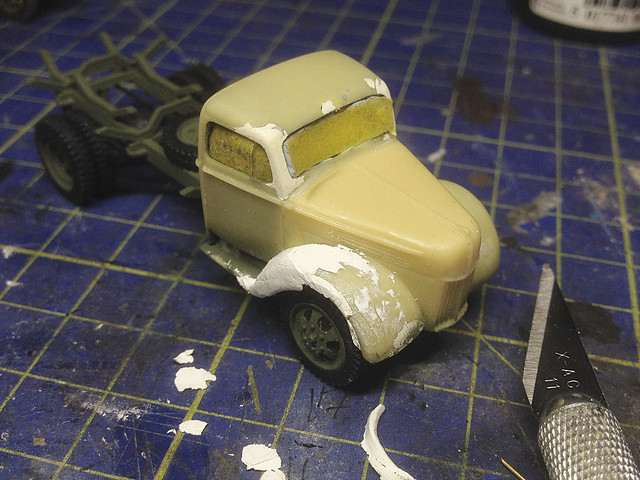
Compounding my mistake - by lowering the front suspension - I began 'improving' the fenders to make them more like the 'early' V3000's deeply rounded mudguards...

Wrong, wrong, wrong! (...Wrong!)
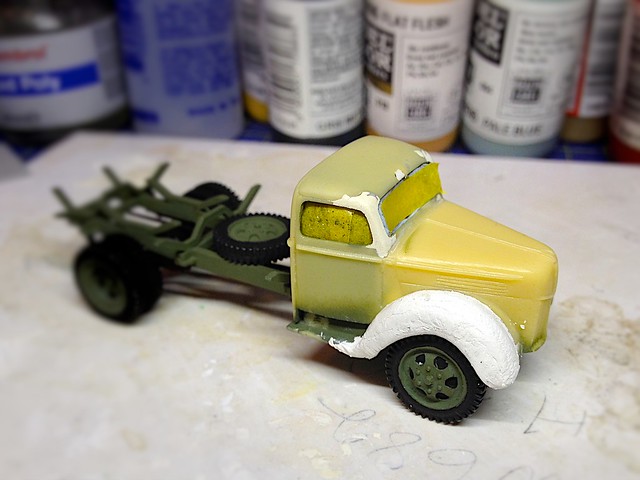
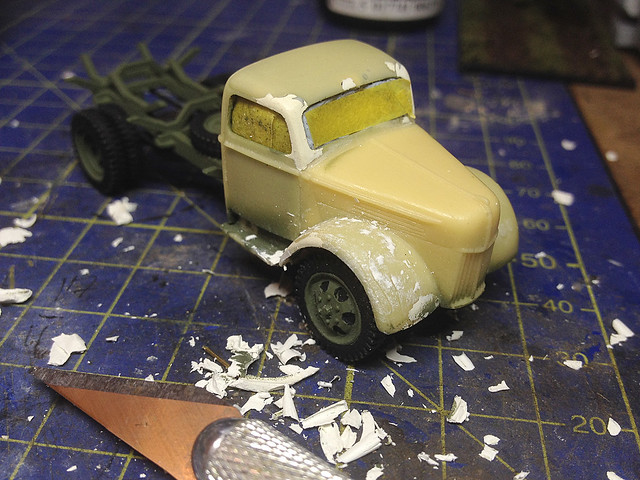
It was at this point I finally realised that the while the ModellTrans conversion was supposed to have been the 'Early' German version the MT's fenders were the wrong shape, or at least an ambiguous shape as they look neither exactly like the 'early' or 'late' version mudguards. But having decided that I wanted the the German version with the later simplified fenders I then had to do some 'cosmetic surgery' to remove my home-made 'early' rounded fenders. This got me back - roughly - to where I should have been...


But there was still one thing wrong - having lowered the cab it now sat too low for the German 'late' version (this is what you get for trying to be 'clever')!

 Note: If I wanted the *accurately* modelled 'early' fenders you would have to modify them with modelling putty like I had started to (above) OR if you want an accurate set of 'late' fenders you will have to thin and straighten out the MT mudguards as per this reference photo...

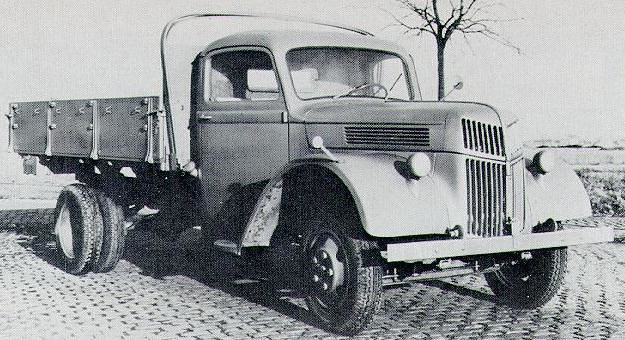
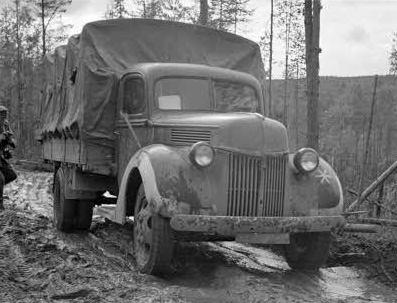
This reference photo shows a late model European V3000 with the simplified
(flat) front fenders and the high sitting suspension.
Photo source: Maquette Garden
So, it was back to the workbench once again with a modification to my front suspension to re-raise the height to be more in keeping with the 'late' model European V3000...


In conclusion
As you can tell, I made a hash of what - really - should have been an fairly easy conversion. Yes I wasn't helped by the lack of instructions or labelling - which had me barking up the wrong tree - but if I had done a bit more research online about what the MT kit was I would have saved myself a lot of time.

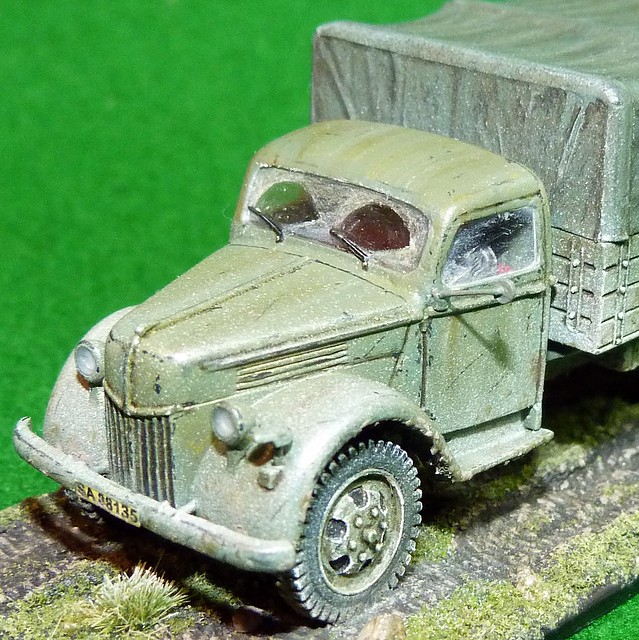
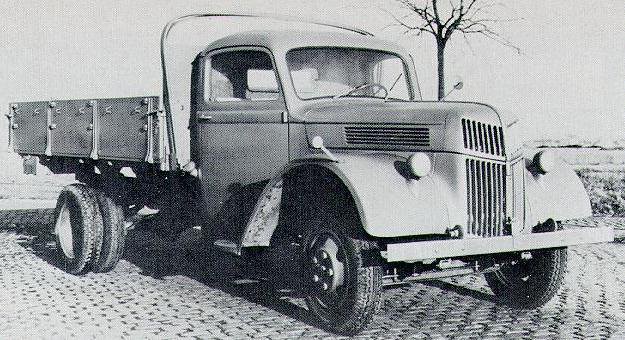
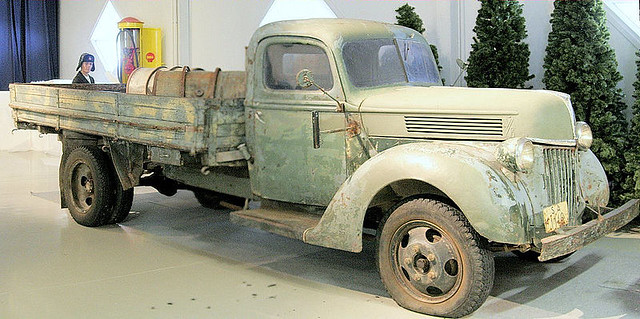
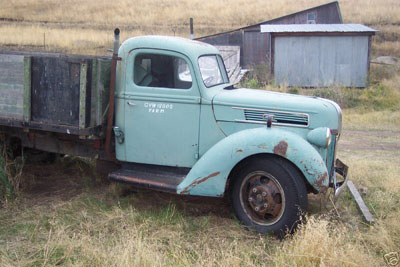
My foolishness aside I am actually quite pleased with the outcome, and did enjoy making and painting the kit. It is a nice option if you really want to add a German V3000 to your collection - just don't fall for MT's assertion that it is a 'early' version of the truck (which had deeply rounded fenders), it isn't. This is what a real early version looked like...

An example of an 'early' V3000 with it's deeply 'rounded' fenders.
Photo source: 9thsspanzer.com
The main issues I would raise relating to the actual conversion kit (rather than my mistakes) were:

• Lack of thought-out design to secure the MT cab section to the Italeri chassis
• Ambiguous MT fender designs - which look neither 'early' or 'late'
• Badly moulded Italeri wheels
• The Italeri front-bumper is OK (but still not quite right) if you are doing an 'early' V3000 but isn't the right shape at all for the 'late' model (but I ignored that and used it anyway).

But as long as you are aware of these issues a good job can still be made of the conversion.


On the positive side, the ModellTrans conversion is a quick and easy way of you getting a Ford V3000 into your collection. Currently there is no V3000 plastic kit available in 1/72 (though there are lots in 1/35) and this is a real shame as it seems that 1/72 kit manufacturers are restricting Braille Scale modellers to the idea that the only WW2 German truck was the Opel Blitz!

The Ford V3000 was a very interesting and important truck. Not only was it a numerically popular design it was one of the few vehicles that was being simultaneously manufactured by both the Axis and Allied sides during the early-mid half of the war! You were just as likely to see a V3000 being rode into action in the Western Desert by either the British 8th Army as you were the Africa Korps! It was used - Lend Lease - by the Soviets while the Dutch and Australians used it in the far east where captured examples were subsequently used by the Japanese!

So, if you want to feature the V3000 - in whatever army you are interested in - the ModellTrans/Italeri conversion kit is the easiest and cheapest way to do this.

Left: Hunor have a V3000 short-run resin kit available but this is about $29 plus shipping. This is a accurately modelled 'Late' German version. Still, that's your only kit alternative, but you have to search hard for it.


All in all, I am very happy with the ModellTrans V3000 conversion kit - despite my meandering diversions! At just €5.91 (plus shipping, plus the cost of the Italeri Opel Blitz) it's a reasonably priced modelling adventure.

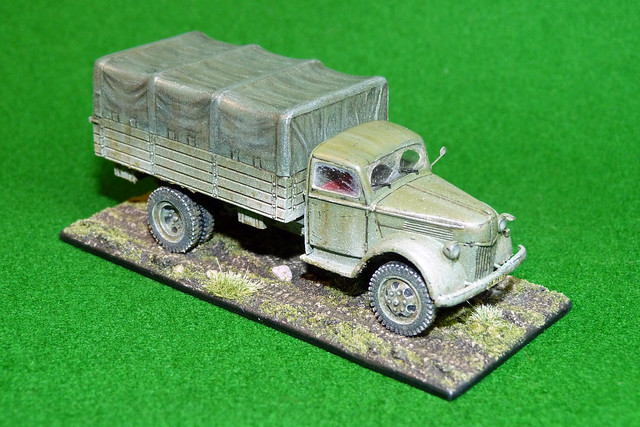
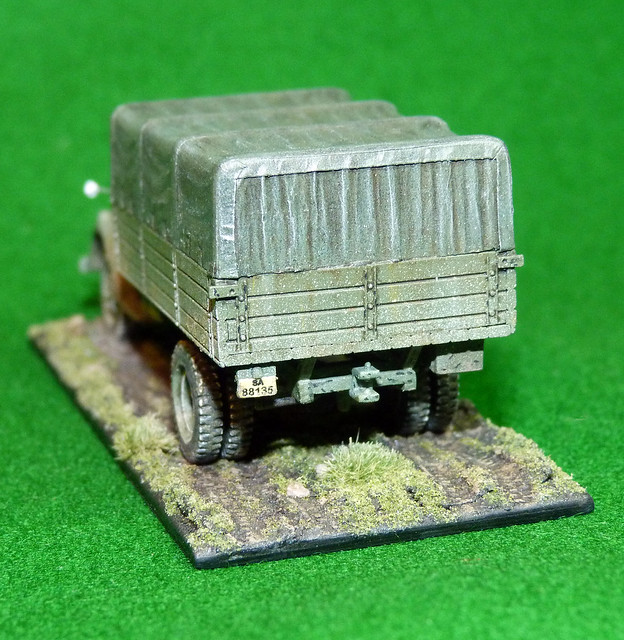
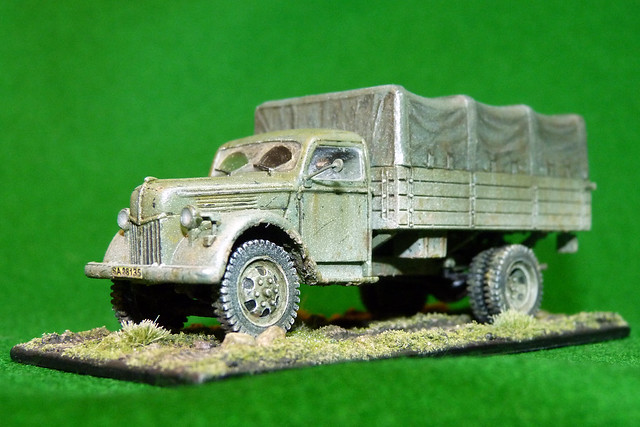
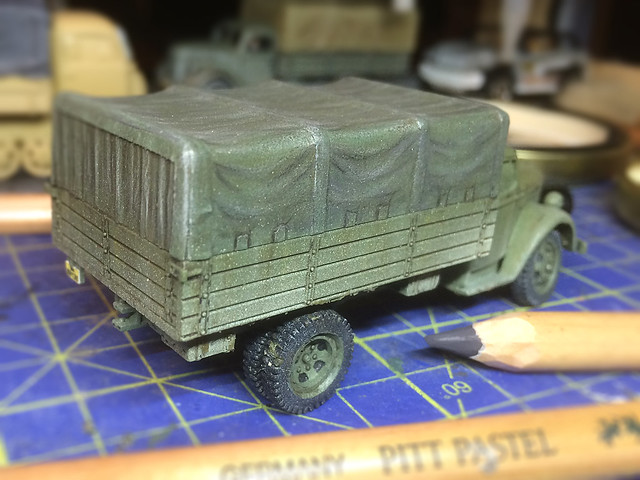
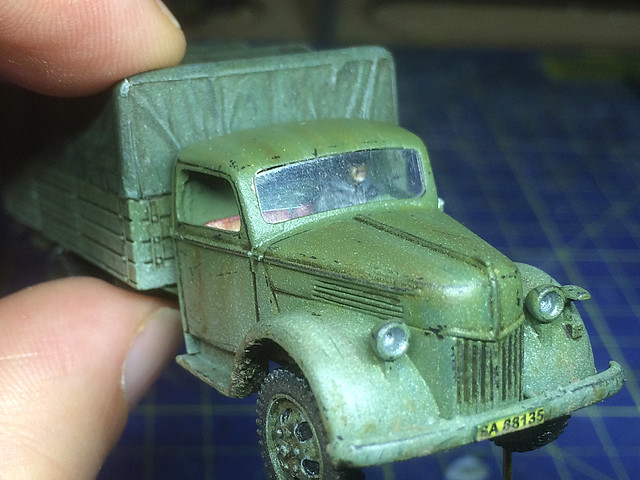
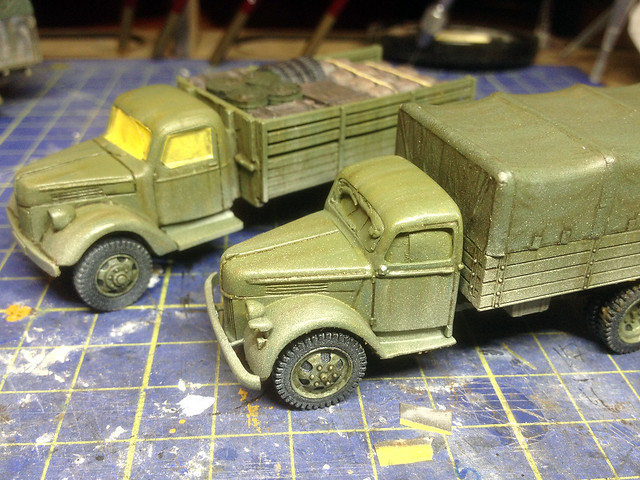
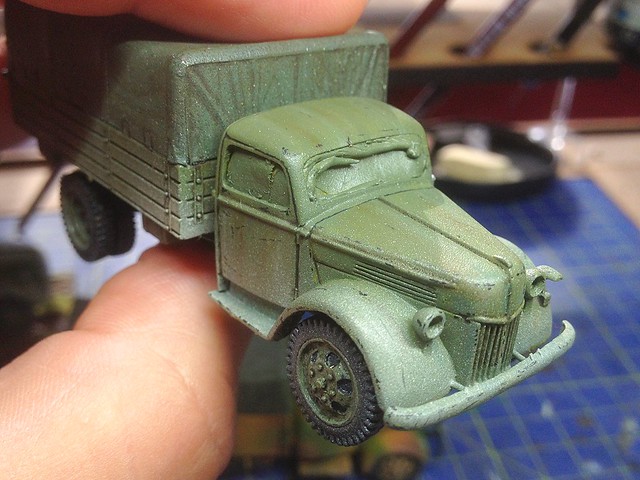
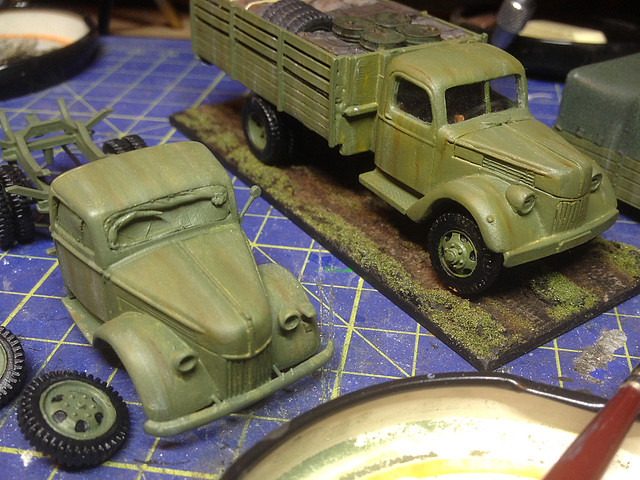
All that's left for me to do now is to take those all important completion photos. Teaser below...


Related/useful Links:

ModellTrans Modellbleu offcial website
ModellTrans catalogue at Henk of Holland review site

• Conversion kit available from: 'Tank Models' store, Poland.

Tuesday, 6 January 2015

ModellTrans Ford V3000 - Part 8

Nice shot of a German model Ford-Werke V3000s (late model).
On the last leg of this model. Today I am working on finishing the tilt canvas shading, highlighting the model, adding the gaming base and fitting the windshield.

The Canvas Tilt
The canvas tilt was a part that was donated by the Italeri Opel Blitz part of this conversion. It wasn't the best model of a canvas cover and had little moulded detailing and was very smooth. I would have preferred some wrinkles and folds, but no.

A photo of the Italeri tilt cover before painting. A bit featureless and smooth.
Therefore, any character I could give this 'canvas' would have to be done using paints or other colour medium. In the end I settled for using a set of Faber-Castell Pastel Pencils over a matt coated primer base. This was the same technique that I used on my Pegasus German trucks, the tilt covers of which were similarly crude.


I could have just as easily used soft Conte chalks but I preferred the pastel pencils because I could sharpen them to a point for drawing on fine detail and outlines.

Highlighting and touching up
Last thing I do [with regards to painting] is touch up small bits I am not so happy with or think need sprucing up. With handling some delicate effects can wear off, or adding a layer of varnish can dull down some others. I also add the brightest highlights with pure white - obviously this needs to be done sparingly.

Things like the rims and sharp edges look nice with a 'reflective highlight'. The top of small bolts and rivets too, plus the edge of the tread on the tires are all places that can be lifted up with a bit of white. I use whatever seems most fitting, a white pastel pencil when I want to blend the 'shine' slightly or, for extreme highlights, white acrylic paint.

Oh...And there was one last bit of tinkering! Axel modifications.
One last very annoying - and embarrassing - modelling climb-down is the realisation that my original opinion that 'the cab sat too high on the chassis' was, in fact, complete nonsense. Sorry MT, you were right, I was wrong! I am now having to modify the front axel to raise the cab/chassis back up again - this involved cutting off the wheels and inserting a new lower axel so that the fenders have more space between them and the wheels. Bummer!

Gaming base
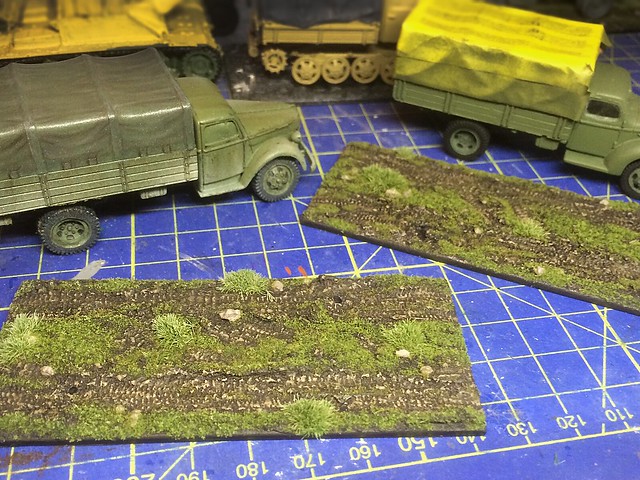
As usual with this particular project I am adding a 'gaming base'. I cut a rectangle of plastic card with a 5mm overhang around the 'footprint' of the vehicle. All my medium trucks are turning out to require a base that is 40mm wide, but length varies depending on the type of wheelbase of the vehicle.

I think I have the technique for doing these bases pretty much off-pat now. A Pollyfilla 'ground' is given some wheel tracks when nearly dry (I have some spare wheels with deep treads I keep especially for this). Then, when completely dry, I give the ground a coat of dark brown which I then dry-brush with medium brown and then highlight with a light brown (to give a dry mud effect).


On top of my muddy earth terrain I glue some random rocks and then add a sprinkling of static grass. Finally I add a few clumps of tufty grass. The whole thing gets a spray of varnish when complete.

Windshield
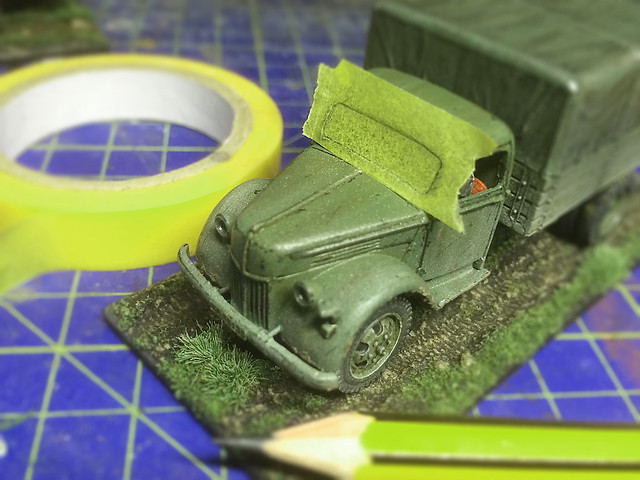
Probably the thing I enjoy least is having to make my own model windscreens. Quite apart from the fiddly custom cutting and fitting there is always the chance I get glue in the wrong place when installing them (a common issue for a Kitnoob like me).

I've done this a few times now so have a process worked out - with trucks anyway - but I still get very nervous doing it. (I just realised, in fact, that I have not made one truck yet that has a factory-made set of windscreens!) I trace the shape of the trucks windows onto some masking tape then lay a pice of transparent plastic over this and draw the shape onto the plastic, then cut it out. Simples! (I wish!)


So, the only thing to add here is that while when I started modelling I thought I needed to buy 'special' sheets of transparent plastic from my local model shop for this (which were expensive) I now use any old transparent plastic from our packaging recycle bin!

This is the bit I don't like, custom fitting of the windscreens. You pop them in, take
them out again, sand, pop them back in, take them back out, etc, etc, etc...
One way I might try and improve this process - but it adds another stage - is to cut out a carboard window from my outline drawing first so I can make the initial fitting and adjustments. Once the cardboard window fits I use that as the template for my clear plastic window, should save a lot of sanding.

Mounting the model
I like a nice secure mount so I don't just glue the model to the base. I drill holes into one of the front tires and one of the rear ones and insert a small piece of metal rod. I then drill holes in the base itself and inset the vehicle tire's metal rods in these holes. I then glue the rods into the base - this makes for a very firm mounting of the vehicle to my base.

I insert two rods like this, one in the front-left tyre and one in the rear-right.
(I should add that I do cut the rods to fit the thickness of the base!)
And finally...
At this point - which could technically be termed 'the completion' - I take a long good look at the model from all angles. I look out for tiny mistakes that can be easily rectified by a touch or paint or any chips or scratches. Anything that is amiss I try and put right before deciding whether the model require one final light spray of varnish - also, I might decide to tone down previous varnish coats of satin if they are proving too shiny with a very light squirt or matt varnish.

But otherwise, this is the end of the project...Except for the completion photography of course!

Thanks for bearing with my long-winded project posts.

Monday, 29 September 2014

ModellTrans Ford V3000 - Part 7

Dust and pin wash...
Others will have their process, but I have settled on giving my trucks a dusting of 'dust' (Vallejo's Model Air Sand Ivory), just on the lower surfaces. This is supposed to represent the build up of dried mud dust...


Next I apply my pin wash using - the usual - AK Interactive's Dark Brown Wash for Green Vehicles. As you can see from the above photo this picks out the panel line detail that the layer of 'dust' slightly obscured.

Chippings and scratchings!
Next stage is the application of scratches and chips. I do this with some Vallejo's German Grey (995) in tiny spots and streaks. Occasionally I join up the dots to make some larger wear and tear to the paintwork on areas which would have seen a lot of use, near the edges of doors and on vulnerable parts of the fenders and bumpers.

Tiny scratches. They never look good real close up like this, but the effect is
ok at a distance. I'm trying hard not to over-do the effect.
Well, another stage in the weathering done. Despite the fact I am trying to develop a process for weathering my vehicles I do find that I sometimes revisit effects as I go along so in the end it's not a formulaic technique where I stick rigidly to my numbered steps. As you add layers of effects you sometimes tone down or obliterate effects you did at the last stage, so you might need to touch up as you go along.

One of the things I had to do at this stage was draw back in the door frame seam as the repair I did to the cab roof supports at the beginning didn't include these thin seam lines. I did this with a thin paint brush and dark grey paint.

Next: Rust and fuel streaks and then the highlighting.

Wednesday, 24 September 2014

ModellTrans Modellbau Ford V3000 conversion kit - Part 6

Weathering - Stage 1: Oils.
I'm slowly improving I think, or at least I am feeling a little more confident about my painting. So much so that I thought I would finally get around to weathering my 'Cheap Ford V3000' conversion. This was one of my early projects which was put on hold until I felt I could do a adequate job of the weathering, which I think I can now.

Weathering with oil paints. A cheap and cheerful but effective technique. Don't
bother with expensive artists oils, I bought mine from a discount store.
So I decided to weather my first V3000 along side my latest V3000 and in doing so I think I am starting to develop a strategy for my weathering.

Having base coated my truck with the usual Humbrol Light Olive I then gave it a light varnish with a satin coat (I always feel that vehicle paint has a slight sheen to it which I think satin varnish captures nicely). The model is now ready to weather, and here's my process (for Olive vehicles):

1. Streak and stain - using oil paints.
2. Dust - with a light airbrushing of an appropriate dust colour.
(Also, mud effects on structure or hard to get places like the chassis or under mud-guards.)
3. Pin-washing - using AK Interactives Dark Brown Wash for Green Vehicles.
4. Chip & scratch - using dark grey or metallic grey.
5. Rust and oil fuel streaks - using AK Interactives washes.
6. Highlighting.
7. Graphite powder and pencil - to give metallic scratches and sheen.
8. Finishing off with surface mud streaks.

-- I tend to varnish between stages to protect the work I already done. --

I quite enjoyed adding oil weathering to my toolkit of techniques, it's quite a forgiving and can be corrected with a quick wipe with a spot of white spirit. Here's a nice video which explains the procedure if you are a beginner like me...

Sunday, 21 September 2014

ModellTrans Modellbau Ford V3000 conversion kit - Part 5

Base coat time!
As usual I have given the truck a quick spray of Humbrol's Acrylic 'Light Olive' paint. I've pretty much settled on this colour for al my Finnish models as it's a good medium hue that can be darkened or lightened to suit. Finnish references mention a 'Moss Green', but picture references and even museums seem to differ on what exactly that was - it swings widely between Russian Green and a faded olive.


It's an interesting point that you can't always trust museum exhibits for colour reference as they have invariably been repainted over the years. This is particularly true of Finnish WW2 vehicles, some museum examples have decidedly inaccurate paint schemes. I just try and be consistent.

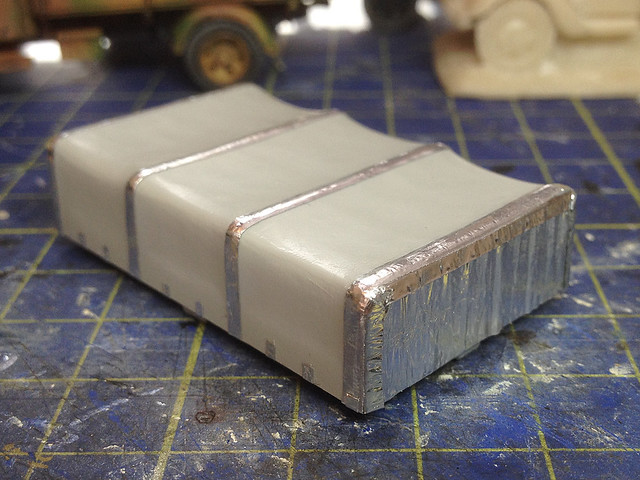
The other item that needed some work this morning was the canvas 'tilt' cover (does anyone know why they call these covers 'tilt' covers) as the Italeri donor cover was exceedingly devoid of detail. I decided to follow the technique I used while doing my German Army Truck project and add extra material folds and texture using metal foil tape...


I really like this stuff and a big thanks goes to my big brother who sent me this stuff!

Next: Base coating the tilt and flatbed and satin glossing the whole model prior to pin-washing.

Friday, 19 September 2014

ModellTrans Modellbau Ford V3000 conversion kit - Part 4

Having got this resin conversion back on track after my little faux pas it's time to move this project along. It's time to add the cab details...


The extras are taken from my scrap box, mostly left overs from Opel Blitz kits I had going spare. I could have gone the extra yard and added a tool set - pick and shovel - on the side of the bonnet, but when I tried them for size it looked a bit cluttered so I left them off.

There are some really nice reference illustrations over on the Engines of the Wehrmacht web site. Each German army truck has it's own page and each page shows variants and differing equipment set-up so it's been invaluable.

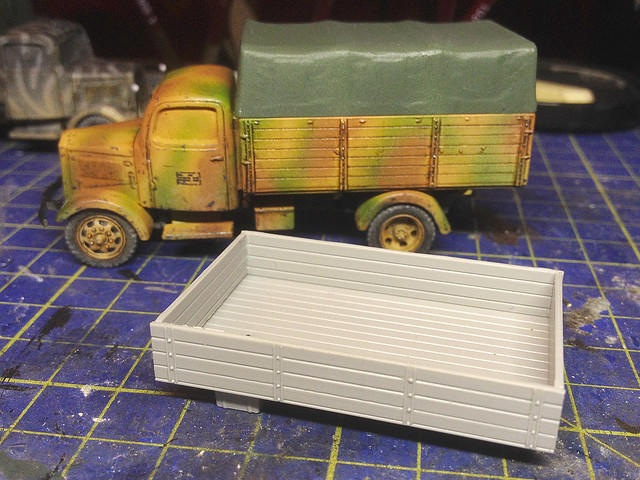
With the cab 'dressed' I turned my attention to making the cargo flatbed. The German version of the V3000 truck had a slightly different flat-bed configuration to that of the usual Opel Blitz (from which I am modifying this model). It's an issue of height, the Blitz has a high-sided cargo bed - about 7 planks high - while the Ford had lower sides - of about 4 planks high.

It was a very simple operation to cut down the Italeri Blitz flat-bed to four planks height...

At the back you can see one of my Pegasus 'German Army Trucks' which have
the high-sided cargo bed typical of Wehrmacht lorries. In front you can see
my modified Italeri Opel Blitz bed.
Despite reducing the height of the cargo bed I found that the canvas tilt cover did not, then, look too low when placed on the new lower sides of the bed. I had thought that I was going to have to make a new taller canvas tilt but I really don't think that will be necessary as it looks OK to me...


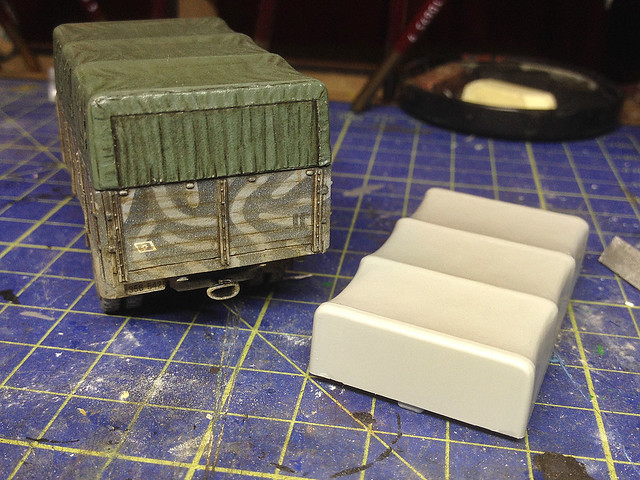
One issue, however, is the very plain and undetailed look of the Italeri canvas cover - which is a good and a bad thing. Good because the real Opel Blitz canvas cover - with all it's distinctive 'window flaps' - is very different to the plain old cover of the German V3000. So I don't have to remove any detail, just add a little - some folds here and there to give it some 'character' (at the moment it is just a sort of plastic 'box').

On the right is the rather uninspiring Italeri Opel Blitz 'canvas cover' next to a
similarly plain Pegasus cover which I added extra detail to. I will add extra
material texture to the Italeri canvas just like I did with the Pegasus one.
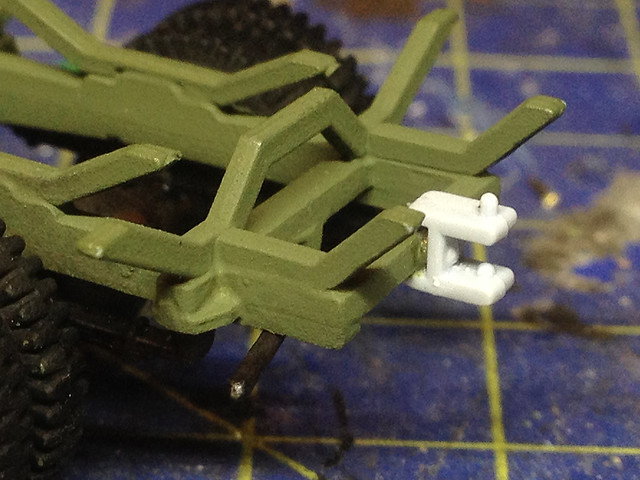
And finally, one very small detail that cannot be left out is the actual vehicle tow 'hook'. The Germans didn't seem to use a hook as such but rather a bolted contraption. The Italeri donor kit did not have this but luckily for me I found one in my scrap box (originally from the good old Airfix Opel Blitz). It's a sort of  'U' shaped item, if the 'U' were turned so the open end were on it's side. The towing equipment's hook was slotted into this 'U' and a retaining bolt slotted through to hold the gun or trailer in place.

The funny German 'tow hook'. This example was pinched from
another kit I happen in my 'spares box'.
As my truck is intended to tow a German Pak40 anti-tank gun this is a small but very important detail.

Well, another stage done. So now I have to base coat the cab and all the new bits and pieces I have added. Next on the agenda is the detailing of the canvas tilt cover and fixing that to the flat-bed before base coating that.

Saturday, 13 September 2014

And sometimes I just get it plain wrong...

History is difficult - even for model makers!
One of the reasons I like model making is that it involves - like it or not - a bit of research. I like research, maybe that means I am an inherently 'nosey' person, as I find nothing more relaxing than spending time trawling though books and websites for tidbits of useless information!

This is where I was with my MT V3000. I had started to make a new shaped fender using
Milliput putty to make the truck look more like the American version of the V3000.
However, this can be a double edged sword. Take my ModellTrans Ford Werkes V3000S conversion project - I had stated that I needed to further convert this conversion because 'it was the wrong type of V3000' truck (the German made one and not the American one as used by the Finns in WW2).

Well...I was wrong. (Or at least right and wrong.)

While researching another Finnish army vehicle I accidentally came across a photo in the fantastic SA KUVA archive that completely disproved my contention that the Finns *only* used the American production model of the V3000 truck. While initially in the war the Finns did source their V3000s from America (before they 'changed sides' and joined the Axis in 1941) they later received German-made V3000s as part of a delivery of equipment from their new best buddies, the Nazis.*

* (It's a complicated story, which I am just reading about in Henrik Lunde's history 'Finland's War of Choice: The Troubled German-Finnish Coalition in World War II'.)


From the SA KUVA archive - this photo shows a long convoy of German-made
Ford V3000s - part of a purchase - I believe - that included StuG III assault guns.
This enlargement clearly shows the features which mark this out as a later model
German Ford Werkes V3000 - note the single piece windscreen and 'flat' fenders.
Anyway, the point is 'never say never' - someone is bound to come along and make you look an ass.

So the Finn's did have German V3000s, which means I don't have to convert my HobbyTrans conversion into a shoddy take on the American production model truck...Bugger (or 'hooray')!

Luckily the Milliput just peeled off, it doesn't melt and stick to surfaces like
poly glue does. So it was a case of just chipping the hardened putty off.
Off with the Milliput - luckily I only had time to modify one of the fenders and the Milliput chipped off the resin model quite easily as it was applied to a smooth surface and so didn't 'glue' itself to the model.

Phew! Back where I started, now I can get on with finishing this model.
So there you go. Proof, were proof needed, that I ain't as clever as I thought I was. A big thank you to the chaps at the Axis History Forum who have been a big help in my research of things pertaining to  the Finnish Continuation War and put me on to the photo I found at SA KUVA.

Sunday, 27 July 2014

ModellTrans Modellbau Ford V3000 conversion kit - Part 2

Picking up where we left off, I've started to rebuild my cab so that the resin
cab sits securely onto the Italeri chassis. As it is there are no guide or pilot
holes or tabs to help this, so I've made some supports myself.
OK chaps, this project is turning out to be a tricky one in so many ways. First of all I have to backtrack a bit and admit I made a boo-boo - the 'problem' I highlighted with the ModellTrans cab not fitting on the Italeri chassis turned out to be 50% my fault. I just hadn't done my research well enough.

I had said that the mudguards (fenders to our American buddies) sat way too high above the front wheels and so I had to lower the cab to get them to fit right. Well, yes I was kinda right IF the ModellTrans V3000 kit had been an early type V3000 with the large rounded mud-guards...Only, it's not!

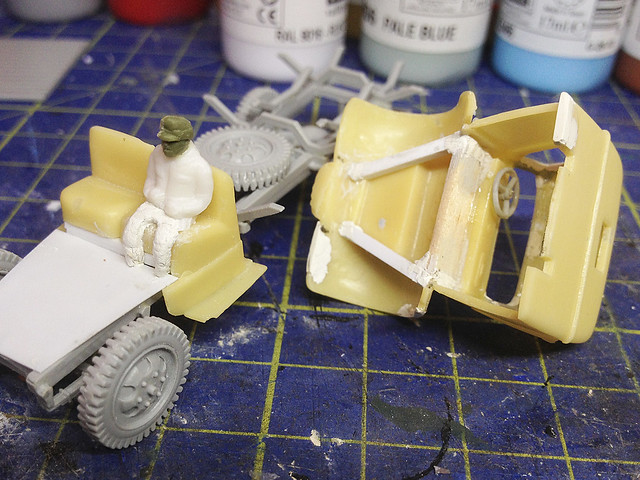
Another little job was the addition of a suitable driver figure. The space in
the cab is very cramped and the steering-wheel (from the Italeri kit) makes
the task all that more difficult. But I cobbled together a figure that fits.
The ModellTrans conversion kit cab is based on the slightly later V3000 with the simplified fenders. These were less rounded - to save metal and speed production I guess - and did indeed sit way higher above the wheels that did the earlier versions fenders. Drat.

A German Ford-Werkes V3000S model.
The reason for this is - I suspect - that the larger rounded wheel-arches are a characteristic of the original Ford design, and of early German Ford-Werkes production models. But this design was simplified by the Germans about 1940, incorporating the simplified mud-guards.

As you can see from the above photo the wheel-arches are, indeed, quite high above the wheels (as with the ModellTrans model). It is not a mistake, even if it does look a little strange.

Unfortunately this causes me a little problem. Finland did not use the German production model of the V3000, much less this simplified model, but rather they used the American production model with the rounded fenders. Double drat!

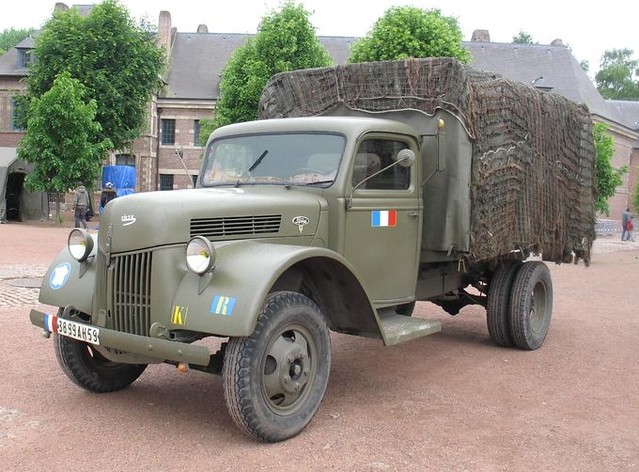
Left: A very nice example of an American production Ford V3000. You can tell it's a US model because of the split windscreen. The Germans used a single piece windscreen.*

So, my friends, it would be wrong to use the ModellTrans conversion if you want to make a model of a V3000 in Finnish use! (Incidentally the Germans used both early and late models with both types of mud-guards. But the V3000s in Allied use - American, British, Australian, etc - did not have the simplified mud-guards. So it's a good way to tell them apart.)

So, I will have to modify my V3000's mud-guard's shape using Milliput to make it more rounded.


This won't be a hard job but will have to wait until I've finished painting the inside of the cab (before gluing it permanently in place) and base coating the completed chassis. I decided that it was more practical to base coat the chassis before fitting the cargo flatbed onto the intricate supports provided.

Here's a shot that shows the flatbed supports that come with the Italeri Opel
Blitz kit. Painting the chassis before attaching the flatbed means you can
paint the spare wheel properly, an impossible job with the flatbed in place.
I really wish some additional historical information had come with the ModellTrans kit (there aren't even any instructions included). I suppose if I had done my research thoroughly before starting I might have avoided my mistake regarding the wheel-arches. But there you go.

Generally, everything is starting to come together and I'm even glad I did do the additional surgery on the cab seats as the cab now sits more securely on the chassis because of this.

Next: Base coats and the flatbed.

* An interesting and amusing fact. The photo of the American production Model is courtesy of '9th Reenactment Society' web site. Just to prove that the issue regarding the confusion between V3000 production types isn't just a problem for modellers they have used this American V3000 and repainted it in German colours. They mention in their text on their site that the variants are 'identical', but of course they weren't. They neglected the fact that only the American production models had the split screen! Of course, they could argue that their example was one of the many V3000s captured from the Dutch in May 1940, as the Dutch models were based on the American design. Confusing? 

Friday, 25 July 2014

ModellTrans Modellbau Ford V3000 conversion kit - Part 1


This will be the third Ford V3000S V8 truck that I will have made for my Finnish Army project. The reason for this is that the V3000 truck was somewhat synonymous with the Finns struggle during WW2, it was one of their most numerous military transports and gained such a reputation that it even had it's own nickname of "Hävittäjä" ('fighter').

Source: SA KUVA No. 69976
Now I won't go into the history of this vehicle and why it ended up such an important vehicle to the Finns as I've done that twice already, suffice to say that it's prominence has encouraged me to seek out the best model I could find.

Left: A very interesting contemporary photo of a Ford V3000S in use in Finland in 1942. What's so interesting is that this isn't a Finnish Army example but is in use by the Wehrmacht. Although the German Army used the V3000 - produced by Ford-Werke factories in Cologne and Berlin - they also pinched a shipment of American Ford V3000s intended for the Finns, and this appears to be one of them. You can tell it's an American V3000 instead of one of the German ones because of the split windscreen (the German ones has a single piece windscreen). Er, so I gave you some history anyway! Sorry.

My search for an accurate 1/72 kit of the Ford V3000S led me to two candidates, and expensive short-run resin kit by Hunor of Hungry and a cheaper resin conversion kit by ModellTrans Modellbau of Germany. 

The ModellTrans conversion - the easy option?
In the end I took what I thought would be the easy - and cheaper - option and bought the conversion kit which was designed (in theory) to be combined with the Italeri/ESCI Opel Blitz kit to make a reasonable V3000 model. 

Unfortunately when the kit arrived - from the Czech Republic - I found that the cab was damaged and that both the windshield pillars were broken and missing. I guess I should have sent it back but who knows who was to blame, so I decided to see if I could fix it myself.

The incentive I needed to actually mend this kit came when I finally came across the Italeri kit which would supply the recommended donor chassis. This Italeri kit is actually an old one and was originally made by ESCI, as such it's not one of the best best Opel Blitz models anyway - but the one I found was very cheap.


Construction
The construction is quite straight forward really, I started by building the Italeri Blitz chassis. It's a simple kit with a limited number of parts (it's marketed for wargaming). I did have a few little niggling problems with the parts, however, and I certainly think you could do better if you actually do want a Opel Blitz in 1/72. The suspension is suspect and the tyres and badly moulded with exaggerated tread and injection marks on the outside which destroys some of the detail. 
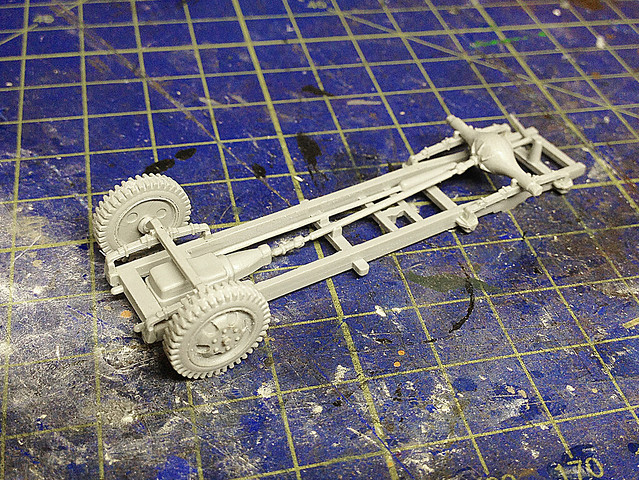
The Italeri chassis, simple but suspect (the rear axle seems to sit too high).
I had to repair the obvious injection marks by using some Milliput.
Once the chassis was completed I tried a test fitting of the ModellTrans cab kit and was very disappointed to find that the two two halfs of the conversion didn't seem to go together easily or precisely. The cab sat precariously on top of the Italeri chassis - I began to doubt whether the Italeri kit was, indeed, the correct donor model (but I double checked the ModellTrans information and it quite specifically mentions the Italeri/ESCI Blitz)!
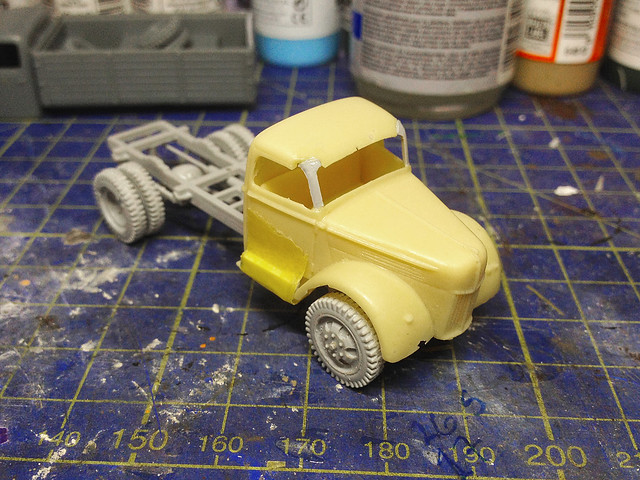
Perched on top of the chassis you can see the start of my repairs to the broken
roof pillars. I now have to think of a way to fit the cab correctly.

Pausing to think just how to fit the cab to the chassis I turned my attention to the cab's broken roof support pillars. I started by gluing in the similar pillars from the Italeri Blitz kit, but these weren't - predictably - exactly the right shape. But they were useful as reinforcing guides onto which I could add some Milliput modelling putty.


I decided to lay on the putty quite thick with the idea that I would sand back this rough pillar to a finer shape when it dried. Not for the first time I cursed the postman who crushed my model and caused me all this hassle.

I used Milliput Superfine White, which as the name suggests gives a very smooth finish when filed and sanded. I am a bit of a Milliput fan but it does have it's downsides - compared to 'green stuff' - such as it's comparatively long drying time. I like to do any Milliput jobs last thing and then leave the job to completely 'cure' through the night before sanding.


While I was at it I added some putty to other parts of the resin cab that were in need of treatment. There were a couple of little cracks and holes that resin kits are prone too, but nothing serious. The pillars sanded down nicely, although I had to guess at the intended shape and just went for something which looked right.

That done I now returned to the vexing question of the cab's attachment to the chassis. It was clear that the ModellTrans cab sat far too height on the Italeri chassis AND that some of the chassis parts actually stopped the cab sitting level - the wheel arches were far too high above the wheels. Something would have to go!
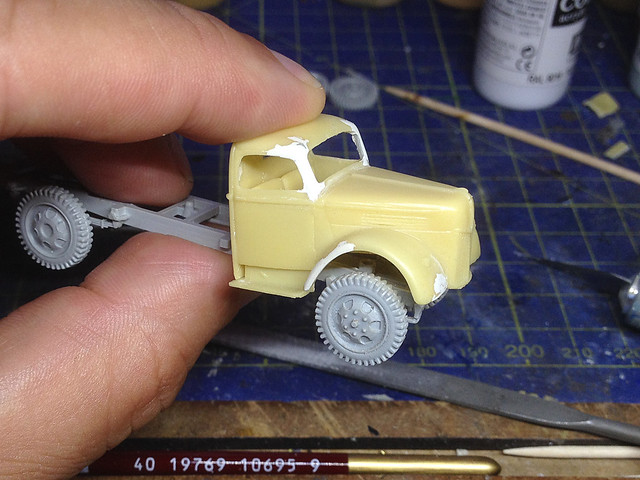
As it stands the ModellTrans cab components just don't sit snugly onto
the Italeri chassis. The problem are the seats.

What seemed to be the problem was the cab seating component, which sits inside the cab and on top of the chassis. The seats were stopping the cab from dropping onto the chassis nicely, I reckoned about half the depth of the seating would have to be removed so that the cab dropped sufficiently. So, I sawed away at the seats - as you can see in the accompanying photo.


It was a pretty drastic piece of surgery but I couldn't figure out what else to do. Once done, however, the cab did seem to be sitting properly over the wheels (maybe even a bit low, looking at my reference photos, but it;s easy to re-level and build the cab back up again now it's sitting level).


However, that's not the end of the story. I have to work out how to attach the cab securely to the chassis now. Once that is done, and the seating is glued permanently in place, I can spray the base coat onto the chassis/seating before painting the inside of the cab in detail (I will have to find an appropriate driver figure).

Next: Cab final assembly and base coat. Then adding the cargo flatbed.
My thoughts so far: Well, obviously this is not the 'easy option' I thought it was going to be. I'm very disappointed that the kit was broken, but even more annoyed that the fit was not as straight forward as it should have been.

As you can see from my pictures this has very much been a case of 'fudging' the assembly - cutting and fitting until things fit to an acceptable standard. I'm not overly impressed.