Showing posts with label X-Ref: AFRVL/LEFH18/0412. Show all posts

Wednesday, 13 June 2012

WW2 Finnish infantry figures - Part 1

I'd already started to work out how to model Finnish army figures while I experimented with my gun emplacement project (artillery crew). Luckily I have managed to get hold of a varied selection of reference material to help me plan out how to model these figures.

Primarily I rely on Osprey's 'Finland at War 1939-45' (Elite 141) and the web site 'The Military Tunics of Finland 1918-1945', both of which give you a good idea of the uniforms and equipment in use by the Finns throughout the war, summer and winter. In my case I was particularly interested in the summer dress of around 1944.

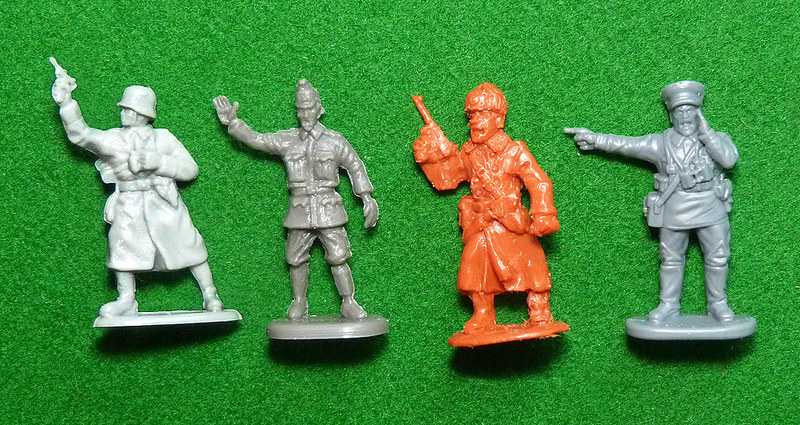
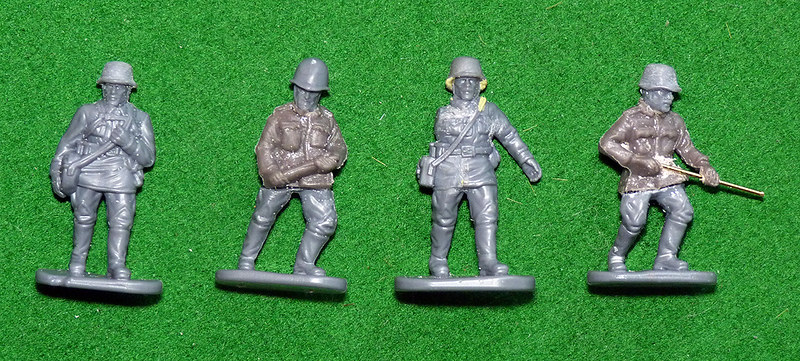
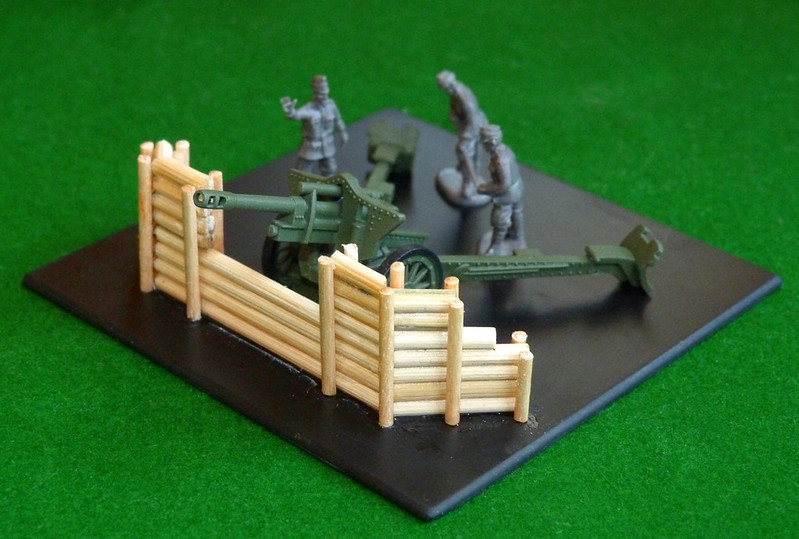
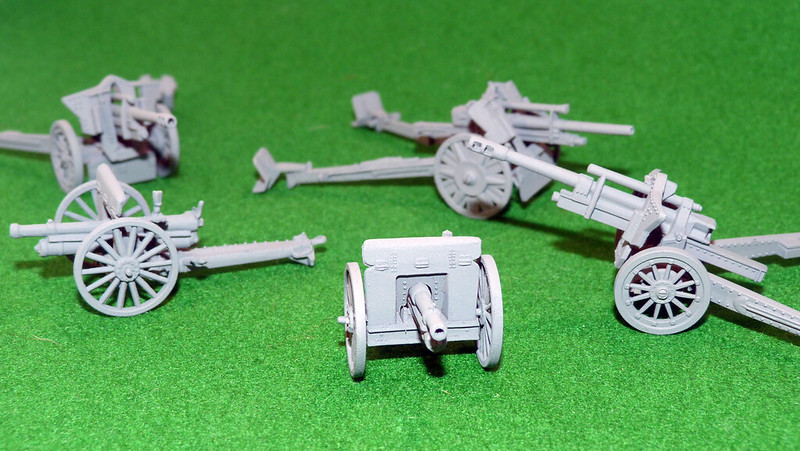
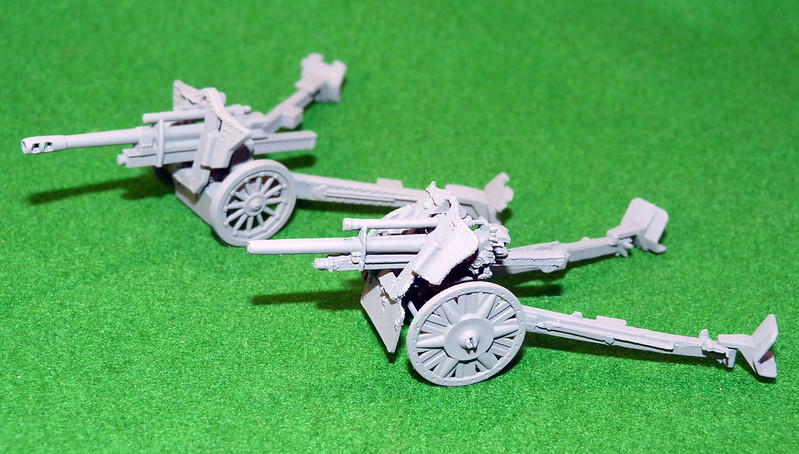
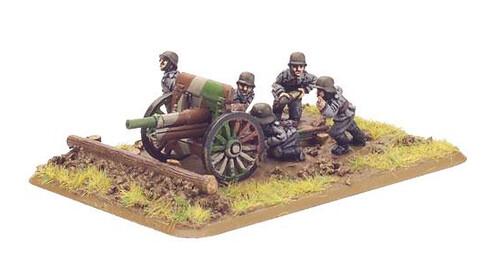
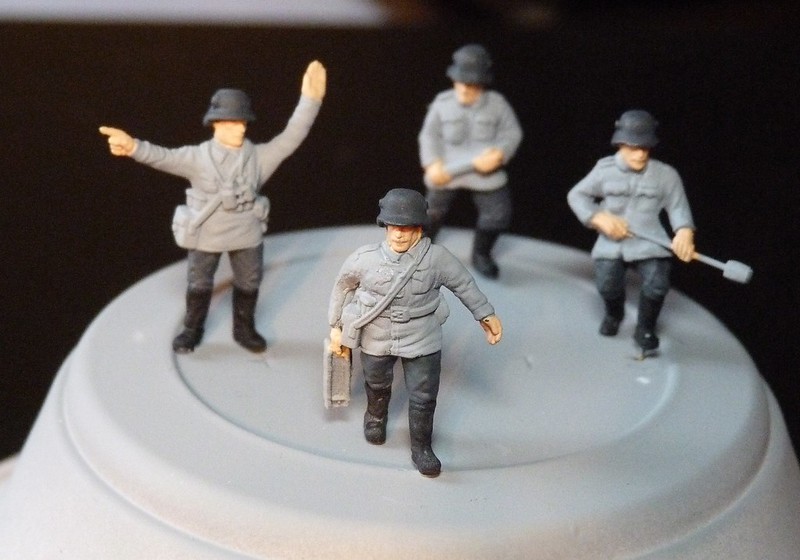
In my previous post on making the artillery crew (see link above) I talked about the choices I had for the figures and how I plumped primarily for the Plastic Soldier Company Russians in Summer Dress, which I mixed in with some parts from other figures for variety. I am now at the stage where I am painting my first four test figures.

Painting Finnish uniforms
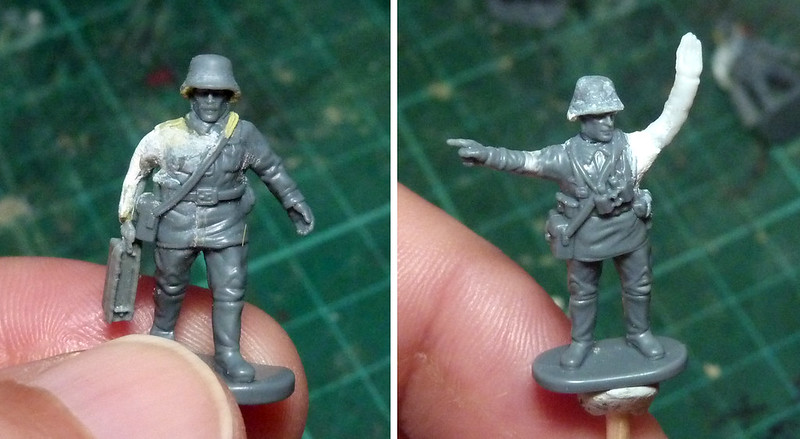
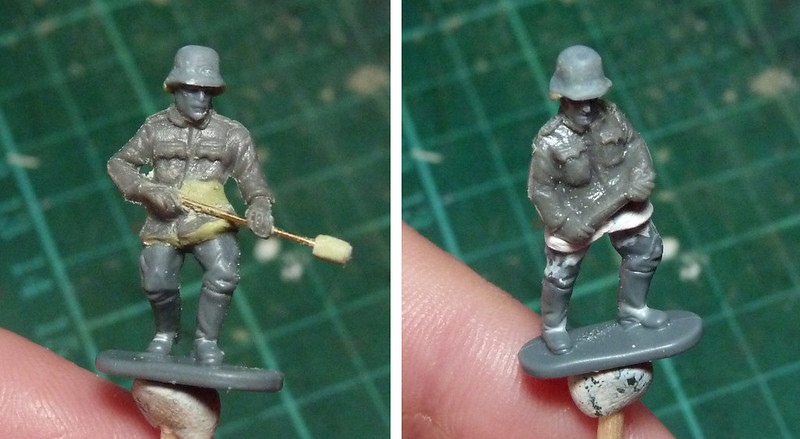
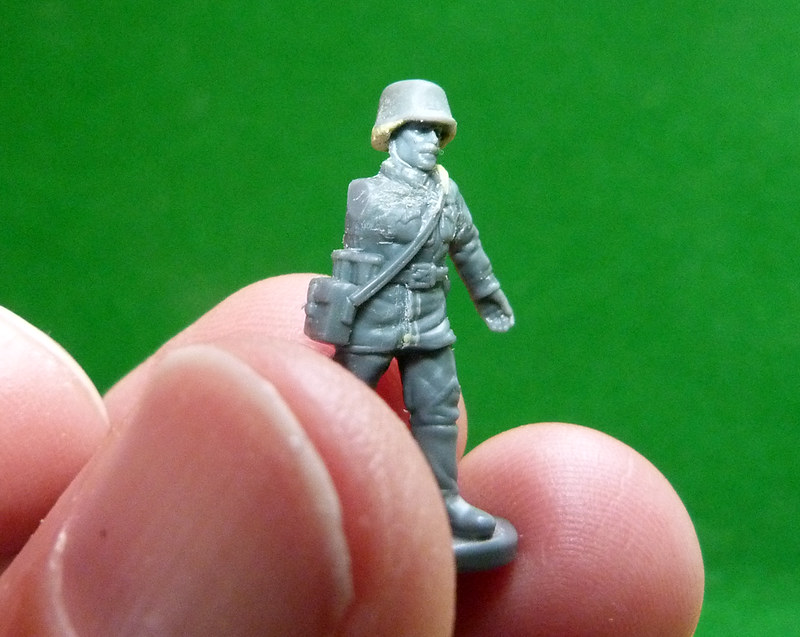
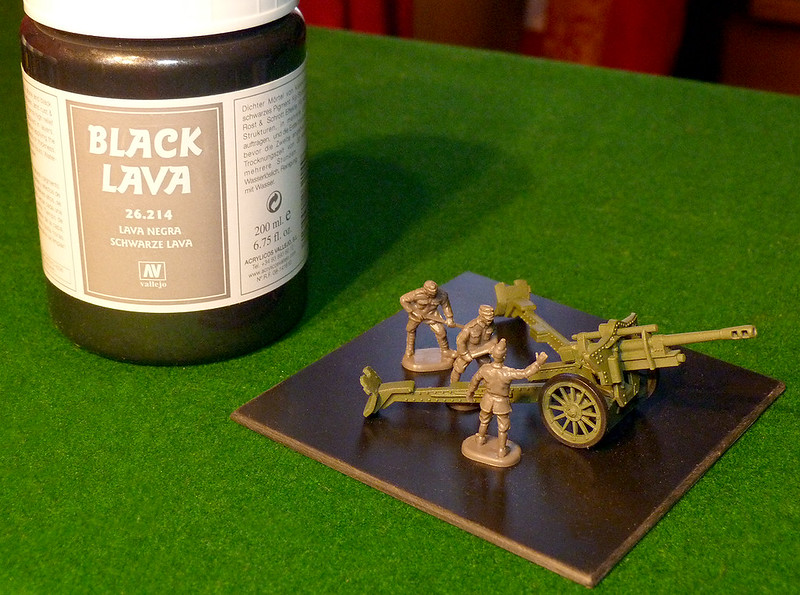
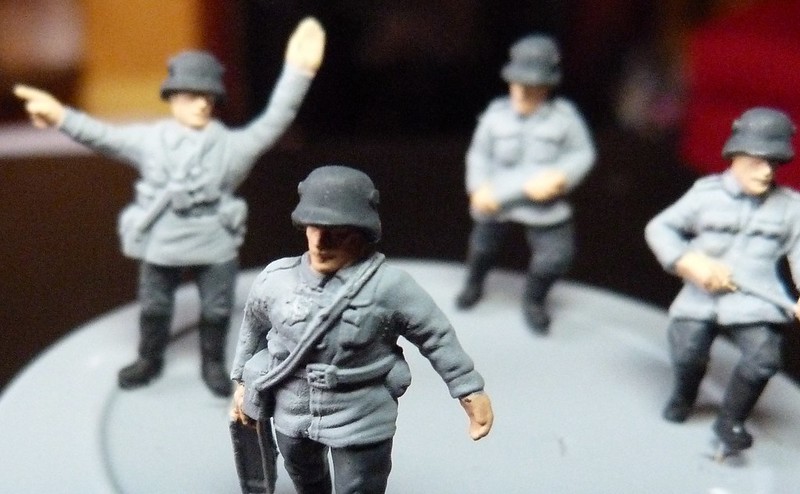
I chose to prime my figures using Humbrols aerosol primer, which just happens to be the perfect light grey for the Finnish army's summer tunics. I know some people prefer to base coat figure using black, but I tried that and it played havoc with my eye-sight! My much prefer grey as an undercoat.

Then I painted the basic coats of the major items using the following Vajello acrylics:
  • Helmet (basically German) - German Grey (995)
  • Tunic - I bought Vajello's Medium Sea Grey (870) but this was exactly the same as the Humbrol primer anyway!
  • Trousers - A 50/50 mix of the two above paints - though I am told Grey Green (866) is similar
  • Boots - Flat black, but I may do some in the distinctive Finnish square-toed style which were tan/brown.
Accessories will need some browns and tans for webbing items before I start the shading. Where I substitute the German helmet for the Czech or Italian helmet I will paint these a dark olive drab and the soft M36 field cap (similar to the Germans') is the same light grey as the tunic.


Friday, 8 June 2012

Making a gun emplacement - Part 7

Crew - final choice, final tinkering…

I've taken a bit longer - perhaps too long - to put together this crew, but as this is my first attempt at playing Dr. Frankenstein I guess I was bound to expend a little too much time on these modifications.

First lesson - soft plastic is a pig to work with!

It actually 'frays' if you attempt to sand it making a unholy mess, so neat and careful carving and shaving with a very sharp craft knife is critical to a clean finished figure. Smoothing of uneven bits or filling must then be done with Milliput or similar putty.

The actual mating of spare limbs and heads isn't all that hard, but you have to chose your doner limbs carefully to match the victim…Er, sorry I mean patient! In the case of my figure who is carrying the ammo crate I used a very thin Revell arm and so had to pad it out a lot - in essence rebuild the arm - with putty to match his other arm.
Tip: I add a reinforcing pin - a small piece of metal wire - to each body part in order to fix it securely to the torso.
Above: These PSC Soviets needed new arms to give them relevance within the gun crew. I quite like the crate carrying figure, it's quite a dynamic pose now. Hopefully the painting will hide his shoddy bionic appendage!

The helmets turned out not so bad and I have the technique fairly sorted now and it's quite quick to do. I just have to add the side rivets which are a distinctive feature if the German WW1 helmet. Luckily, for my infantry I will be making the far simpler Czech M1935 'pudding bowl' helmet as well and that's a doddle.

Above: These are the two 'cut & shut' composite figures made from PSC head and legs and HaT bodies. I needed these for the specialist artillery poses, but the HaT head and legs didn't match the PSC figures so had to be changed. It wasn't all that hard, though my filling leaves something to be desired.

It's been a useful experiment and I am now more confident with working with small figures and have a better idea with what can be done. Obviously I cannot lavish this level of modelling on each and every figure in my Finnish army, but the artillery crews are of sufficient specialism that they need quite unique poses - a rifleman is pretty much a rifleman and won't need much more than a change of hat or helmet!

NEXT: Honest - I will paint these next!

Monday, 4 June 2012

Making a gun emplacement - Part 6

The crew - juggling figures!
OK, having worked out how to do the gun and the emplacement it's time to think about the crew. Long story short - I will have to make my own Finns.

Above: A starting point. From left to right - Revell WW1 officer, HaT Austrian officer, Starlet's Finnish officer and PSC Soviet officer. You can see just how much 1/72 figures vary in stature. The PSC figures are the most chunky but - importantly - unike the other three makes they are made of hard plastic.

After a lot of head scratching - and a couple of false starts - I have plumped for the Plastic Soldier Company's 1/72 Soviet Infantry in Summer Unifoms as the base for my mock Finns. The three most important criteria that made me chose these PSC figures as a starting point were:
  1. The Finns relied heavily of Soviet type small arms - such as their version of the Mosin-Nagant rifle as well as lots of captured arms like the Degtyarev DP LMG and the famous Finnish Soumi SMG looks reasonably similar to the Soviet PPSh41. An important consideration for the infantry contingent of my army.
  2. The Finns summer uniform is similar to the early war German Army uniform (but in grey) BUT the Finns - like the Soviet infantry - seemed to prefer a spartan webbing arrangement which is at odds with the complicated German webbing patterns (and I didn't want to do too much trimming of small items).
  3. The PSC figures are made in hard plastic. This point is quite important if you intend to be doing a lot of 'cutting and shutting' to make hybrid figures.
Some might argue that I would have been better - or it would have been easier - using early WW2 German infantry instead, but I just felt the Soviet infantry was closer to the light-weight Finnish summer dress and kit.

Above: A work in progress as my PSC Soviets slowly mutate into Finnish artillery crew. There is also a couple of hybrids here where PSC heads and legs have been mated to HaT artillery crew bodies. Figure 2 still has his Soviet M40 helmet.

Modifying - shaving and sanding!
The principal item I have to modify is the Soviet M40 helmets of the PSC figures. The Finns used quite a variety of helmets - ranging from Czech, Italian and Swedish tin lids - but perhaps the most recognisable and widely issued helmet was the WW1 vintage German M1918 'coal scuttle' Stahlhelm.

Tip: If you don't fancy trying to do the German M1918 then just round off the Soviet M40 to make a simple Czech M34 helmet - another type used by the Finns. <Link>

The hard plastic of the PSC models lended itself well to being remoulded to a different shape and I had soon sanded the rounded dome of the M40 into a more squarish shape. All I had to do then was add a tiny bit of Milliput putty to give the back of the new helmet it's distinctive protective shroud.

Above: My rather amateurish attempt at a M1918 Stahlheim helmet. At a distance it does have a 'German' look to it which I hope will be acceptable.

There was some other modifiying to do, mainly the removal of the unique Soviet back sack. The Finns seemed to like to travel light and apparently didn't have use for backpacks with their summer uniform.

There were a few figures with the distinctive Soviet blanket wrapped around the torso which would have been too difficult to remove, so I used some of these figures for spare heads, arms or legs!

Next: The painting.

Edit: I should note that another big consideration here is the main infantry section of my little army! I chose the PSC figures for my arty crew as they would then match my foot-sloggers!

Friday, 1 June 2012

Making a gun emplacement - Part 5


While I didn't achieve a finished build in time for the Armourfast Group Build deadline I am still pleased with the way things are going with my LeFH18 gun position. Sorry if I sound a little self-congratulatory but it's nice - and a pleasant surprise - when something you haven't done before doesn't end in complete disaster. This project is actually going as well as I could have hoped - which as a modelling newbie is a happy place to be!


Once again I have used the Citadel scorched summer grass, a nice mixed colour flocking which has some subtle tones of reds and browns in it as well as the light summer green. I've tried to ensure that the tiny stones I carefully placed around the gun pit show though.

Painting the base Pollyfilla 'earth' was pretty straight forward - a mid-coloured base coat of Humbrols' spray buff followed by a wash of a darkened version of Tamiya's Flat Earth followed again by some dry brushing of two tones of lighter mixes of the Flat Earth colour. Really the rough Pollyfilla 'earth' does most of the work by means of it's nice texture.


The logs were a little harder as I have never painted wood before. Again, the base coat was buff to which I applied a dark wash (dark brown) to emphasis the shadow areas. Highlighting was done in two stages with increasingly lighter shades of Tamiya's indispensable Flat Earth and then I touched in some white highlights to try and bring out the grain in my wood skewer 'logs'.


Next: Well I still want to add some more new diorama accessories - like small bushes and brush scrub - and I would like to have a try at adding some moss to the logs!

After that it's back on to finishing of the gun itself with some gentle weathering and then I have the scary bit (for me) which is painting the crew!


Wednesday, 30 May 2012

Making a gun emplacement - Part 4

Scrapped across the final touch of Pollyfilla to make the actual gun pit itself.


I put in some support planks to place the gun on and then drew some wheel tracks through the wet Pollyfilla. Additionally I had a go at some tiny footprints in the mud of the pit - just a lot of random shallow impression in the plaster. Hope it shows up ok once painted.

[I had intended to use Vajello's Black Lava texturing material for the ground surface, but I think I will lose the subtle detail I've added in the wet Pollyfilla if I do. So I will save this for another project.]

Next: Painting the base colours in preparation for flocking.

Tuesday, 29 May 2012

Making a gun emplacement - Part 3

Quick update on the gun emplacement, I built up the earth works using some thin strips of scrap foam packaging and Polyfilla. Over the top of this I will be applying the Black Lava texturing material.


I really like using Polyfilla for ground work, the texture you get just by slapping it on is an easy way to make realistic earth and mud.

Next: Black Lava!

Monday, 28 May 2012

Making a gun emplacement - Part 2

Time to play with sticks! I'm using a mixture of wooden BBQ skewers and cocktail sticks for the different thickness of logs, the skewers have a nice wood grain in them that should paint up well.


Following the pattern set by Gunbird in his tutorial I made a wall using the skewers and then secured them upright by using the cocktail sticks as stakes. I have probably gone a bit over the top but it's a fun experiment and it'll be nice to see what I can do with this when I make the earth works to make this more 'bunkerish'.

My crew still have to be modified and painted and I am just using three, which isn't a lot but I believe this is the norm for war games. Besides space is a bit cramped for a full historical simulation of a real gun crew and all their associated nick-nacks.


Next: The earth work and gun weathering.

Sunday, 27 May 2012

Making a gun emplacement - Part 1


Integral to my 105mm LeFH18 howitzer build - part of a group project on the Armourfast forum - was the intention of making a base for the model, a sort of mini-diorama. Although there is a train of thought that says artillery pieces for war games shouldn't have a base I was persuaded to the contrary by the argument that although not basing a gun means you can fit it 'anywhere' a gun shouldn't be able to go 'anywhere'.

Anyway, suffice to say that my interests in modelling still lay half-way between display modelling and war game modelling, so this is a hybrid project.

I have decided to model a make-shift gun emplacement made from logs, typical of the sort of quickly constructed emplacements that might have been found in the forest battlegrounds during the Finnish campaigns during the mid-late WW2 period. It will give me some much needed diorama practice and make a nice simple little display.

Luckily for me a modelling blogger called Gunbird has created a really informative tutorial on making log bunkers which is an ideal starting point for my project, you can find it here: 20mm and then some blog… Tutorial - Log MG Bunker

I've cut a 9cm x 9cm square piece of black plasticard to act as my base and, as it happens, I came across a pot of Vallejo's 'Black Lava' in a local store so we will see how that product works compared to Pollyfilla.

By the way, the crew you see are figures from HaT's WW1 Austrian artillery figures set, the closest figures I have found that will make do for a summer uniformed Finnish gun crew.

Next: Building the bunker

Wednesday, 9 May 2012

Finnish field guns - basic paint coat


It's nice to see a 'herd' of models together at one time and is what has swayed me more to the war gaming side of the hobby than the individual display side of things. There is a weird attraction to seeing a group of vehicles or weapons like this together.

Anyway, here's a group of my WW2 Finnish Army field guns. These include two of my light Putilov 76mm guns and three LeFH18 105mm medium howitzers (by Revell and Armourfast). This is just the field green base coat - Humbrol's Dark Green spray - but it does bring out the detail nicely.


I will be keeping these guns a plain field green with appropriate weathering and will resist the temptation to apply the pretty Finnish 3 colour camo pattern to them. I guess for war gaming there may be an argument to apply a standard camo across your army to aid easy identification of units, certainly the guys at the Flames of War site could not help themselves and use the 3 colour scheme on their Putilov guns...

Above: The Flames of War team could not help themselves but applied the
distinctive Finnish 3-colour camo scheme to this field gun. This despite the fact
that the Finnish Army actually used a rather more mundane field green.

A simple field green may not be the most attractive scheme but using this camo on ALL my Finnish models just wouldn't be authentic. One thing though, my flash has turned Humbrol's Dark Grey into something a lot more like mid-grey, I will have to adjust my lighting in my next snaps to get a truer reflection of the green coat I have applied.

Wednesday, 25 April 2012

Armourfast versus Revell LeFH18 105mm gun - Part 2


Having discussed the initial impression of the two LeFH18 models it’s time to put them together and compare the ease of construction, quality of detail and sturdiness of material.

Thursday, 19 April 2012

Armourfast versus Revell LeFH18 105mm gun - Part 1

Description: The is a comparative review of two similar products, the Revell German Artillery set (£4.99 from ModelZone.co.uk) and the Armourfast LeFH 18 105mm Howitzer set (£7.50 from Armourfast).
The 10.5 cm leFH 18 was the standard divisional field howitzer used by the Wehrmacht during the Second World War. It was designed and developed by Rheinmetall in 1929-30 and entered service with the Wehrmacht in 1935. Generally it did not equip independent artillery battalions until after the Battle of Stalingrad in 1943. Before 1938 the leFH 18 was exported to Hungary and Spain. 53 were also exported to Finland, where they were known as 105 H 33. [Source: Wikipedia]
 Of course it's the 'exported to Finland' that caught my eye and why I was eager to get my hands on Armourfast's newly released LeFH18 gun set. However, I also knew that I wanted a gun tractor of some sort and additional crew, so while looking for these I came across Revell's German Artillery set on sale at a local store. this turned out to be a very interesting find and unexpectedly inspired this comparative review.