I decided to correct the wing profile with just a tiny bit of Milliput. I'm not sure how hardy this modification will be for wargaming, Milliput can dry quite hard but having it so thin on trailing edges like this might be asking for a chip if handled roughly. I won't be using my models for gaming though.
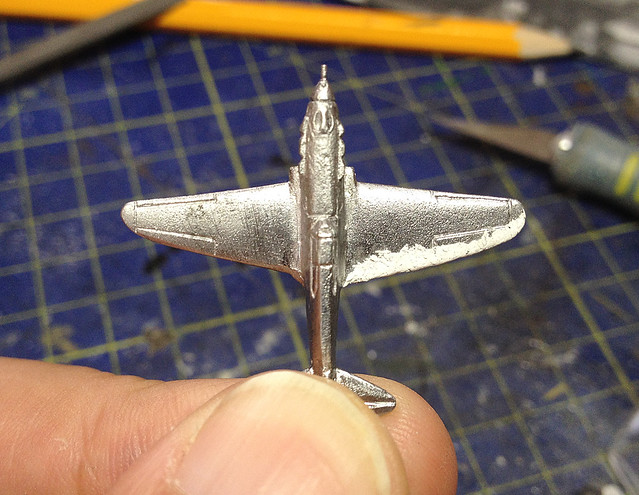
Next was the nose profile. As it was it was a bit too P-40 Warhawk looking, so I added some Milliput on the chin to round out the area between the prop boss and the intake.
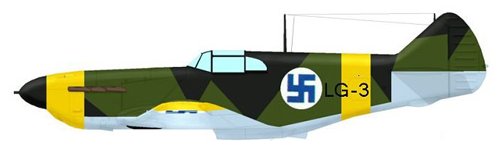 |
| LAGG-3, Nurmoila, Finland, March 1943. Artist: © Rick Kent. More Finnish LAGG-3 schemes at Wings Palette. |
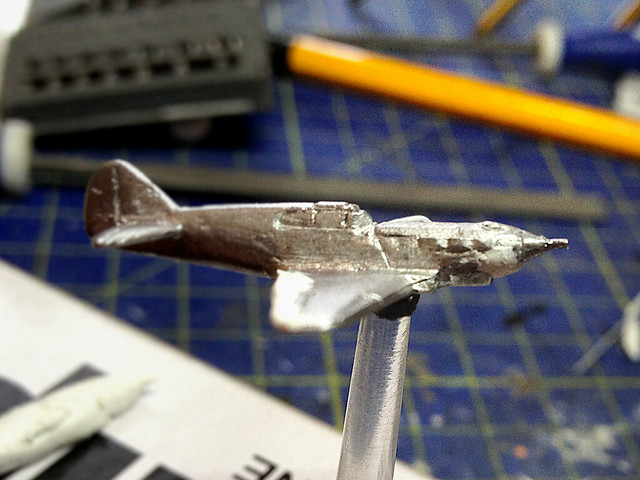
Finally, I smoothed out the lower body from the intake to the tail to make it more like the version in use by the Finns. I'm not really that familiar with the numerous versions of this plane but the shape of the fuselage between the tail and center intake seems to be one of the things that differentiates them.
Finally, I smoothed out the lower body from the intake to the tail to make it more like the version in use by the Finns. I'm not really that familiar with the numerous versions of this plane but the shape of the fuselage between the tail and center intake seems to be one of the things that differentiates them.
 |
| The aircraft became LG-3 in Finnish service, and was assigned to LeLv 32 during winter 1942/43; this unit was based based at Nurmoila, on the Olonets isthmus. Source: mig3.sovietwarplanes.com |
But in a strange way this sort of fiddling about is what I enjoy most about modelling and why I continually buy cheap wargame models and spend so much time trying to make them look better than they perhaps ought to be. In short, were we talking houses I would be the guy that likes 'fixer uppers'!
Anyway - back to the LAGG-3.
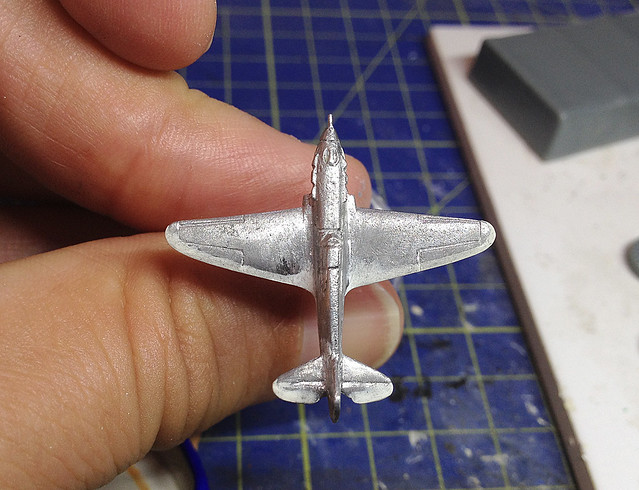 |
| The new 'improved' wing shape - symmetrical and more accurate. |
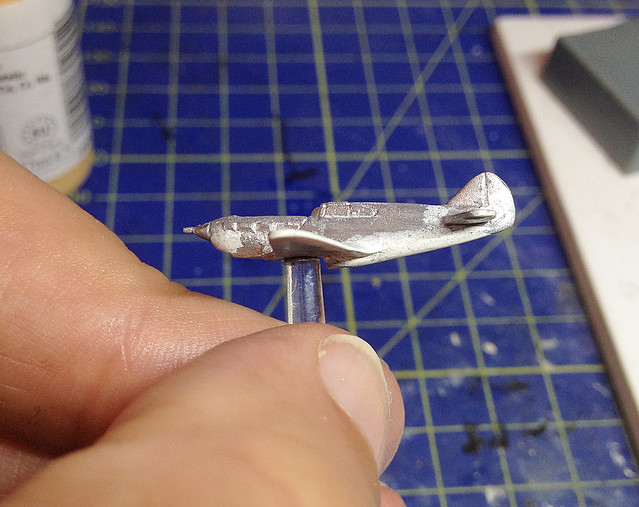 |
| The finished profile - a little more like the real aircraft (hopefully). |

Now, finally, to the big question. Hand brush or airbrush?
At 1/300 scale I am far more tempted to have - at least on this test model - a go with hand painting the model. An airbrush or aerosol spray seems overkill (unless you were doing a batch of these for a wargame).
As for the paint scheme, well as you have seen with some of the reference photos I've included there is very good historical information on the exact colour schemes to be applied to the Finnish LAGG-3s. In fact, as there were only 3 of these fighters in service with the Finns there is exact schemes for each of these specific aircraft - AND, my favoured example of 'LG-3' (see above photo) there are two specific schemes, one for up to 1944 and one after 1944. SO no problem there!
For more information on these Finnish LAGG-3s go to mig3.sovietwarplanes.com/lagg3/
Next: Painting the LAGG-3.
Oh! PS...The little transparent plastic stand doesn't come with the model. This has to be bought separately. I got mine from Scotia Grendel at the cost of £1.50 for a pack of five.
Cripes mate you are a sucker for punishment!!!
ReplyDeleteIts looking much better. Hand brush with a no4 for the base coat.
Ain't I just, Paul! Thanks for the tip - it's brushes all the way with this one. It'll be nice to just relax and piddle about with some brush work...Although this scale is REALLY pushing the limits of my eye-sight. I have one of those magnifier things but I think I need stronger lenses! :D
Delete