 |
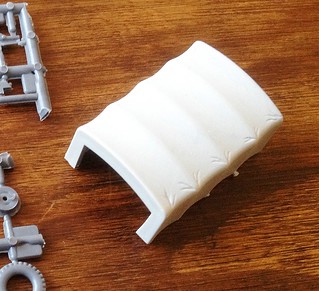
| PST's very basic tilt canvas |
There was no texture, few details simulating folds in the 'material' and the rear 'door' was just left a gaping hole with no option to place a closed cover on it. So, to finish off the model, I decided to make some improvements.
The main problem was the very smooth plastic PST had used to mould the canvas cover - it didn't look like canvas at all, just a big flat plastic box (with some half-hearted ridges and scores in it to suggest it was a fabric cover). So, problem number 1 - how to simulate a canvas texture?
 |
| Here's a nice photo showing a canvas tilt on the back of a ZIS-42M, a relation of the ZIS-6. You can see a lot more wrinkles and folds in it's canvas cover than my overly smooth kit version, as well as how it was actually attached. Source: Wikipedia |
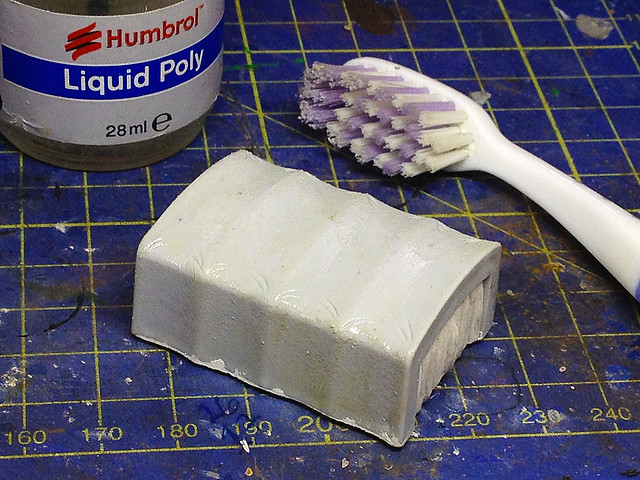
This technique involves coating a plastic part with a thin layer of liquid poly glue and leaving it for a few seconds - this should be enough to melt the surface just a bit - and then you scrub at the surface with an old toothbrush to scuff it up. The resultant roughened surface
BUT FIRST...I wanted to close the gap at the back of the tilt cover. I did not like the big empty 'hole' this left at the back and so decided to cover this up with a scratch-made drop sheet. So, to begin I made a false partition out of plasticard onto which I could model a sheet with lots of folds in it...
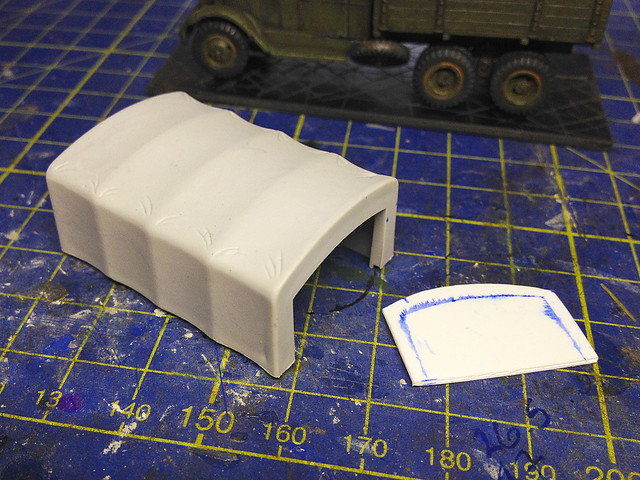

I glued this blanking plate into the 'hole' in the cover. This would give me a firm base onto which I could sculpt my folded material out of good old Miliput putty.
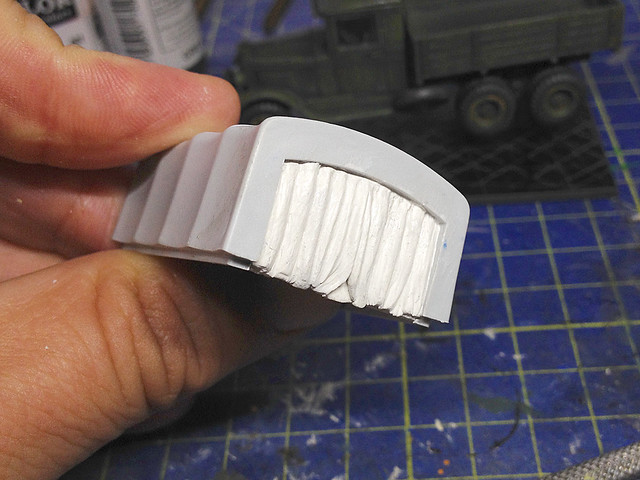
Admittedly I went a bit over the top with lots of vertical folds and it does look more like the Muppet Theatre curtain than a drop cover, but I wanted a dramatic effect. I then test fitted the cover again to ensure the folds tucked nicely inside the wooden flatbed of the truck, which they did.

Next I painted on the poly glue and scrubbed the cover gently with an old toothbrush. The pattern you end up with can be determined by how hard you brush and also in which direction you brush. If you feel that you've gone over the top another light coat of poly glue should smooth the texture back down again. Just keep doing this until you are happy with the result.
The colour of canvas?
Here was another little problem. I couldn't find a reliable or accurate colour photo of a ZIS truck with the original tilt cover in place. Illustrations and other scale models showed a variety of colours, from light green to a canvas brown. Annoying.
 |
| The PST box art suggests a buff or light khaki canvas cover colour. |
So, I (and you) will have to make some kind of guesstimate at what the correct colour for the cover might be. Looking at the B&W reference photo I included at the top of the page I will hazard a guess that the colour is lighter than the Russian Green of the vehicle itself. The PST box art has an illustration of the truck with a light-khaki canvas cover so I suppose failing any better reference I'll just go with that.

I started with a quick spray of what Humbrol described as 'brown'...OK. And then airbrushed on some highlights to the ridges of the tilt. Then it was back to the workbench and the brushwork begins...
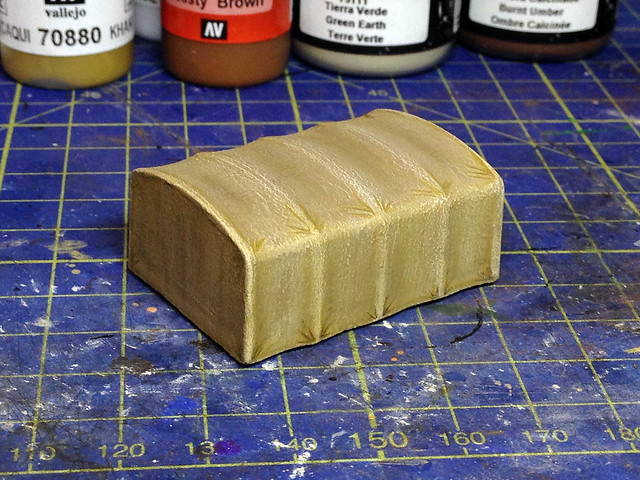
Not the best thing I've done, dry-brushing isn't my favourite technique. But it does look a bit better at a distance! Also, it will be interesting to see how a coat of matt varnish affects the drybrushing effect.
Not much to do now, just some touching up details on the truck itself.
No comments:
Post a Comment