Another experiment complete, this time I've been trying out 'chipping'. This is where corroded and chipped paintwork is added to the surfaces of a model (I'm sure you knew that), a form of weathering that is in principle the opposite of the hairspray technique.
Whereas with the hairspray technique you remove parts of a paint layer to reveal the base colour underneath, with chipping you add small patches of another colour over the top of a base layer. Obviously the hairspray technique is more realistic in that it mimics what is actually happening - a top layer removed to real a lower layer - whereas the chipping technique is a bit of a cheat as you are painting a lower layer over an upper layer of paint (if that makes sense), however chipping is somewhat faster to apply than the more convoluted hairspray technique.
About the Pegasus Hobbies KV-2
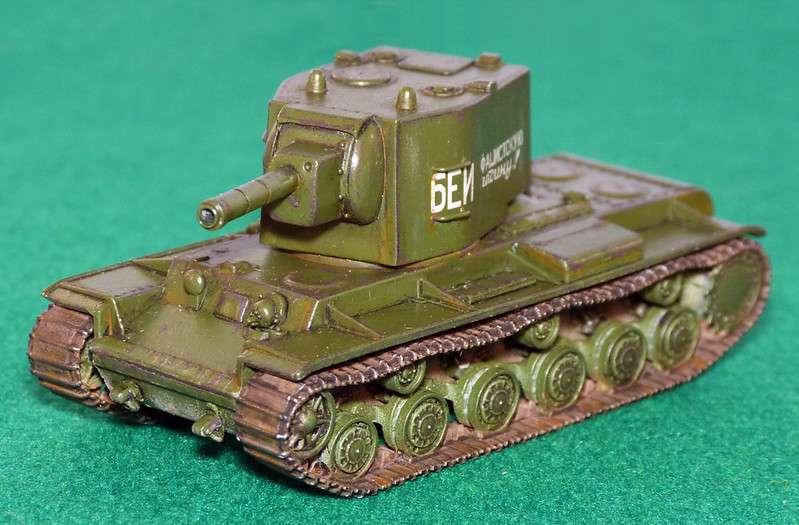
Before I go into detail about how I did the chipping let's talk about the Pegasus quick build KV-2 tank. This was one of two tank models I got in the Pegasus #7665 1/72 KV-1 & KV-2 Soviet Heavy Tank set and you can build either a KV-1 or 2 by replacing the optional turrets.
As usual Pegasus impressed me with their formula of doing a little more detail than most quick build or war gaming quality kit manufactures but not so much detail that the models are complex or time consuming to make. It's a fine balance, but Pegasus seem to have gotten the recipe just right - particularly with their tracks. They also make great 'first kits' for young modellers or beginners like myself.
The KVs are particularly impressive and you have to look carefully to see where Pegasus has simplified the detail. At tabletop distance - the distance for which they were designed to be viewed - war gamers will not, I think, spot these fudges at all. The KV-2 looks particularly impressive and will be an intimidating piece for any early WW2 Soviet campaign.
Chip off the old block
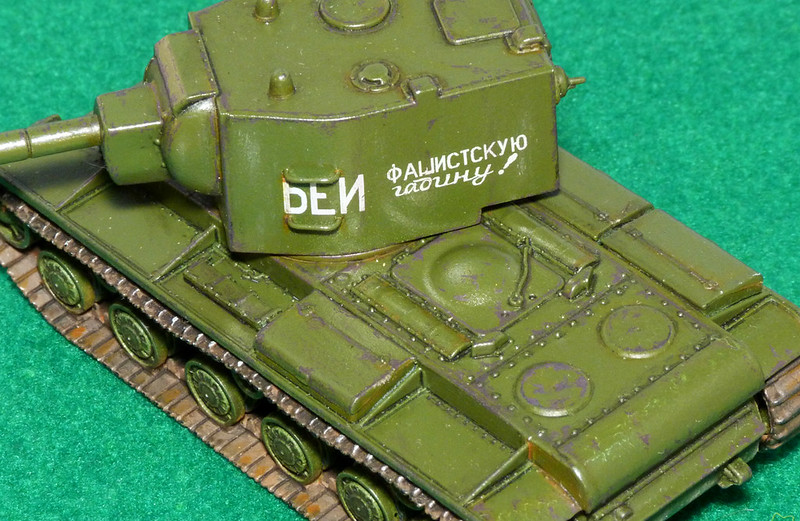
As I said chipping is fairly easy, though like all weathering the real trick is knowing when to stop. It's essencial that you start with a good reference photo if you want to be assured that your chipping is realistic and not over the top. That said, as this was my first experiment I just winged it!
I did refer to several tutorials about the technique before I started - notably Alex Clark's 'Small-scale Armour Modelling' - but I soon found that I didn't like the advice I was being given. Alex's method was to use a small sponge with which he lightly dappled on tiny patches of Vallejo SS camo black for his chips. I tried this but simply found the effect too dark on my Russian Green KV-2.
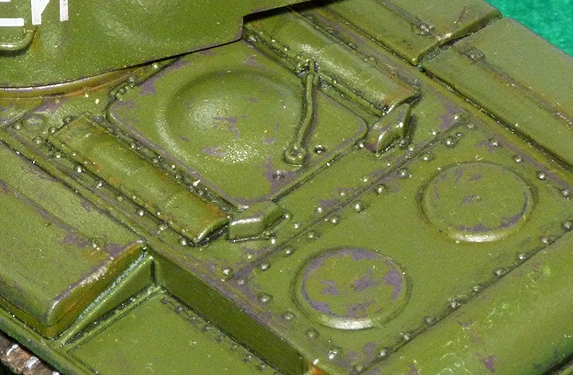
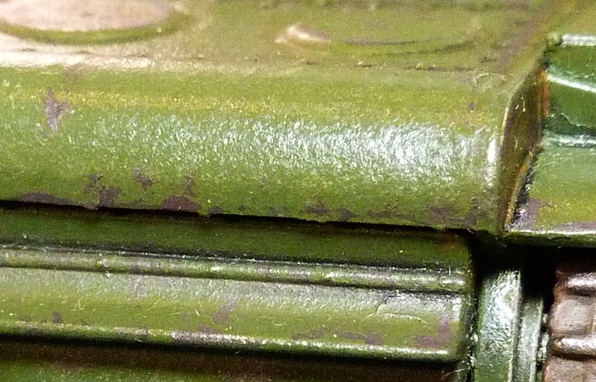
 So I started looking around for some real world examples of chipping and corrosion flaking and I noticed that the colour effect was - in my opinion - more purple than black. I did try a very dark grey in order to represent the underlaying bare metal, but even this was a little flat for me. What I eventually found gave me the look I was after - and matched the beat up building site machinery I had been looking at - was actually a shade of plum purple!
Above: This photo hows how the base bare metal takes on a purple hue where the gun metal or dark grey metal gets a surface sheen of light rust. Source: (c) FreeFoto.com
This seemed to work particularly well with a green base coat as the red tone of the chipping contrasts well against the green, but the hint of blue in the purple gives the impression of a gun metal colour of bare metal.
Additionally the overall effect is that the redness in the pigment gives the model a warm accent to it when seen in the whole - particularly when you add some light rusting to the edges of the chipped areas...
The model itself came off quite well, though it really was just a vehicle for my experiment with chipping (forgive the pun)! As such I didn't give it either the same level of additional detailing or painting that I would have for a 'live' project, but even so I think it looks attractive enough and I feel I'm making some progress with my modelling.
Bonus weathering effect - wet mud/dry mud
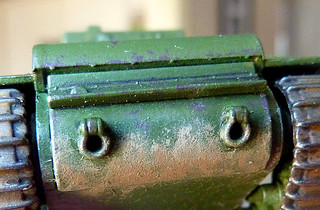
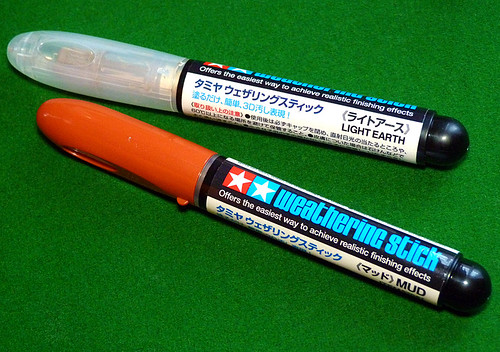
While I have concentrated on chipping I did in fact refine another weathering technique on this model, realistic mud. Now I haven't done a lot of mud on this tank, I just tried out a couple of small patches using a new product I bought - Tamiya's Weathring Stick #87081 Mud.
I'd already tried out the Light Earth version of this product on my Armourfast SU-85 and while the effect certainly replicated the clumpy nature of mud tonally the look was quite flat and without depth. What I was after was a multi-tonal effect that replicated wet mud over mud which had had time to dry.
The Tamiya 'mud' is easy to apply and is almost cosmetic in that it can be moved around and blended and using the two shades of earth together gives me the depth I wanted. I picked these up because they were on sale, about £3 each but they will go a long way.


very nice job for a wargame kit...
ReplyDeleteErhan
Wow the weathering on that looks fantastic as does the overall paintjob...hope you don't mind me stealing some of your techniques.
ReplyDelete