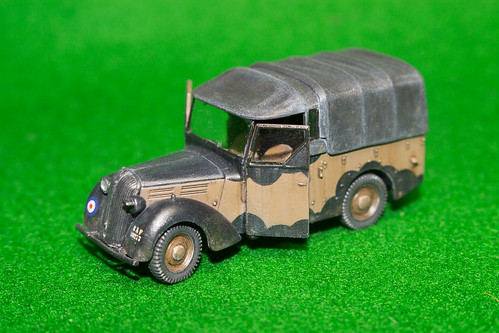
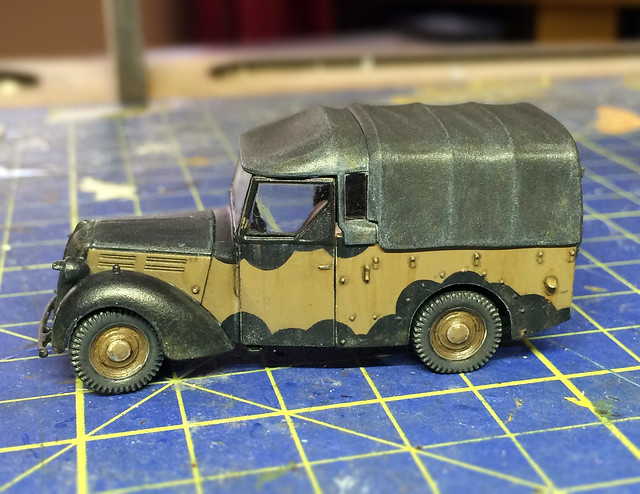
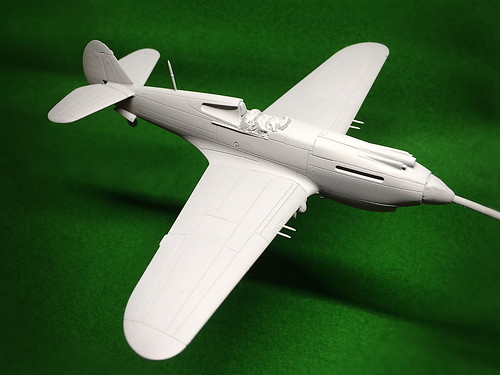
Phew! Finally, I managed to finish a kit. But - for once - I haven't any complaints about this build whatsoever. It's been an absolute pleasure, if all kits were of this quality I would have three times as many kits built as I have.
All credit to Airfix, it's a beautifully designed little model - everything fits exactly as one would expect. So, without further ado, here's the final slideshow of the construction...
And in case you missed them, here are parts one and two...
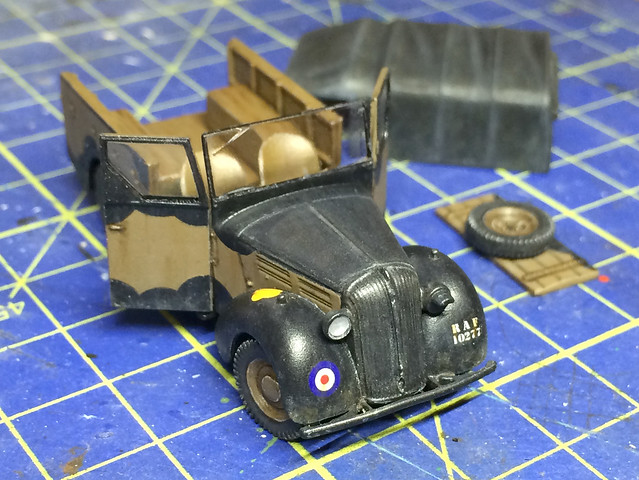
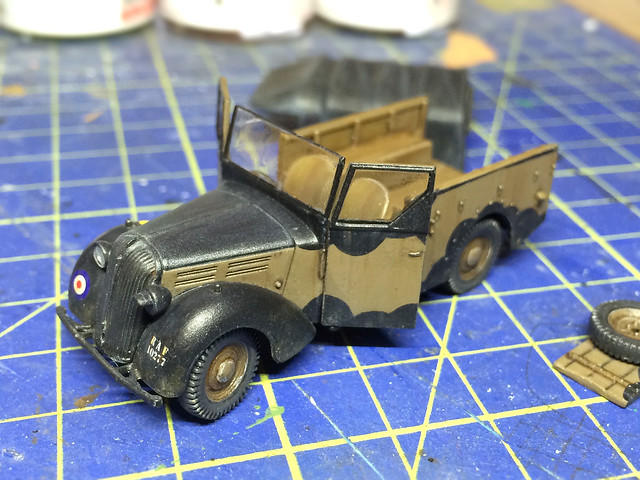
I decided I would do the final slideshow when I finish this kit altogether. So here's the latest progress, a gnat's hair away from finishing...
I only put the bloody doors on! ;)
I went with semi-open doors as this kit will eventually be part of an RAF diorama along with my Airfix Tomahawk.
I actually feel I have made some progress with my modelling techniques with this one (sorry to sound so self-congratulatory), but for once good effects seemed to be by design rather than luck as I felt that some were with my previous models.
Really want to get back on with my Finnish trucks again now as I want to keep the momentum going now I have made some progress!
While I would much rather continue the updates of this model by means of the video format I started the particular technique I have been involved with has been so taxing for me that I can't resist putting up another mini-update...
To re-cap: I was having problems getting the 'Tilly's' canvas roof cover right. I had over-weathered it - with pastel pigments - and it eventually just looked over-the-top.
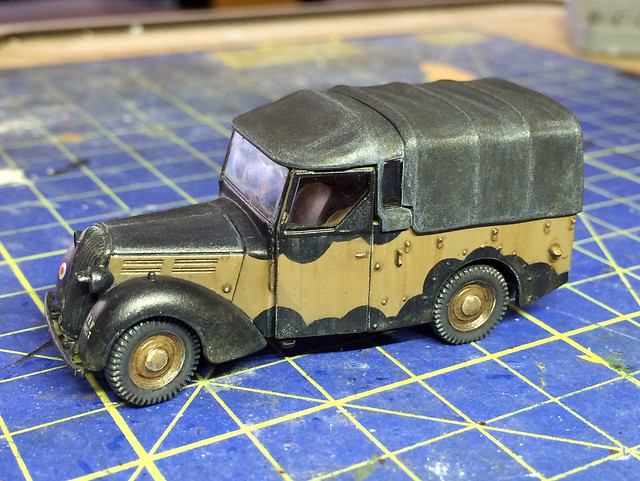
After canvasing for tips to resolve this the most favoured technique seemed to be a light airbrushing to 'smooth out' and tone down the over contrasty highlighting I had done. So I tried it and here's the result...
I am very pleased indeed. You can still make out the underlying weathering and highlighting but it is much more subtle now. All I did was to airbrush Vallejo Matt Black very lightly over the top.
The trick seems to be to stop airbrushing while you think it is just not quite as dark as you think you want it and leave it to dry. When you check it again when dry it probably is exactly the shade you were actually going for! (Does that make sense?)
Anyway, that major hurdle (for me) overcome I can now continue to finish off the model and produce the final movie slideshow.
As the current work on the Tilly is somewhat involved - for a someone of my meagre experience - I don't yet have a full set of photos to make the latest slideshow. But I did want to show that I have made some progress, so here's a snap of the latest state of play...
The canvas tilt cover looks a little messy, but this is because I have just applied the oil paint weathering - which gives it it's patchy look. The next job is to smooth this out and tone it down, though I'm not sure about the best way to achieve this (subtle airbrushed layer or maybe charcoal powder or a wash maybe).
Been a while since I did a featured work post but this one has particular relevance to my main current project - the Airfix 1/72 Curtiss Hawk (in Tomahawk IIA guise). I have been following the excellent 'MakingModelsAgain' YouTube channel (highly recommended) and was very excited to find that he was involved with a club build of the Airfix Hawk.
Well, his club - who are obviously far more committed modellers than I am - finished their group project and a video of the results has been duly posted...
A little depressing as they ALL put my meagre effects to shame (even though mine is not fully completed yet) and they all show some wonderfully creative weathering effects for this aircraft.
As my Airfix Tomahawk and 'Tilly' utility vehicle models near completion my attention turns to the diorama I plan to make for them. My idea was to create a pretty simple - and small - airfield scene with the 26 (recce) Squadron Tomahawk being serviced by ground crew...Which begged the question, where do I get the 1/72 RAF ground crew figures from?
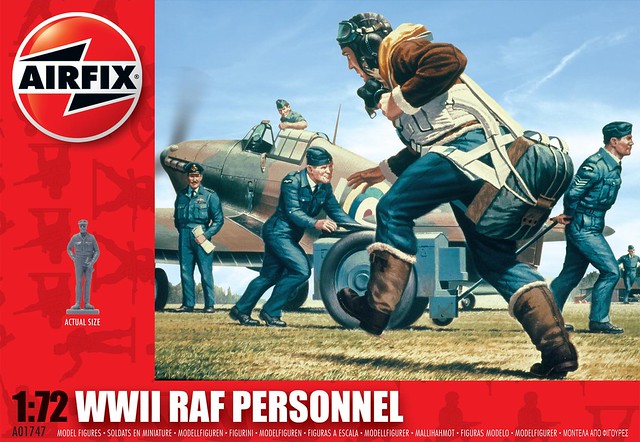
Annoyingly the Airfix 'Tilly' vehicle doesn't come with any crew - not even a driver. So I had to start from scratch - luckily Airfix makes it's own 1/72 'WWII RAF Personnel' figure set (which explains why their vehicles don't come with a crew - they want you to buy this set).
I did look around for alternatives and there are some individual white metal figures and some very plastic expensive Czech 3-figure sets, but neither were right for me. Revell, on the other hand, do a very nice hard plastic set, similar to the Airfix one in theme, but it focuses more on the pilots than it does the ground crew.
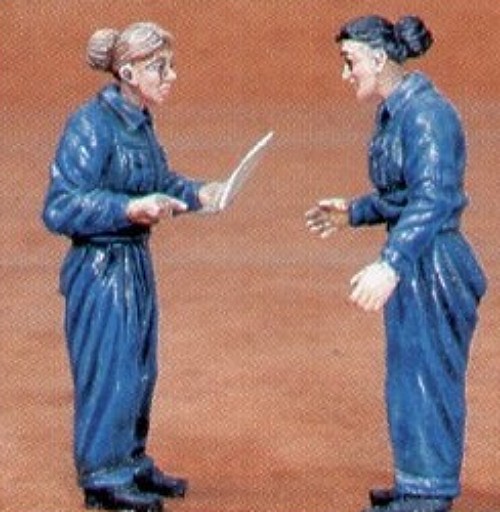
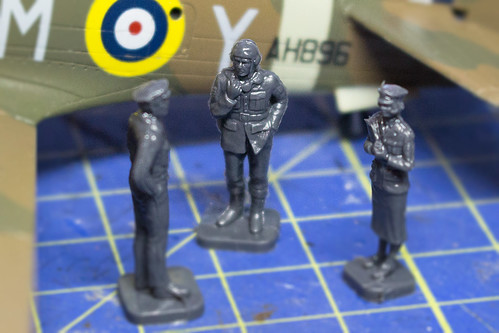
Left: One of the optional figure sets I looked at was some lovely figure models by the Czech Master company. But at £8.50 for just 3 figures this was a bit too expensive for me. The photo shown is, however, two of their excellent WAAFs, which would make terrific subjects for a diorama.
To be honest I would have preferred to have used the Revell set, aside from being he right price and the right number and variety of figures it was also made in hard plastic. The Airfix set is the same soft plastic they use for their other 1/72 military figure sets. Catch 22 - but in the end it was ground crew I was after and the Airfix set had a greater variety (if you need pilots, however, do try the Revell set).
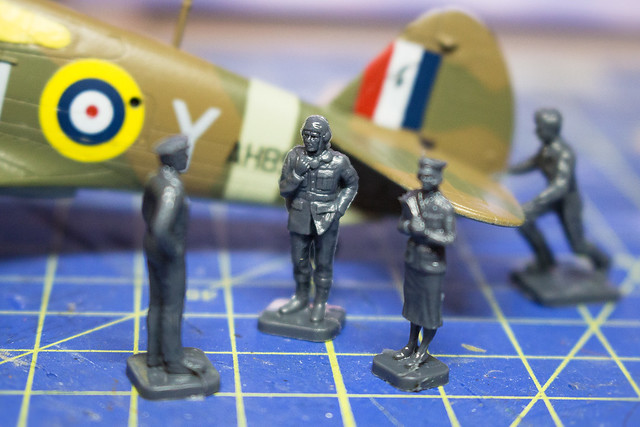
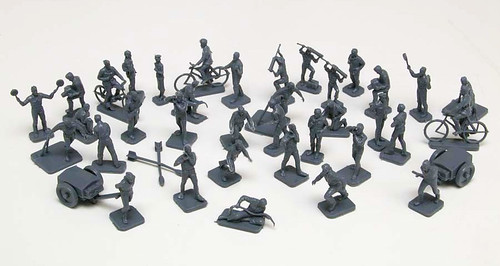
The Airfix 'WWII RAF Personnel' set has great variety of ground crew in a number of poses.
Another reason I went for the Airfix set is that it had two particularly nice and unique figures; a WAAF (female RAF personnel) and - importantly for my diorama theme - a ground crewman who was posed with the sort of reconnaissance camera that my army co-operation Tomahawk would have been equipped with.
Despite it's issues the Airfix set does contain some very nicely posed figures. The detail and
sculpting is very lifelike - if somewhat stiff - and so it's worth persevering with.
Plastic not-so-fantastic!
Now, the reason I prefer to avoid soft plastic figures is because they can be a nightmare to 'clean up'. Even the better quality ones - and the Airfix figures counts among these - suffer from a varying degree of flash and moulding seams. Trimming off this extraneous plastic is a bit of a pain as you cannot simply sand soft plastic parts smooth.
Soft plastic tends to 'fray' if sanded or filed, so any superflous plastic left over from the moulding process has to be very carefully shaved off with your sharpest craft-knife blade. But even then seam-lines can be left behind so the problem becomes one of how to get rid of these pesky blemishes.
I have decided to experiment with heat. Either by using a heated needle or by using liquid poly cement I hope to carefully melt the soft plastic and so smooth out and seams and plastic remnants.
I had planned to be further on with this model by now. In fact I was hoping to have finished it in time for the next meeting of the Hull Scale Model Club, but this seems very unlikely now. Hence this feeble update being '10.5' instead of Part 11!
By now I had hoped to have the all the decals applied, the Tomahawk weathered and - perhaps optimistically - the model finished and ready to mount on the diorama base I have designed. But, guess what, I hit some snags.
What problems? Annoyingly - in this instance - some of the issues I have experienced have been 'glossed over' (excuse the pun) by the photography!
Humbrol Gloss Cote issues back to haunt me
Basically, I made a complete mess of the glossing stage as my choice of Humbrol enamel varnish (over acrylic) appears to have been a faux pass of major proportions. At the very least I should have research this product more and done some experimentation before using it on a 'live project'.
The unfamiliar varnish has never dried properly for me (my subsequent research suggests this is a reasonably common problem and might be caused by the varnish not having been stirred sufficiently before use). It remained stubbornly tacky and this caused a lot of other problems down the line.
Handling the model became very difficult indeed. The sticky gloss coat became a trap for dust and finger prints and each touch resulted in the gradual destruction of a little bit of the basic paint coat that the varnish was actually intended to protect.
And then...
The AML Decal Set So, the gloss problems set the scene (and may be connected) with the issues I am having with the AML decal set I bought. Ironically, while my gloss coat was too sticky one of the main problems I encountered with AML's water-slide transfers was that they weren't sticky enough!
To begin with though, while my initial impression of the decals (while still on the carrier sheet) were positive - the print and colour quality being good - once it came to applying the decals a couple of things were not so positive. The AML decals appears to be quite thick - in my opinion (similar to some of the cheaper Italieri decals I have used but perhaps not quite as glossy) and they were also did not seem to respond quite so well to either Micro Sol or Micro Set solutions.
I did take the precaution of trimming the decals as close to the graphic as I could, minimising the amount of transparent carrier film visible around the edge of each symbol. One of the effects of Micro Set/Sol is that it aids the creation of a 'painted on' effect where the carrier film appears to blend in seamlessly with the underlying paint scheme. The level to which this is successful depends on the coat onto which they are applied (gloss or Klear being best), the quality and thickness of the decals themselves (the thinner the more chance they have of blending in) and the pliability of the decal (where Micro Sol, in particularly, can help the decal conform to irregular shaped surface detail).
AML decals - sadly - seemed immune to my decal fix solutions, even the stronger Micro Sol (which I have know to completely dissolve some Hobby Boss decals in the past).
Was it the failed gloss preparatory coat onto which the decals were applied? Was it the thickness or lack of adhesion of the AML decals themselves? I know it wasn't a 'bad batch' as - I must admit - I had to order a second set of the decals as I accidentally damaged one of the vital letter transfers and the replacement set was just as stubbornly 'un-sticky' as the first was.
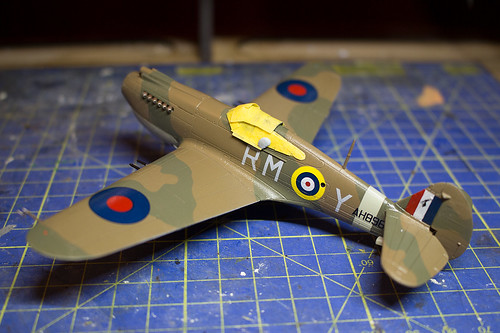
In consequence, although it is (ironically) not apparent from the first photo at the top of this entry, some of the decals have areas where the carrier film is obviously visible - despite repeated applications of Micro Sol - and in a couple of places the edges of some decals have persistently peeled up slightly.
My only hope is that the protective varnish 'sealing layer' I am about to apply with help to remedy this somewhat. And here I must assure you that I am NOT using Humbrol's Enamel Cote but am instead returning to my tried and tested (if somewhat thicker) Humbrol Acrylic Satin Varnish aerosol spray.
Well, despite the wife's unrelenting DIY regime I did find a little time over the weekend to make a tiny bit of progress on the 'Tilly'! As before I have documented this build by means of a video slideshow (but I have added some text commentary this time)...
It's all going fairly well, but I have hit on one small snag. To include this vehicle in the RAF 'Tomahawk' diorama I have planned I will want some RAF personnel. But, unfortunately, the Airfix Vehicle Set that the Tilly comes in doesn't include any figures at all (no drivers or ground crew).
I blatantly realised that this was because they want you to buy their own 1/72 'RAF Ground Crew' plastic figure set (naturally enough). More expense!
Still, the set does include a selection of very nicely posed ground crew and pilots (including one female WAAF). I bought the set from Amazon and have been sorting through the poses and have picked out a group I would like to include. My one qualm is that they are soft plastic figures and so have a little flash and some seams which I will have to try and get rid of.
Hope you enjoy the slideshow. As said before, I'm experimenting with this format so please feel free to make any constructive criticisms
Im trying out something different today. As the Airfix Tilly is so straight forward it actually bearly needs any commentary about the building (yes, it is that well behaved) so I have decided to do a bit of a slideshow of the stages in construction and post it up as a movie...
I decided to stop at this half-way stage as I now have to do some prep work to do prior to painting the interior (masking and what-not). But this build is a breeze and it's nice to get back onto vehicles again - aircraft just ain't my thing I don't think.
Let me know what you think of me doing the construction journals in this way - as movie slideshows - and any constructive criticism or suggestions would be gratefully received.
Rectified canopy...
First of all I have managed to produce a better canopy. I had to start from the beginning again (luckily I bought several of Airfix's P-40s so had spare canopies) and I managed to apply the Johnson's Klear successfully this time. There's definitely a knack to working with Klear...
Next I painted the canopy frame by hand. The result was quite acceptable, which just goes to show that even though you can do a lot with an airbrush there is a lot to be said for the good old fashioned paint brush - despite my shaky hand!
I first painted the frames using an enamel - Humbrol's Matt 105 (Marine Green) - as the varnished transparent plastic of the canopy seemed a little 'slippy' for acrylics. Once dry I then applied a coat of Vallejo's acrylic RAF Dark Green over the top of the enamel layer. I finished this all off with a coat of Humbrol's Satin Cote varnish (over the painted frame only, not on the transparent parts).
Gluing the canopy in place
At least I'm back on familiar and trusted ground again now. I attached the canopy pieces using Pacer's Formula '560' Canopy Glue. This despite the fact that I am not entirely sure how it differs from normal PVA - I suspect it's just very, very good quality PVA glue. But it's worked well for me up to now...
I should make a point of saying that the Airfix canopy parts are a very good fit and there were no problems. They simply slipped into place snuggly and very little glue was required.
Satin coat and decaling
Up until now I have been using Humbrols aerosol spray-can varnishes for my models, but now I want to move up a step and start applying my varnish coats using an airbrush. Obviously I am looking for a lighter, thinner varnish layer, aerosol spray layers being a little too heavy.
I have bought Humrol's Gloss and Satin Cotes, these are solvent-based varnishes and need to be used in conjunction with enamel thinners. This raises a lot of questions about thinning and how to use these varnishes with an airbrush, luckily Humbrol has produced a neat little video calming m trepidations about using a new medium (or at least an familiar medium in a new way)...
Luckily I got a chance to use Humbrol Satin Cote when I did my revised canopy, I finished the canopy frame off with a bit of Satin Cote using a brush. But this gave me a chance to experiment with using thinners and mixing the correct consistency. The Humbrol varnish worked nicely with my Vallajo Odourless Thinners and as a result I am less fretful about putting some through my airbrush.
Nice side-effect of the light gloss coat was to slightly darken the RAF camouflage
scheme. I had been worried that my version of the pattern had been too light.
The airbrushing was interesting, I am used to a wide coverage using the spray cans which only meant a couple of passes across the model to cover it. My airbrush - having a finer (narrower) nozzle - only had a smaller coverage and so I had to spray back and forth a bit at a time until I completely coated the whole model. It's a bit more complicated than my spray-can method, but the result is - as I hoped - a lighter and superior coat of varnish.
This gloss coat should ensure that the AML decal set I bought for my Tomahawk adhere to the model without 'silvering' (tiny air bubbles caught between the paint layer and the decal).
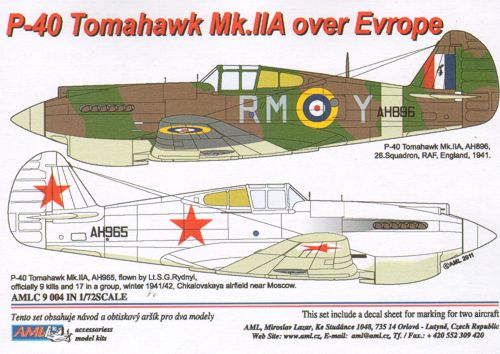
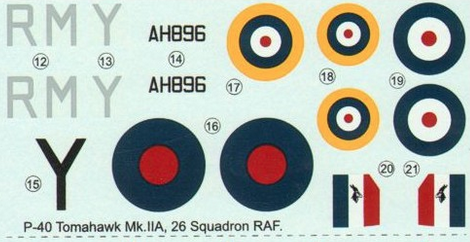
The decals - 26 Squadron, RAF, England 1941.
Interestingly, AML's decal set for European theatre Tomahawks include not only
the RAF example that I will be modelling but also a lend-lease Soviet P-40 which
appears to be ex-RAF. It comes in a striking winter camo scheme.
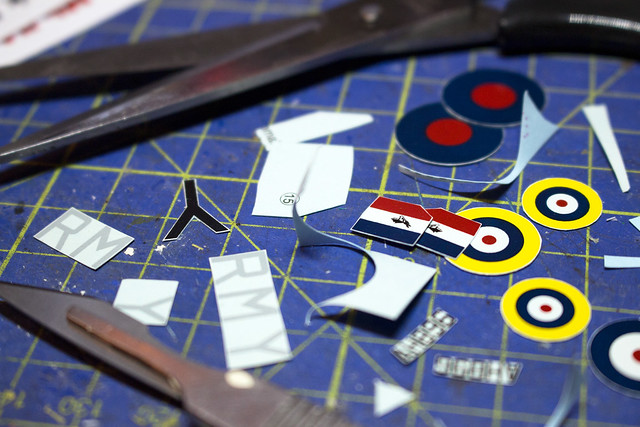
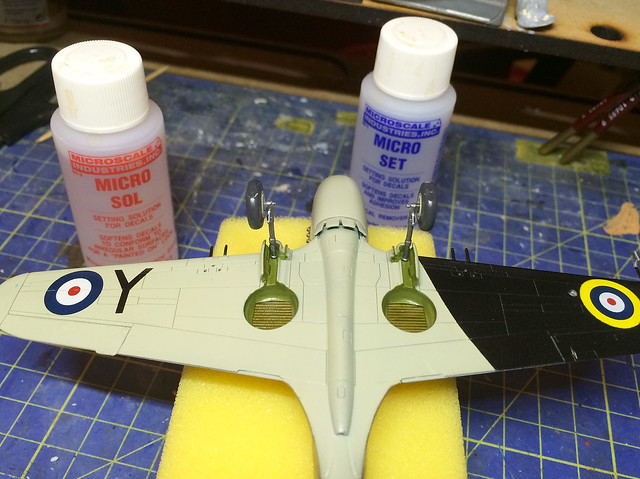
As usual I will be using Microscal Micro Set decal fix to fix the decals, but also Micro Sol to soften the decals so they sink nicely into the Airfix's rather deep panel lines. The AML decals look well printed with no misalignments in the colours and I will be trying to trim the individual decals as close as I can so that they - hopefully - look 'painted on'.
Trimming the decals is a time consuming and nerve wracking process - or at least it is for me! No room for shaky hands here, the closer to the decal the better but lettering can be a bit of a bitch...
Problems...Sticky varnish
I suppose when I am always trying out new things it means I'm always coming across problems, in this case the Humbrol Gloss Cote varnish remains sticky to the touch. I've searched on the internet and found that a few people have had this problem - and some have decided never to use this varnish again! Oh dear.
What I've decided to do is persevere and return to using my trusty Humbrol acrylic spray varnishes. They may not be as fine but they work and I am pretty sure that a layer of these over my Humbrol Cote layer will solve the stickiness issue. We shall see.
In any case, I've continued on and applied the decals...
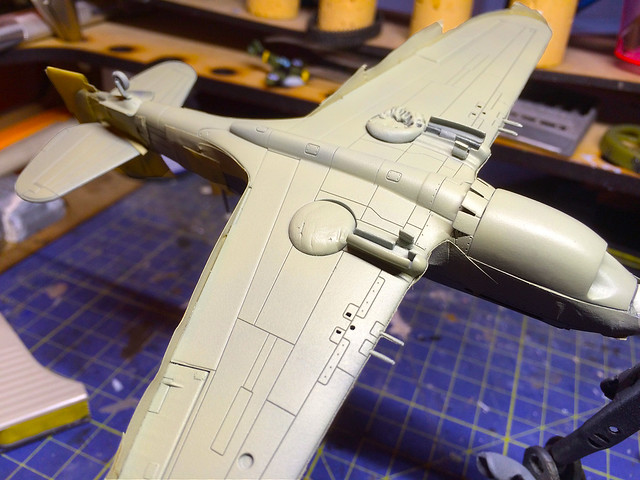
A good excuse to show off the rather novel underside of the model - which, sadly, will be mostly hidden when mounted on the diorama I will be making.
And here another little issue popped up. I had to apply one of the roundels onto the black underwing panels and I never thought about how that would effect something so thin as a decal. If I had been really clever what I should have done is to paint a flat white circle the same size as the roundel and applied the decal over that to ensure the correct level of opacity. Another lesson learned!
Next: Another coat of varnish to protect the decals and then onto the panel lining and weathering.
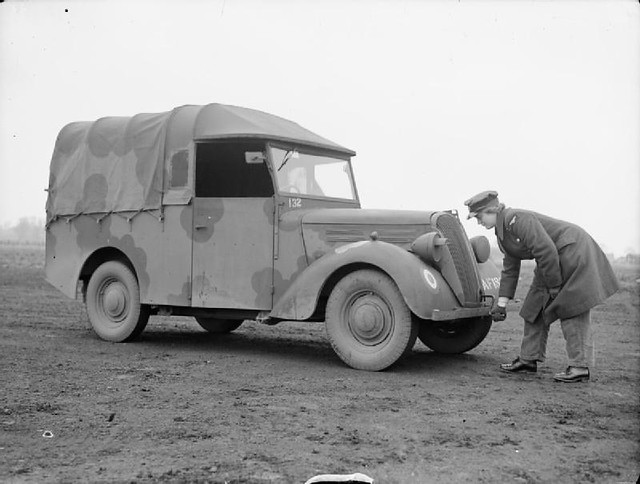
The Standard Utility Vehicle, or 'Tilly'. Photo source: Wikipedia
I have been wondering what to do with my Airfix Tomahawk IIAnow that it's nearing completion. I have constructed it with the landing gear down so mounting it on some sort of small diorama seemed on the cards. But I didn't just want to mount the aircraft with - say - a single pilot figure, I fancied having a go at something a little more involved and interesting.
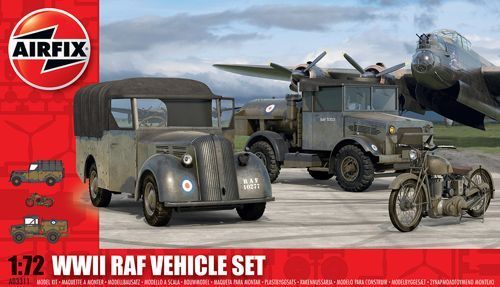
As it happened, while looking around my local model shop I came across Airfix's WWII RAF Vehicle Set. This seemed to be the ideal basis for my diorama...
I decided to go for the utility car as the partner for my RAF Tomahawk. It was a vehicle made by the Standard company based on a civilian car design, the common nickname for which was the 'Tilly'.
In my head I had an idea for a little story - unfortunately I now realise that I should have planned the idea for a diorama BEFORE making the Tomahawk as I missed an obvious opportunity for a lovely little scene using Airfix's 1/72 RAF Ground Crew figure set...
Some examples from Airfix's R.A.F. Personnel (set 01747). Source: Plastic Soldier Review
My Tomahawk is a 'Army Cooperation' machine from RAF 26 Squadron the primary duty of which was tactical photo reconnaissance. As you can see the Airfix figures has an RAF crewman working with one of the photo-recon cameras (far right in picture) and this would have been ideal for my diorama IF I had discovered this first and then opened up the little side hatch in the fuselage (which I didn't). Du-Oh!
It's just one of those things. I didn't know what I was going to do with my Tomahawk when I started it, I was just doing it for a change of scene (as a break from all the trucks I had been doing). Ah well!
...And on that note, back to my truck! (Well, car really!)
I got a really good idea how this model was going to go together from this YouTube build video...
It does look a very nice little kit (Airfix are really on a roll these days it seems) and this impression was reinforced when I cracked open the box. Once again - just like the Tomahawk kit - the Airfix RAF vehicles are lovely and crisp mouldings with plenty of nice detail. The Tilly itself is a lovely little van and the instructions for it's construction are easy to understand and idiot proof (bearing in mind the last truck I was working on was the horrible Zebrano YaG-6 the AIrfix Tilly is s breath of fresh air)!
So, onwards and upwards, as I begin construction. It will be interesting to see how long this kit takes to put together.
Canopy masking, painting and attachment And now to the bit I've been dreading. Although I've done a couple of aircraft since taking up modelling again I am still affected by memories of the mess I used to make of my model canopies when I was a kid. If I didn't get glue on them - usually a thumbprint - I made a dog's dinner of painting the canopy framework.
To complicate my worries I had decided to try out a technique whereby I dip the canopy components in Johnson's Klear floor wax. This is said to give transparent plastic parts an extra sparkle as well as protecting the 'glass' parts while you undertake work on them.
I didn't do this job quite right and unfortunately I got what is called 'pooling' where too much Klear congregates in a tiny puddle in one place and drys to for a little blob. It's fifty-fifty as to whether these blemishes are noticeable so I haven't tried to rectify them in case I make them worse. But it's worth noting that if you do want the clean off Klear again should you make a mistake you can do so using 'Windex' window cleaning liquid (which contains ammonia).
The big chunks of masking tape are protecting the rear cockpit windows, overkill perhaps but I don't want and mishaps when I spray.
I then give the parts a quick pass with Humbrol grey primer before applying a couple of light coats of Vallejo's RAF Dark Green to match the fuselage camo pattern. Then it's the moment of truth when I remove the masking.
I suppose I could have simply painted the frame by hand, starting with an enamel priming coat. Spraying does seem a little much - and a bit wasteful - when it's just small parts like this but I do like a nice sharp line so I think it's worth it.
I'm not really pleased with the results. I've made a bit of a mess of this bit of the model - first by the bad application of Klear and then by spraying the frame instead of panting it by hand (the photo flatters the job I've made of it, it's not that good).
I'm sorely tempted to start again with one of the canopies from my other Airfix P-40. I'll sleep on it (which is always the best thing to do if you are unsure about something.)
Final component additions...
There are a few parts to still be attached before the model is - essentially - complete. These include the undercarriage, the exhaust stubs and the Pitot probe.
I am building the Airfix undercarriage 'as is' and not adding any scratch built hydraulic cables. So after cleaning up the components it's onto the spray booth for priming...
Then the parts are hand painted. I didn't have an 'aluminium' for the landing gear struts so I just mixed a little flat black with silver, the wheel hubs were done in the same Hakata 'Sky' light blue-green and - finally - the tyres were painted with a new colour I bought, Vallejo's Panzer Aces [306] 'Dark Rubber'.
I was very pleased with the Vallejo rubber colour and will use it by default on all my tyres from now on. It's a warm, dark grey with just a hint of blue (I think) and really is a wonderful base for creating rubber tyres.
The landing gear was assembled and glued into place, so I now have to be extra careful when handling the model in case I knock one of them off. I also popped on the prop - which I finished painting - but I haven't glued it on permanently as I want to make use of the hole for the prop as a means of supporting the model while spraying it.
Now I move onto the last two smaller parts, beginning with the exhaust stubs...
The obvious flaw with these parts are that the 'pipes' are not hollow, so the simple remedy for this was to drill out the stubs to make them more realistic...
Painting the stubs caused me some head scratching as opinions seem to vary about what colour they should be. Airfix seems to suggest using a dark grey, but my research seems to suggest a metallic bronze-brown...
Next up is the Pitot probe which is positioned near the end of the port wing. What is it?
'A pitot tube is a pressure measurement instrument used to measure fluid flow velocity...It is widely used to determine the airspeed of an aircraft...' [Wikipedia]
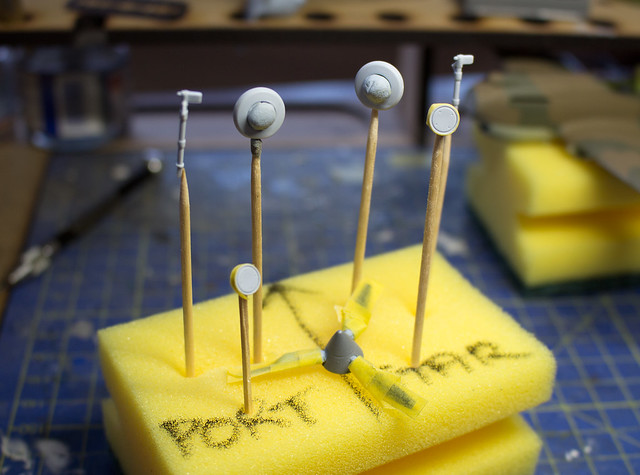
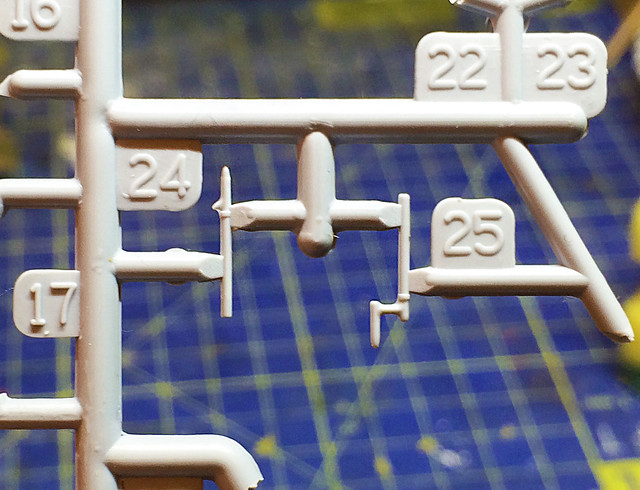
On the left is the US style Pitot probe [24] and on the right is the RAF 'cranked' probe [25].
Airfix provides you with two pitot probes, one for US aircraft and one for British. US Army aircraft sported the straight probe while the RAF fitted what was termed a 'cranked' probe, a sort of 'L' shaped tube.
Aside from a couple of small repairs - I finally managed to break off one of the delicate wing-mounted machine-gun barrels, it was inevitable - I am just doing some paint touch up to rectify some small blemishes. But otherwise that is the majority of construction complete - the exception being the cockpit canopy
I'm not sure when to attach the canopy. I could do now I guess and then mask it out to protect when I start weathering. Or I could wait until I've done the weathering then attach it...I shall have a think about that...
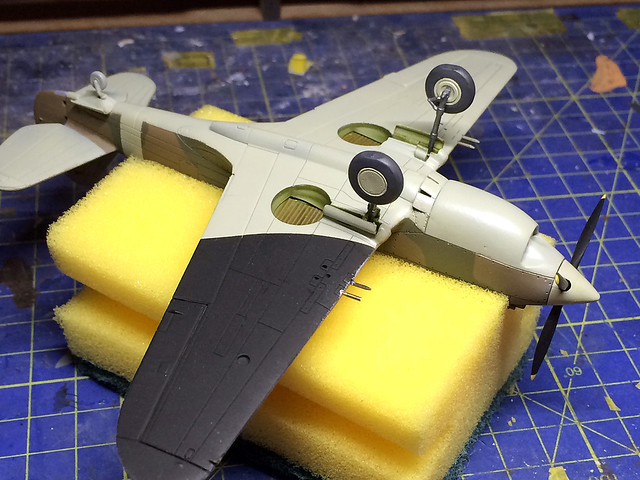
I've completed the basic colour scheme on the underside of my Tomahawk and now have to remove the masking tape ready to start the job of re-masking in order to spray the top-side. This gives me a glimpse of those undercarriage wells and I'm pretty pleased with how they look - the BluTack masking worked and I got a nice clean finish...
My main worry now is the Hataka paint, but it's now a case of having paid for it and started using it I best muddle through to the end with it. I'm pretty sure the problems I had with the underside coat was an issue of dilution, I have a suspicion that the Hataka paint needs to be mixed thinner - to aid flow through the airbrush - but then needs several coats to build up the required finish. We shall see.
Update: Had a lovely reply from Hataka themselves to a query I made on their Facebook page. They directed me to a review of their paints on the AeroScale web site which includes comparisons and suggestions regarding dilution and compatible thinners: AeroScale Tool Review - Hataka Acrylic Paints.
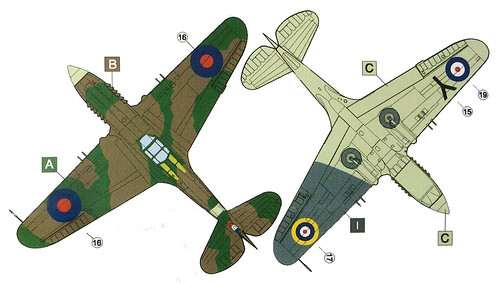
AML's reference sheet for their 26 Sqdn. decal set.
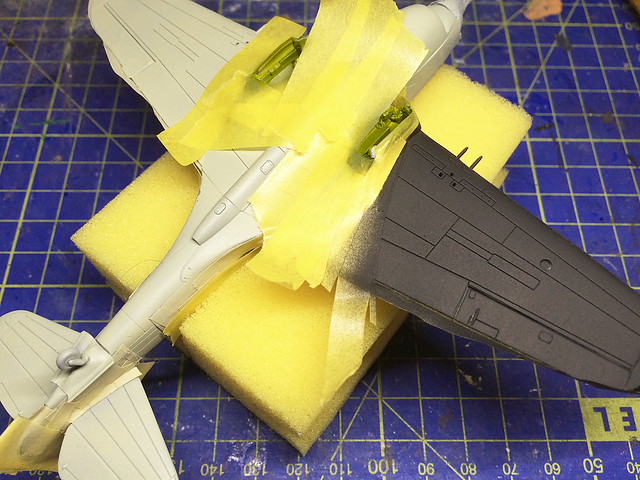
Back to the masking tape (I must get a selection of different sizes to fit the different nooks and crannies that need to be covered plus some wide tape for the big areas). Obviously I'm reversing the masking in that I am covering the underside that I have painted in order to spray the upper-side. I'm trying to 'underlap' by masking nearly up to the line where the Sky colour finishes but I leave a tiny bit of Sky (about half a mil) so I can over paint it with the Dark Earth to give a nice smooth demarcation between colours.
OK, that looks nice enough - aside from the inevitable tiny hairs - where do they come from? Still I carefully removed them and think I can touch in these tiny blemishes. The Dark Earth colour looks a bit on the light side - in my opinion - but checking through colour reference photos it seems to come within the margin of acceptable RAF early war camo-brown. In any case I will be weathering this model so starting a little on the light side isn't a bad thing as it will tone down once the weathering is applied.
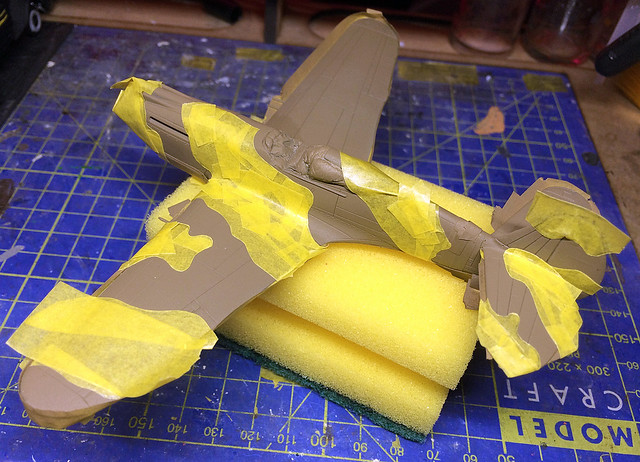
Now to mask for the RAF Dark Green. I'm going for a hard-edged cam pattern - I think that is correct - using masking tape rather than Blu Tack (which gives a softer edge)...
Half the Tomahawk masked, phew!
I just judged the green pattern by eye rather than doing it 'properly' by enlarging the AML colour pattern sheet up to 1/72 scale and then using that as a template with which I could cut the patterns accurately. I think there is wiggle room as regards authenticity and my interpretation will be close enough.
Dropped Hataka paints: I'm afraid I simply lost confidence in the Hataka paints, mainly as they simply refused to play nicely with my airbrush. I had repeated blockages despite trying a few different thinners and so have now reverted to Vallejo paints. The 'Dark Earth' was Humbrol's and the Dark Green I am about to apply is Vallejo's Model Air No. 12.
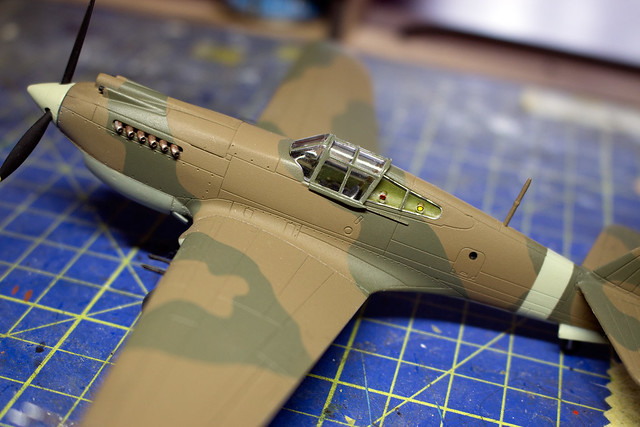
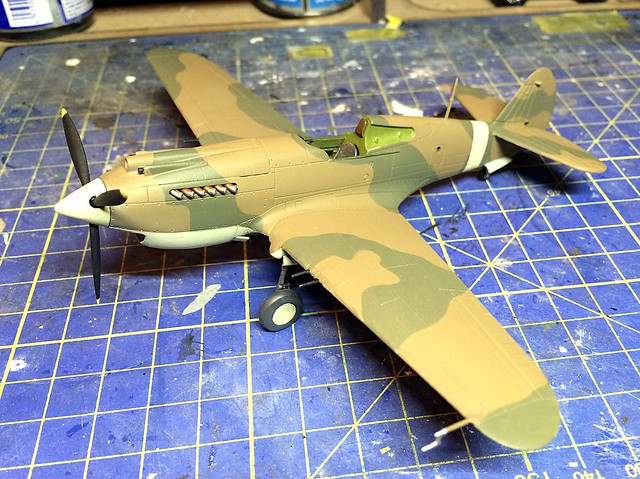
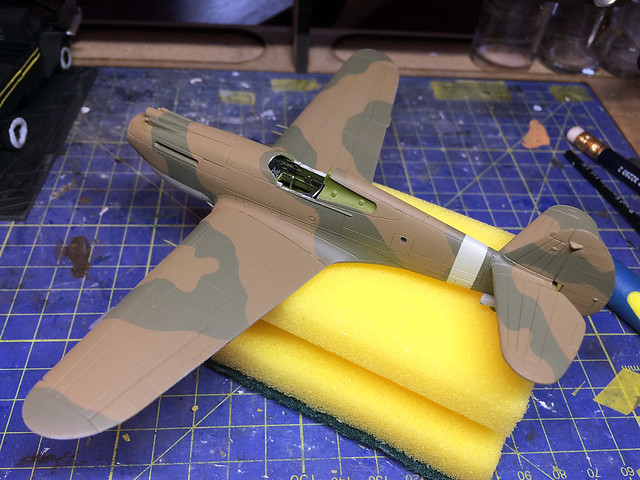
I was very pleased with the results of my airbrushing as I haven't done a lot of camouflage painting as yet and this is my very first RAF camo scheme. The decision to paint the sky fuselage band first and then mask it was a good choice as it came out really well.
Another positive was that the addition of the RAF Dark Green has toned down the Dark Earth - which I was worried might be too light - and the overall effect is a relatively acceptable interpretation of the RAF's early WW2 camouflage scheme. I think once I spray on a satin varnish it will be a quite satisfactory job.
Well, that didn't turn out to be the disaster that I was worried it might be! I think I may even have made some progress in my modelling. In fact I think I will go and reward myself with a nice mug of tea and a ginger nut. :)
Next: Touching up and repairs before varnishing prior to adding the decals.
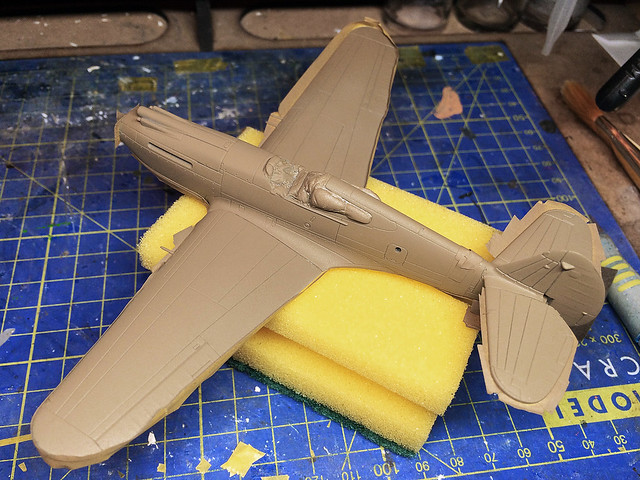
Now the fun begins! It's onto the priming - using Humbrol's Grey Primer Matt - 150ml Acrylic Spray Paint - AD6001 (I am not making the move to airbrush applied primer until I use up my stock of this 'rattle-can' primer). So, it's a last chance to check over the model and fix any remaining issues, fill any gaps, smooth off any raggedy edges and - importantly - clean off any dust specs...
I masked out the cockpit with BluTack and stuck a cocktail stick into the prop shaft - held in place with more BluTack - to give me a convenient 'handle' for spraying.
You can also see my patented 'KitNoob all-purpose model clamp' which is simply a kitchen sponge split down the middle so it opens up to gently grip the model...
I pushed blobs of BluTack into the painted landing gear wells to mask them and I checked over the underside of the model for any blemishes or dinks that will show up after priming.
I really like the priming stage, though it is a moment of truth - did you really sand all the seams flush and was your filling good enough? There is nothing that makes me happier than a nice clean primed model - a good canvas increases the chances of a good painting job (I hope)!
Primed and ready to go!
Now I have to decide how to tackle the shading - do I pre-shade or add the shading on top of the basic paint scheme? I haven't had much success on the couple of pre-shading experiments I have done, but then I didn't have a proper airbrush before.
My Revell 'Starter Airbrush' is good quality but isn't a brush capable of 'fine' spraying - the spray is what I would describe as a medium size (I understand this is dictated by the size of the needle in the airbrush). Good enough for most general jobs but not up to the task of very small jobs - certainly the fine lines I want to spray on for pre-shading might be beyond it's ability. So, sadly, I will leave off pre-shading panel-lines until I have an airbrush capable of spraying a line of a couple of millimetres in width.
RAF Europe Colour Scheme (1939-1941).
Right, onwards and upwards. The RAF scheme for 'Early War' - as given in my Hataka paint set - is as follows:
• Dark Earth — Used for upper surfaces in RAF camouflage schemes until 1941
• Dark Green – Used for upper surfaces in RAF camouflage schemes throughout the war
• Sky 'Type S' — Used for lower surfaces of RAF aircraft until 1941
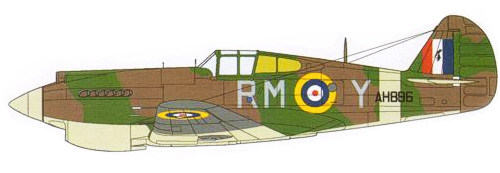
AML's scheme for an example of a Tomahawk IIA of 26 Squadron, England, 1941
Note: The medium grey on the underside wing is actually black!
I will start with the underside which is mostly Sky 'Type S' apart from the novel exception of an area of the left wing, which is painted black. I haven't been able to find out why this was or if there was a particular meaning to this colour scheme [I'm sure a reader will put me right] but I *guess* it could have been to aid recognition. Anyhoo...
There is a band of the 'Sky' colour which wraps around the fuselage so I will include this in masking the spray that as well (rather than over-spraying the upper-side camo). However, before that I noticed that the cockpit's rear windows are painted with the 'interior green' so I will have to remember to give those a splash of paint as well.
Sky 'Type S' is a funny colour. When you say 'sky' you think of a light-blue but 'Type S' is actually a greeny hue if anything. The Hataka colour seems spot on but I am less happy about the consistency of the paint.
This is the most Hataka paint I have used - the first real job I've done with it in fact - and I had a couple of problems getting it to play nicely with my airbrush. The first issue was just how much I should dilute it with thinners and still get an opaque coverage (even after a couple of passes with the air brush). The second issue was how quickly the Hataka paint dried.
For the very first time I was finding that the paint in my airbrush was drying inside the airbrush and thus causing blockages. This may be to do with the dilution mix - perhaps I was using the paint too 'straight'?
I'll finish at this point and do some research on mixing Hataka paints before I move on to the upper fuselage coat of Dark Earth. Hopefully I can find a solution (excuse the pun) to this problem.
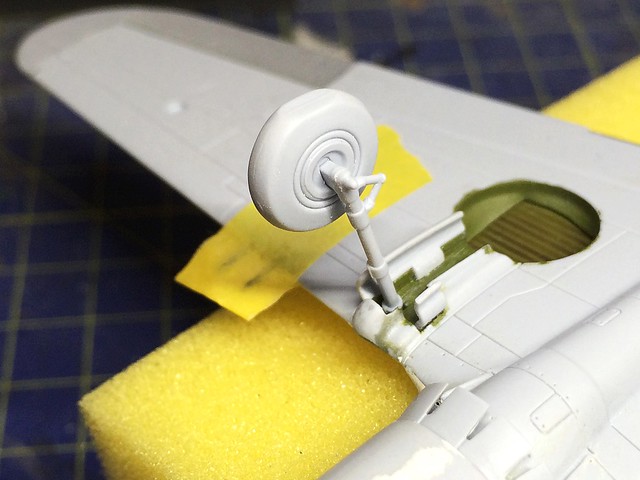
On to panels 11 to 15-ish of Airfix P-40 instructions. I say '15-ish' because I won't be sticking religiously to suggested order of assembly (owing to how I have decided to paint the model). The main job, now, is the assembly of the undercarriage...
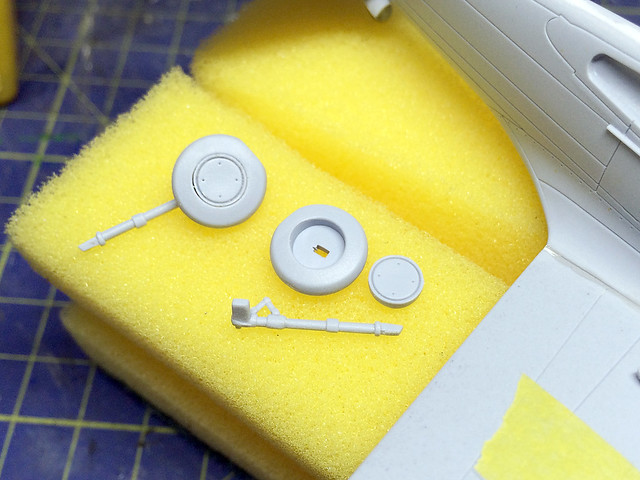
The undercarriage components. I've started cutting the parts off the sprues with
plenty of room to spare on the attaching sprig. Then I will trim the unwanted
sprue off - past 'accidents' have taught me to err on the side of caution.
I may want to lay-off attaching the completed undercarriage until I have painted the airframe, though, as all these sticky out bits might hinder my masking and airbrushing. But I will test fit everything before painting these parts separately.
The main landing gear is nice enough, but as with everything else it is simplified. Sticklers for accuracy might go to the additional lengths of adding the hydraulic cables (brake line) using pieces of wire and the tyres have no tread pattern. But I'm keeping my P-40 'no frills'.
There was quite a bit of sanding to get the hubs to fit into the wheels.
The landing gear are pretty delicate, which is another good reason to leave these off until I am ready to mount the model on a display stand. A bit of a knock would be enough to break them off.
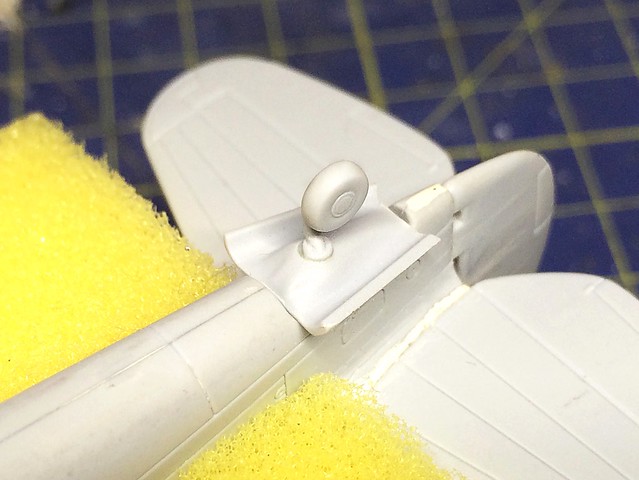
The tail wheel is less likely to either interfere wit the painting or get knocked off so I did fix this in place. There is no detail at all here, which isn't a big deal as it will be practically unseen, but you should be aware that there is more to it on the real aircraft - so, like everything else, if you want to 'super-detail' your P-40 you will have to do your homework.
(I highly recommend 'P-40 Warhawk in Detail' by Bert Kinzey, Squadron/Signal Productions. It has very detailed photographs of the aircraft, with all it's nooks and crannies shot in close-up.)
Finally, prior to my actually starting the painting, there is the pilot's headrest to add. There are still some other parts which need to be added to complete the build - the exhaust stacks and the wing-mounted pitot probe - but, like the landing gear, I am attaching this after the basic paint scheme has been applied.
As much as I want to stick to the 'out the box' build idea I really don't like the shape of Airfix's headrest. The size and shape of this cushion just doesn't seem to match any of the reference photos that I have seen, so I'm going to do a little 'modding'...
Now, all that's left to do is to start masking out those areas of the model that I don't want affected when I spray on the primer coat (cockpit and undercarriage wells). Then it's on with the Humbrol Grey Primer.