
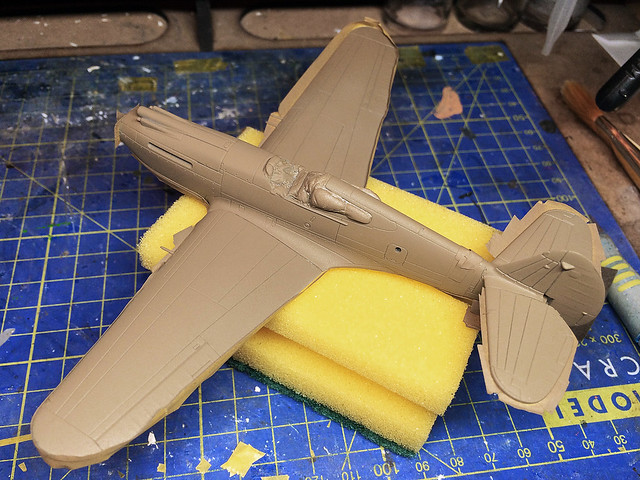
I've completed the basic colour scheme on the underside of my Tomahawk and now have to remove the masking tape ready to start the job of re-masking in order to spray the top-side. This gives me a glimpse of those undercarriage wells and I'm pretty pleased with how they look - the BluTack masking worked and I got a nice clean finish...

My main worry now is the Hataka paint, but it's now a case of having paid for it and started using it I best muddle through to the end with it. I'm pretty sure the problems I had with the underside coat was an issue of dilution, I have a suspicion that the Hataka paint needs to be mixed thinner - to aid flow through the airbrush - but then needs several coats to build up the required finish. We shall see.
Update: Had a lovely reply from Hataka themselves to a query I made on their Facebook page. They directed me to a review of their paints on the AeroScale web site which includes comparisons and suggestions regarding dilution and compatible thinners: AeroScale Tool Review - Hataka Acrylic Paints.
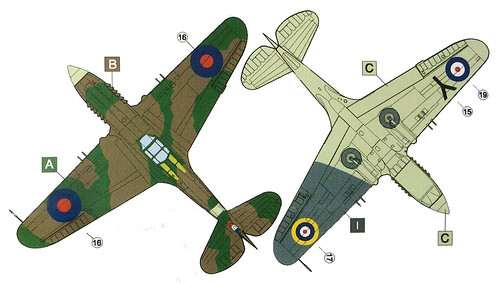 |
| AML's reference sheet for their 26 Sqdn. decal set. |
Now to mask for the RAF Dark Green. I'm going for a hard-edged cam pattern - I think that is correct - using masking tape rather than Blu Tack (which gives a softer edge)...
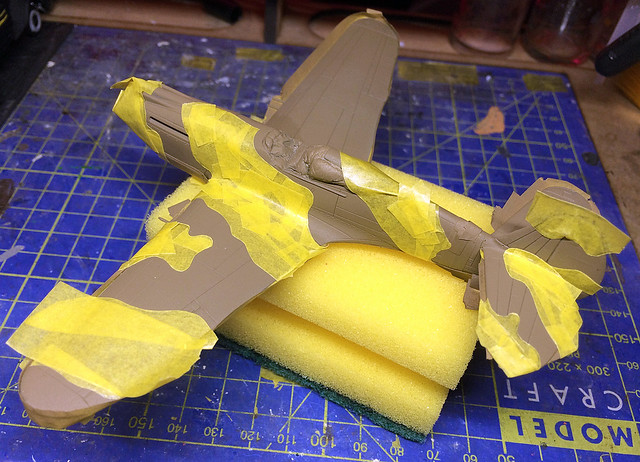 |
| Half the Tomahawk masked, phew! |
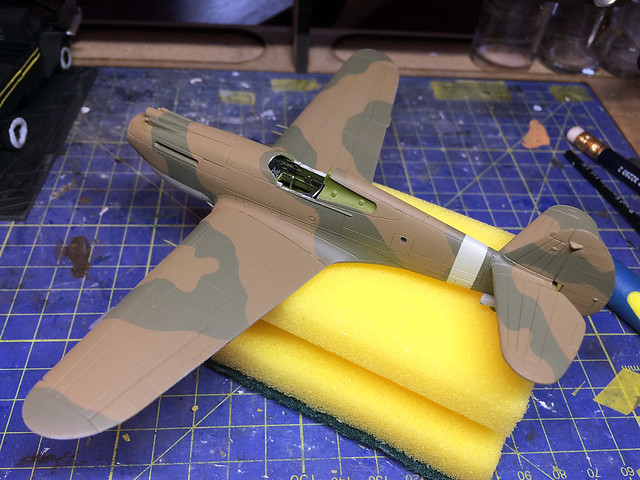
Dropped Hataka paints: I'm afraid I simply lost confidence in the Hataka paints, mainly as they simply refused to play nicely with my airbrush. I had repeated blockages despite trying a few different thinners and so have now reverted to Vallejo paints. The 'Dark Earth' was Humbrol's and the Dark Green I am about to apply is Vallejo's Model Air No. 12.

I was very pleased with the results of my airbrushing as I haven't done a lot of camouflage painting as yet and this is my very first RAF camo scheme. The decision to paint the sky fuselage band first and then mask it was a good choice as it came out really well.
Another positive was that the addition of the RAF Dark Green has toned down the Dark Earth - which I was worried might be too light - and the overall effect is a relatively acceptable interpretation of the RAF's early WW2 camouflage scheme. I think once I spray on a satin varnish it will be a quite satisfactory job.
Well, that didn't turn out to be the disaster that I was worried it might be! I think I may even have made some progress in my modelling. In fact I think I will go and reward myself with a nice mug of tea and a ginger nut. :)
Next: Touching up and repairs before varnishing prior to adding the decals.
No comments:
Post a Comment