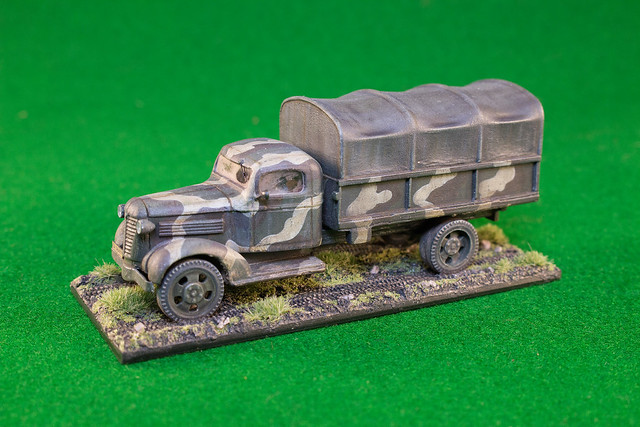
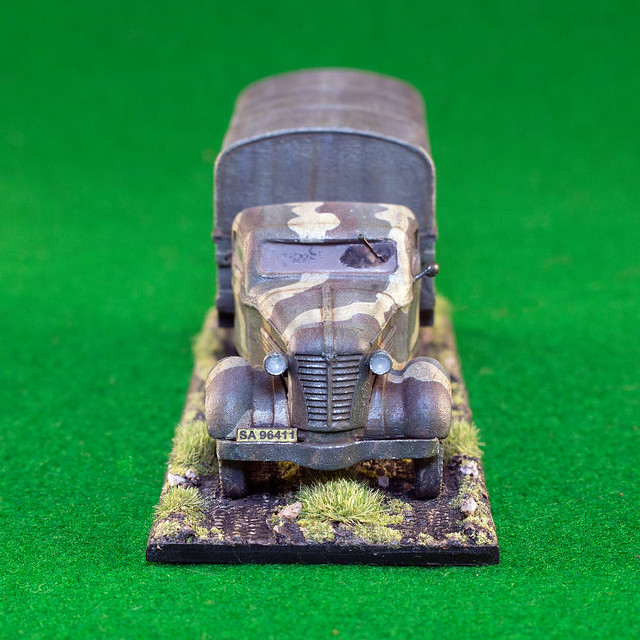
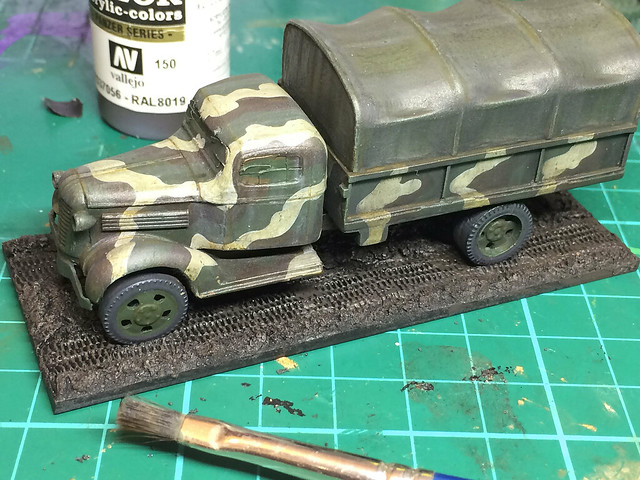
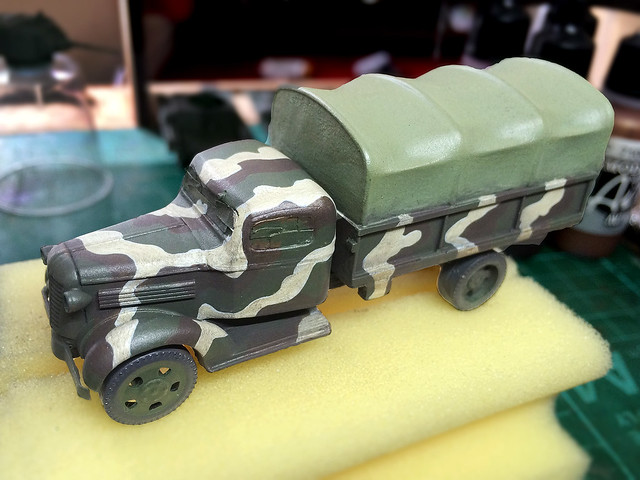
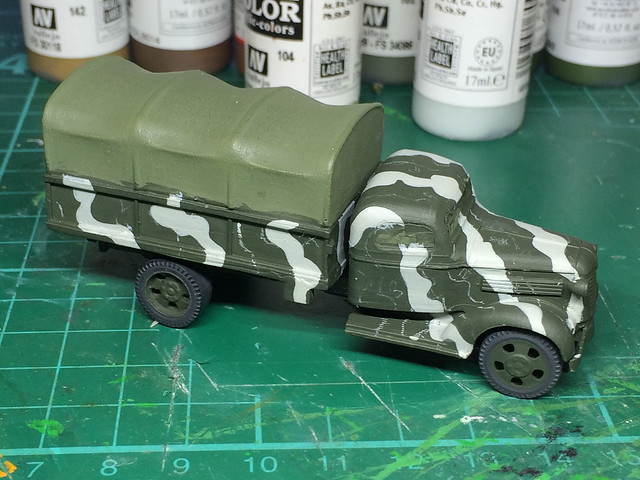
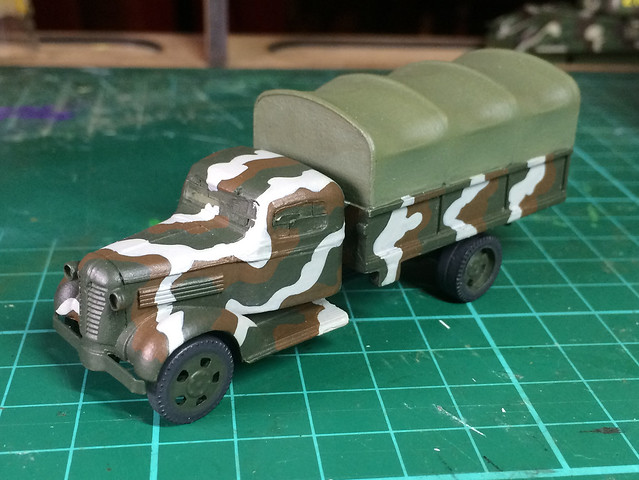
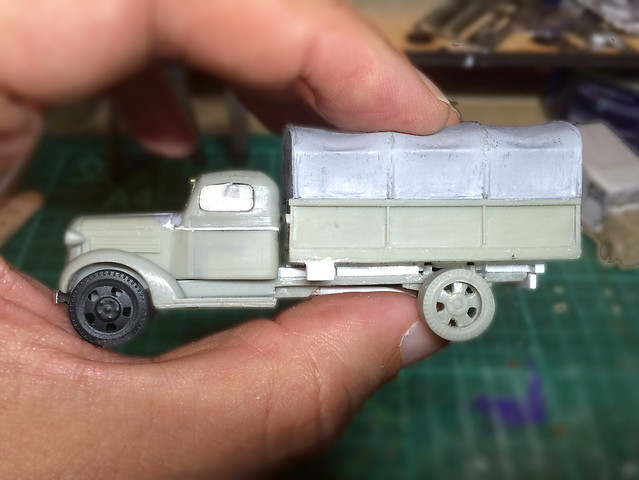
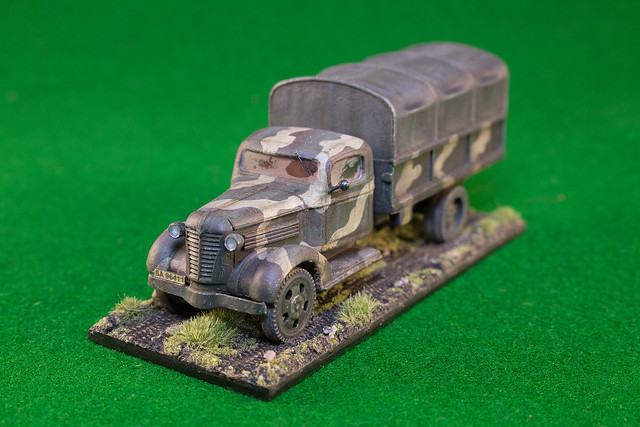
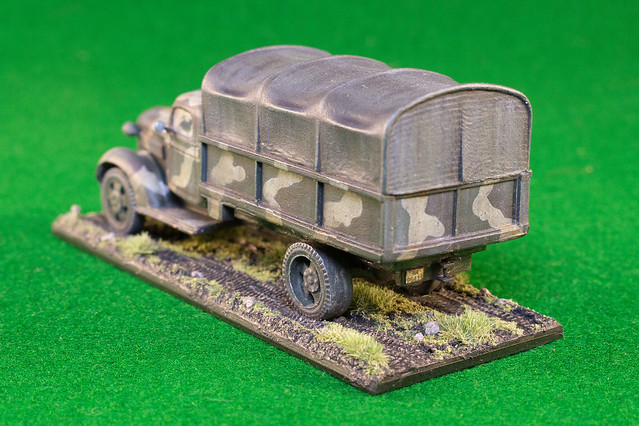
Phew! Well, this has been a bit of a marathon (even for me)! I can't believe that such a simple model as Minairon's 1937 Chevrolet has taken me so long to complete - though, to be fair, I've had a lot of 'real life' distractions this year.
Anyway, my Finnish 37 Chevy truck is done...
I'm quite pleased with some of the weathering tricks that I've learned with this one - the use of eyeshadows was a particularly interesting addition to my skill set!
Onwards and upwards!
Postscript: I nearly forgot to mention. This is the first use of my 'new' photography lamps - I'm rather chuffed with the end product!
Diary of a novice scale model maker and his adventures in the wacky world of Braille Scale.
Showing posts with label Minairons. Show all posts
Wednesday, 25 May 2016
Friday, 13 May 2016
Minairons 1937 Chevrolet 1.5ton truck - part 9
[Like many of my posts, this entry is more of a reminder to myself how I did something. I realise it may be a little boring for third-parties reading it.]
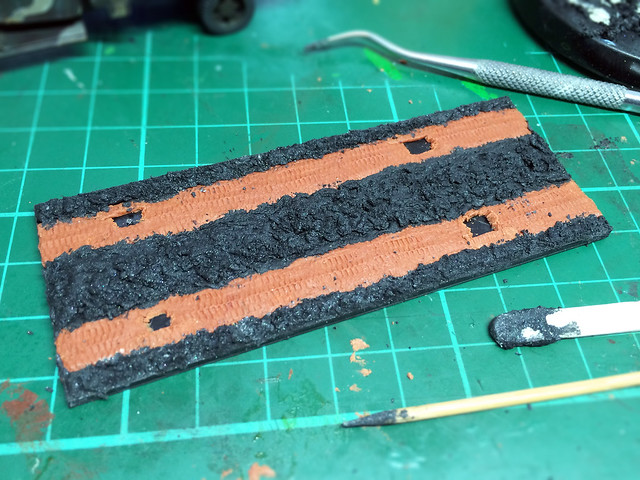
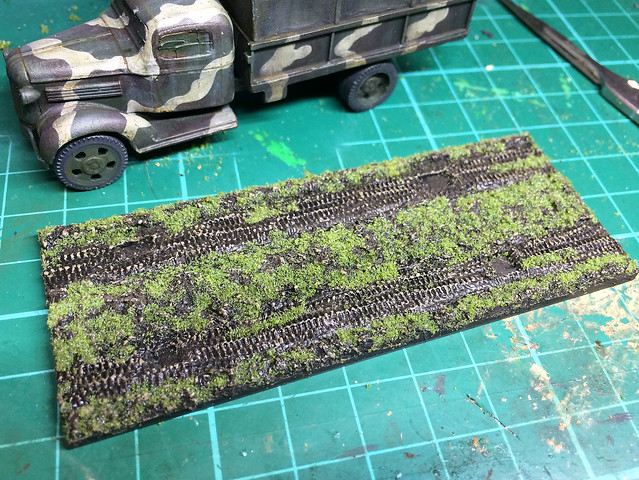
Onto making the base. I like to do this just before I add the final weathering to my vehicles as I try to match the colour and shade of the mud and dirt of the base with the mud I add to the vehicle. I find this easier to do if I have the base finished first.
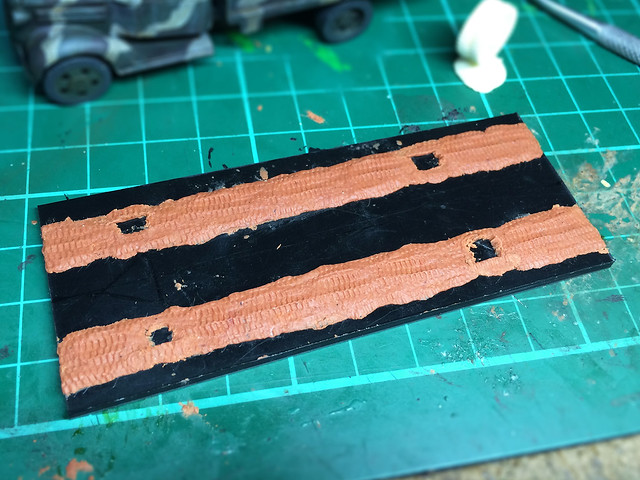
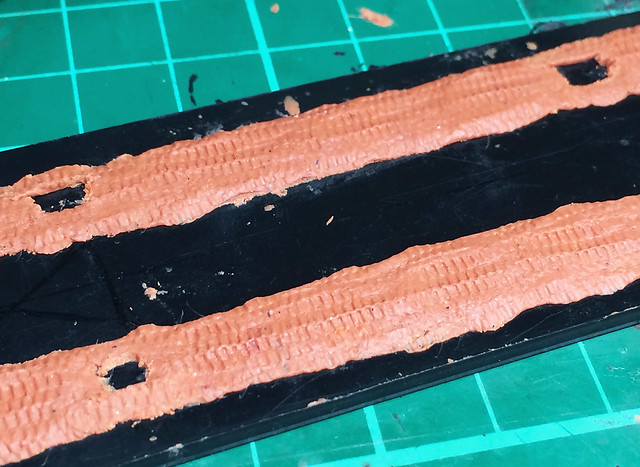
I've tweaked the process of making my base slightly, I now create the tyre tracks (or track tracks) using Milliput. This is just because the plasticine-like consistency of Milliput makes it easier to impress the tyre or track patterns into the modelling putty (which isn't as easy to do with the PollyFilla that I use for the rest of my base).
I've also started making small indentations in the track area for the wheels of the vehicle to sit, so that the truck tyres look slightly recessed into the mud (rather than sitting on top of the 'ground' as I had in some early models).
After that is the usual routine for painting and applying the 'grass' and weeds...
'Black Lava' ground
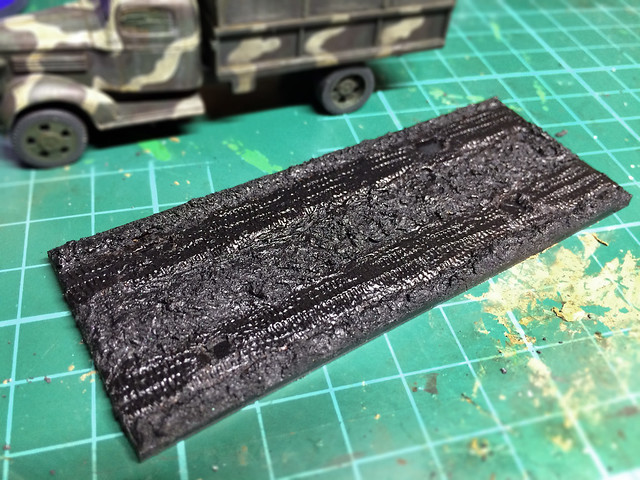
AV's 'Black Lava' compound is really supposed to be for making realistic tarmac roads, but I like its gritty texture and I add it to my PolliFilla to make a black-ish goop with which to make a rough earth base for my dioramas. It's a bit wild and flakey and come up with some nice organic textures.
Also, I like to start with a dark base, so having bare white PolyFilla doesn't work for me.
Black Primer
A quick squirt of HiCote Auto Black...
Brown-earth Base
Next, I apply a dry-brush coat of Vallejo's German Camo Black Brown, which is a nice dark muddy brown. I'm trying to retain a bit of the underlying black base colour this time, to emphasise the contrast in the detail and give more depth to my 'earth'...
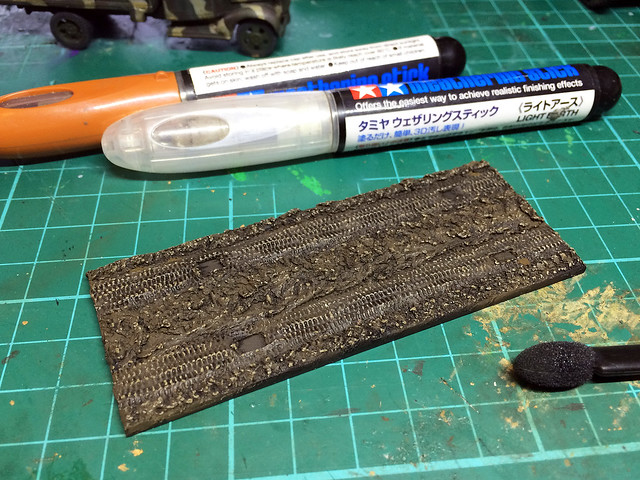
'Weathering' the earth tones
Weathering is perhaps not the correct term, but I am shading the highlights to give a - hopefully - natural weathered look to my ground texture. I used Tamiya's weathering sticks to achieve this, highlighting using their 'Mud' and then 'Light Earth' to give the varied tones I want...
Green, Green Grass
I've stuck to my very simple application of scenic 'grass', it's not very sophisticated or realistic but I am not tinkering with my 'system' of doing grass as I want all my Finnish project bases to look the same. Basically, sprinkling on just one colour/tone of scenic grass doesn't quite produce a really convincing grass effect - to do this I should be experimenting with mixing tones and maybe introducing 'static grass' medium to get a true grass. I will try this with future projects.
Stoney grounds and grassy tufts
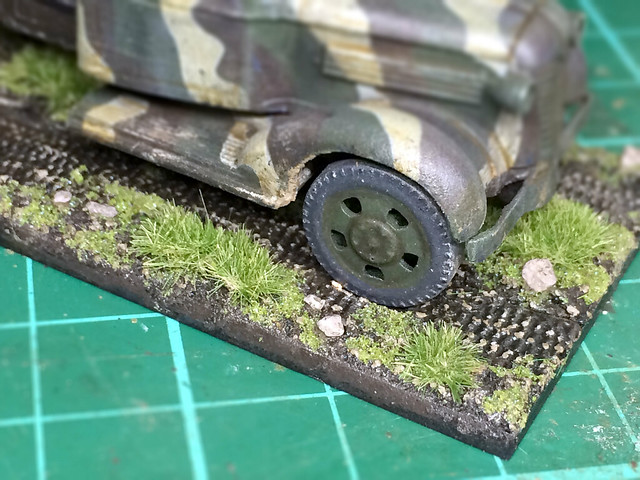
The final thing I add is some 'rocks' and turfs of grass. The 'rocks' are just scale model railway track 'ballast' I think, but any old scenic stones will do. These are just individually glued on - randomly - using good old PVA glue...
The grassy tufts are, however, specialist scale model scenic 'self-adhesive tufts'! You can get them in a variety of colours from eBay to suit your 'season' mine are 'light summer' I believe. Despite them being advertised as 'self-adhesive' I do find that I have to secure them with a spot of - you guessed it - PVA!
Conclusion
Well, that's the base, though I do like to give the base a light spray with matt varnish as it helps to keep the grass in place.
That done, I affix the truck to the base and then check to see if I need to do some 'touching up' to blend the truck into the ground. My early attempts at basing had my models looking like the were sitting on top of the ground, with now 'weight' to them. I know try to sink my vehicles' tyres or tracks into the ground slightly. It looks more realistic.
Onto making the base. I like to do this just before I add the final weathering to my vehicles as I try to match the colour and shade of the mud and dirt of the base with the mud I add to the vehicle. I find this easier to do if I have the base finished first.
I've tweaked the process of making my base slightly, I now create the tyre tracks (or track tracks) using Milliput. This is just because the plasticine-like consistency of Milliput makes it easier to impress the tyre or track patterns into the modelling putty (which isn't as easy to do with the PollyFilla that I use for the rest of my base).
I've also started making small indentations in the track area for the wheels of the vehicle to sit, so that the truck tyres look slightly recessed into the mud (rather than sitting on top of the 'ground' as I had in some early models).
After that is the usual routine for painting and applying the 'grass' and weeds...
'Black Lava' ground
AV's 'Black Lava' compound is really supposed to be for making realistic tarmac roads, but I like its gritty texture and I add it to my PolliFilla to make a black-ish goop with which to make a rough earth base for my dioramas. It's a bit wild and flakey and come up with some nice organic textures.
Also, I like to start with a dark base, so having bare white PolyFilla doesn't work for me.
Black Primer
A quick squirt of HiCote Auto Black...
Brown-earth Base
Next, I apply a dry-brush coat of Vallejo's German Camo Black Brown, which is a nice dark muddy brown. I'm trying to retain a bit of the underlying black base colour this time, to emphasise the contrast in the detail and give more depth to my 'earth'...
'Weathering' the earth tones
Weathering is perhaps not the correct term, but I am shading the highlights to give a - hopefully - natural weathered look to my ground texture. I used Tamiya's weathering sticks to achieve this, highlighting using their 'Mud' and then 'Light Earth' to give the varied tones I want...
Green, Green Grass
I've stuck to my very simple application of scenic 'grass', it's not very sophisticated or realistic but I am not tinkering with my 'system' of doing grass as I want all my Finnish project bases to look the same. Basically, sprinkling on just one colour/tone of scenic grass doesn't quite produce a really convincing grass effect - to do this I should be experimenting with mixing tones and maybe introducing 'static grass' medium to get a true grass. I will try this with future projects.
Stoney grounds and grassy tufts
The final thing I add is some 'rocks' and turfs of grass. The 'rocks' are just scale model railway track 'ballast' I think, but any old scenic stones will do. These are just individually glued on - randomly - using good old PVA glue...
![]() |
| Stoney ground. The front wheels need some more 'mud' applied to the very bottom of the tyres to give the impression of the weight of the truck.. |
Conclusion
Well, that's the base, though I do like to give the base a light spray with matt varnish as it helps to keep the grass in place.
That done, I affix the truck to the base and then check to see if I need to do some 'touching up' to blend the truck into the ground. My early attempts at basing had my models looking like the were sitting on top of the ground, with now 'weight' to them. I know try to sink my vehicles' tyres or tracks into the ground slightly. It looks more realistic.
Sunday, 24 April 2016
Minairons 1937 Chevrolet 1.5ton truck - part 8
I'll start this episode by taking a step back. In Part 7 of this project, I was left feeling quite unhappy with the colours I painted my Chevy. They just weren't right - so I had to do some tinkering!
Now, this can be a gamble, as over-painting unsatisfactory paint coats (rather than stripping them back and starting again) has all sorts of pit-falls. But, primarily, slapping on an additional coat is bad in that - obviously - it thickens the amount of paint you have on your model...
Well, it doesn't look too bad (from a distance) but you can make out a bit of streakiness. This is because I attempted to off-set the paint thickness issue but using a thinned (near wash) consistency of the paint I used to rectify my colours. Close-up, it is a little 'bumpy' in places, but hopefully the varnish coat - which I will apply next - will smooth this effect out a little.
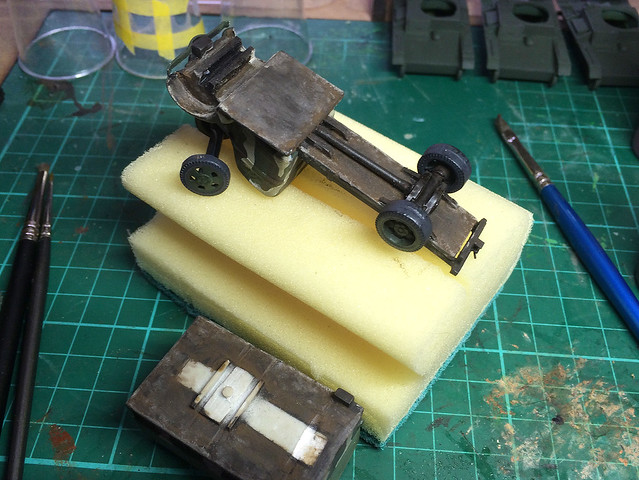
There's very little to see on the underside of the model - Minairons keeping this very simple - and so I didn't bother too much with painting and weathering. I just applied a couple of dark and muddy looking layers, after all, it's underneath and will be hidden once mounted on its base...
Weathering the Chevy
Before weathering, you have to decide what look you are going for. This entails you - the modeller - giving your model a back story. Is your truck old or new, what were the conditions in which it served, what was the weather like, etc, etc. This will dictate just what kind of state the truck would be in.
I decided that - by 1944 - my 1937 Chevy would have been a little beaten up. But I wanted it to be more dirty than neglected, so less rust and chips and more grime and dust!
The first part of this process was to apply the base dirt layer, and for this started with a dusting of Humbrol's 'Smoke' pigment (I could have used charcoal powder as an alternative)...
This gives a nice 'grubby' effect, and tones down the pristine camo scheme a bit.
The next phase in the weathering is my oil paint 'staining and bleaching' work. The usual process where I dab the model in a variety of 'dots' of oil colours, then I smear them into streaks using a wide brush which has been wetted with some thinners.
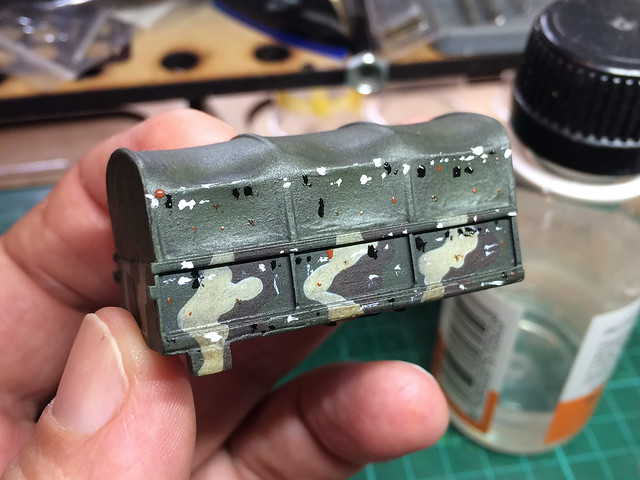
The above picture gives you and idea how I begin my oil streaking and staining - by applying a multitude of colored dabs of oil paint. I've probably gone a bit over the top here (I normally just do a few dots at a time) but I wanted to experiment with a multi-tonal effect.
The great thing about staining with oils is that you can more or less scrap the whole thing and start again if you are unhappy. So long as you have a good underlying varnish layer to protect the work that has gone before, you can wipe off your oils with a tissue which is damp with thinners.
You then just streak your dots in the pattern you want with a broad brush which is damp with thinners...
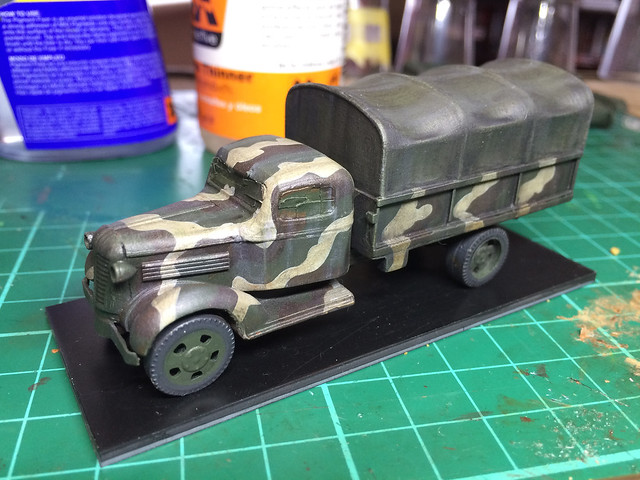
Oils give a nice greasy and oily stain (naturally enough) which looks particularly nice on tarpaulins. Overall, this truck is as dismal and filthy as I imagined I would like it now. The Finns actually took very good car of their vehicles (as getting new ones was nigh on impossible for them), but as a frontline vehicle I guess there wasn't a lot of time for a wash and scrub up!
Next: Chipping and pin-washing stage (plus, I make a start on the base).
Now, this can be a gamble, as over-painting unsatisfactory paint coats (rather than stripping them back and starting again) has all sorts of pit-falls. But, primarily, slapping on an additional coat is bad in that - obviously - it thickens the amount of paint you have on your model...
Well, it doesn't look too bad (from a distance) but you can make out a bit of streakiness. This is because I attempted to off-set the paint thickness issue but using a thinned (near wash) consistency of the paint I used to rectify my colours. Close-up, it is a little 'bumpy' in places, but hopefully the varnish coat - which I will apply next - will smooth this effect out a little.
There's very little to see on the underside of the model - Minairons keeping this very simple - and so I didn't bother too much with painting and weathering. I just applied a couple of dark and muddy looking layers, after all, it's underneath and will be hidden once mounted on its base...
Weathering the Chevy
Before weathering, you have to decide what look you are going for. This entails you - the modeller - giving your model a back story. Is your truck old or new, what were the conditions in which it served, what was the weather like, etc, etc. This will dictate just what kind of state the truck would be in.
I decided that - by 1944 - my 1937 Chevy would have been a little beaten up. But I wanted it to be more dirty than neglected, so less rust and chips and more grime and dust!
The first part of this process was to apply the base dirt layer, and for this started with a dusting of Humbrol's 'Smoke' pigment (I could have used charcoal powder as an alternative)...
The next phase in the weathering is my oil paint 'staining and bleaching' work. The usual process where I dab the model in a variety of 'dots' of oil colours, then I smear them into streaks using a wide brush which has been wetted with some thinners.
![]() |
| Going dotty! Yeah, a bit over the top here. |
The great thing about staining with oils is that you can more or less scrap the whole thing and start again if you are unhappy. So long as you have a good underlying varnish layer to protect the work that has gone before, you can wipe off your oils with a tissue which is damp with thinners.
You then just streak your dots in the pattern you want with a broad brush which is damp with thinners...
![]() |
| You dirty, dirty truck! |
Next: Chipping and pin-washing stage (plus, I make a start on the base).
Monday, 11 April 2016
Minairons 1937 Chevrolet 1.5ton truck - part 7
After the usual primer coat of Hycote Black Matt aerosol, I brush painted on a coat of my 'Finnish Green' (50/50 mix of Vallejo 'German Cam. Dark Green' and 'Yellow Olive'). I'm beginning to like brush painting, it's not only a lot less fuss than airbrushing, but it has a texture and variability of coverage that I think looks a little less clinical as airbrushing does. But, that's a matter of opinion.
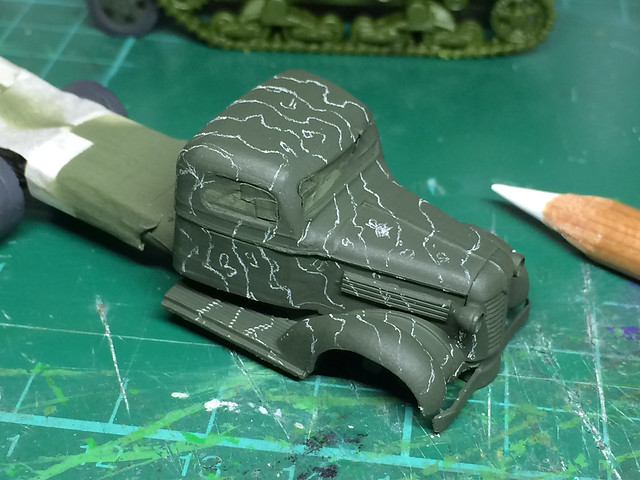
Next, I prepared for the application of my Finnish 'Beige-Grey' by marking out these patches using a white pencil...
As it turned out, my beige-grey mix was far too grey (and not enough beige). In fact, my camera's flash even made the grey look snow-white!
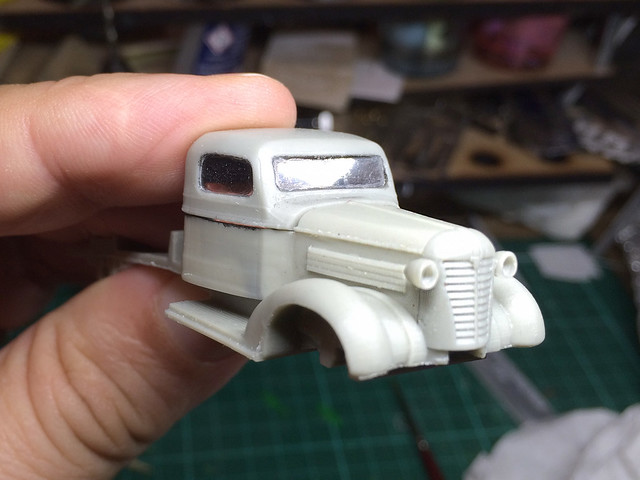
It looks a rather attractive winter camouflage scheme (must remember that)! But, for my purposes, the beige is a bit of a fail and will have to be rectified (replace Vallejo's 'Blue Grey' with their 'Stone Grey' paint).
Still, let's get the third colour of the Finnish camo scheme on first before I tinker with the 'beige'...
It's obviously not my day, as the dark brown came out a bit too light and red! Again, that is easily rectified with a light wash of darker brown. However, in a way, using lighter paints is a bit of a tactic I have been thinking of employing as I am finding that once I introduce weathering this darkens the base paint scheme anyway.
Well, that's the progress on the '37 Chevy. Even at this stage, it's quite a handsome looking kit, despite its simplicity.
Next: Rectifying my dodgy camo scheme, and painting the tilt canvas!
Friday, 20 November 2015
Minairons 1937 Chevrolet 1.5ton truck - part 6
When I finished the last post on this model it was as finish as Minairons intended it. Me being me, I couldn't resist tinkering...Just a little!
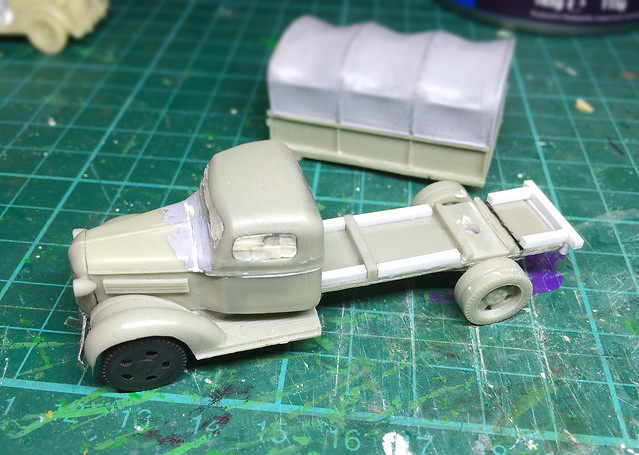
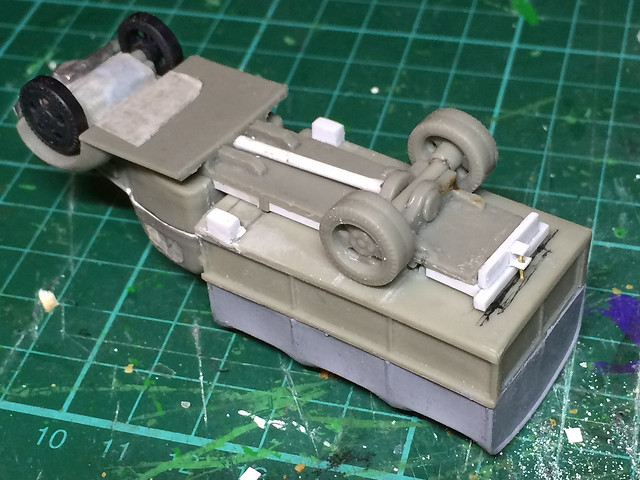
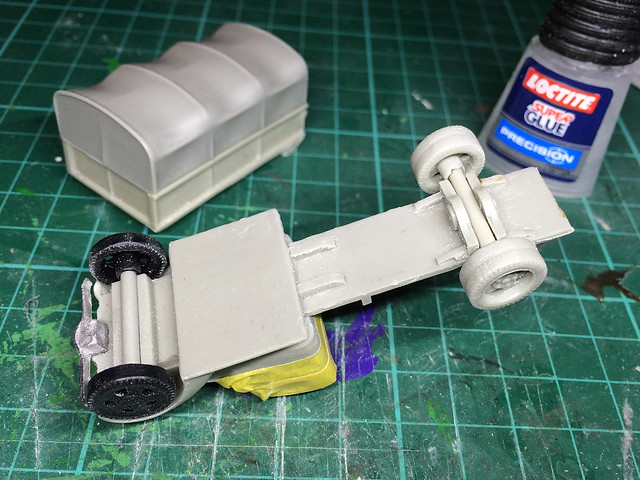
The main thing that I noticed about the Minarions Chevy was that the chassis was a little flimsy. I mean there was no cross bracing under the cargo bed and you could see straight through. I did a bit of digging around and found this reference of a '37 Chevy - 'Stake Truck' variant - and it clearly shows that there was a pretty solid chassis framework under the flatbed...
So I added some styrene rods to the basic chassis to beef it up a bit...
This extra structure will allow me to add a tow-hook at the rear - quite important as this truck is one of three I will be assigning to my anti-tank company (towing 7.5 cm Pak 40s).
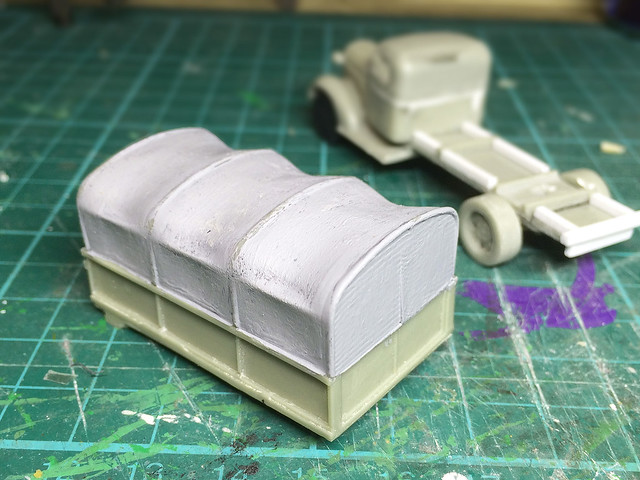
It's not a big mod but I feel a bit better about it as the chassis now looks a little more substantial. Now, the other thing I wanted to 'improve' was the tilt canvas. It was a little bland so I painted on some Mr. Surfacer 1000, waited for it to go tacky and then brushed it to produce some rough texture...
And that's about it really, not earth-shaking but issues that were niggling me a bit. There are a couple of other small 'improvement' I'll be adding as I go along as well - I want a windsheild wiper over the drivers window and I want numberplates. Again, not big jobs.
The main thing is the work I have done on the chassis.
And with that, the model is now ready to prime and base coat.
The main thing that I noticed about the Minarions Chevy was that the chassis was a little flimsy. I mean there was no cross bracing under the cargo bed and you could see straight through. I did a bit of digging around and found this reference of a '37 Chevy - 'Stake Truck' variant - and it clearly shows that there was a pretty solid chassis framework under the flatbed...
So I added some styrene rods to the basic chassis to beef it up a bit...
This extra structure will allow me to add a tow-hook at the rear - quite important as this truck is one of three I will be assigning to my anti-tank company (towing 7.5 cm Pak 40s).
It's not a big mod but I feel a bit better about it as the chassis now looks a little more substantial. Now, the other thing I wanted to 'improve' was the tilt canvas. It was a little bland so I painted on some Mr. Surfacer 1000, waited for it to go tacky and then brushed it to produce some rough texture...
And that's about it really, not earth-shaking but issues that were niggling me a bit. There are a couple of other small 'improvement' I'll be adding as I go along as well - I want a windsheild wiper over the drivers window and I want numberplates. Again, not big jobs.
The main thing is the work I have done on the chassis.
And with that, the model is now ready to prime and base coat.
Monday, 16 November 2015
Minairons 1937 Chevrolet 1.5ton truck - part 5
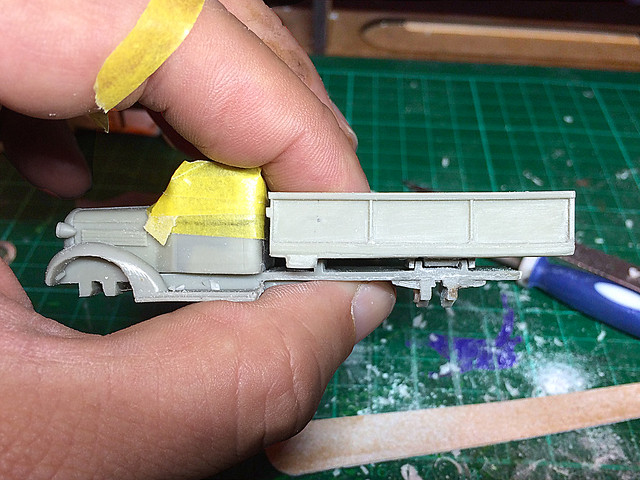
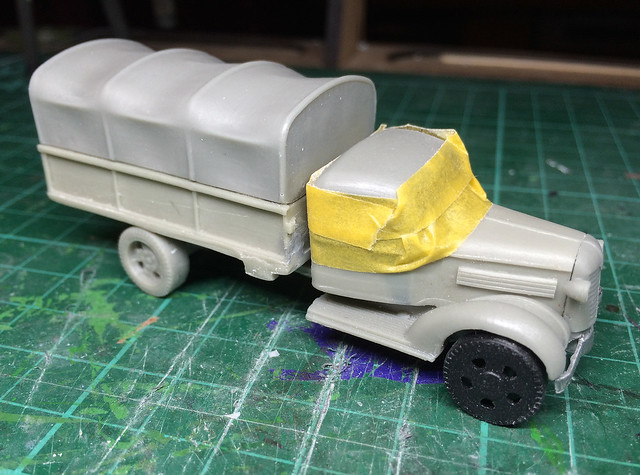
Moving from the cab to the rear of the truck, there is some tidying up work to do to ensure a good fit and a level assembly. As I showed in an earlier post, the Minairons truck chassis was quite distorted and had to be straightened out by immersing the resin part in hot water. This softened the resin and I was able to straighten the flatbed base out again.
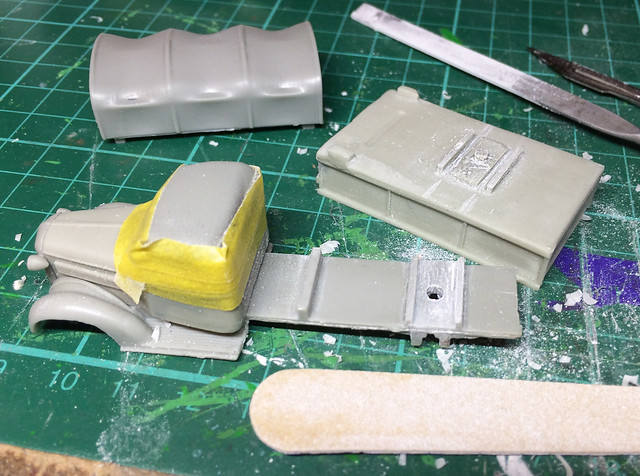
Additionally, I have had to do a fair bit of sanding to get the cargo flatbed to fit on the base...
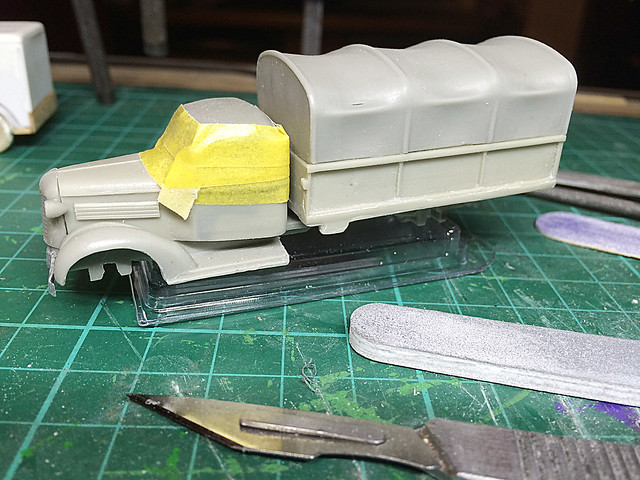
I personally thought that the cargo flatbed and its tilt cover sat a little too high, making the vehicle quite tall. So I have sanded down the plinth on which the flatbed sits on the chassis to lower the profile of the truck and level up the bed at the same time.
By the way, the masking tape is there to ensure that none of the fine resin powder that is coming off as I sand gets inside the completed cab and settles on the inside of the windscreens I have installed!
With the flatbed low and level, it's time to look at the tilt canvas. I won't glue the flatbed in place yet as I want to apply the primer and base paint coats before I attach everything together.
The two-part flatbed and tilt cover went together with some minor sanding. It's not the greatest model of a canvas cover, with few fold or wrinkles, but the hint of the 3D printing texture does inadvertently add a little character to it.
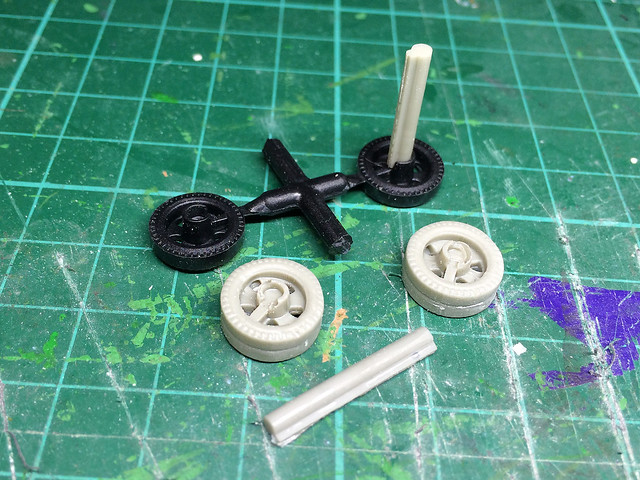
The wheels are acceptable but don't have any tread on the tyres. The axels are just two strips of resin and there is hardly any detail on the underneath of the truck - no suspension or drive shaft, etc.
And that's all there is to it! You can see why it's a handy kit for war gamers - no fiddling about with intricate detail that won't be seen or of interest to a game player.
But yet the model has its own charm and I reckon could be upgraded to something a little more detailed without too much effort. I've opted to build it as is (for once)!
Next: Onto the painting.
Additionally, I have had to do a fair bit of sanding to get the cargo flatbed to fit on the base...
I personally thought that the cargo flatbed and its tilt cover sat a little too high, making the vehicle quite tall. So I have sanded down the plinth on which the flatbed sits on the chassis to lower the profile of the truck and level up the bed at the same time.
By the way, the masking tape is there to ensure that none of the fine resin powder that is coming off as I sand gets inside the completed cab and settles on the inside of the windscreens I have installed!
With the flatbed low and level, it's time to look at the tilt canvas. I won't glue the flatbed in place yet as I want to apply the primer and base paint coats before I attach everything together.
The two-part flatbed and tilt cover went together with some minor sanding. It's not the greatest model of a canvas cover, with few fold or wrinkles, but the hint of the 3D printing texture does inadvertently add a little character to it.
The wheels are acceptable but don't have any tread on the tyres. The axels are just two strips of resin and there is hardly any detail on the underneath of the truck - no suspension or drive shaft, etc.
And that's all there is to it! You can see why it's a handy kit for war gamers - no fiddling about with intricate detail that won't be seen or of interest to a game player.
But yet the model has its own charm and I reckon could be upgraded to something a little more detailed without too much effort. I've opted to build it as is (for once)!
Next: Onto the painting.
Saturday, 14 November 2015
Making windscreens
The two projects I am currently working on are at the same stage of construction. As neither have purpose-built windscreens (for different reasons) I will have to make some.
It's not a difficult job, and indeed it's surprising how many kits these days still require you to make your own windscreens (the next two kits I will be making are from PST and Hunor and both require me to do so). So here's my procedure for doing this (I do not claim it's the best way, just the way that works for me)...
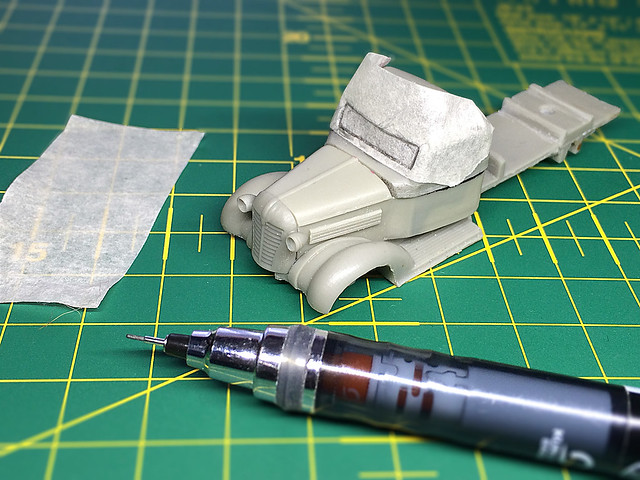
1. Create templates for your windows.
I begin by masking over the vehicle's empty window spaces. Then I take a sharp pencil or technical pencil and carefully draw around the window...
I press very gently and get the point of the pencil lead just inside the lip of the window. I use the shape of the window itself to guide my pencil around the edge so I end up with a drawing of the exact contour of the inside of the window.
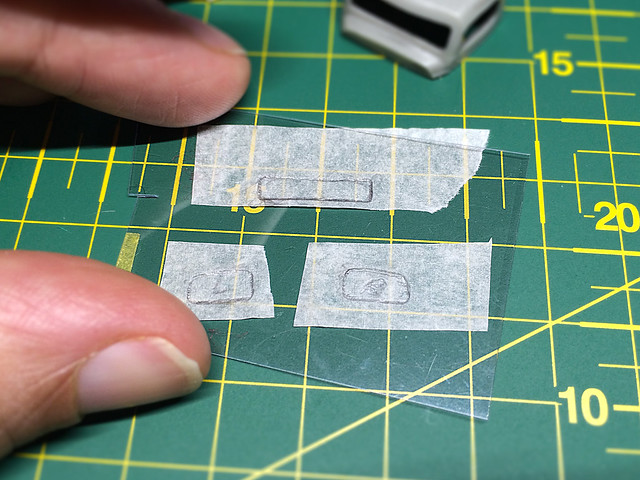
2. I transfer the contour template onto transparent plastic.
Then I just stick the masking tape with the template on it to a flat surface, lay some transparent plastic over it and trace the outline using an indelible pen...
Not the best photos I've ever taken, but then transparent plastic isn't the easiest thing to photograph. My drawings are a bit shaky, but I will cutting generously and sanding the window edges to fit. It's a bit time-consuming, but the best way to ensure and exact and snug fit, especially with resin models where straight lines ain't so straight sometimes.
3. Fitting...Carefully now!
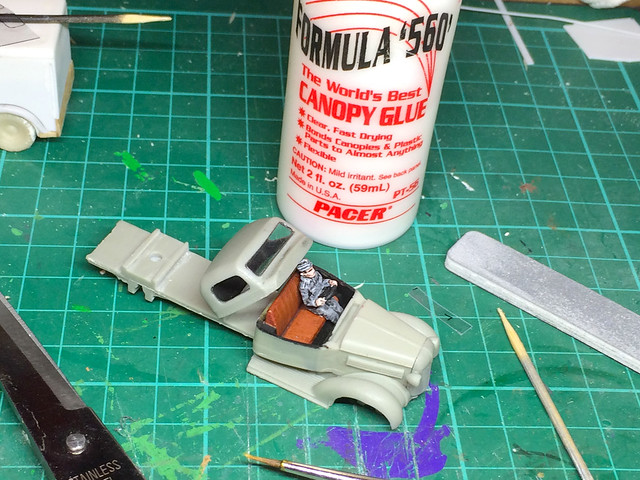
I'll be honest, it took a couple of goes to cut the correct shapes - or nearest thing to them - and then some very careful filing using my trusty Squadron Premium Sanding Stick. These sanding sticks are excellent and come in a variety of 'grits' right down to a very fine. They do make the difference.
Pacer's Formula '560' is my go to glue for canopies and windscreens, it dries a crystal clear...
Hard to tell but the windscreens have been fitted! I finished them off by painting on a layer of Johnson's Klear (now Pledge Multi-Surface Wax) which not only makes the 'windows' shine but clears up any light scratches and helps to stick the windshield in place securely.
Conclusion
Making your own windscreens is a bit of a black art. Sometimes you get a perfect fit first time, but then sometimes one windscreen can be an absolute bitch and needs recutting a couple of times. You just keep going until you are happy.
Things like a good canopy glue and using Klear are a big help, but no matter how experienced you are things can go wrong. Even when I thought I had made a good job I have looked at my work the next day and found a fingerprint or spec of dust or scratch on the inside of the glass. Boy, is that frustrating.
One thing is that I no longer buy expensive sheets of transparent 'modelling' plastic. Two reasons for this, aside from it being costly I found - no matter how I tried - keeping the sheet pristine and unscratched is neigh on impossible. Far better to use clear plastic from blister packaging or food packs - it's cheaper and you can always guarantee it's unscratched when you begin.
Well - that's my thinking anyway.
It's not a difficult job, and indeed it's surprising how many kits these days still require you to make your own windscreens (the next two kits I will be making are from PST and Hunor and both require me to do so). So here's my procedure for doing this (I do not claim it's the best way, just the way that works for me)...
1. Create templates for your windows.
I begin by masking over the vehicle's empty window spaces. Then I take a sharp pencil or technical pencil and carefully draw around the window...
I press very gently and get the point of the pencil lead just inside the lip of the window. I use the shape of the window itself to guide my pencil around the edge so I end up with a drawing of the exact contour of the inside of the window.
2. I transfer the contour template onto transparent plastic.
Then I just stick the masking tape with the template on it to a flat surface, lay some transparent plastic over it and trace the outline using an indelible pen...
Not the best photos I've ever taken, but then transparent plastic isn't the easiest thing to photograph. My drawings are a bit shaky, but I will cutting generously and sanding the window edges to fit. It's a bit time-consuming, but the best way to ensure and exact and snug fit, especially with resin models where straight lines ain't so straight sometimes.
3. Fitting...Carefully now!
I'll be honest, it took a couple of goes to cut the correct shapes - or nearest thing to them - and then some very careful filing using my trusty Squadron Premium Sanding Stick. These sanding sticks are excellent and come in a variety of 'grits' right down to a very fine. They do make the difference.
Pacer's Formula '560' is my go to glue for canopies and windscreens, it dries a crystal clear...
Hard to tell but the windscreens have been fitted! I finished them off by painting on a layer of Johnson's Klear (now Pledge Multi-Surface Wax) which not only makes the 'windows' shine but clears up any light scratches and helps to stick the windshield in place securely.
Conclusion
Making your own windscreens is a bit of a black art. Sometimes you get a perfect fit first time, but then sometimes one windscreen can be an absolute bitch and needs recutting a couple of times. You just keep going until you are happy.
Things like a good canopy glue and using Klear are a big help, but no matter how experienced you are things can go wrong. Even when I thought I had made a good job I have looked at my work the next day and found a fingerprint or spec of dust or scratch on the inside of the glass. Boy, is that frustrating.
One thing is that I no longer buy expensive sheets of transparent 'modelling' plastic. Two reasons for this, aside from it being costly I found - no matter how I tried - keeping the sheet pristine and unscratched is neigh on impossible. Far better to use clear plastic from blister packaging or food packs - it's cheaper and you can always guarantee it's unscratched when you begin.
Well - that's my thinking anyway.
Friday, 13 November 2015
Minairons 1937 Chevrolet 1.5ton truck - part 3
This is the first time I have been blogging about two projects simultaneously, haven't decided whether alternating the posts like this is a wee bit confusing or not?
Anyway, progress on the '37 Chevy truck...
I've gone for the civilian type red leather bench seat colour. I can still remember this colour so well from cars when I was a lad in the 1960s (and I remember the beautiful smell too). They knew how to make car seats in those days, my father's Rover P5 had seating that would have done a gentleman's club justice! Sorry, I digress...
The small unpainted splodge you can see is a bare patch of plastic I have left so that I can glue the driver onto the seat properly. As a matter of fact, I have also left the driver with an unpainted bum.
I've really simplified the painting and gone a bit minimalistic with the painting. Just a plain black painted interior for this one. (Which I guess it's in keeping with this war game format of model.)
Before I close the cab by glueing the two halves together, I have the windscreens to make and fit. It's an easier job if I have access to the windows from inside and out. This actually brings my two current models to the same state of construction and I will be concentrating on a little windscreen production line when I have some time to myself today!
Anyway, progress on the '37 Chevy truck...
I've gone for the civilian type red leather bench seat colour. I can still remember this colour so well from cars when I was a lad in the 1960s (and I remember the beautiful smell too). They knew how to make car seats in those days, my father's Rover P5 had seating that would have done a gentleman's club justice! Sorry, I digress...
![]() |
| A tip for painting drivers - I glue them to cocktail sticks for easier handling. |
![]() |
| A bit 'Gothy' perhaps? :) |
I've really simplified the painting and gone a bit minimalistic with the painting. Just a plain black painted interior for this one. (Which I guess it's in keeping with this war game format of model.)
Before I close the cab by glueing the two halves together, I have the windscreens to make and fit. It's an easier job if I have access to the windows from inside and out. This actually brings my two current models to the same state of construction and I will be concentrating on a little windscreen production line when I have some time to myself today!
Tuesday, 15 July 2014
Minairons 1/56 1937 Chevrolet truck - coming to 1/72 scale
Very, very chuffed that Minairons have now released their 1/56 1937 Chevrolet 1.5 ton truck kit, not that I 'do' 1/56 (yet) but because they are now working on a 1/72 version of the wargame quality kit.
The '37 Chevy truck is yet another vehicle that was pressed into service by the Finns during WW2 (as if their motor pool wasn't eclectic enough). The 1/72 version should be released in 2015, which is great for me as that should come out just in time to finish off my Finnish logistics collection.
I am becoming a bit of a fan of Minairons Miniatures, even though I haven't bought a single model of their yet. The specialise in Spanish Civil War era models and they don't seem scared to try out some of the more niche and exotic vehicles times from that period. The good thing about this is that much of their stuff fits nicely into the Very British Civil War genre.
As I mentioned in a previous post they have actually produced a set of fictional 'Scottish Republican' decals for some of their vehicle kits specifically for the VBCW game. So the next project after I eventually finish my Finns is taken care of then!
Links:
- Minairons official web site and online store: www.minairons.eu/en/
- Minairons official blog, development journal and 'wish list' pages
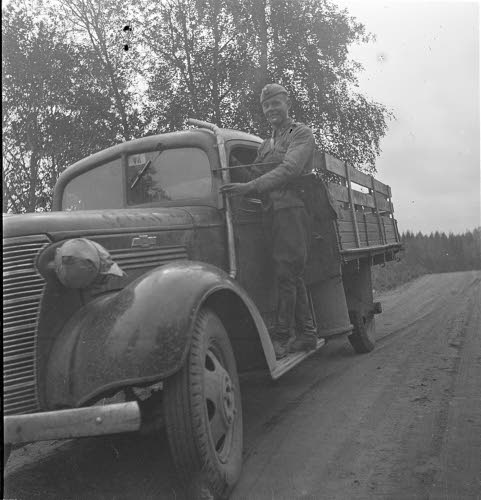
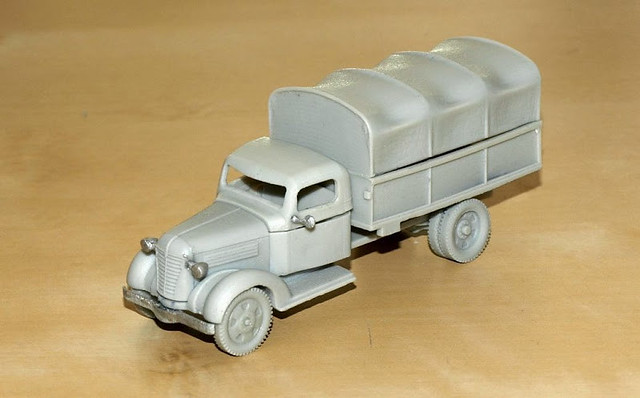
The '37 Chevy truck is yet another vehicle that was pressed into service by the Finns during WW2 (as if their motor pool wasn't eclectic enough). The 1/72 version should be released in 2015, which is great for me as that should come out just in time to finish off my Finnish logistics collection.
![]() |
| Finnish war correspondent hitches a ride on a '37 Chevy's running board in 1941. Photo source: SA KUVA |
![]() |
| Photo source: Minairons Miniatures |
I am becoming a bit of a fan of Minairons Miniatures, even though I haven't bought a single model of their yet. The specialise in Spanish Civil War era models and they don't seem scared to try out some of the more niche and exotic vehicles times from that period. The good thing about this is that much of their stuff fits nicely into the Very British Civil War genre.
![]() |
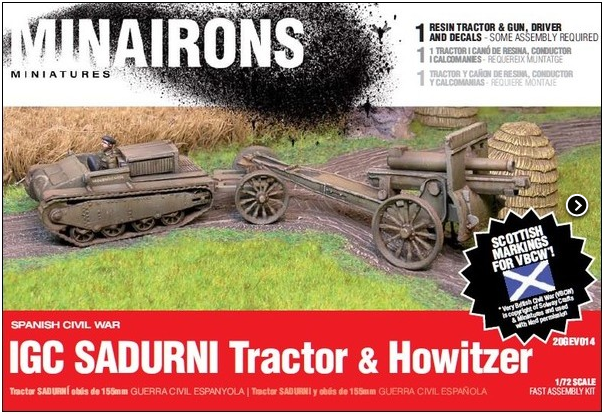
| Scottish Republican artillery for VBCW game. |
As I mentioned in a previous post they have actually produced a set of fictional 'Scottish Republican' decals for some of their vehicle kits specifically for the VBCW game. So the next project after I eventually finish my Finns is taken care of then!
Links:
- Minairons official web site and online store: www.minairons.eu/en/
- Minairons official blog, development journal and 'wish list' pages
Wednesday, 12 March 2014
Tanks of the Scottish Republic!
Oh I am a very happy camper this morning! :)
Basically, my Finnish Army project - while it has a long way to go - is pretty much planned out and so I have been mulling over what I might like to do when it's eventually finished. I'm planning well ahead because one of the issues I identified with my first experience of building a wargame themed project was the amount of research I need to do to do the thing properly. (I've made a lot of mistakes and had a few false starts with my Finnish project.)
Anyway, I had a few vague ideas but nothing really grabbed me 100%. I vaguely fancied an Inter-Wars project, and I sort of liked some of the 'British Civil War' fantasy rules that are knocking about and I have enjoyed reading about the Spanish Civil War...But then all these ideas came sharply into focus and amalgamated this very morning when I was absentmindedly perusing the Minairons Miniatures blog...
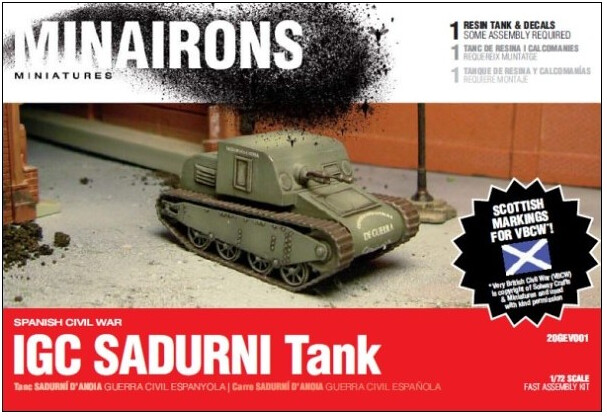
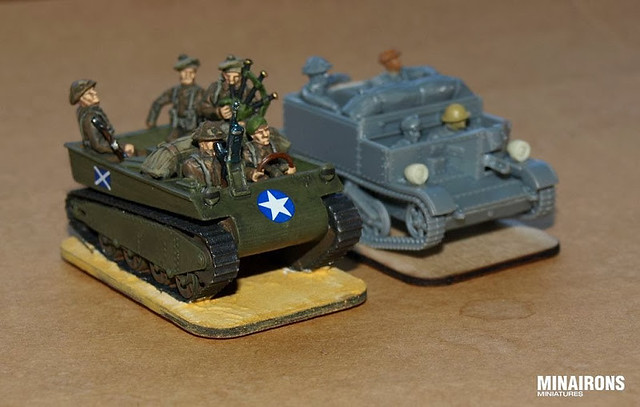
They have started doing markings for some of their kits for a hypothetical Scottish Republic!
...BAM! I'm sold!
I'll have to do some more reading - I'd like to know what game rules they are basing this idea on, or whether it could be worked into other 'British Civil War' rules - but to will give me a chance to build some of Minairons wonderful inter-war designed tankettes, so that's great!
Update: I just saw that Minairons mention the use of the VBCW ('Very British Civil War') rules in conjunction with their 'Scottish Republic' themed models.
Long Live the Republic!
> Link to Minairons Blog: Minairons-news.blogspot.co.uk/
> Link to Minairons web site: www.minairons.eu/en/
> Link to Solway Crafts, who made the VBCW rules: Very British Civil War Source Book
Basically, my Finnish Army project - while it has a long way to go - is pretty much planned out and so I have been mulling over what I might like to do when it's eventually finished. I'm planning well ahead because one of the issues I identified with my first experience of building a wargame themed project was the amount of research I need to do to do the thing properly. (I've made a lot of mistakes and had a few false starts with my Finnish project.)
Anyway, I had a few vague ideas but nothing really grabbed me 100%. I vaguely fancied an Inter-Wars project, and I sort of liked some of the 'British Civil War' fantasy rules that are knocking about and I have enjoyed reading about the Spanish Civil War...But then all these ideas came sharply into focus and amalgamated this very morning when I was absentmindedly perusing the Minairons Miniatures blog...
They have started doing markings for some of their kits for a hypothetical Scottish Republic!
I'll have to do some more reading - I'd like to know what game rules they are basing this idea on, or whether it could be worked into other 'British Civil War' rules - but to will give me a chance to build some of Minairons wonderful inter-war designed tankettes, so that's great!
Update: I just saw that Minairons mention the use of the VBCW ('Very British Civil War') rules in conjunction with their 'Scottish Republic' themed models.
Long Live the Republic!
> Link to Minairons Blog: Minairons-news.blogspot.co.uk/
> Link to Minairons web site: www.minairons.eu/en/
> Link to Solway Crafts, who made the VBCW rules: Very British Civil War Source Book
Subscribe to:
Posts (Atom)