 |
| An example of a real Willy's 1941 Coupe Hot Rod, which my Revell 1/25 kit is based upon. This one has a nice view of that lovely chromed engine and blower. |
There are no rules - it doesn't have to be exactly one of the cars from the movie, just a car 'in the style of' the movies theme. So this is a chance for me to go a bit wild and use my imagination. But, also, this project gives me a chance to try out some new techniques which I might not otherwise get a chance to do making military vehicles.
So, today I am working on the first part of the construction instructions - the engine.
Despite the fictional/fantasy them of the project I couldn't resist doing some research into the Revel model and Willy's Couple car itself. The first thing I discovered was that the engine in the kit (which apparently is the wrong engine by the way) is a V8 Hemi engine with blower, which looks like this...
 |
| 3D artwork by SamCurry, Deviantart.com |
The Revell kits does - in my novice opinion - make a lovely job of recreating this engine in plastic, with moderate detail and some very impressive chromed parts...
I have already put together the two part main engine block (top of photo) and I have taken the precaution of numbering the other components before removing them from the sprue as I know noting about engines and don't want to get the assembly wrong! In truth I am not even sure what the correct name is for ten various parts...5 points off my 'Manly Man Score'. ;)
Now there are two points to take into consideration here; I could 'accurise' this engine by scratch making some of the smaller parts that Revell has not included (I'm thinking of all those wires or tubes in my reference picture) but also I am looking at those chromed parts and wondering if they suit the theme of my model?
If you take a look at one of the actual Mad Max: Fury Road car engines it certainly isn't as pristine a condition as the Revell model engine will be...
So, at some point soon I will have to decide what to do about those lovely chrome parts - 'weather them' or completely repaint them? It might be a shame to completely do away with the nice chrome job that's been done on these parts, s I've been having a look online at some real chrome parts that have suffered pitting and corrosion to see what they might look like...
Luckily, that legendary Hot Rod car model maker 'Doctor Cranky' has some tutorial videos specifically on weathering (pitting) chrome parts...
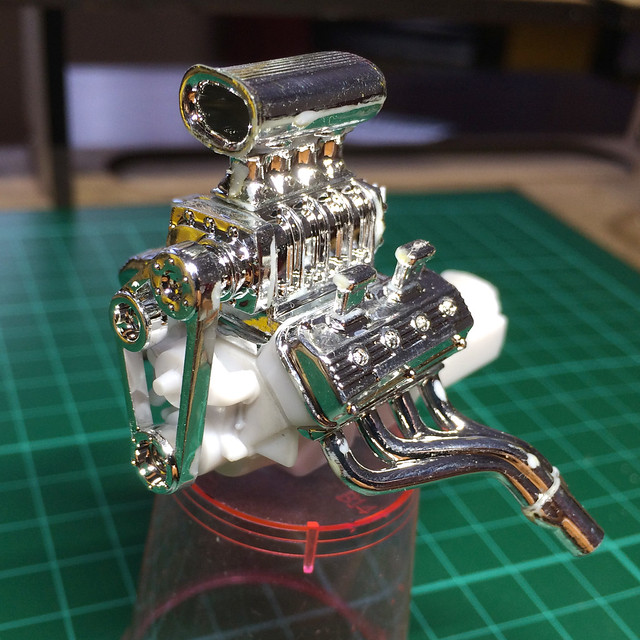
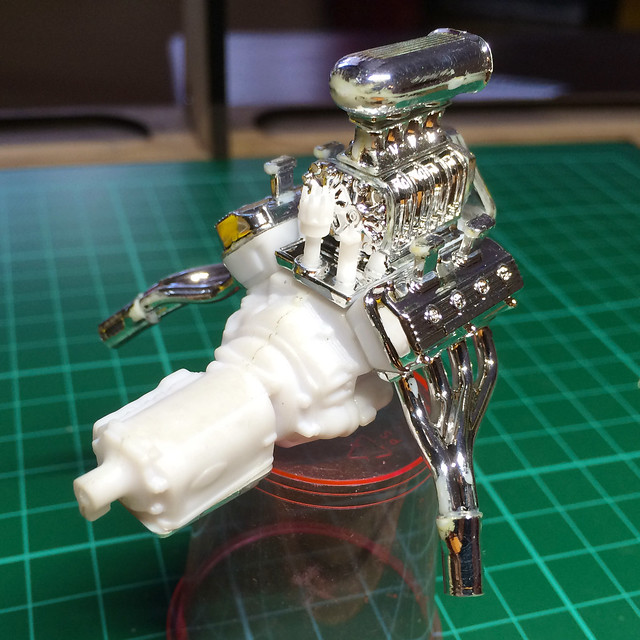
But while I let all that sink in - and do some planning - let's get on with the rest of the basic kit engine construction. It's a pretty simple and straight forward construction but with the issue of what effects I will eventually apply to the chromed parts I have only glued on these components using PVA glue.
In this way I can examine the finished engine and plane how to tackle the painting effects but still remove the chromed parts so I can paint the plain white plastic parts separately if I want (I will only glue the chrome parts on permanently when I decide on how I am painting the engine as a whole).
One thing I noticed was that despite the nice chroming job done by Revell the small fly in the ointment is that when you cut these parts off the sprues you inevitably chip away at some of the chrome coating where you have to trim off the left over sprue. This is unavoidable and means that is you wanted the pristine chromed effect you would have to find a way to touch up these blemished with some sort of high shine metallic paint.
Luckily for me, if I do weather the chrome so it's pitted these slight imperfections can be easily camouflaged.
So that's it, stage one of the Willy's Coupe complete. Next I move onto what I believe the drag racers call the 'bucket' - the car's interior where the driver sits.


No comments:
Post a Comment