Showing posts with label ACE. Show all posts

Friday, 7 March 2014

Always sleep on it, then things aren't as bad as they seem

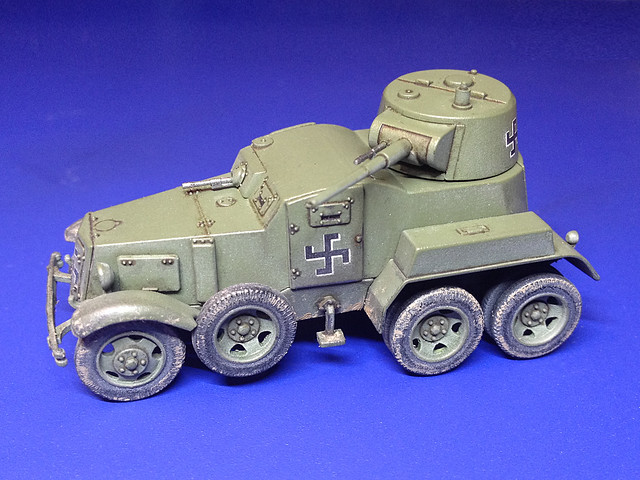
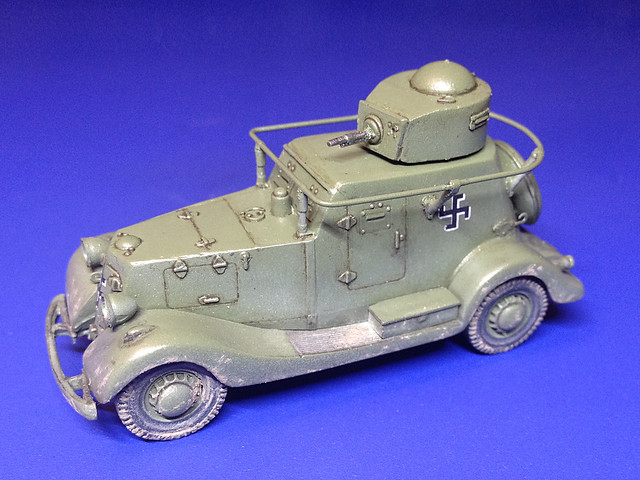
Sometimes - I guess - you think you have spoilt a model, things just get out of control and the more you try to save the situation the worse you make things. This is how it felt last night with my BA armoured cars.

I was tinkering with the last weathering stage and - on paper - there wasn't actually that much left to do as I had already decided to go easy on the wear and tear effects. Even so, things got messy - literally - as I tried to add a smattering of mud. But, oh I *wasn't* happy, not one bit!

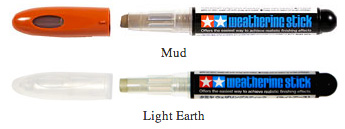
It's not the fault of the product I was using, I was using Tamya's 'Weathering Stick' effects - 'Light Earth' and 'Mud'...


I like this product because it's like a cosmetic approach to applying effects, I *guess* they are like women's eye-shadow or foundation (not that I have a lot of experience in this area)! What I mean is that this medium is a soft 'cream' and always remains 'live' (it doesn't really dry), so it can be spread about, blended and wiped off.

The two sticks I have work together well and nicely represent 'dry' mud and 'fresh' mud. But this didn't help me, I was having a nightmare where everything I did didn't seem right.

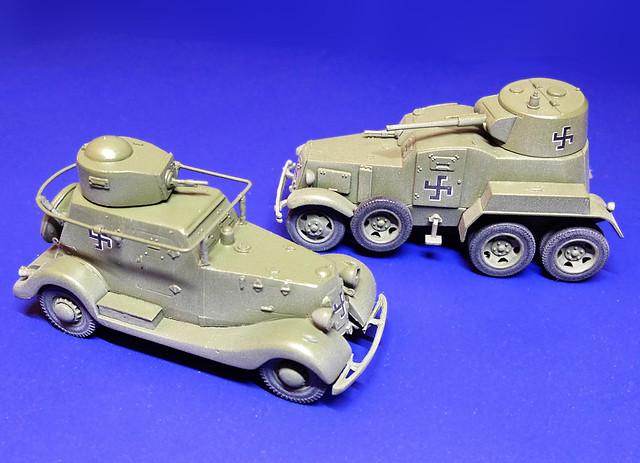
HOWEVER...I slept on it. And I also did a very useful thing - I took a couple of snaps on my iPhone to record the stage I was at and check what the 'failed' effects looked like through a lens. What a good idea this turned out to be (and I will do this more often)!

When I got up this morning I sat down with my mug of tea and opened my Flickr photo gallery page...And do you know, things weren't as bad as I thought! What do you think?


Anyway, there you go. If things look like they are going badly, stop! And sleep on it - things might not be a bad as you think.

Next: I'm starting to work on the model bases - designed for the Rapid Fire game rules - and I also will be making the headlights. Nearly there!

Monday, 3 March 2014

Dusty Finnish armoured cars

Well, having satisfied myself that I was happy using AK Interactive's weathering medium I got down to applying AK's 'dust' to my BA-10 and BA-20 armoured cars...


The advantage of this enamel effects wash - when applied over a thin varnished layer - is that you can blend the 'dust' layer using a brush which has been moistened with some thinners...In this way you can get a nice streaking effect if you want it.

I gently airbrushed the dust on concentrating at the bottom of the vehicle. Once dry I carefully wiped a broad brush - with a touch of thinners - down the vertical surfaces.

(I decided to do the 'dust' effect *before* the pin wash as this sprayed on layer would obliterate any panel line work I had done during pin-washing.)

NEXT: Pin washing.

Wednesday, 15 May 2013

ACE 1/72 BA-20 Armoured Car Pt. 5 - Decals


I haven't gone wild with the decals but instead just produced something fairly generic that will suffice for a war gaming model. Besides I'm afraid Finnish decals in 1/72 are a bit rare and my stock is nearly depleted.

Anyway, it looks smart enough but those Finnish swastikas were a real pain to get straight. These are later war cropped swastikas, I believe the Finns used full sized ones in the early war but then clipped the swastika 'arms' for armoured units mid-war. Of course, when Finland changed sides in the later part of the war they changed over to the Finnish roundel at the insistence of the Soviets (for obvious reasons).


I will give the decals a light coat of gloss varnish to seal them and then the model is ready to pin-wash and weather. But I will pause at this point while I await my new BA-10 wheels to arrive as I want to weather these models together (as they are part of the same company).

While this project is on hold I will move onto my next Finnish war game army model. I suppose there is some merit in getting a few models up to the same stage and then finish them together, especially when you are weathering.


Wednesday, 27 March 2013

ACE 1/72 BA-20 Armoured Car Pt. 3 - Construction III


While I did say that I had completed the basic construction of this model, I forgot the DIY aerial!

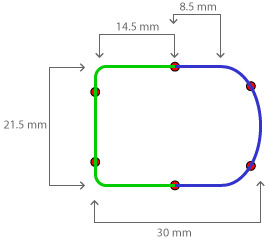
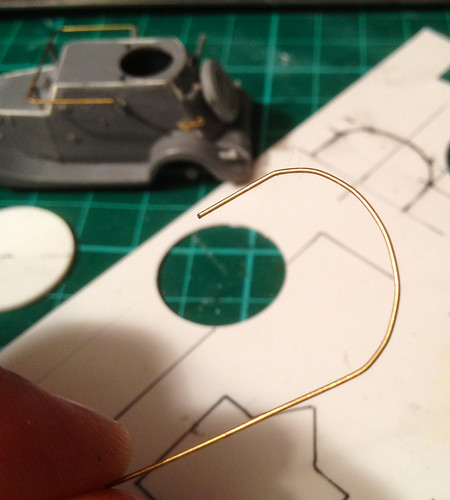
ACE leaves you to make the 'washing line aerial' for the BA-20, you use a length of thin wire - or brass rod in my case - and bend it to shape. It has to fit on top of the 6 support posts that ACE do supply. So, you have to get the measurements and shape of you wire aerial just right.


I started by drawing up a template to guide me in how and where I bent the wire - even so I had a couple of goes before I got it right. As shown in my diagram I divided this job up into two halves - front and rear, the rear half was the tricky curved part...


I tried making a small circular template out of plasticard so I could bend my wire into a semi-circle of the exact size I wanted, but this didn't work quite as I imagined. So it was down to good old fudging it and bending the curve by hand (fingers) and checking the shape against my diagram.

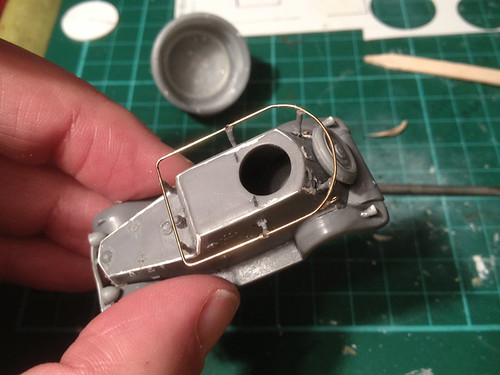
It seemed  to work well enough, I also kept checking my aerial's shape against the model and the support posts to make sure the wire would fit just right. Once I was happy with my aerial I glued it into place with super glue...


Hoo-rah! Job done, but now I will pause - I want the accompanying BA-10 armoured car model to be at the same stage so I can paint them together...So, it's on with my UM BA-10 kit.

Wednesday, 13 March 2013

ACE 1/72 BA-20 Armoured Car Pt. 3 - Construction II

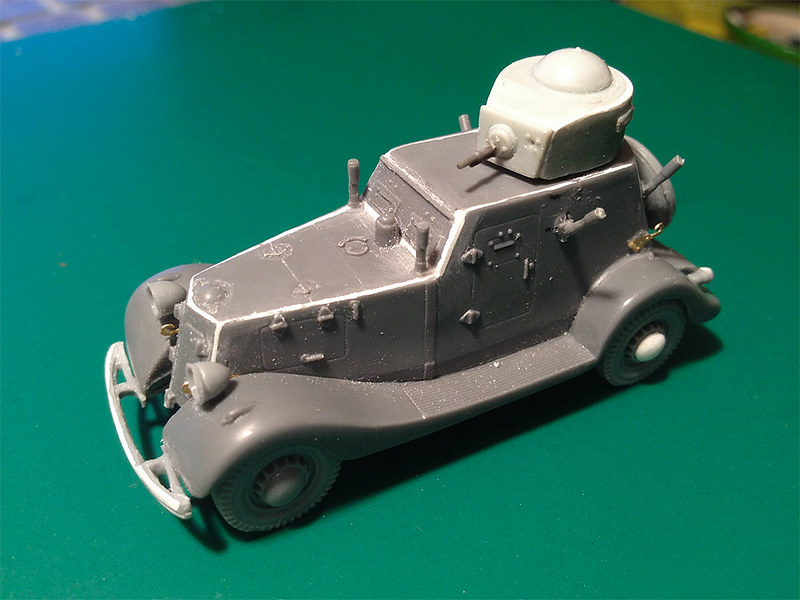
Got most of the fiddly little bits added to my BA-20, now ready to make the wire 'clothes line' arial around the roof...


You can see the filling I had to do with white Milliput putty. But I also had to use putty on the front bumper which I snapped while removing it from the sprue and to make a new hub cap to replace one that the small parts goblin stole!

I've put off doing the wire arial tonight as I'm pooped, but I also wanted to give the super glue I used on the arial supports overnight to dry properly. It's getting there though.

Saturday, 9 March 2013

ACE 1/72 BA-20 Armoured Car Pt. 2 - Construction

I mentioned in my summary of the components contained within this kit that I was a little worried about fitting together of the parts when there were no obvious pilot holes. Well this issue did indeed come back to haunt me at the construction phase, most notably with the chassis...


The whole chassis is dependent on the placement of the leaf-spring suspension and these four parts simply lay on the main chassis body with no positive indentations - it's all down to your glue. These springs also suffer from flash and noticeable seams, which in itself I am not bothered about as these parts are - after all - underneath the car but what little detail there is on these parts soon evaporates after you sand away the offending rangam plastic.

I was also dubious about the centering of the axels. Again, with no pilot holes these have to be positioned largely by eye, though there are shallow notches in the springs which identify where they should go. But expect to have to dry fit the wheels a few time until you are satisfied that they  look OK under the mud guards.

And talking of the wheels, there was a lot of trimming and filing to be done to make the wheels fit correctly under the fenders as I found the axels a little too long.


Next, I had stupidly thought that after the fiddling about with the chassis that the main body of the car would be quite straight forward as they are all flattish plates. Oh dear, how wrong I was!

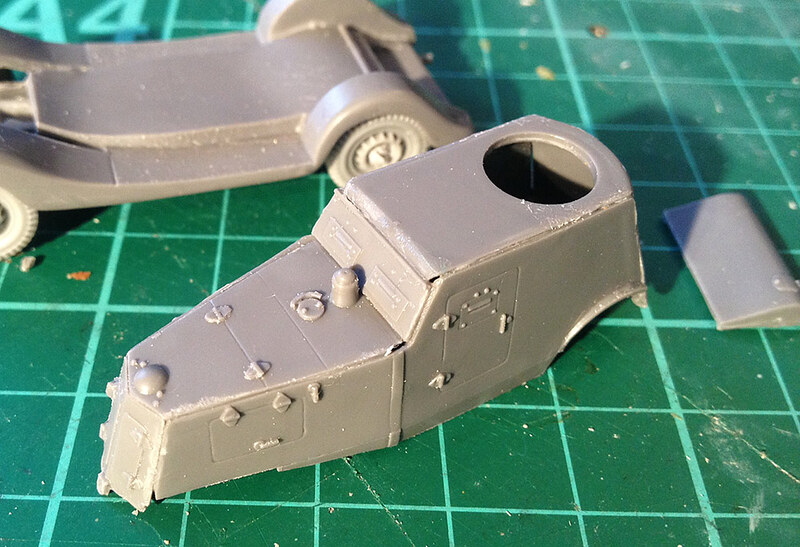
In the above photo I think you can make out the gaps between some of the hull parts - they just wouldn't fit together neatly. I wasn't too concerned because these can easily be filled with modeller's putty, but I was annoyed that I had to do so as these should have been fairly fool proof and uncomplicated parts.

Still, the best was saved for last, the turret...


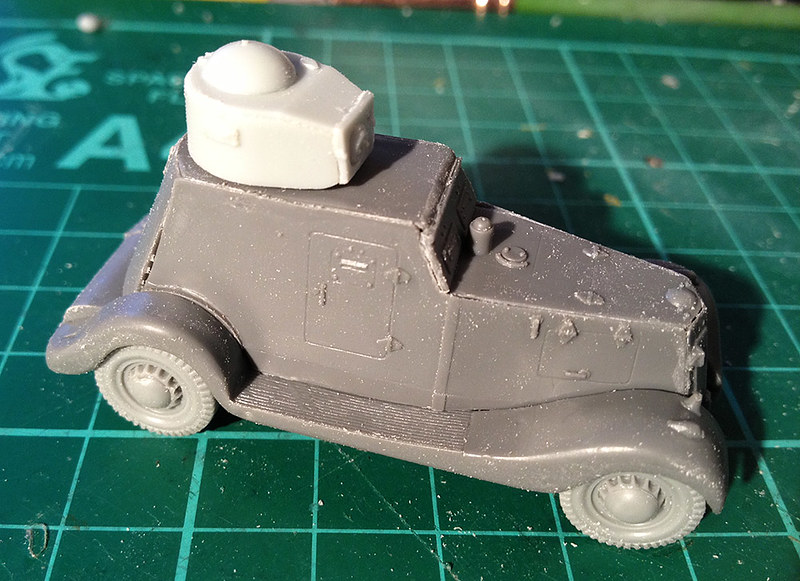
Unfortunately my photo gives the impression that a - once again - fairly simple part fitted together and mated with other parts quite simply. Er, no. Amusingly the hole provided in the roof was way too small for the turret collar...Shazbat!

MORE sanding!

I think you can see that there are plenty of gaps between the ill-fitting parts. Really, £10.70?

Well, it all sort of went together in the end, but I haven't added smaller external components yet - like the arial or the machine guns - as I really felt like I needed a break before undertaking these. Next job, though, will be the filling of all the gaps and tidying up the edges.

...Grumble!

Friday, 8 March 2013

ACE 1/72 BA-20 Armoured Car Pt. 1 - Unboxing


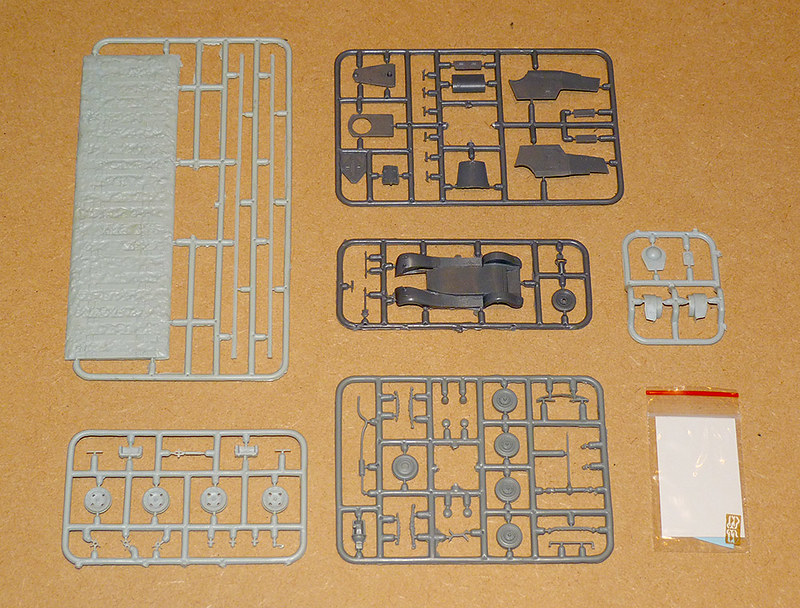
I was very excited as I cracked open the lid of this kit - I really like the look of this little armoured car. At first everything looked good, all sprues were encased in a sealed plastic bag (a good sign I thought) and inside this the tiny etched parts and decals were given their own separate plastic bag. On opening up the main bag this is what I got...


Notable among these are the two light grey sprues on the left - one is the small railway diorama (which I won't be needing, but thanks anyway) and the other is the railway wheels set. Obviously these will both be assigned to my spares box, but I am glad they are separates - it tells me that ACE added these to a basic BA-20 that they must've done. But more importantly...


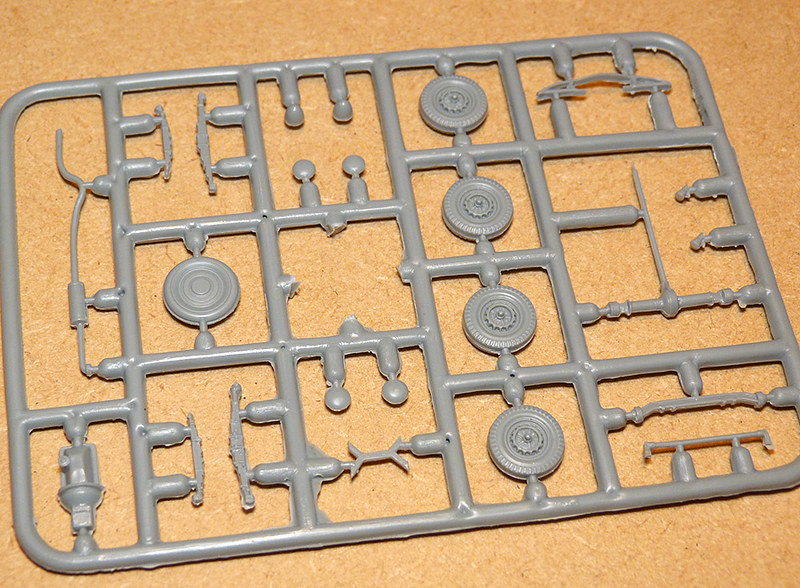
The normal road wheels come on their own sprue. These are solid plastic wheels and tyres, but I do like both the level of detail and the fact they come with optional domed hub caps.

Now, I won't go through every sprue individually, but I do want to show you this one - the chassis sprue - in some detail. Now do bear in mind that out of the two armoured car kits I bought - this one and the UM BA-10 - this kit was the more expensive (£10.70) so the quality of this main component is interesting to say the least...


Just in case you can't make out what I am trying to get at, here is the same sprue photographed from a more side-on angle...


The phrase 'rough round the edges' comes to mind. Practically all parts in this kit, in fact, come with a fine film of flash around the seams and in this case the edges of the chassis are in need of a good sanding and the roughness has ruined the little lip which runs around this component. I shall have to do a bit of repairing here to smooth things out.


The above photo shows the quality of some of the panel line detail - they aren't the sharpest lines in the world, just OK. But maybe I am being too picky, I am sure they will be serviceable enough and will be picked up nicely at the painting stage.


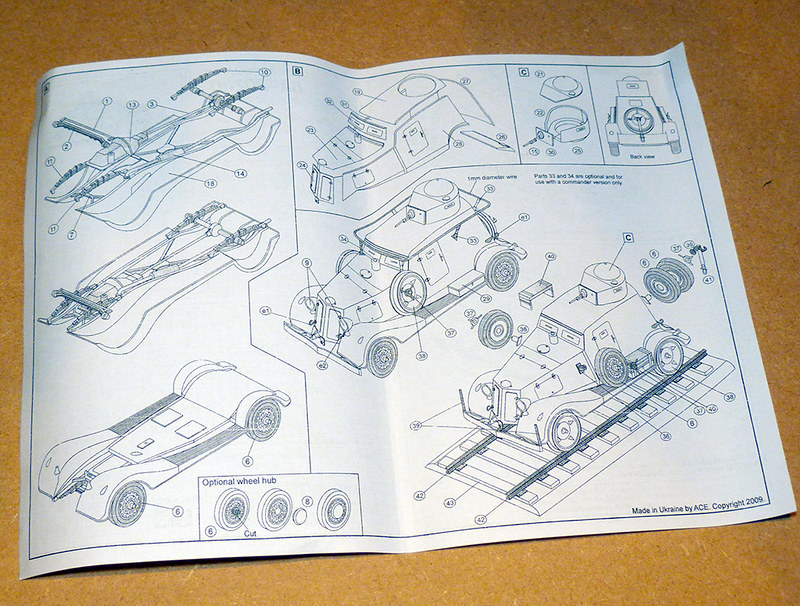
Instructions are clear enough, but while test fitting some of the parts I did find that ACE have left you to try and figure out the best place to glue some of the parts. The suspension in particular has a noticeable lack of pilot holes to guide your assembly.

Edit: Nearly forgot an important issue. While the instruction sheet clearly numbers each component ACE neglected to add these numbers to the sprues themselves! Common sense helps you identify parts, but in some cases - like the suspension springs - there can be some confusion.

One thing to note is that you have to make the 'clothes line' antenna yourself out of some spare thin wire, not a big problem but the war gamer may chose to skip this fiddly step (some BA-20s were not equipped with this option anyway). And the last parts are the etched ones, four tiny brass tow hooks, a indication, to my mind, that ACE is not up to moulding more delicate parts in plastic.

Finally, there are the decals - well, this particular version only comes with one set, some German crosses. I suppose my hope that they might have included some Soviet or Finnish decals to make the alternative road car was asking too much!

Above: A lovely built example of this kit by Neil Lyall. Photo
source: Henk of Holland's ACE WW2 models review section.

Overall I don't really think I am getting my ten quids worth here, but there again it is a relatively rare subject for 1/72 and I couldn't find any alternative, so beggars can't be choosers in my case. The quality of parts are mediocre, reminiscent of some of the older Airfix kits and I really did expect more.

It will be interesting to compare the quality of this to the UM BA-10 I have bought to accompany this BA-20. Both are Ukrainian made kits, I believe, but the UM armoured car was priced at a rather more palatable £7 (though do remember that you get TWO Pegasus BA-6 armoured cars for £9). It all depends wether, like me, you especially wanted this particular armoured car or not.