
The whole chassis is dependent on the placement of the leaf-spring suspension and these four parts simply lay on the main chassis body with no positive indentations - it's all down to your glue. These springs also suffer from flash and noticeable seams, which in itself I am not bothered about as these parts are - after all - underneath the car but what little detail there is on these parts soon evaporates after you sand away the offending rangam plastic.
I was also dubious about the centering of the axels. Again, with no pilot holes these have to be positioned largely by eye, though there are shallow notches in the springs which identify where they should go. But expect to have to dry fit the wheels a few time until you are satisfied that they look OK under the mud guards.
And talking of the wheels, there was a lot of trimming and filing to be done to make the wheels fit correctly under the fenders as I found the axels a little too long.
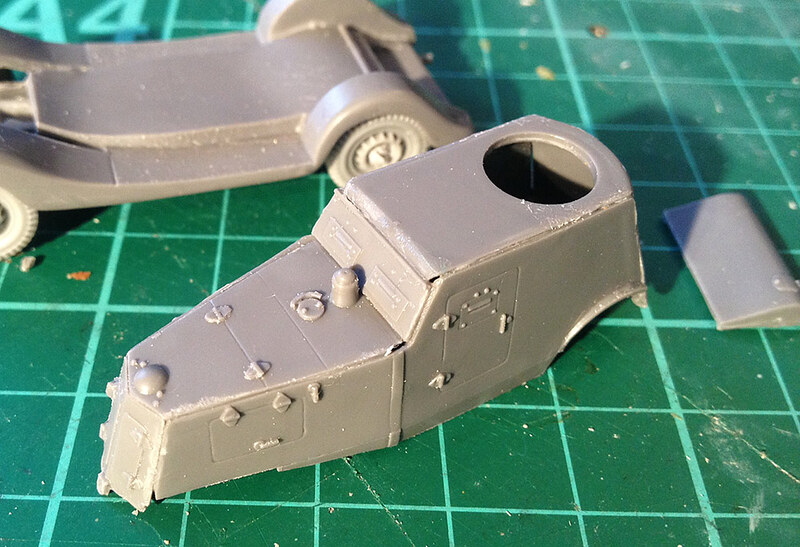
Next, I had stupidly thought that after the fiddling about with the chassis that the main body of the car would be quite straight forward as they are all flattish plates. Oh dear, how wrong I was!
In the above photo I think you can make out the gaps between some of the hull parts - they just wouldn't fit together neatly. I wasn't too concerned because these can easily be filled with modeller's putty, but I was annoyed that I had to do so as these should have been fairly fool proof and uncomplicated parts.
Still, the best was saved for last, the turret...
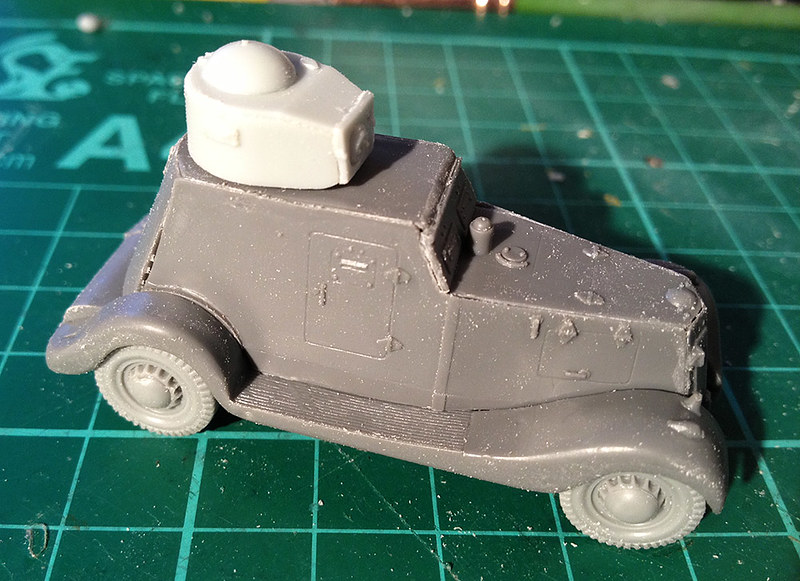
Unfortunately my photo gives the impression that a - once again - fairly simple part fitted together and mated with other parts quite simply. Er, no. Amusingly the hole provided in the roof was way too small for the turret collar...Shazbat!
MORE sanding!
I think you can see that there are plenty of gaps between the ill-fitting parts. Really, £10.70?
Well, it all sort of went together in the end, but I haven't added smaller external components yet - like the arial or the machine guns - as I really felt like I needed a break before undertaking these. Next job, though, will be the filling of all the gaps and tidying up the edges.
...Grumble!
Well done Stephen. I have made a few ACE kits before and have not found one yet that did not require a more than fair amount of eye bashing and a few ales for bravery.
ReplyDeleteAll this and like you say the price tag.
Keep up the good fight!
Stephen, perfect so fare. Ya got the best out of ACE.
ReplyDeleteBut... there is at least one good thing about ACE: These kits look nice if ya keep the faith till basing.
Good luck man. Cheers Per