Showing posts with label armoured car. Show all posts

Saturday, 8 March 2014

A curio from history - BA Beutepanzer

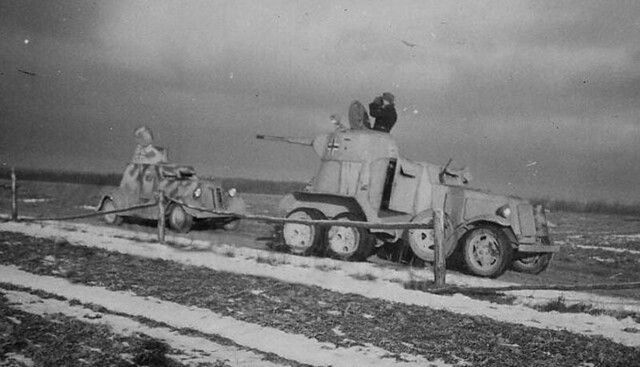
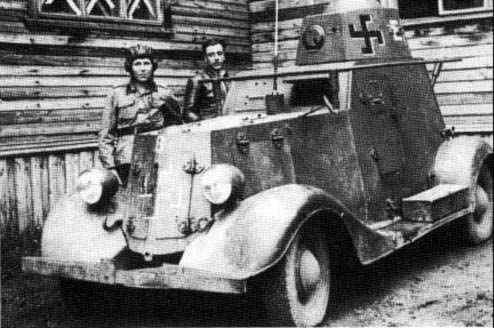
I was sent a very interesting photo from 'Pierzisme' - who follows my model-making exploits on Flickr - of a BA-10 and a BA-20 armoured car which was taken sometime during World War 2. While there is plenty of photographic material of these Soviet armoured cars what makes this such and interesting snap is that - like my BA project - it shows captured examples of these vehicles.


Coincidently and most curiously, while this photo shows the very same combination of ex-Soviet armoured cars as I am currently modelling, unlike my Finnish examples these captured machines are being put to use by the Germans!

Many thanks to Pierzisme from passing on this picture.

Friday, 7 March 2014

Always sleep on it, then things aren't as bad as they seem

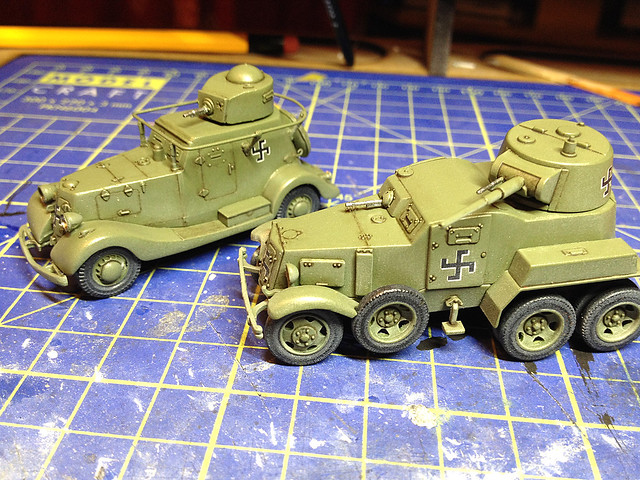
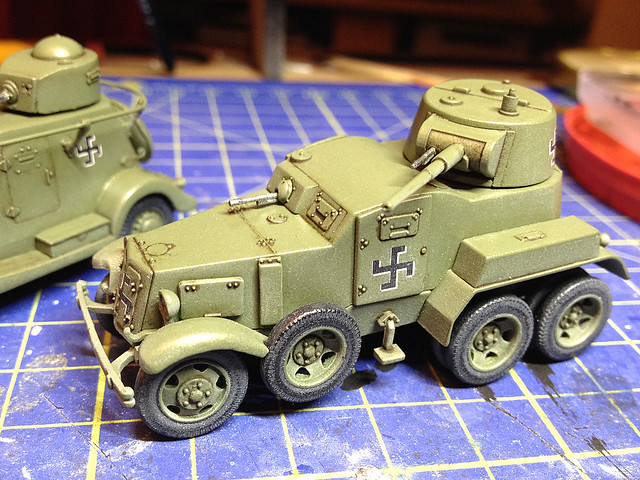
Sometimes - I guess - you think you have spoilt a model, things just get out of control and the more you try to save the situation the worse you make things. This is how it felt last night with my BA armoured cars.

I was tinkering with the last weathering stage and - on paper - there wasn't actually that much left to do as I had already decided to go easy on the wear and tear effects. Even so, things got messy - literally - as I tried to add a smattering of mud. But, oh I *wasn't* happy, not one bit!

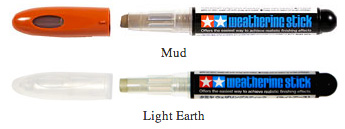
It's not the fault of the product I was using, I was using Tamya's 'Weathering Stick' effects - 'Light Earth' and 'Mud'...


I like this product because it's like a cosmetic approach to applying effects, I *guess* they are like women's eye-shadow or foundation (not that I have a lot of experience in this area)! What I mean is that this medium is a soft 'cream' and always remains 'live' (it doesn't really dry), so it can be spread about, blended and wiped off.

The two sticks I have work together well and nicely represent 'dry' mud and 'fresh' mud. But this didn't help me, I was having a nightmare where everything I did didn't seem right.

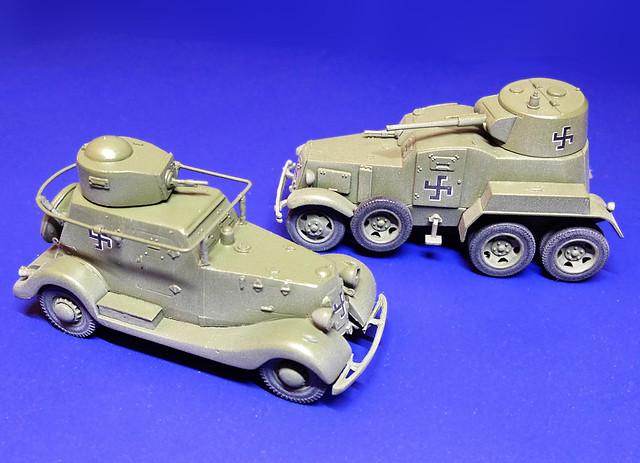
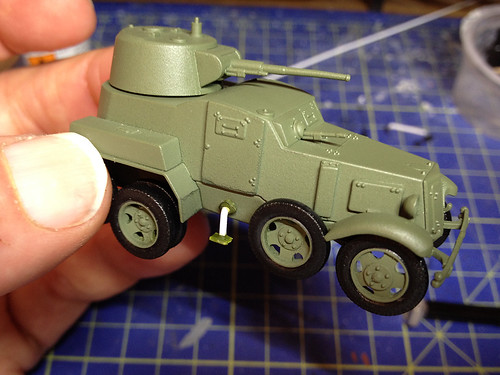
HOWEVER...I slept on it. And I also did a very useful thing - I took a couple of snaps on my iPhone to record the stage I was at and check what the 'failed' effects looked like through a lens. What a good idea this turned out to be (and I will do this more often)!

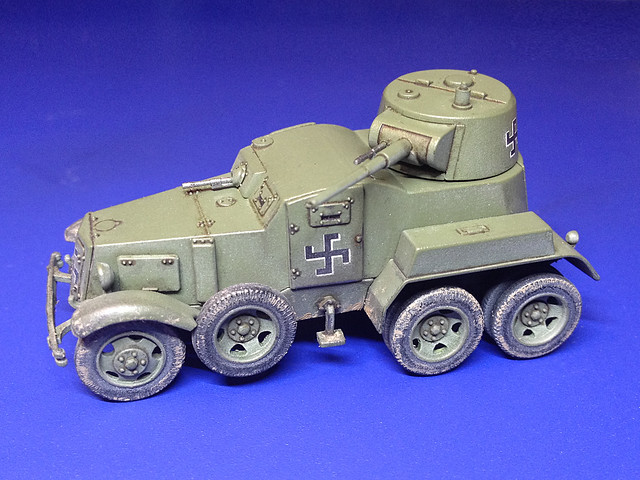
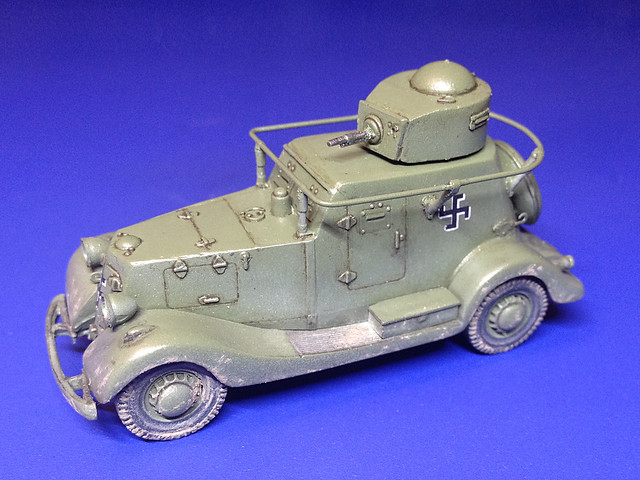
When I got up this morning I sat down with my mug of tea and opened my Flickr photo gallery page...And do you know, things weren't as bad as I thought! What do you think?


Anyway, there you go. If things look like they are going badly, stop! And sleep on it - things might not be a bad as you think.

Next: I'm starting to work on the model bases - designed for the Rapid Fire game rules - and I also will be making the headlights. Nearly there!

Thursday, 6 March 2014

All washed up! Soviet armoured cars.

It's time to put the techniques I practised on my little T-34 to good use. Having sprayed on my 'dust' layer I now apply a pin-wash to my Finnish armoured car company...


I am using AK Interactive's enamel based 'Dark Brown Wash for Green Vehicles'. I prefer this to my initial attempts at pin-washing where I used black. Black is too harsh and makes it look like you are drawing an outline around everything, by contrast AK's brown wash has a nice greasy hue to it.

When applying the pin wash I have found using two brushes helped - one thin brush to apply the pin-wash itself and a second clean brush dipped in thinners to clean up mistakes and tidy up wonky lines.


Next I will start to apply he chipping - but I want to go easy with this and won't be adding too much rust either. From what I have seen in reference photos the Finns seem to have taken quite good care of their equipment. Perhaps because it was in such short supply.

So, just some light wear on the most vulnerable parts - like the edge of the fenders and parts that had the most use (like doors and hatches).

Oh! Nearly forgot - what's next? Well, as we are nearing the end I must start on the bases for these models.

Monday, 3 March 2014

Dusty Finnish armoured cars

Well, having satisfied myself that I was happy using AK Interactive's weathering medium I got down to applying AK's 'dust' to my BA-10 and BA-20 armoured cars...


The advantage of this enamel effects wash - when applied over a thin varnished layer - is that you can blend the 'dust' layer using a brush which has been moistened with some thinners...In this way you can get a nice streaking effect if you want it.

I gently airbrushed the dust on concentrating at the bottom of the vehicle. Once dry I carefully wiped a broad brush - with a touch of thinners - down the vertical surfaces.

(I decided to do the 'dust' effect *before* the pin wash as this sprayed on layer would obliterate any panel line work I had done during pin-washing.)

NEXT: Pin washing.

Thursday, 27 February 2014

The best laid plans, etc...BA-10 problems

Funny thing about doing a scale model hobby blog is that you have a tendency to highlight the successes rather than the failures. I don't think it's deliberate, it's just that people like looking at interesting or nice models. Well, anyway, by way of balance here's a tale of one of my 'mishaps'...


If you model then you know what a 'Ping!' is. It's fairly self-explanatory if you have tried making small plastic models - it's when you are working with a very small part or cutting it off a sprue when...'Ping!' Off it flies, who knows where. Certainly I can never seem to find them again.

I blame my 'Ping!' episodes on my big porky sausage fingers...I really should use tweezers more often (note to self).

Anyhoo, 'Ping!' went the passenger's side side-step thing and despite a good search it was never heard of again. So I had to make one. I guess - actually - this is a positive thing and shows how I have improved a little as a modeller because I didn't panic (I did use an expletive) but philosophically thought out how to make a replacement part.

Luckily this was a simple small part, with not a lot of detail...Otherwise I would have been scuppered! :)

Monday, 24 February 2014

UM BA-10 - new wheels

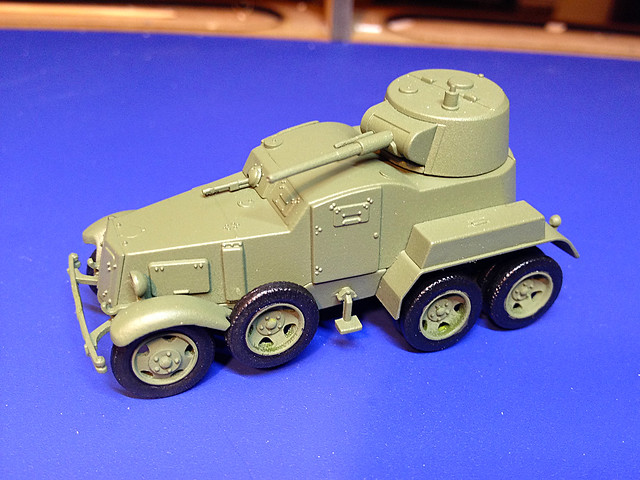
I'll keep it short and sweet today...My BA-10 armoured car now has new wheels!


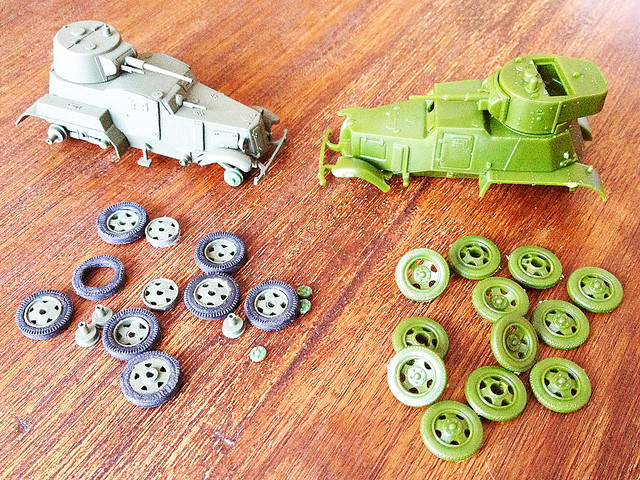
To recap, I was worried that the infamous 'vinyl rot' would affect the UM's rubbery tyres but aside from that the moulded tyres were quite distorted and slightly misshapen. A few of the tyres bulged when fitted to the wheel hubs and looked like they were going to pop off.

Well, I solved this problem when I came across a cheap Pegasus BA-6 kit, this included hard plastic one-piece versions of the wheels and tyres. Bit of an annoying sacrifice - as the Pegasus kit is nice in itself - but I was determined to finish my BA-10.


Well, they aren't perfect - but the new wheels are now on. Next, glossing and the decals.

Friday, 21 February 2014

Right...Let's go! Finnish armoured cars!

OK, having taken time to tidy up my attic 'man cave' and take stock of the plethora of half completed projects littering my work bench. Having done my inventory and checked against what my plans were I have created a plan to get me up and going again and making models!

Top of my list for 2014 is my 1944 Finnish Army (Rapid Fire) project, and a large number of the semi-completed models belong to that category. I've drawn up a list of what I have and what needed doing and have decided the running order for kit making for the next couple of month. There'll be no getting distracted this time!

Job number 1 is to complete my Finnish Armoured Car Company. To re-cap from last year this was going well, I was really pleased with my purchases - a ACE BA-20 light armoured car and a UniModel BA-10 Heavy Armoured car - and they were both about 70% complete...

Left: UniModel BA-10. Right: ACE BA-20

The snag which stopped me finishing off this set was the issue of the UniModel's vinyl tyres. I had come up with a plan to stop the notorious 'vinyl rot' but, in the end, was scuppered by the very bad fit of the tyre on the wheel hubs. The tyres bulged and were - in any case - of inconsistent quality, some looked fine but others were badly moulded.

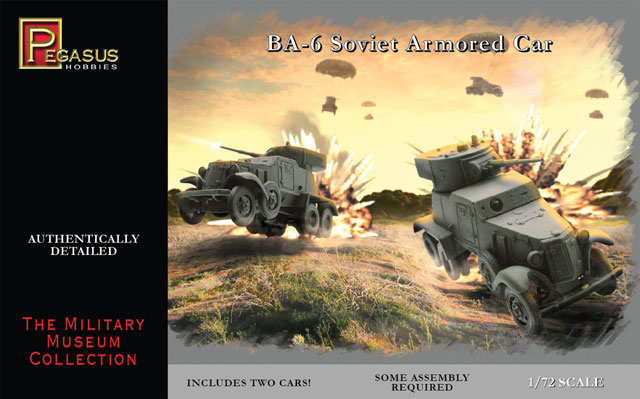
So, to get this project to completion I have bought Pegasus's BA-6 Soviet Armoured Car Set...

The Soviet BA-6 and BA-10 are nearly identical, the most noticeable
difference being the turret types (though both are armed with a 45mm gun).

This is rather a nice set in it's own right - and gives me the option to add a BA-6 to my BA-10 as a companion heavy armoured car - but it's the solid plastic wheels/tyres that I want scavenge. I will use one of the sets of BA-6 wheels to replace the shoddy UniModel BA-10 wheels and thereby get the kit on it's way to being finished.

The nasty vinyl tyres of my UniModel BA-10 (left) compared to the one-piece
plastic wheels of the Pegasus BA-6. You can also see the different turret
designs which defines the two armoured cars.

(I will send the second set of wheels up to my brother and have him duplicate these wheels in resin should I wish to build the second BA-6 or get any further kits with similar wheel issues.)

As I said, I originally planned to make my Rapid Fire Finnish AC Company up from the light BA-20 and the heavy BA-10, but having seen the quality of the Pegasus BA-6 I think I will pair up one of these with my BA-10 to make a all heavy armoured car company (the Rapid Fire Finnish rules I am using allow for the choice of these two types in the unit). My BA-20 will now be moved to another unit in my army as either a reconnaissance or radio car.

A captured Soviet BA-20 being used by the Finns as a radio/recce car.

EDIT: Just double checked the Rapid Fire rules and I cannot, in fact, replace the BA-20 with a BA-6 in the Armoured Car Company as the rule specifically call for a BA-20 to be used as the Company 'HQ' vehicle. Still, never mind, the BA-6 kits will come in handy - they are nice.

Wednesday, 15 May 2013

ACE 1/72 BA-20 Armoured Car Pt. 5 - Decals


I haven't gone wild with the decals but instead just produced something fairly generic that will suffice for a war gaming model. Besides I'm afraid Finnish decals in 1/72 are a bit rare and my stock is nearly depleted.

Anyway, it looks smart enough but those Finnish swastikas were a real pain to get straight. These are later war cropped swastikas, I believe the Finns used full sized ones in the early war but then clipped the swastika 'arms' for armoured units mid-war. Of course, when Finland changed sides in the later part of the war they changed over to the Finnish roundel at the insistence of the Soviets (for obvious reasons).


I will give the decals a light coat of gloss varnish to seal them and then the model is ready to pin-wash and weather. But I will pause at this point while I await my new BA-10 wheels to arrive as I want to weather these models together (as they are part of the same company).

While this project is on hold I will move onto my next Finnish war game army model. I suppose there is some merit in getting a few models up to the same stage and then finish them together, especially when you are weathering.


Sunday, 12 May 2013

1/72 Unimodel BA-10 Armoured Car Pt. 6 - base coat

I do like Humbrol's Light Olive, especially when you add a thin gloss varnish layer...


This is my first chance to see the BA-10 and BA-20 together in their final base colour and they do look a really sweet couple! At the moment I am trying to ready the god awful UM acrylic tyres, the UM kit maybe better than the ACE BA-20 kit, but I wish I had the ACE's hard plastic wheels for my BA-20.

However...I have a cunning plan.

So while I tinker with this I will move on to the decals and also get the wheels on the BA20.

Wednesday, 8 May 2013

1/72 Unimodel BA-10 Armoured Car Pt. 5 - Vinyl rot prevention


As a newcomer to modelling and it's dark arts I happen across brief mentions in modeling forums of things I do not understand but worry me a lot. 'Track rot' sounds very nasty indeed but I really don't have a clear understanding of what it exactly was/is, but the various reports of vinyl tracks disintegrating and rotting plastic parts they adjoin were a concern.
So imagine my shock when - while posting up the progress of my UM BA-10 armoured car on the Society of Gentleman Gamers forum - I discovered that the vinyl tyres of my model were exactly the type material that causes this sort of disintegration. Chris Steadman (of SoGG) commented on my project...
"On the UM kit, did you use a barrier between the vinyl wheels and the plastic? Are you aware that they are known to interact and that the plastic dissolves with time? PVA apparently acts as a good barrier. There are also reports that washing the vinyl parts well, helps to reduce the effect. Also, when you paint the model, any paint with a solvent base will attack the vinyl parts."
Eeeek! This was enough to send any kitnoob like myself into a mild panic...But I calmed down!

And so, my solution was a bit belt and braces but I hope this works; I detached the tyres from the plastic wheels and coated the wheels with a gloss varnish to act as one barrier between the materials, then I sprayed the wheels their base colour (Humbrol acrylic Light Olive) to act as a second barrier. I also sprayed a light coat of varnish over any other area - notably the front fenders - where the tyres would come into contact with the main model.
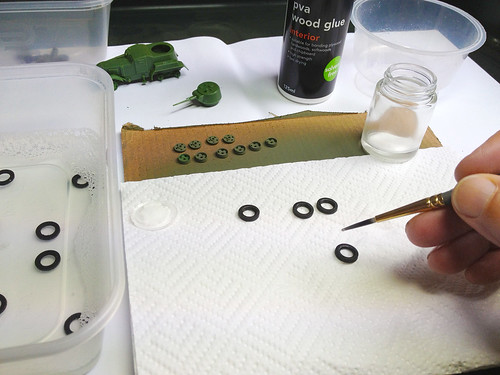
Having done that I next turned my attention to the tyres themselves. As recommended I washed the tyres in soapy water and then, once dry, I painted on a thin solution of PVA just on the inside of the tyres where they would come into contact with the plastic wheels.

Coating the vinyl tyres with a thin layer of PVA glue to act as a barrier.
I was going to weather the tyres using a AK Interactive enamel based weathering wash - for dust effects - but I will avoid anything like this now. Instead I will use chalk and conte crayon dust brushed on over a very thin coat of PVA to hold the dust in place. Bit of an experiment there but let's see how that turns out.

So, little hic-up. To be honest I was skeptical about the merit of the vinyl tyres right from the start, tyres are just as easily modeled using hard plastic and paint effects. In any case they are a pig to fit and deform - I will probably try to avoid them in the future (though I can't really avoid vinyl tracks unfortunately).

Tuesday, 9 April 2013

1/72 Unimodel BA-10 Armoured Car Pt. 4 - Construction complete

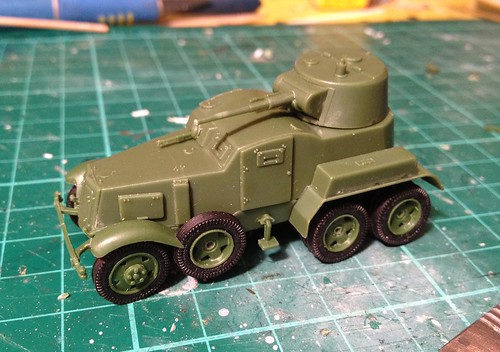
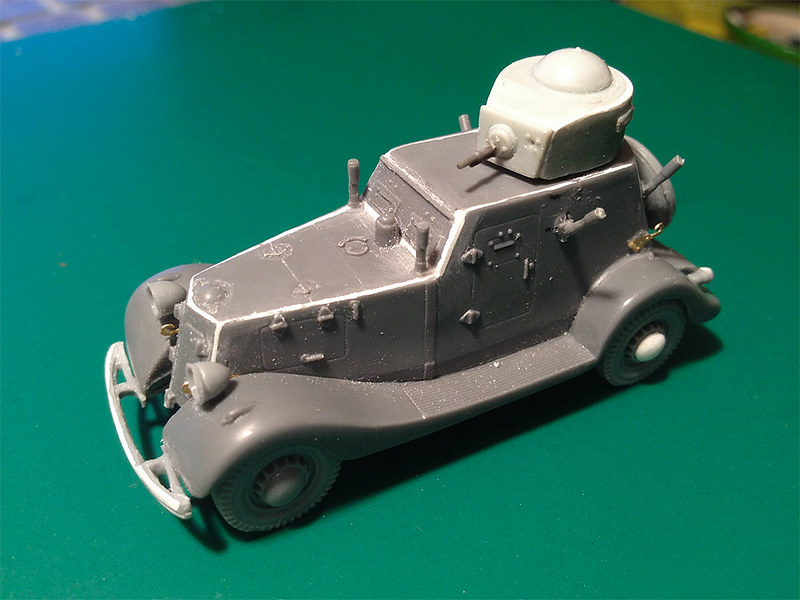
Got the last little twiddly bits stuck on (I think that's the technical term for it)! Looks OK I think...


The next phase would be the base coat - Humbrol Light Olive - for this and it's BA-20 partner but I am going to pause here while I finish off my 'man cave'. Once done my new hobby space will have my airbrush booth set-up and I will be able to spray these properly.

So, a short break from armoured cars, let's see what else I have in the unfinished project box.

BA-10 & BA-20 together, this represents my Rapid Fire! rule set Finnish
armoured car company.

Sunday, 7 April 2013

1/72 Unimodel BA-10 Armoured Car Pt. 3 - Cab

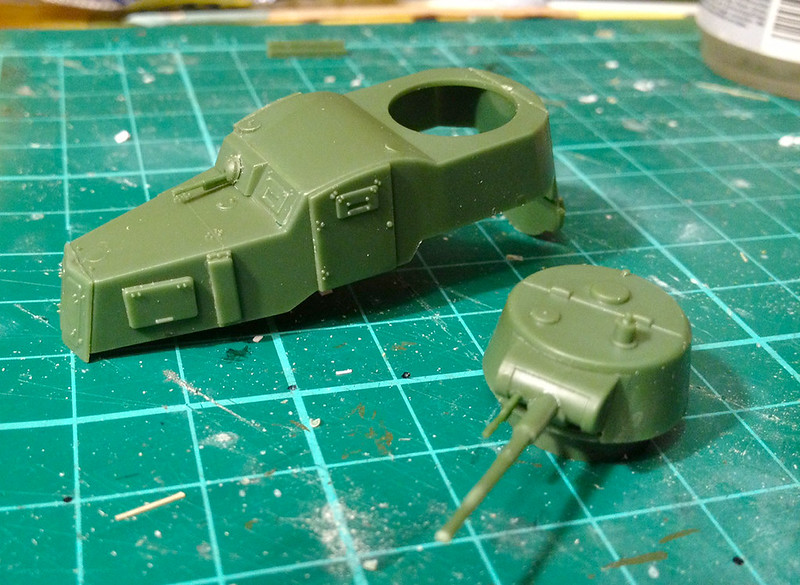
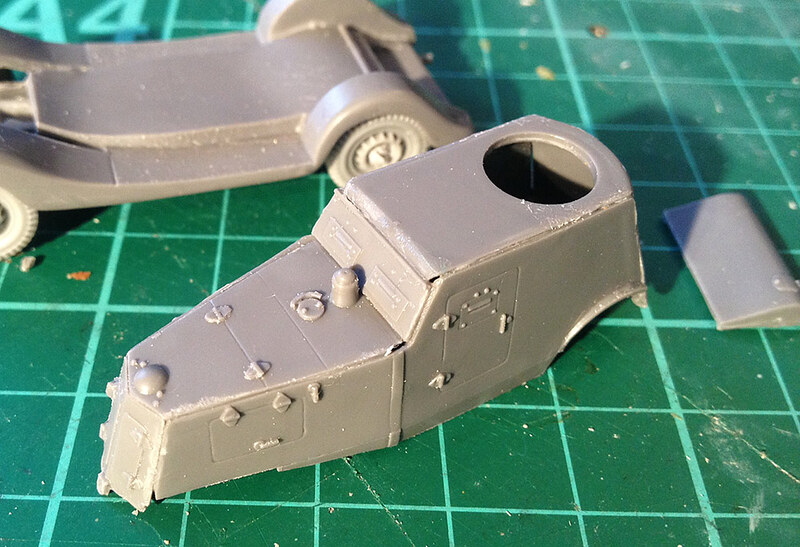
A nice way to finish off the weekend - some BA-10 relaxation. Once again the UM kit's complexity has turned a small job into a bit of a intense session. I did have to wonder if they really had to have separate parts for some of the features of the cab.


Take the engine hatches, I am pretty sure if I bought the Pegasus BA-6 kit that these hatches would be perfectly well represented by being moulded onto the hull's body itself. But would they be as sharply and delicately as defined as they are in the UM kit?

It is a nice kit - I shall have to get some more UM models.


My only criticism of this stage would be the delicacy of the guns. I would prefer to find a brass turned barrel to replace the 45mm main gun. The machine guns are a little fragile too.

Next: Mating the chassis to the cab and adding the additional hull features. Let's see if I can get the construction phase finished!

Monday, 1 April 2013

1/72 Unimodel BA-10 Armoured Car Pt. 2 - Wheels

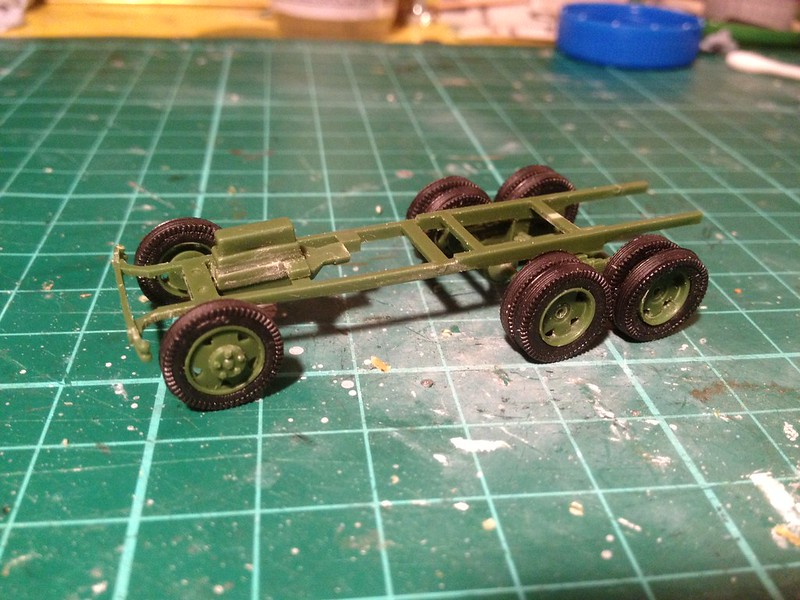
The UM model is a complex one, amazingly the construction of the wheels, suspension and lower chassis includes about 42 parts! So while it seems I haven't made a lot of progress here it actually feels like I have done a lot.


The rubber tyres are interesting to work with. There was a little flash around the inside which needs to be trimmed off with a sharp knife and then you slip them onto the wheels themselves. The fit is OK but some went on better specific ways round, and these pop off easily and look strange, so these ones were fitted onto the inside of the rear double sets.

There is also the issue of painting the tyres. I decided to not glue the double wheel sets together at this point so I could remove the tyres again and spray the wheels before the final construction. Otherwise getting at the inner wheels to paint them would be tricky.


Everything goes together easily enough though and unlike the ACE BA-20 kit I just constructed the UM model has very helpful pilot holes or makes it obvious where things are supposed to go.

So there we go, aside from being a little skeptical about the merits of real rubber tyres - precisely because of their flexibility - I am enjoying this construction so far. You could say that there is a little too much complexity, but that would depend of whether you are a war-gamer or a display modeller. You are certainly aren't going to be able to bang this one together in a hurry (try the Pegasus BA-6 which only has 23 parts in total if speed of build is your goal)!

Next: The upper chassis and hull.

Wednesday, 27 March 2013

ACE 1/72 BA-20 Armoured Car Pt. 3 - Construction III


While I did say that I had completed the basic construction of this model, I forgot the DIY aerial!

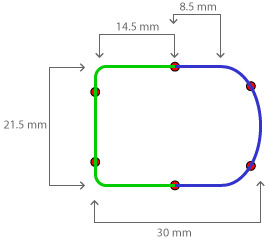
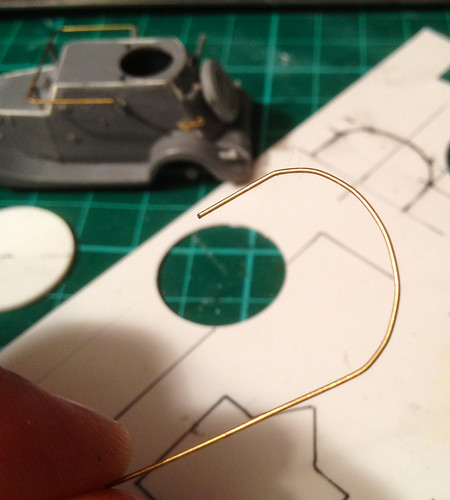
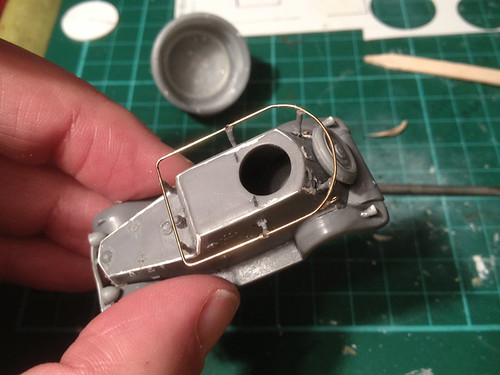
ACE leaves you to make the 'washing line aerial' for the BA-20, you use a length of thin wire - or brass rod in my case - and bend it to shape. It has to fit on top of the 6 support posts that ACE do supply. So, you have to get the measurements and shape of you wire aerial just right.


I started by drawing up a template to guide me in how and where I bent the wire - even so I had a couple of goes before I got it right. As shown in my diagram I divided this job up into two halves - front and rear, the rear half was the tricky curved part...


I tried making a small circular template out of plasticard so I could bend my wire into a semi-circle of the exact size I wanted, but this didn't work quite as I imagined. So it was down to good old fudging it and bending the curve by hand (fingers) and checking the shape against my diagram.

It seemed  to work well enough, I also kept checking my aerial's shape against the model and the support posts to make sure the wire would fit just right. Once I was happy with my aerial I glued it into place with super glue...


Hoo-rah! Job done, but now I will pause - I want the accompanying BA-10 armoured car model to be at the same stage so I can paint them together...So, it's on with my UM BA-10 kit.

Thursday, 14 March 2013

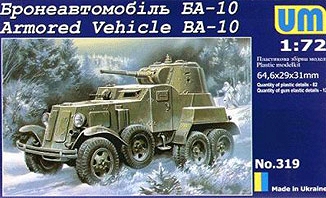
1/72 Unimodel BA-10 Armoured Car Pt. 1 - Unboxing


While I complete the construction of my ACE BA-20 armoured car I thought I would start off the BA-10 I got to accompany it as part of my Finnish Army recce company. Another Ukrainian made kit I had trepidations after my ACE BA-20 experience.

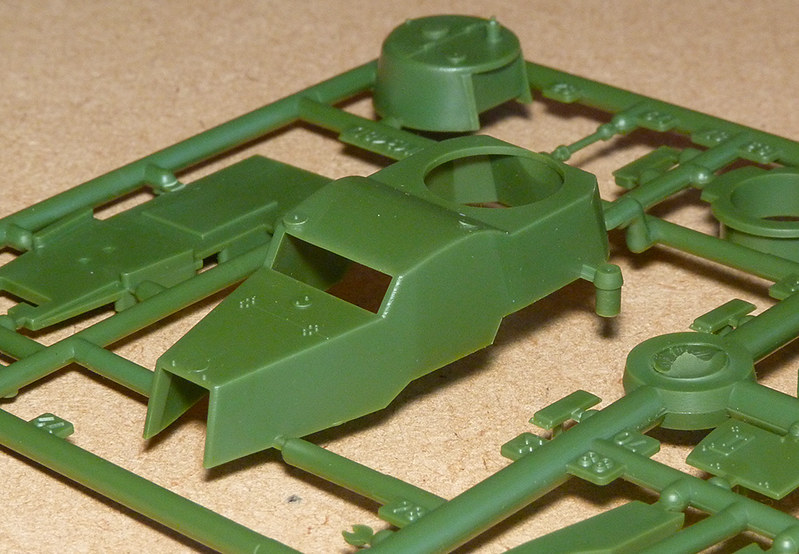
However, a quick look over the various sprues in this kit (4, plus bag of tyres) was enough to satisfy me that the general quality of this UM model was superior to the ACE kit.


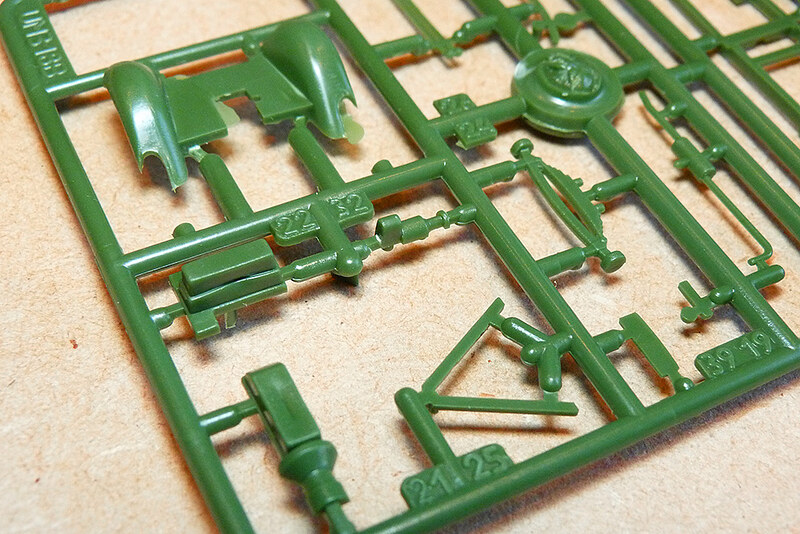
Moulded in a 'Russian green' plastic the parts are quite sharp and free of flash. Kudos UM!


No raggy edges or vague matching parts, everything looks likes they are meant to fit together tightly. But we shall see at the construction phase, still the look of the quality does instill some confidence.

Importantly - unlike the ACE BA-20 - each part is accompanied by very clear numerical IDs moulded onto the sprue...


This, of course, makes things a whole lot easier when it comes to identifying parts. Quite important when this model has more than 80 parts to it! Quite remarkable really.

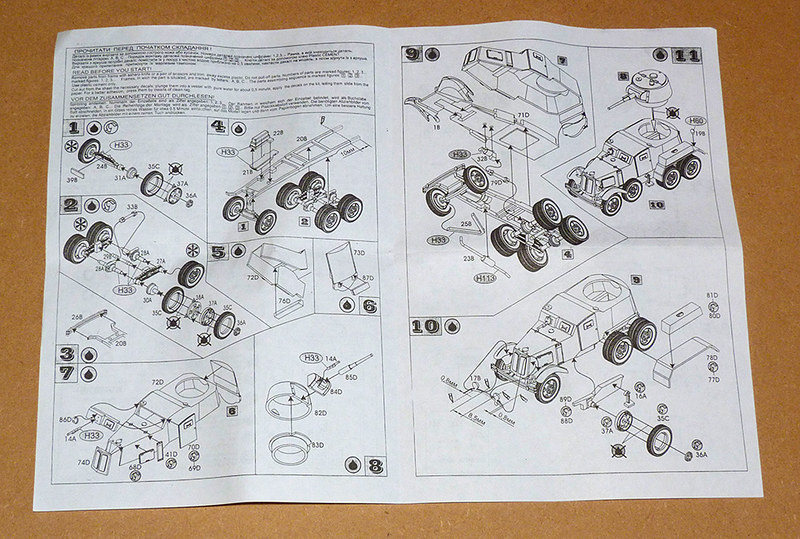
And talking of identifying parts, this brings me to the instruction sheet...


The instructions are quite clear and everything seems to have an obvious place to go, again unlike the ACE armoured car where here were no pilot holes to help connect components together. Probably just as well with so many parts to deal with.

Of particular note, I thought, were the nicely moulded black rubber tyres. I haven't dealt with rubber tyres before in the kits I have made so far so this should be interesting.

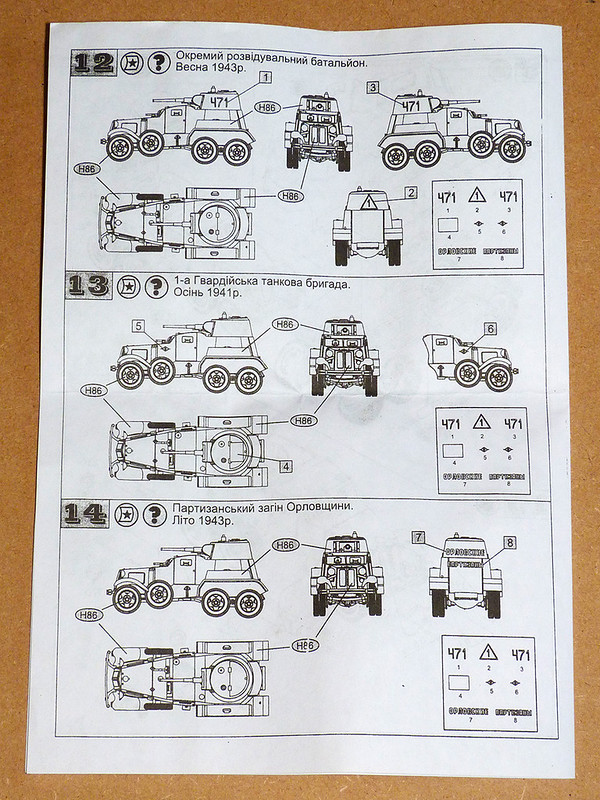
As to the historical schemes that are included, well according to the instruction sheet there are three. All Soviet.

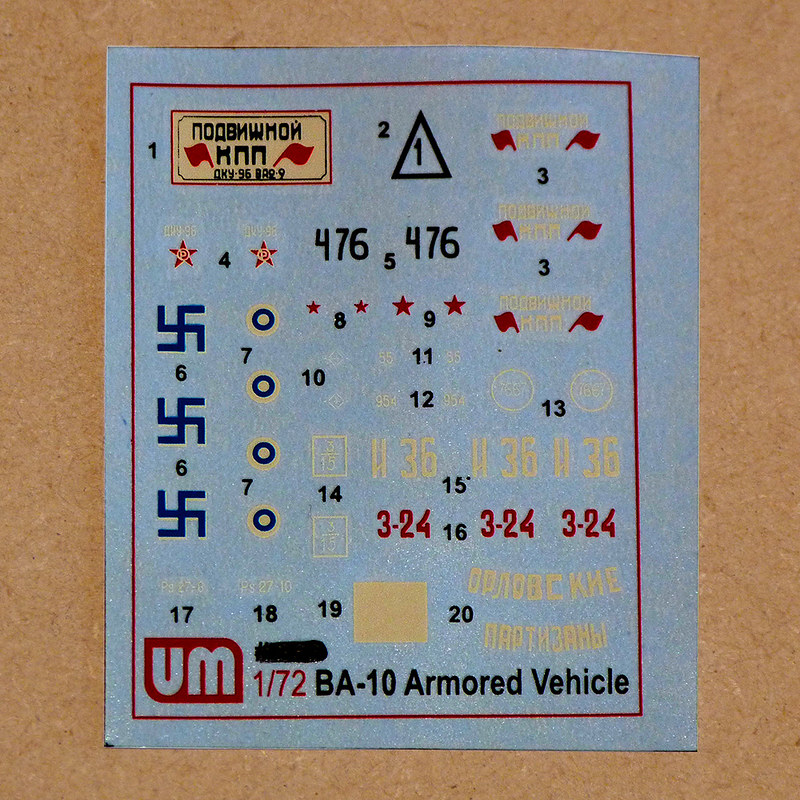
Now this is rather interesting as the decal sheet included in this kit also includes a Finnish option too. Good news for me you might think as I want to build this model as a 'liberated' Finnish  version of this vehicle. But no...

Unfortunately, and inexplicably, UniModels have included Finnish Hakenkruis (Finnish swastika) in completely the wrong colour. UM have supplied you with three medium blue swastikas on white outlines - while medium blue is correct for the Finnish air force of WW2 the Finnish army identified their armoured vehicles with a modified hakenkruis in black on an offset white outline.


There also appears to be a set of post-1945 Finnish roundels (as part of the peace agreement made between the Soviet Union and Finland in September 1944 the Finns got rid of their swastikas, for obvious reasons, and replaced them with blue and white roundels instead). Apparently the BA-10s (known to the Finns as the BAF C) served with the Finnish army until 1959, so these roundels would be appropriate if you wanted to build a post-war model.

Above: A captured Soviet BA-6 armoured car (predecessor to the BA-10) in use
with the Finnish army. You can see the off-set black swastika.


In conclusion, I am quite pleased so far with this UM kit, the first I have bought, and there are a lot of positive points especial compared to my recent ACE BA-20 build.

So, it's onto the construction...

Wednesday, 13 March 2013

ACE 1/72 BA-20 Armoured Car Pt. 3 - Construction II

Got most of the fiddly little bits added to my BA-20, now ready to make the wire 'clothes line' arial around the roof...


You can see the filling I had to do with white Milliput putty. But I also had to use putty on the front bumper which I snapped while removing it from the sprue and to make a new hub cap to replace one that the small parts goblin stole!

I've put off doing the wire arial tonight as I'm pooped, but I also wanted to give the super glue I used on the arial supports overnight to dry properly. It's getting there though.

Saturday, 9 March 2013

ACE 1/72 BA-20 Armoured Car Pt. 2 - Construction

I mentioned in my summary of the components contained within this kit that I was a little worried about fitting together of the parts when there were no obvious pilot holes. Well this issue did indeed come back to haunt me at the construction phase, most notably with the chassis...


The whole chassis is dependent on the placement of the leaf-spring suspension and these four parts simply lay on the main chassis body with no positive indentations - it's all down to your glue. These springs also suffer from flash and noticeable seams, which in itself I am not bothered about as these parts are - after all - underneath the car but what little detail there is on these parts soon evaporates after you sand away the offending rangam plastic.

I was also dubious about the centering of the axels. Again, with no pilot holes these have to be positioned largely by eye, though there are shallow notches in the springs which identify where they should go. But expect to have to dry fit the wheels a few time until you are satisfied that they  look OK under the mud guards.

And talking of the wheels, there was a lot of trimming and filing to be done to make the wheels fit correctly under the fenders as I found the axels a little too long.


Next, I had stupidly thought that after the fiddling about with the chassis that the main body of the car would be quite straight forward as they are all flattish plates. Oh dear, how wrong I was!

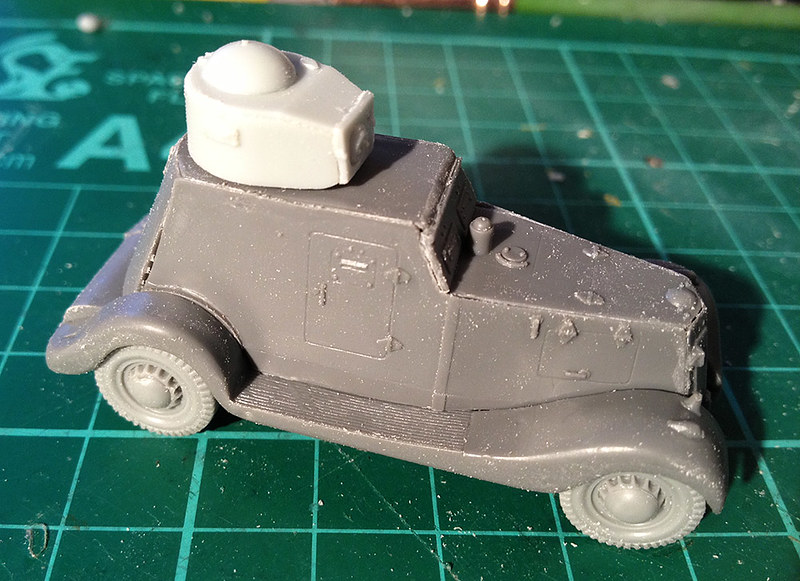
In the above photo I think you can make out the gaps between some of the hull parts - they just wouldn't fit together neatly. I wasn't too concerned because these can easily be filled with modeller's putty, but I was annoyed that I had to do so as these should have been fairly fool proof and uncomplicated parts.

Still, the best was saved for last, the turret...


Unfortunately my photo gives the impression that a - once again - fairly simple part fitted together and mated with other parts quite simply. Er, no. Amusingly the hole provided in the roof was way too small for the turret collar...Shazbat!

MORE sanding!

I think you can see that there are plenty of gaps between the ill-fitting parts. Really, £10.70?

Well, it all sort of went together in the end, but I haven't added smaller external components yet - like the arial or the machine guns - as I really felt like I needed a break before undertaking these. Next job, though, will be the filling of all the gaps and tidying up the edges.

...Grumble!

Friday, 8 March 2013

ACE 1/72 BA-20 Armoured Car Pt. 1 - Unboxing


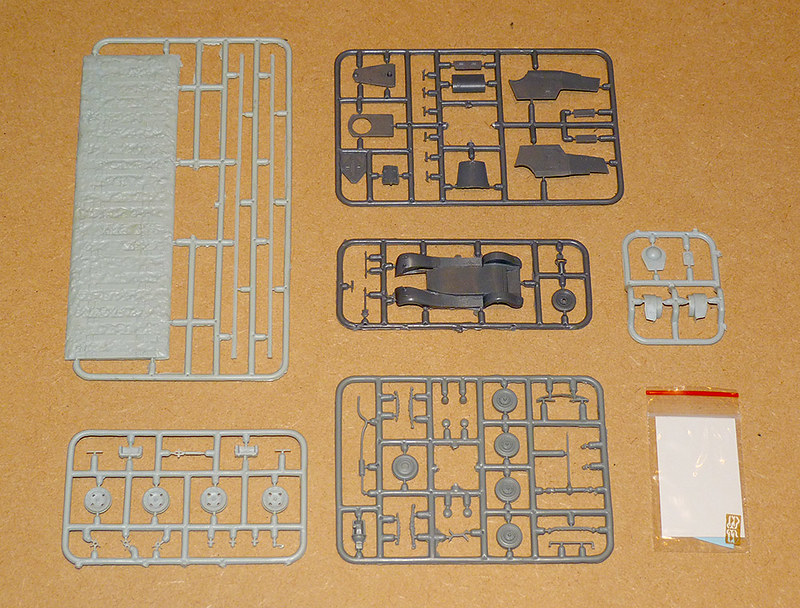
I was very excited as I cracked open the lid of this kit - I really like the look of this little armoured car. At first everything looked good, all sprues were encased in a sealed plastic bag (a good sign I thought) and inside this the tiny etched parts and decals were given their own separate plastic bag. On opening up the main bag this is what I got...


Notable among these are the two light grey sprues on the left - one is the small railway diorama (which I won't be needing, but thanks anyway) and the other is the railway wheels set. Obviously these will both be assigned to my spares box, but I am glad they are separates - it tells me that ACE added these to a basic BA-20 that they must've done. But more importantly...


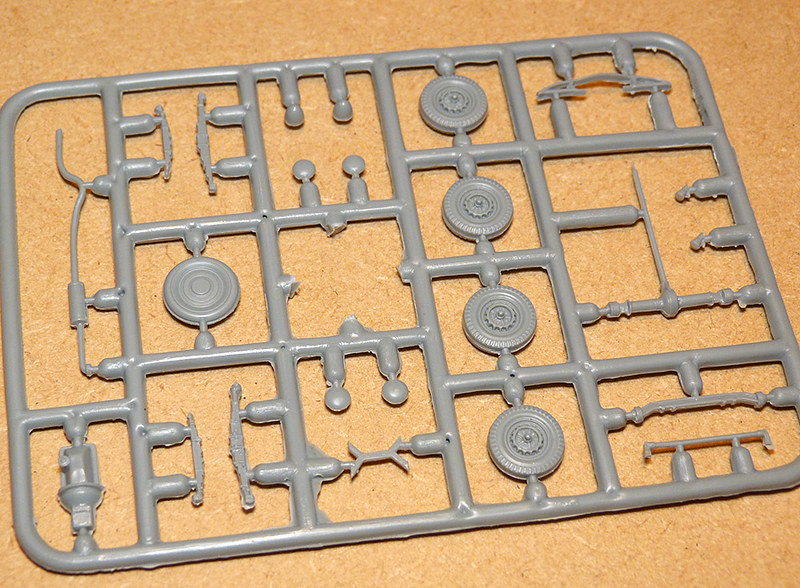
The normal road wheels come on their own sprue. These are solid plastic wheels and tyres, but I do like both the level of detail and the fact they come with optional domed hub caps.

Now, I won't go through every sprue individually, but I do want to show you this one - the chassis sprue - in some detail. Now do bear in mind that out of the two armoured car kits I bought - this one and the UM BA-10 - this kit was the more expensive (£10.70) so the quality of this main component is interesting to say the least...


Just in case you can't make out what I am trying to get at, here is the same sprue photographed from a more side-on angle...


The phrase 'rough round the edges' comes to mind. Practically all parts in this kit, in fact, come with a fine film of flash around the seams and in this case the edges of the chassis are in need of a good sanding and the roughness has ruined the little lip which runs around this component. I shall have to do a bit of repairing here to smooth things out.


The above photo shows the quality of some of the panel line detail - they aren't the sharpest lines in the world, just OK. But maybe I am being too picky, I am sure they will be serviceable enough and will be picked up nicely at the painting stage.


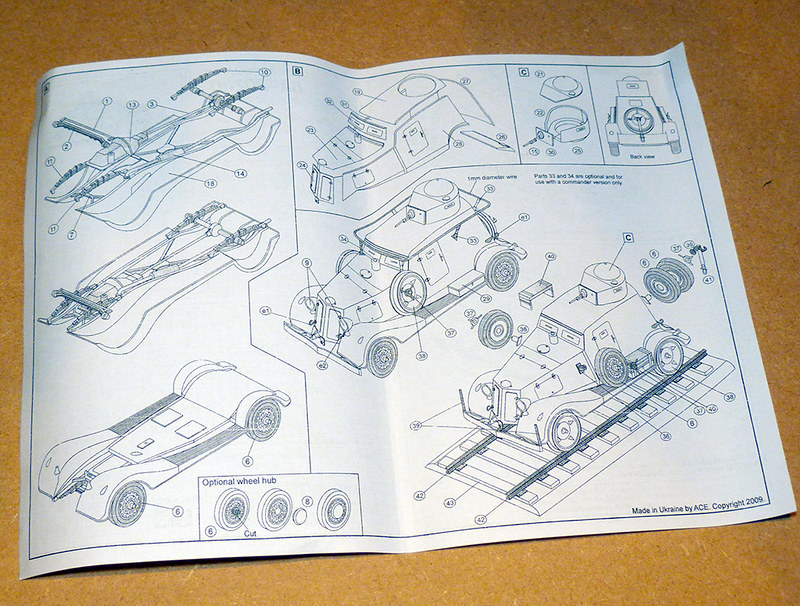
Instructions are clear enough, but while test fitting some of the parts I did find that ACE have left you to try and figure out the best place to glue some of the parts. The suspension in particular has a noticeable lack of pilot holes to guide your assembly.

Edit: Nearly forgot an important issue. While the instruction sheet clearly numbers each component ACE neglected to add these numbers to the sprues themselves! Common sense helps you identify parts, but in some cases - like the suspension springs - there can be some confusion.

One thing to note is that you have to make the 'clothes line' antenna yourself out of some spare thin wire, not a big problem but the war gamer may chose to skip this fiddly step (some BA-20s were not equipped with this option anyway). And the last parts are the etched ones, four tiny brass tow hooks, a indication, to my mind, that ACE is not up to moulding more delicate parts in plastic.

Finally, there are the decals - well, this particular version only comes with one set, some German crosses. I suppose my hope that they might have included some Soviet or Finnish decals to make the alternative road car was asking too much!

Above: A lovely built example of this kit by Neil Lyall. Photo
source: Henk of Holland's ACE WW2 models review section.

Overall I don't really think I am getting my ten quids worth here, but there again it is a relatively rare subject for 1/72 and I couldn't find any alternative, so beggars can't be choosers in my case. The quality of parts are mediocre, reminiscent of some of the older Airfix kits and I really did expect more.

It will be interesting to compare the quality of this to the UM BA-10 I have bought to accompany this BA-20. Both are Ukrainian made kits, I believe, but the UM armoured car was priced at a rather more palatable £7 (though do remember that you get TWO Pegasus BA-6 armoured cars for £9). It all depends wether, like me, you especially wanted this particular armoured car or not.