Friday, 31 March 2017

28mm Buildings - Part 2

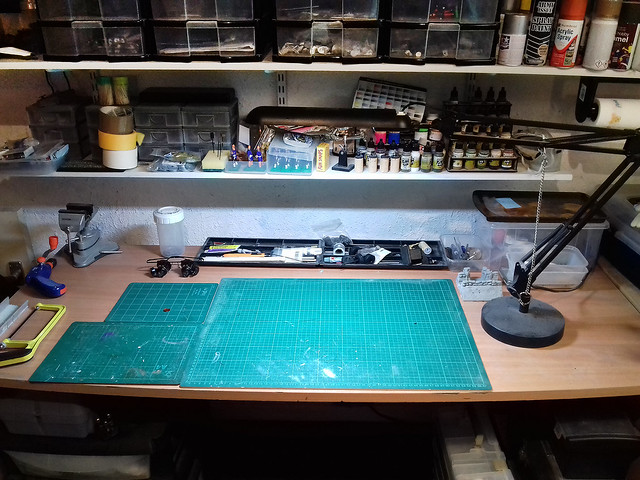
Before I do anything, I had one important job to do and that was to create some workspace for these larger models. My attic mancave has been out of action for some time, but now I can no longer put off the inevitable...I have to tidy my work bench!

This took a few hours...


First Test Example
As usual, when trying out something new, I begin with a test model. In this case, there is a lot that I am trying out for the first time, so there will be plenty of experimentation on my poor guinea pig!


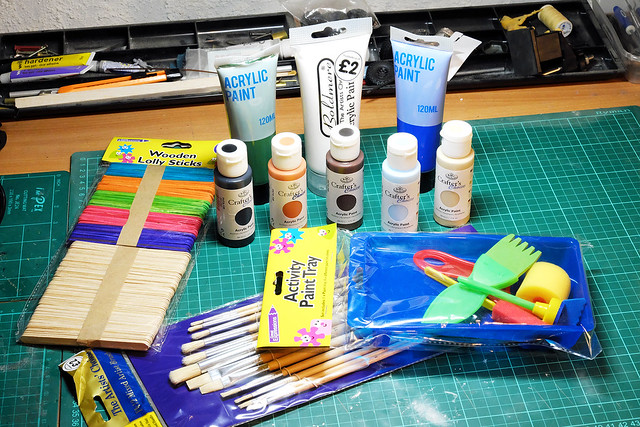
For starters, because these are pretty big models, I won't be using my normal Vallejo Model Color paints as these won't last two minutes with the amount of paint I will need. So, I am taking a bit of a gamble and buying some very cheap 'acrylics' (as I have to be careful with my budget as the club is paying). And while I was at it, I bought some very cheap and nasty brushes from my local low-cost crafts store...


There are a mixture of cheap acrylic paints here, some from Ryman (£1 each) and then a couple of large tubes from Poundland, and finally, a big tube of white from xxxxx. Honestly, I have no idea if these paints will be any good!

Obviously, spray can acrylics would have been the fastest way to do this, but I am really trying to keep costs down. So, I bought just one can of spray primer (Wilkos grey primer, £3.50) and will colour my buildings with the cheap acrylics.

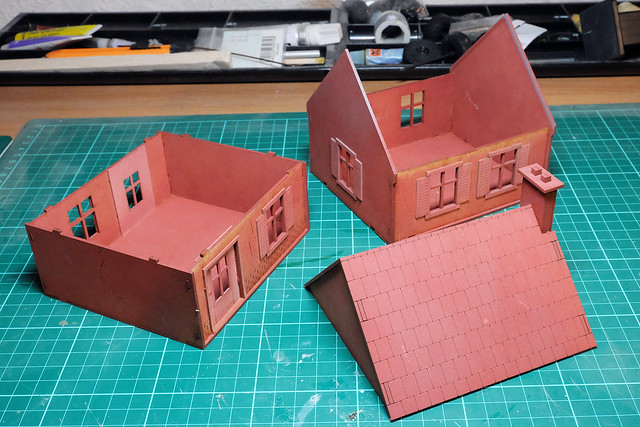
Because these are wargaming buildings, these models disassemble so that you can place figures on either floor inside the house. This is rather handy for painting purposes...


Priming is very easy, and the Wilko's grey went on beautifully...
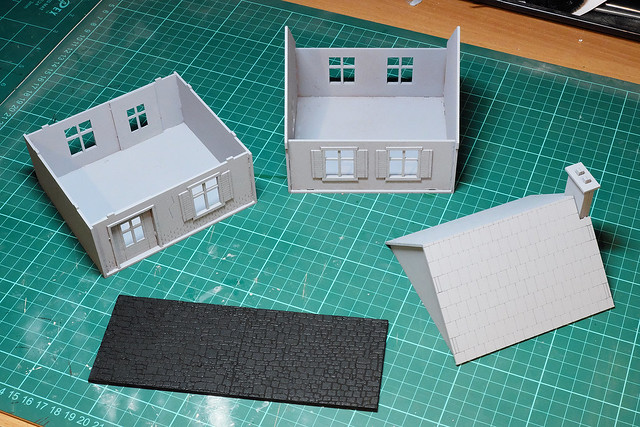
I'm also painting some sections of cobblestone road!
Painting with cheap acrylics
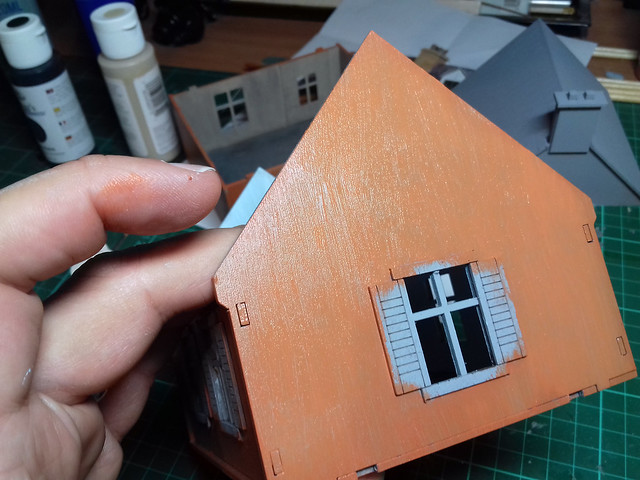
For once, I just launched myself into this and started to slap on some of the cheap acrylic paints. I knew I was going for a 'rustic' French rural look, so I wasn't too fussy about nice flat coverage...In this particular case, I thought streaky and patchy would be good...
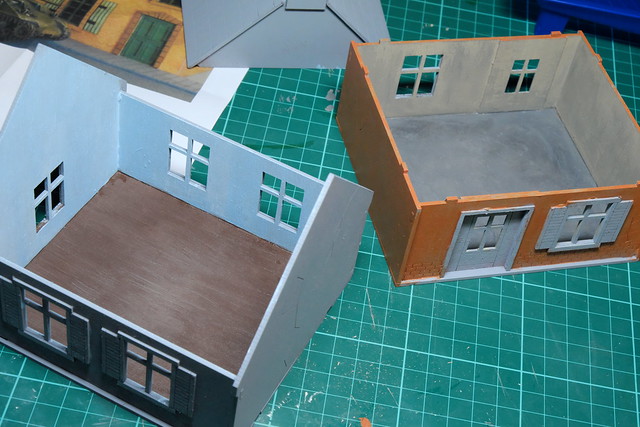
Straight in! I quickly laid down the inside walls before painting the ground
floor outer wall. Two coats are definitely needed.
This was just as well as the cheap acrylic paints were horrible. I guess they are really made for kids crafts so it's a case of quantity over quality with them. But these cheap paints also have an unpleasant 'oily' sort of texture to them so tend to be a little streaky, and this wasn't helped by the very cheap brushes I was using.

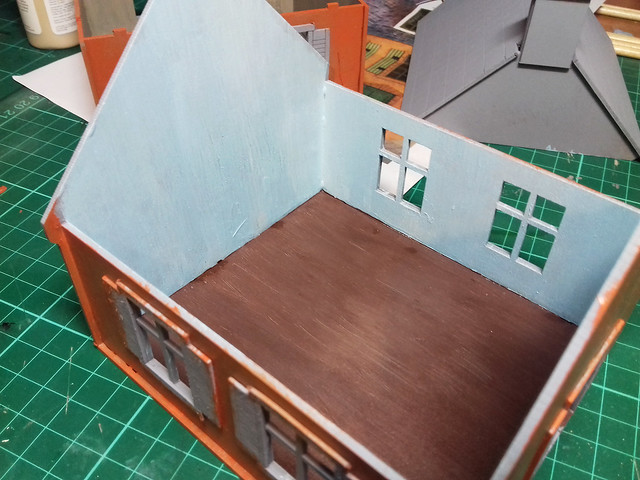
In fact, I found that the best way to treat these paints was as 'poor man's oil paints' and in this way I created some nice textured effects, like this 'wooden' floor...


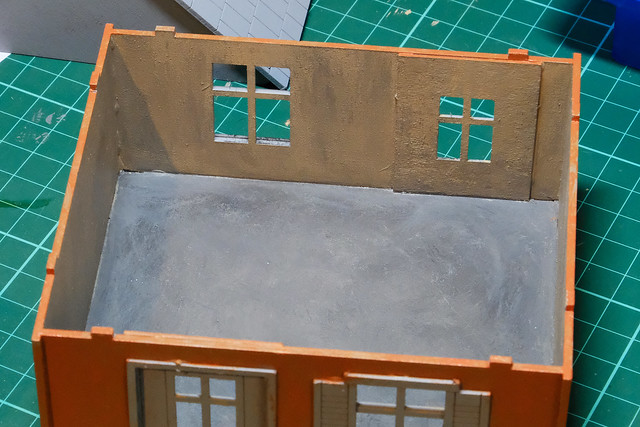
The knack was to apply a first coat fairly loosely and not to worry about the streak BUT make sure that your brush strokes (and streaks) are in one direction. In the case of my wooden floor, I ran the streaks along the length of the house to create a sort of wood grain effect. And with my ground floor stone floor I applied the paint in blended streaks in a generally circular manner, creating a gradient effect in from the outer edges...


You can also see how patchy I have left the walls, hopefully, this will look intended and 'rustic' and not just like a bad paint job (on my part)!

Perhaps this picture gives you an idea about how gloopy and streaky the cheap paint is...


This 'faux-texture' with thick paint is great when the model doesn't have any surface detail in itself as it adds some interest to plain flat MDF walls and floors. Had the models included surface detail - like floorboards or bricks - I would have been tempted to do a nice flat base coat and then apply a wash over the top of that to bring out the detail.


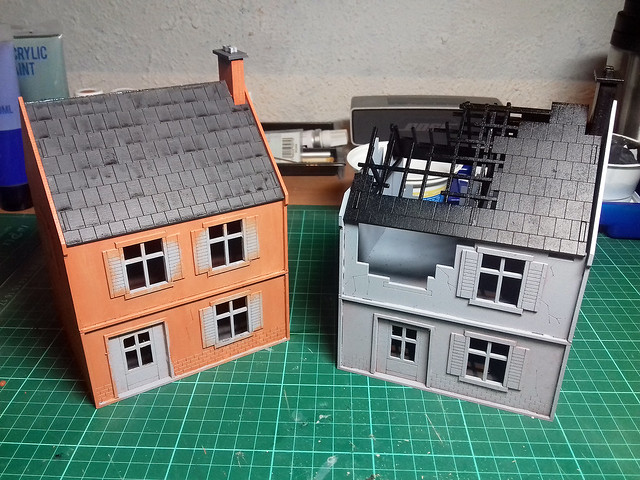
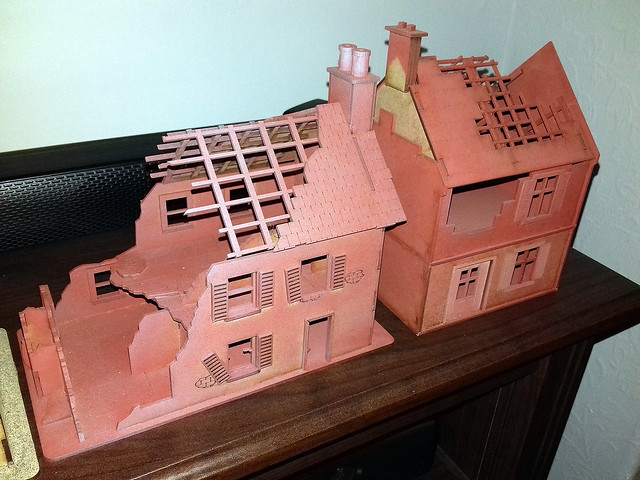
My test is coming along nicely, and as I'm pushed for time I've decided I am confident enough to begin work on the other buildings. I quite satisfied with the approach that I've taken, so I'm getting a little production line going with the priming coats being applied to all the remaining models.

Sometimes, as in the case of the damaged building in the above picture, I am priming with black where I feel it is appropriate. And, as for my test example, it's on with the detail painting - things like the shutters and doors, etc.

At this stage, I'm feeling a little more happy with the time I have available to me. I'll just have to try very hard not to get bogged down with too much detailed work and adding supperfluous weathering and what not!
Wednesday, 29 March 2017

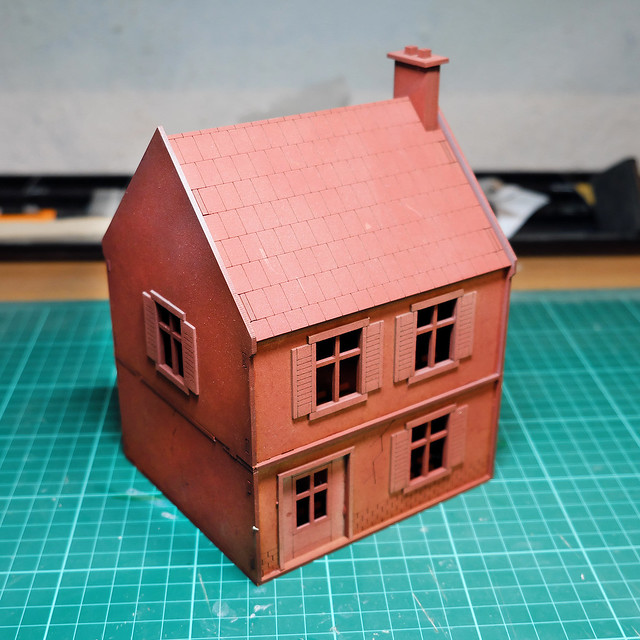
Emergency 28mm 'Normandy' Housing Project!
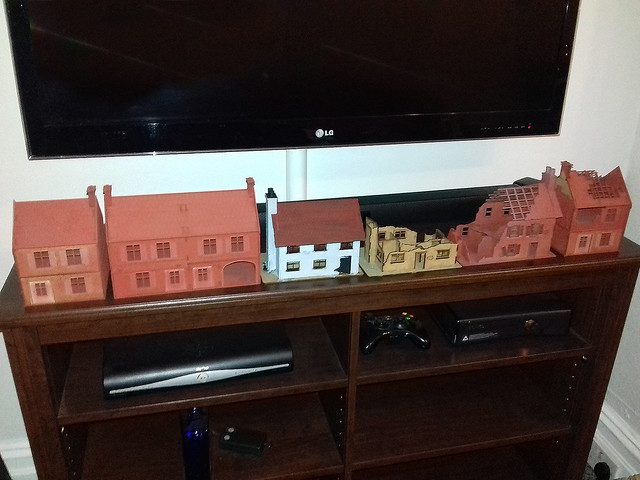
...Hold everything else! I have - rather madly - 'volunteered' myself to paint half a dozen 28mm buildings for my local club. There are holding a demo game - Bolt Action Normandy themed - in a weeks time!


...But that's not the bad news...The bad news is that I have *never* painted a model building before!

OK, I did that Berlin diorama facade, but that was in 1/72 and also I had all the time in the world to work on it. And as you all know by now - I am NOT the fastest modeller/painter in the world!

I didn't even know where to start with these models, but luckily - as usual - there is a YouTube tutorial that covers this sort of thing...


Lots of big brushes and plenty of dry brushing seems to be my only hope...I am really worried I have bitten off more than I can chew this time!


Edit: Here's another video that has some useful techniques for painting buildings fairly quickly. One of the things that has surprised me - and I have started doing some research on French village houses of the period - is the use of some quite bright pastel colours - lemon yellows, sky blues, peach reds, etc. It's not just all grey!

Thursday, 23 March 2017

MW 1/72 GAZ AA Truck - Part 4.5

Apologies for the 'micro-posting', but just finished this (early morning start) and wanted to post it up as it will be a few days before I have time to do any more model stuff.

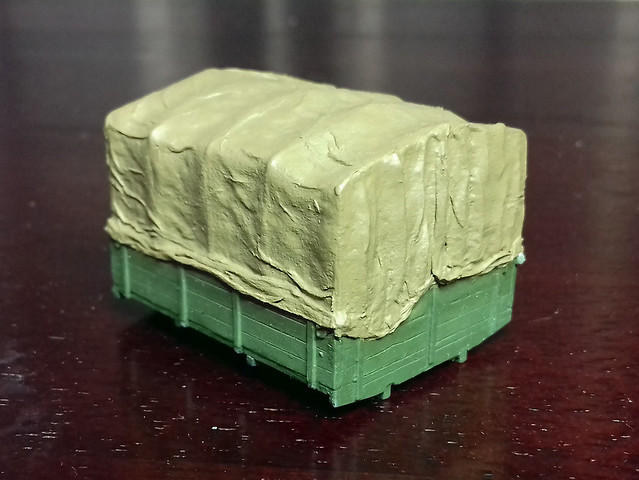
I got the base colours on my 'canvas tarp'...


I got lots of really good feedback and suggestions from the Facebook modelling groups I posted my progress on.This included a great idea for improving this method...

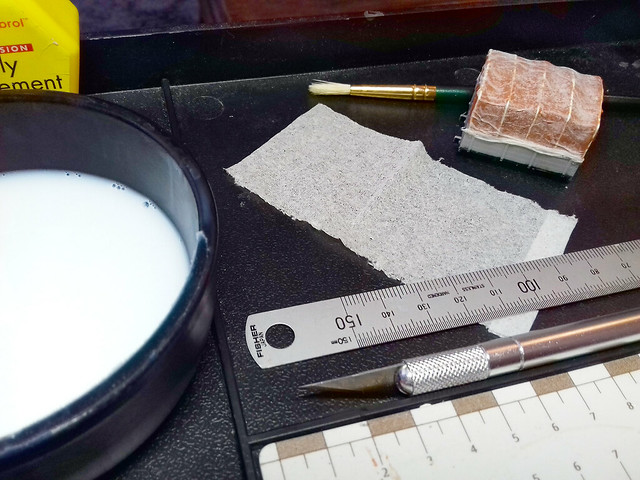
One of the problems with paper tissue is that it has a tendency to tear and even dissolve when it gets too wet (as I found with my first attempt) and it's not easy to handle and reposition. So, I've been advised to try out wet wipes (you know, the baby cleaning tissues) as they are made out of a plastic-based material (which is why you shouldn't flush them) and so don't tear as easily.

You just let the wet wipe dry out a little (stick it on top of a radiator) and then apply the diluted PVA as normal. Good tip (thanks GReg)!

Wednesday, 22 March 2017

MW 1/72 GAZ AA Truck - Part 4

Making a Canvas Tarpaulin
As mentioned in the previous post, I am going to make my actual canvas material using tissue soaked in PVA. However, to give this material a shape which looks like canvas draped over a frame - with all it's natural folds and wrinkles - I will be adding some texture to my 'frame' so that the wet tissue conforms to a tilt cover texture and shape.

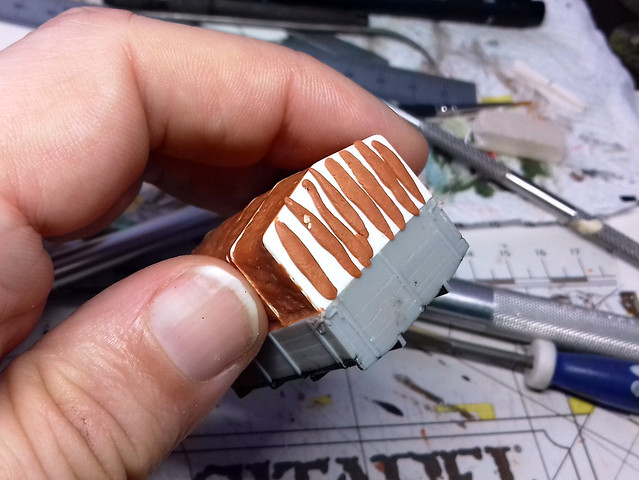
Here, I begin to add some underlaying 'fold' shapes to my framework using pieces of Milliput...


I then form these putty worms into - hopefully - waves...


Let's get sticky!
Never having done this before, I am playing this by ear! The premise is simple, soak some tissue paper - in this case a piece of Kleenex tissue - in watered down PVA glue and then wrap it over the frame I have made...Let the fun begin!


My first attempt was to dunk the tissue into the pot of glue and then try to lay it over my frame...WRONG! This was a complete disaster, as the soaked tissue started was a nightmare to handle and ended up becoming a soggy ball of mush...

So, second attempt, I laid a pre cut rectangle of tissue onto my frame and then dabbed on some of my PVA mix with a brush...Better. BUT, wet tissue stretches and I ended up with a larger 'canvas' than I needed AND wet tissue is a pig to trim, no matter how sharp your craft knife is...

Third attempt: So, what you do is carefully measure and cut your tissue to roughly the size and shape you want, taking into consideration the additional couple of millimetres that the material will stretch, then lay it on your frame, then apply the diluted PVA.

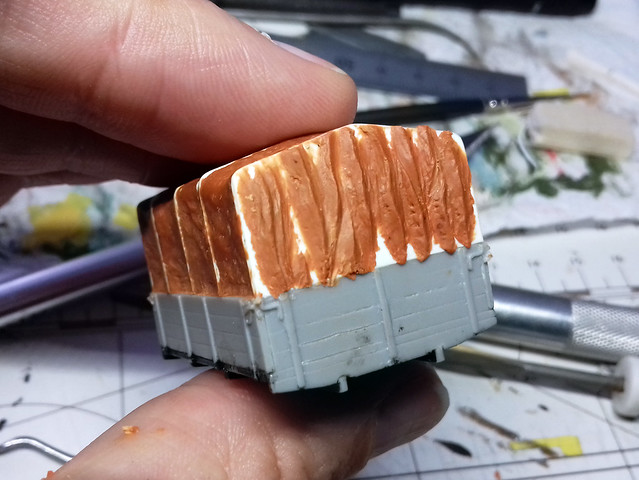
You can move the wet tissue around a bit to create little folds and wrinkles, and when you are happy with how it looks leave it to dry...


The wet tissue clings to the textured frame and so you benefit from any shapes you made with your Milliput. The tissue dries fairly solid so you don't have to worry about damaging it when handelling.

You can maybe just make out that you also get a nice texture from the paper itself, further adding to the look of canvas...Though, obviously, this will all look better when painted.

Getting the hang of it now...
By the time I applied the top and front canvas pieces and got to the rear 'flap' I began to get a feel for working with this stuff...


The trick is to wet the frame a little and then lay your tissue piece in place (the little wetness holds the tissue in place but you can still move it around to position it correctly). Then, when you are happy with the position you can then brush on extra diluted PVA over the tissue and start wrinkling it up a bit with the tip of your brush.

I suppose it's a bit like mini-wallpapering, but you are trying NOT to be neat! (Which is handy as I am rubbish at wallpapering.)

Another 'trick' I discovered is that you can add further pieces of tissue on top of tissue you have already laid if you want extra folds. This is how I made the rear flap.

Next: Well, I'll leave this to dry thoroughly now, then I'll prime it. Be interesting to see how 'realistic' the folds look with a bit of paint on them!

Tuesday, 21 March 2017

MW 1/72 GAZ AA Truck - Part 3

Constructing the Tilt Canvas
As mentioned, the MW kit does not come with a tilt canvas cover. For the most part, it seems to have been deemed either unnecessary or a bit of an inconvenience, but there are some instances where they were used. (I cannot find any reference which mentions whether the GAZ AA came supplied with a tilt cover from the factory, or whether it was a field modification or later upgrade.)

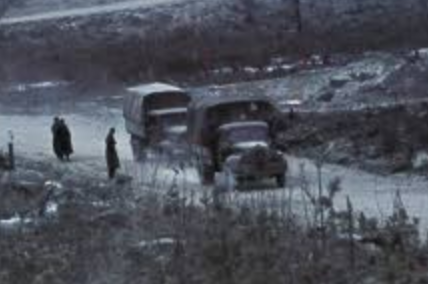
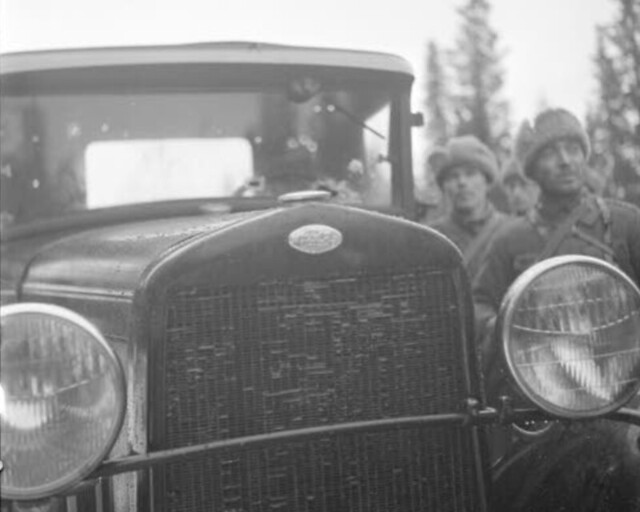
The only example of a Russian truck in Finnish service wth a tilt canvas fitted
(rearmost truck) that I could find. This may be a Zis 5 rather than a Gaz, I can't
quite tell. But it's all the reference I need to say that my Gaz *could* have had
one! Source: SA KUVA
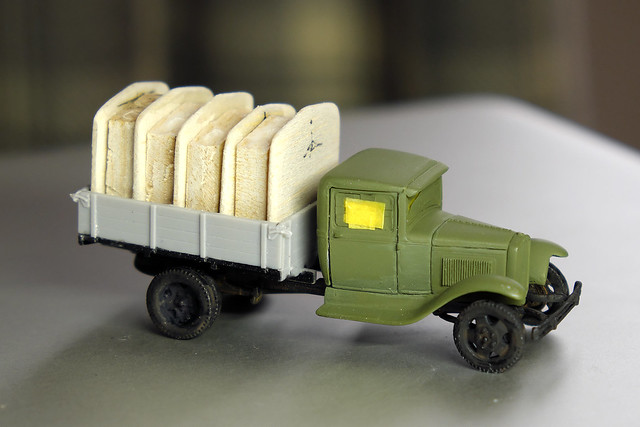
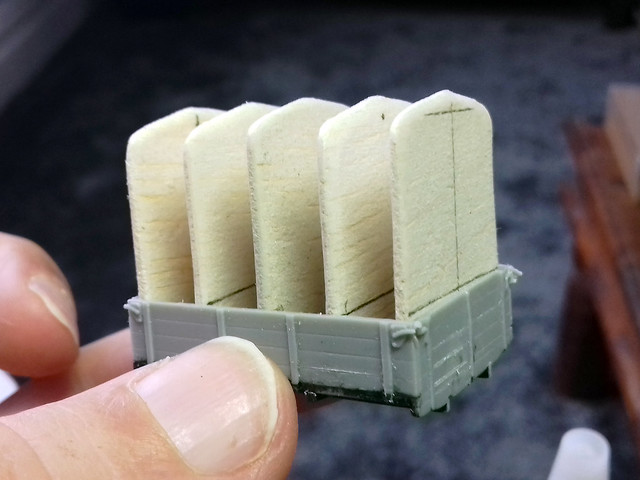
Anyway, I want my GAZ to be fitted with a canvas 'tilt', which means making one. I decided to try making a basic frame using balsa wood - as it's very easy to work with - and then to cover it with another material to make the canvas itself...


The five 'fins' are to represent the supporting frame rods and the four intervening balsa blocks are just fillers to support the overlaid 'canvas' - these are recessed so I can give the covers a loose and undulating look.

Making the Canvas Material
There are a couple of different ways I could create the canvas itself. I could wrap some tape or other paper-like material over the frame I made or I could build up a canvas using Milliput putty...

AND STOP! --->

...Not everything I do works out, and this is an example of something I did that didn't work!

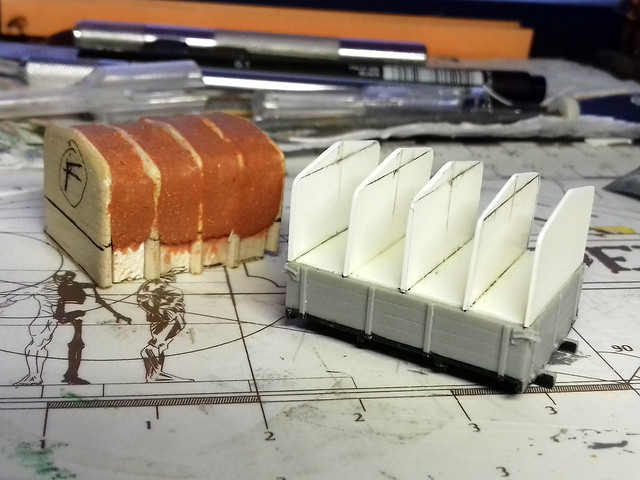
Basically, I made a bit of a faux pas in my measurement with my balsa frame and so I had to start all over and this time I made a plasticard frame (as I also wasn't happy with the thickness of the balsa I used in my first attempt) and mounted it on the outside edges of the cargo flatbed (instead of inside the cargo frame)...

My Mk. II frame (front) compared to my failed Mk. I version (rear).
I was happy with using the terracotta Milliput as the filler because I was getting some nice texture with it, but the balsa frames were far too thick. So, back to square one - I've rebuilt the frame using a thinner plasticard and I will use the brown Milliput again to fill the spaces in between...


Right...With the underlying 'frame' of the canvas done, it's time to think about the canvas cover material. My plan is to use PVA soaked tissue paper to cover the frame so it has more of a 'fabric' texture to the cover and also so I can add some believable folds and wrinkles in the trampoline.

I've never done this before, but it's a pretty common technique among military modellers so there lots of tutorials out there. However, I get the feeling it's one of those things you have to learn by doing!

...Fingers crossed!

Sunday, 19 March 2017

Bolt Action British Commandos Part 8

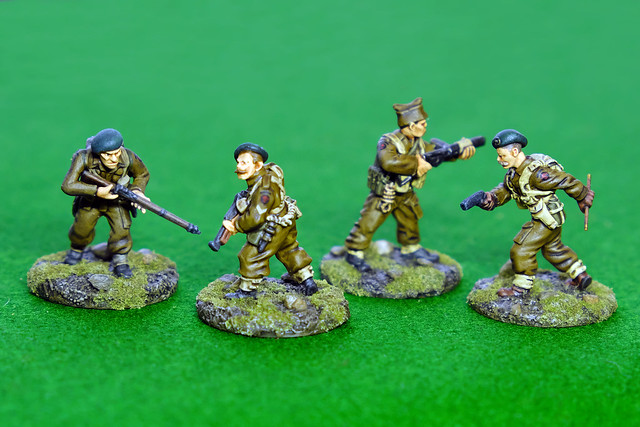
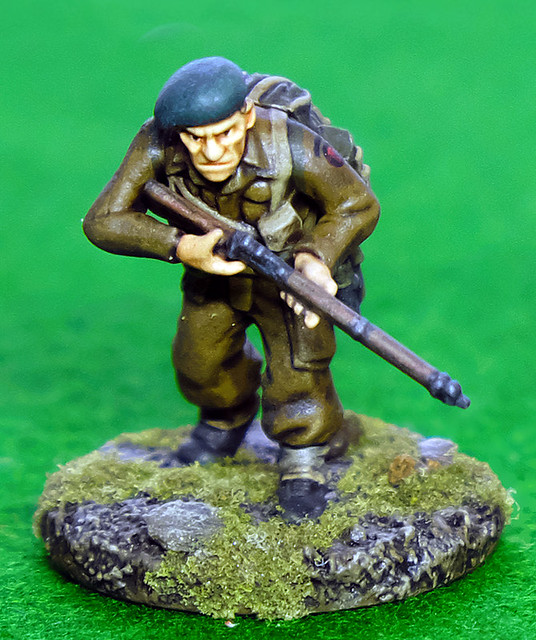
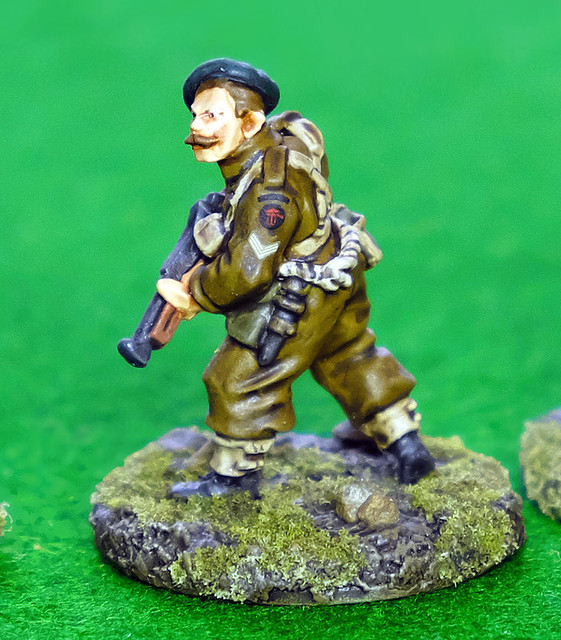
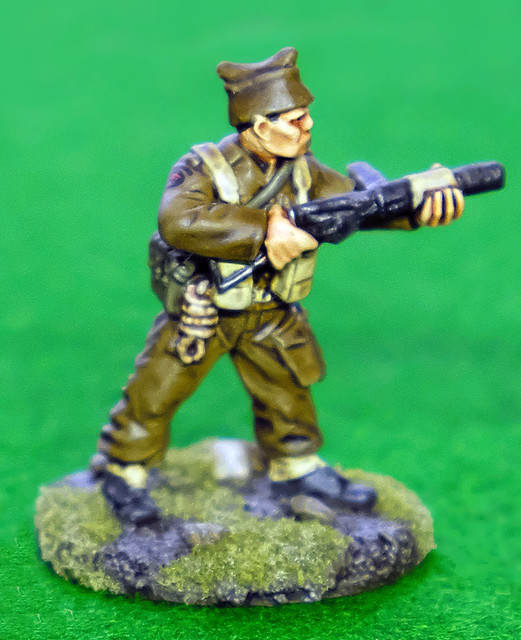
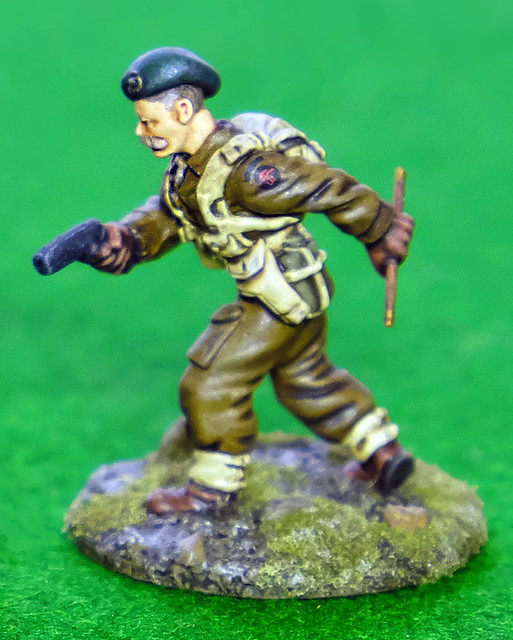
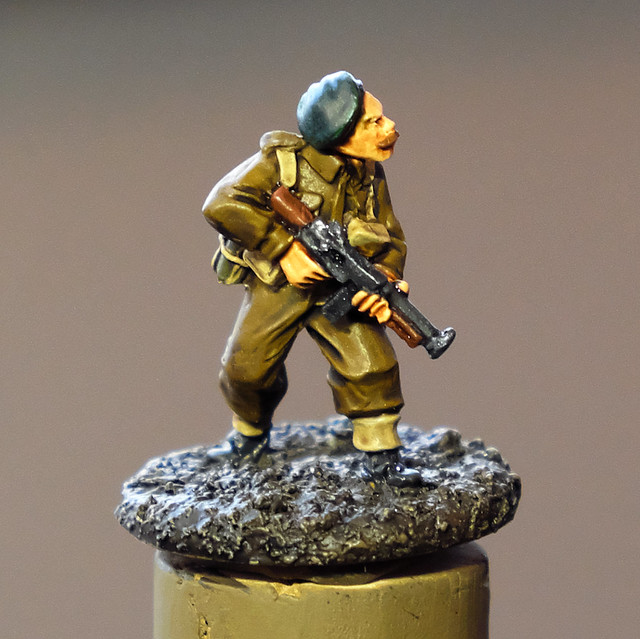
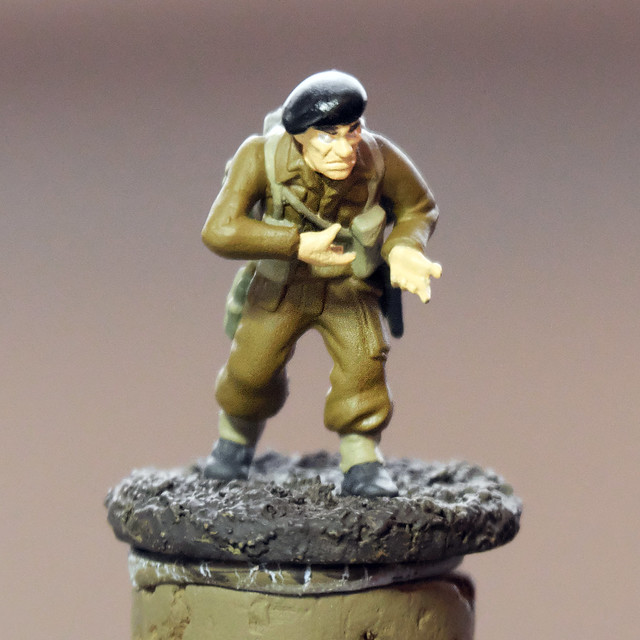
Finished the initial test figures...
Well, about time I finished something! Because these were my first experiments with 28mm figure painting it took a bit longer than I expected, mainly because I changed my mind about my colours a few times.


Like I said in an earlier post, the colours aren't exactly historically accurate. Rather, I have modified the colour palette used to suit tabletop gaming (so the contrast and lightness is somewhat exaggerated). Having said that, I am quite pleased for my first attempt.


That done, now the real work begins...I shall be starting to put together my first Bolt Action Commando platoon!

Saturday, 18 March 2017

MW 1/72 GAZ AA Truck - Part 2

The Finns 'liberated' their Gaz trucks from the Red Army. In this case the
driver was persuaded to vacate his vehicle with the help of three bullets.
Source: SA KUVA
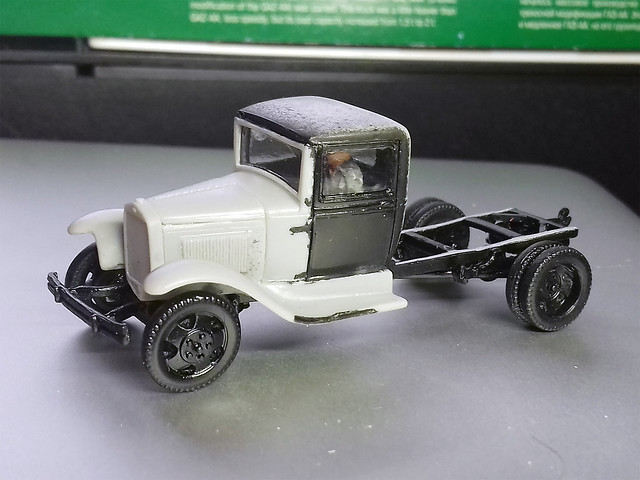
Although I kind of completed the basic construction of this kit along the lines of the instructions, there were some areas I was not happy with and so had to rectify these issues before I begun painting. They were just minor adjustments and some of them had to do with my preferred way of putting together a truck kit based on my experience with previous kits.

So let's go through them...

1. The Cab - Interior Painting
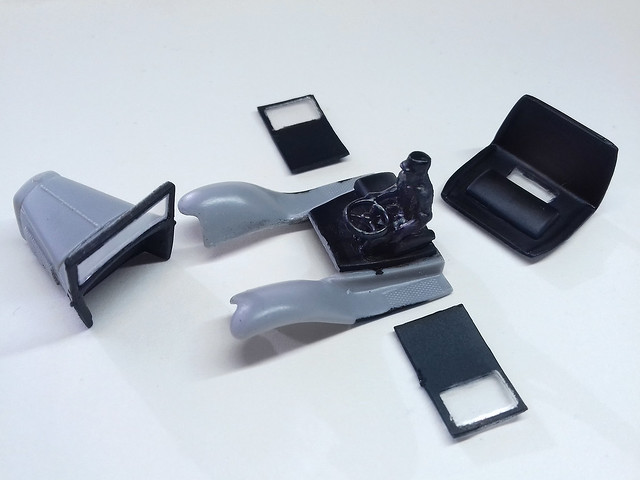
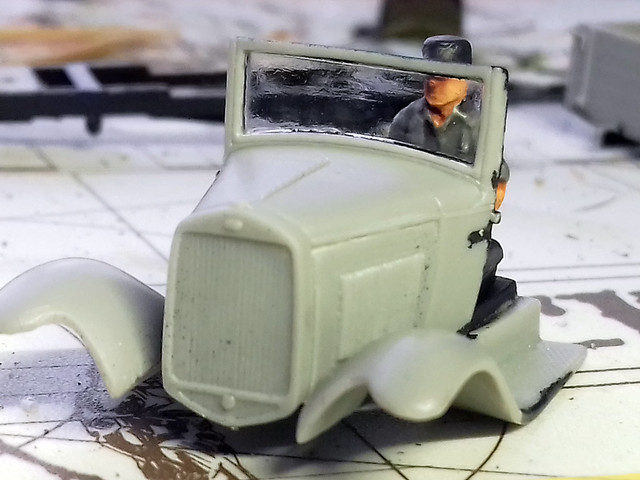
This is the one sub-assembly that I am 'doing my own way' principally because I am adding a driver figure. The MW kit cab was not designed with the inclusion of a driver in mind and that caused all sorts of fit problems.

The upshot is that my inclusion of a driver has pretty much mangled the cab interior - which does come with a certain amount of detail which I cannot now include. Therefore, to hide my ham-fisted modifications I am 'blacking out' the cab interior so it is less noticeable from the outside (once the cab is put together).


All I want is the faint impression of a driver to be just visible through the windshield. The black interior making the figure a shadowy one (in theory).

2. The Chassis - Bumper
As it was there was too little space between the wheels and the bumper in this kit (they were nearly touching each other). So, I extended the length of the bumpers 'braces' by adding a couple of millimetres of brass rod.


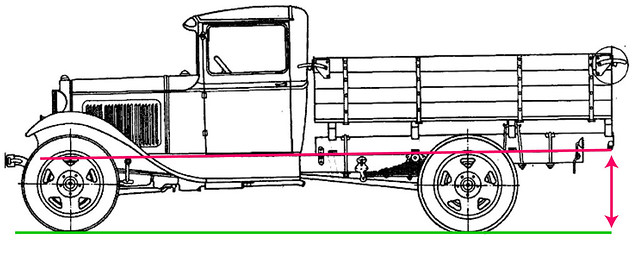
I used the 'Engines of the Red Army in WW2' website for reference, they have a page devoted to the Gaz AA and you can see the correct spacing for the bumper: ERAW2 - GAZ-AA, 1½-ton 4x2, Cargo Truck.

Also, note - when you look at this reference - that the back of the truck is raised slightly on its rear suspension. This is something that isn't clear in the instructions, and - as I did at first - you might think that the chassis should be level, but this isn't the case...

3. The Tilt Canvas Scratch Build
I've made canvas truck covers before and there are many different ways to do them, with many different kinds of materials. I'm tinkering with some balsa wood to make the canvas cover supports and will put something like masking tape over this to form the basis for the actual canvas itself...


Over the top of the masking tape I might (I haven't decided yet) wraps some PVA soaked tissue paper to get the canvas texture and wrinkles...We shall see.

4. Wheely Necessary?
The last sub-assembly/s are the wheels. As I mentioned in my first post on this project, the MW wheels aren't terrific. Not only is there no outer tire tread pattern, but the holes in the hubs on the rear wheels are filled in. I guess I could have tried to drill these out, but I am opting to paint the 'holes' black instead.

5. Note on 'Windows'
The inclusion of transparent plastic parts for the kit is a great idea and for the majority of modellers they may 'do'. However, the transparent plastic parts aren't altogether clear and there is some distortions and blemishes that come with cheap transparent plastic. The 'windows' are also quite thick.

The 'glass' is a little distorted and unclear in places, but I may camouflage this
by adding a layer of 'dust' and muck on the windscreen!
If you are a 'display modeller' you might want to replace these parts with - I'm sorry to say - acetate cut to size. They will be clearer and a better - more realistic - thickness. For me, the MW 'glass' will do fine.

The 'glass' in place and coated with Klear, it was now - finally - the time to close up the cab...


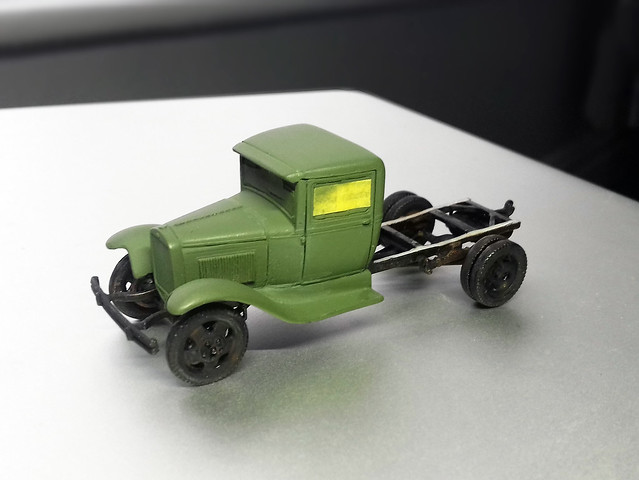
It looks a little messy as only parts of the model are primed, hopefully, it will all come together in the next stage when I apply the base coat of Light Olive (fingers crossed)!

Postscript: I actually made some progress on getting the base coat on the cab and some preparatory weathering on the chassis...

Tuesday, 14 March 2017

Commando Figures - Basing

The whole purpose of doing this blog was supposed to be so I could document techniques and processes so I could come back later and remind myself how I did 'something'. Annoyingly, I didn't do this for my figure basing process so I am having to remind myself - again - how I did it the first time!

Above: One of my current (1/56) figures next to one of the (1/72) Germans that
I completed last year. I like the way I did the base, but I forgot to document just
how I did it!
After some examination of figures I had previously done I think I have a rough idea of the 'recipe'...

[Bear in mind that I don't create the base in isolation, I work on it as I paint the figure itself. It's not done in one go, but over a period of time finishing after the painting of the figure is completed.]

1. Base: The foundation of the 28mm base is a 25mm diameter disc, though - as I mentioned in a previous post - I like to base my Bolt Action figures on metal discs (in this case, 25mm steel repair washers).


2. Ground Effect: Next I build up the 'ground' with a rough application of quick drying PollyFilla. This I either mix with some dark brown paint or with Vallejo's 'Black Lava' compound so that the PolyFilla plaster is no longer white.


3. Base Colour: Once dry, I slap on some Vallejo Black Brown as my earth base layer.

4. Wash: Then I apply a black wash to pick out the nooks and crannies.


5. Rocks and stones: I'm not too fond of the fake 'flowers' that seem to be in fashion as base ornamentation at the moment. I prefer to keep things simple, just some 'moss' (or grass) and some random 'rocks'. I super glue some tiny pebbles I find in the back yard onto the bases. [Note: I may do this stage while laying down the Pollyfilla/Lava material so that the stones stick in the 'ground' instead of being glued on top of it.]

6. First High-Lights: I then start my highlight dry-brushing, with - first - a medium brown (Burnt Umber mixed with Khaki) and then I dry-brush a very light highlight on top of Khaki.


7. Grass: I don't bother with fancy static grass, just plain old flock from my local railway model shop (the cheapest mid-green colour).  I like a bit of 'earth' showing through...


8. Finishing Highlighting: As it is the grassy base is still a little flat and bland, so I then go in and do some extra highlighting and colouring just to pick it up a little. I did some gentle dry-brushing with Vallejo's Stone Grey and then added some spots of Citadel's Agrax Earthshade wash here and there for some extra depth or where I thought my 'ground' was becoming too light (the idea is to create contrast).

I also very lightly dabbed some spots of Vallejo Stone Grey onto the flock 'grass' to add some areas of bleached grass. Just for some variety in colour.

9. Glossing: Although this stage is actually to provide the paintwork with some protection and prepare the model for the addition of decals, a coat of varnish also helps to stick down that pesky flocking (which has a tendency to moult if you aren't fastidious with your glueing)!


And, there we go. The figure is now ready to have the shoulder patch decals applied and then fixed in place with a final coat of matt varnish. This will also take the shine off the model.

Conclusion...
I did notice that while this worked perfectly well for my smaller 1/72 war game figures, I think I need to add a little more texture to the larger 28mm scale disc base. In retrospect, this is probably why many modellers add 'flowers' and tall grass clumps to their bases.

I am still a bit adverse to flowers but will experiment with other texture additions in future figures.

Tuesday, 7 March 2017

Bolt Action British Commandos Part 6

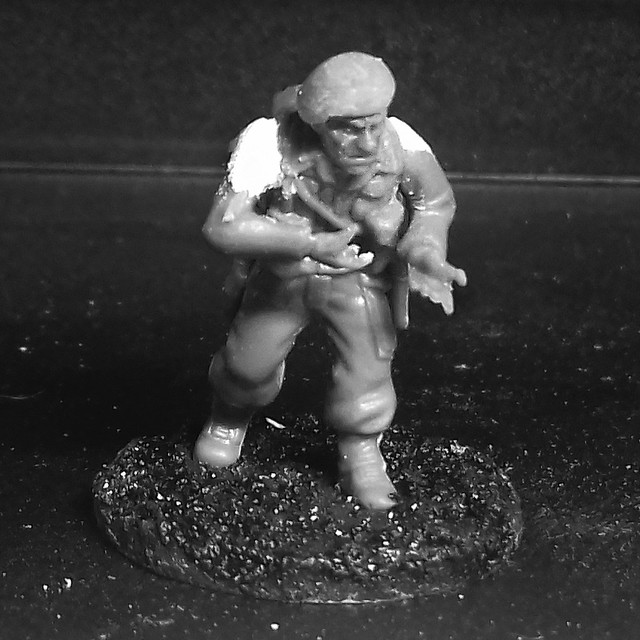
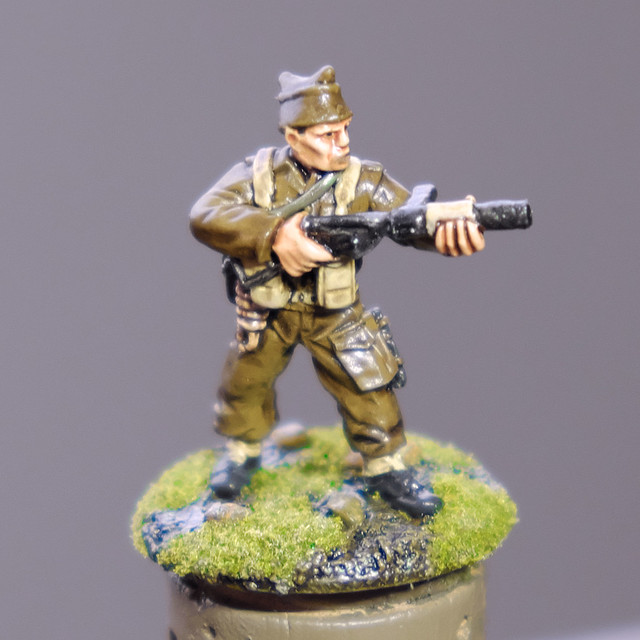
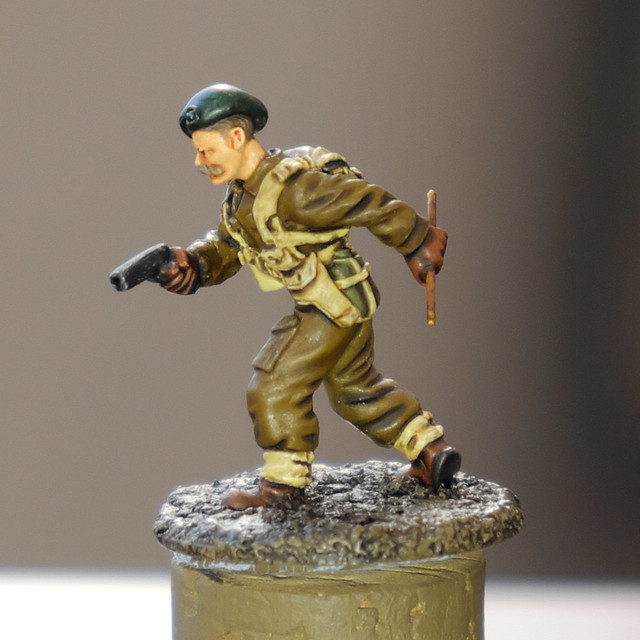
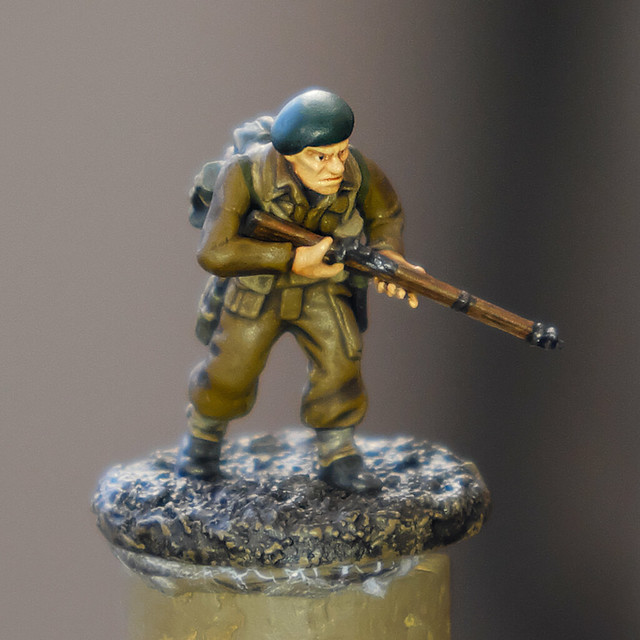
Just some minor progress as I continue to experiment with my 28mm test figures. I'm slowly feeling my way with the 'Bolt Action' style of painting - which has been described to me as 'heroic' (in the vein of 28mm fantasy figures) - and I think I'm getting somewhere...

My four 'guinea pigs', brands from left to right - Artizan, Warlord, Black Tree & Dixons.
It's slow progress as I have repainted certain parts a couple of times as I adjust and refine my colours. And I have finally come up with a palette that I am happy with. Ironically, it's not entirely historically authentic.

Drab World War 2 Uniforms being what they were (with good reason), the earthy tones tended to blend at a distance. This is not necessarily so attractive for a tabletop game where it's nice for your army to be easily identifiable and distinct from your opponent. So I have exaggerated contrasting colours a bit to make these figures something of a caricature of WW2 British Commandos.


Overall, I'm pleasantly surprised and pleased with my progress. 28mm is turning out to be a very nice compromise between the 1/72 and 1/32 scale figures that I have worked on before, a nice amount of detail but not too big a 'canvas' (1/32 does take quite a bit of paint)!

Things left to do:

• Finish base terrain (add grass and some 'rocks')
• Maybe add some highlights to faces and berets
• Gloss figures and apply shoulder decal badges
• Apply light matt varnish coat to flatten gloss coat

Friday, 3 March 2017

Commando Raid!

Oh, nice delivery by Mr. Posty! Though, in a way, this arrived a little sooner than I might have wished it as I'm still tinkering with my Commando test figures...


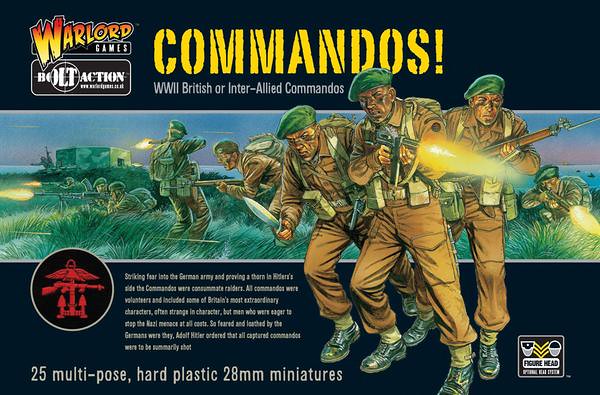
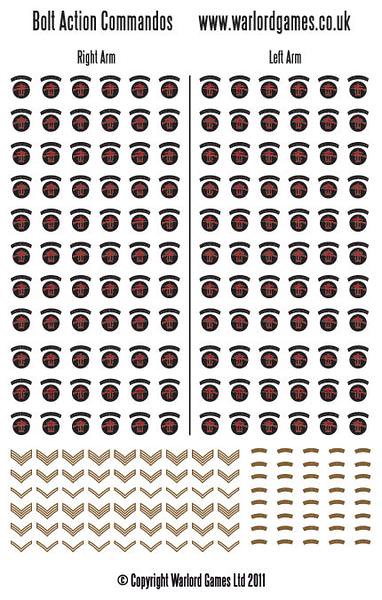
A useful advantage to buying the Warlord Commando starter set - aside from the cost - is that this set includes a set of decals for the Commandos' shoulder badges...


Should be interesting putting all these on (though I'm pleased to see that they include - in theory - enough decals to do 66 Commandos...IF you don't spoil any of the transfers!)

Still, I guess I now have to decide how my Bolt Action Commando force will be put together. At this stage, I am looking at just a modest 500 point army, so the core will be two infantry squads. And I know I want to take advantage of the Commandos strong points, particularly for close-in fighting, so one of those squads will be heavily SMG based (the other being rifle for longer range engagements).

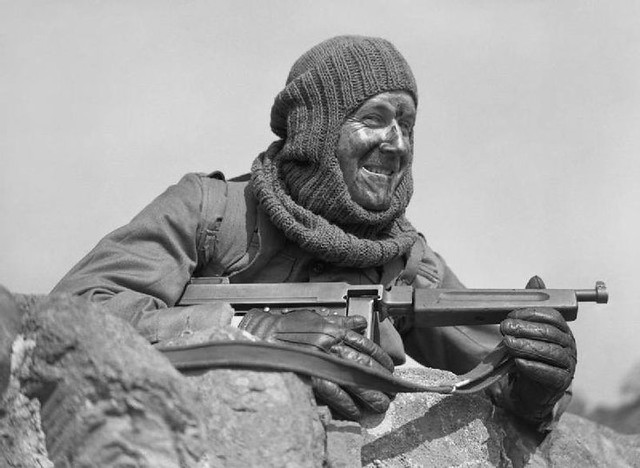
The 'coolness' of the knitted Balaclava helmet was a short lived thing! LOL
I'm sure my opponents at the Scarborough Games Society will soon show me (and take advantage of) any errors and weaknesses in my organisational skills! :)

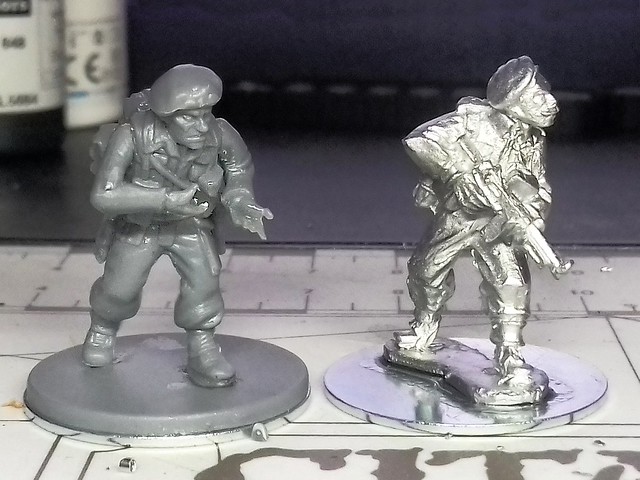
Another new arrival was a couple of figures I ordered from Black Tree Designs. While the bulk of my army will be made up from Warlord's plastic figures - to keep costs down - I still want special characters within my army to be ones from the Artizan Designs range. But, at the same time, I also wanted to have a look at other makes of 28mm Commandos out there.

Here's a little selection of some of the samples I've bought so I can compare them...


All of the metal figures I ordered are a smidgen taller than the Warlord plastics, but not as much as you might notice when they are mixed in together. The tallest figures are the Black Tree Commandos, which is a shame as this is the only range that includes things like silenced weapons and specialist demolition teams (the downside is that they are wearing the comforter - or 'watch cap' - instead of a beret).

The Dixons Miniatures figures are rather nice in their own way - and are closer in design to the Artizan ones if you want to mix and match - and they have some nice individual poses. I bought the officer with Colt 1911 (or possibly a Browning HP35) and the walking radio operator as they are something the other ranges don't have. One advantage of Dixon's Commandos is that the poses come with the options of headgear - beret, comforter or helmet.

Foundry Commandos
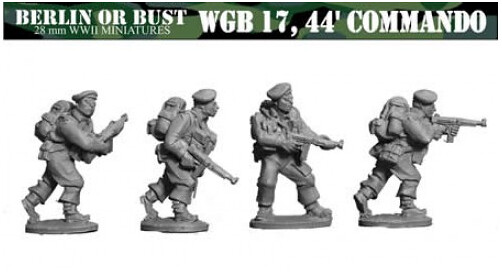
 I came across two other ranges - Foundry (wearing comforters) and Westwind's Berlin or Bust (wearing berets) - but they were both a bit pricey, with basic sets coming in at £11 so I didn't bother with them. But, they did look very interesting. Let me know if you know of any other 28mm WW2 Commando miniatures out there!
Westwind Commandos