Showing posts with label Commandos. Show all posts

Sunday, 19 March 2017

Bolt Action British Commandos Part 8

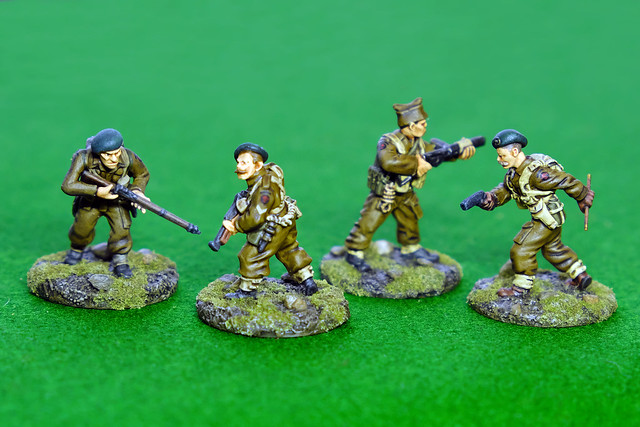
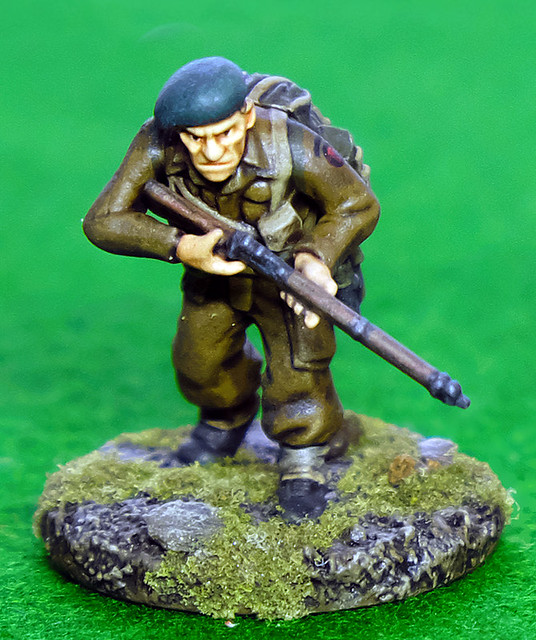
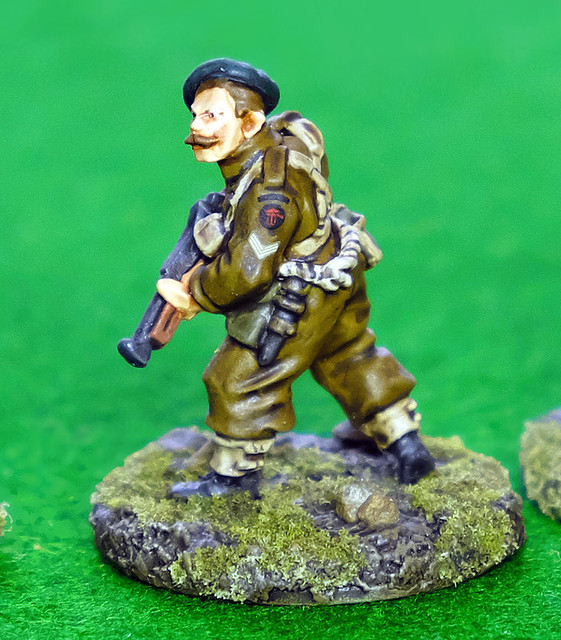
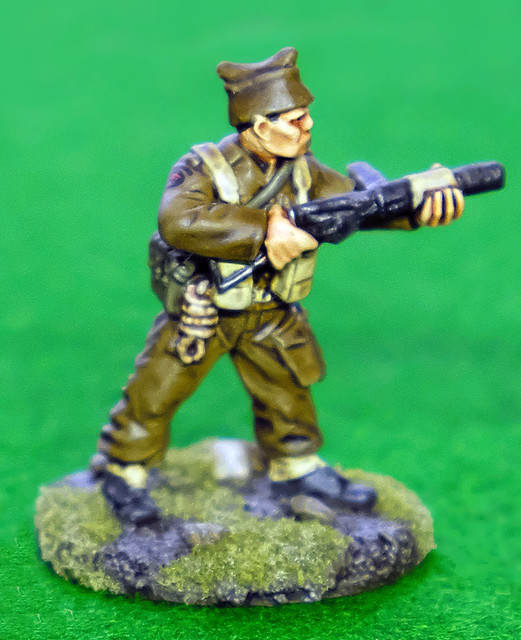
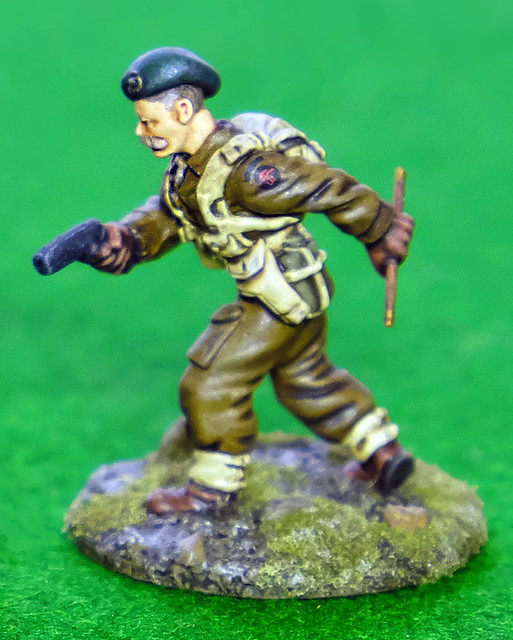
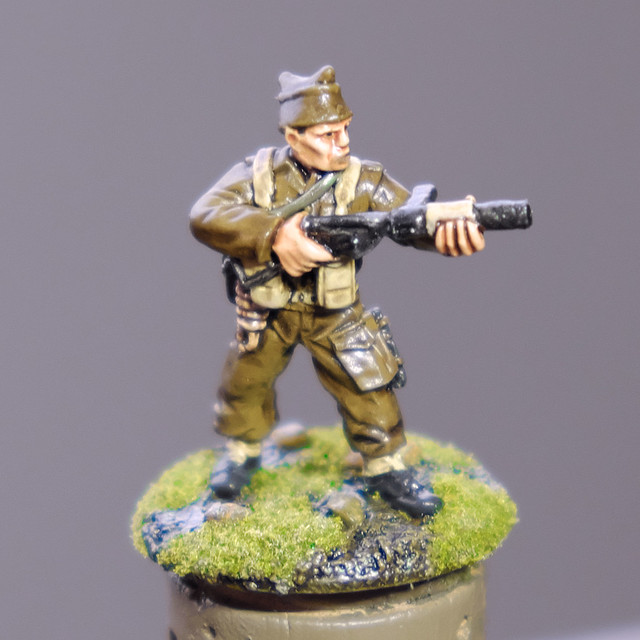
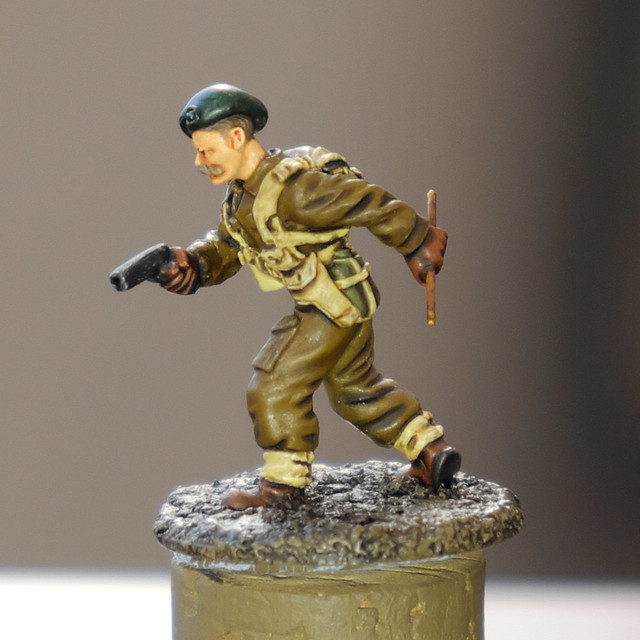
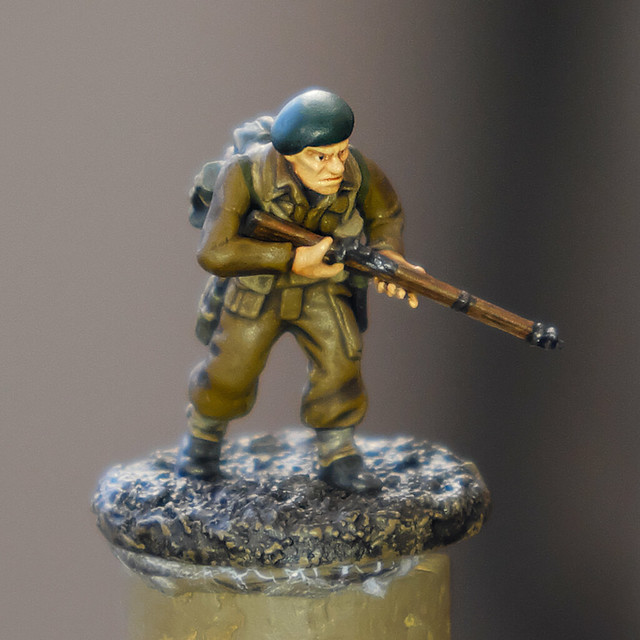
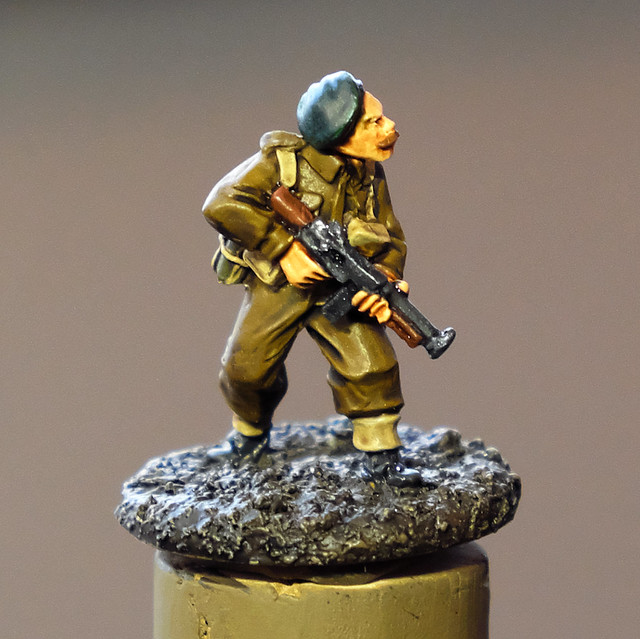
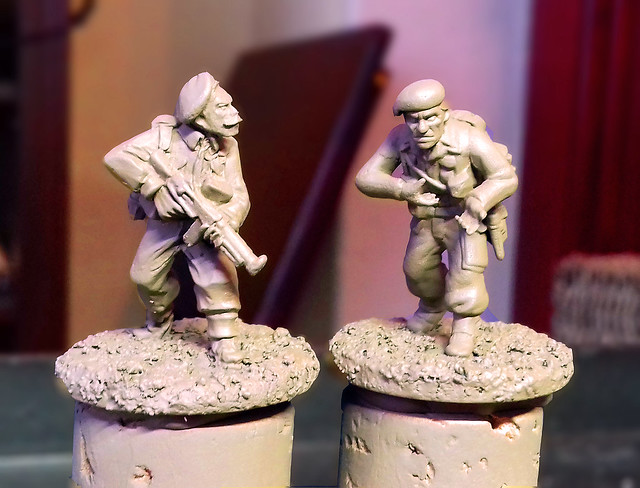
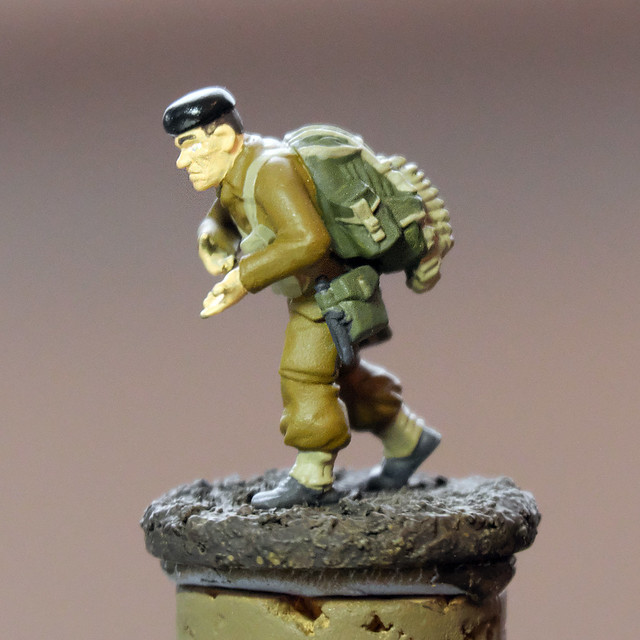
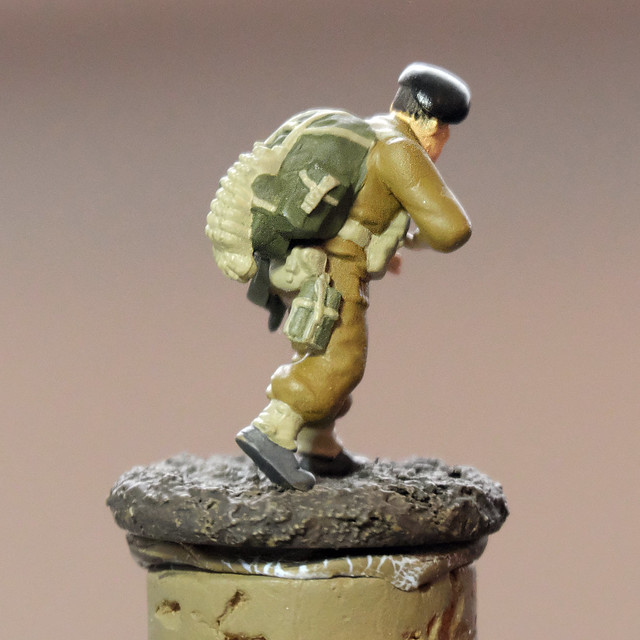
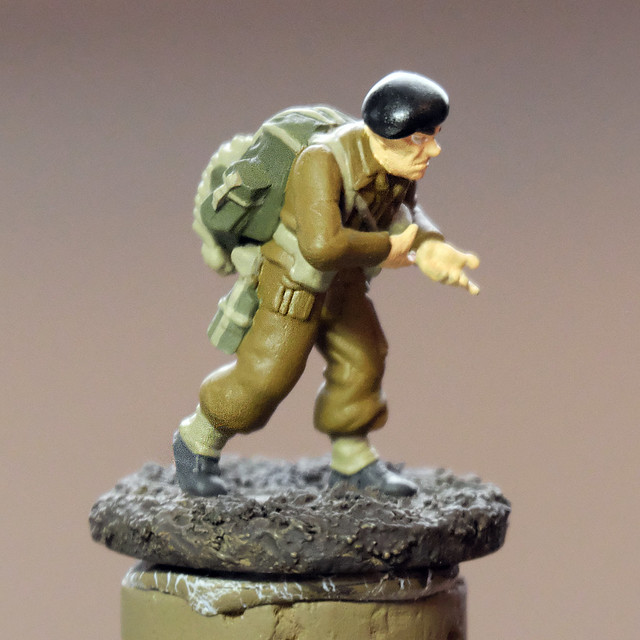
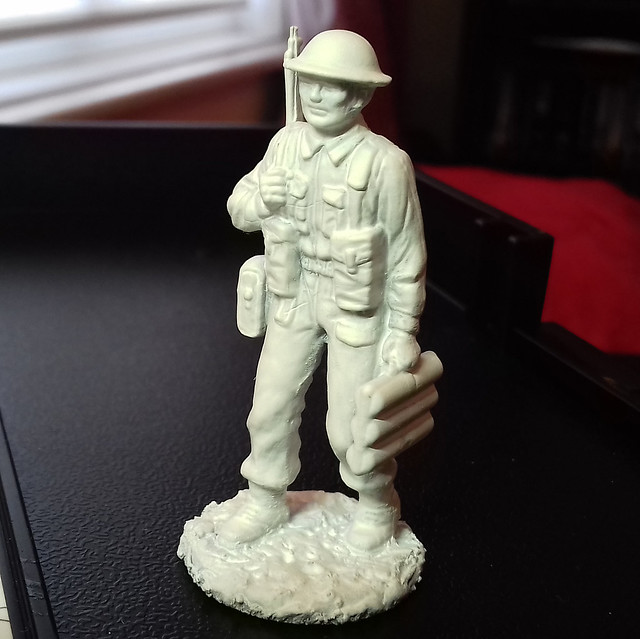
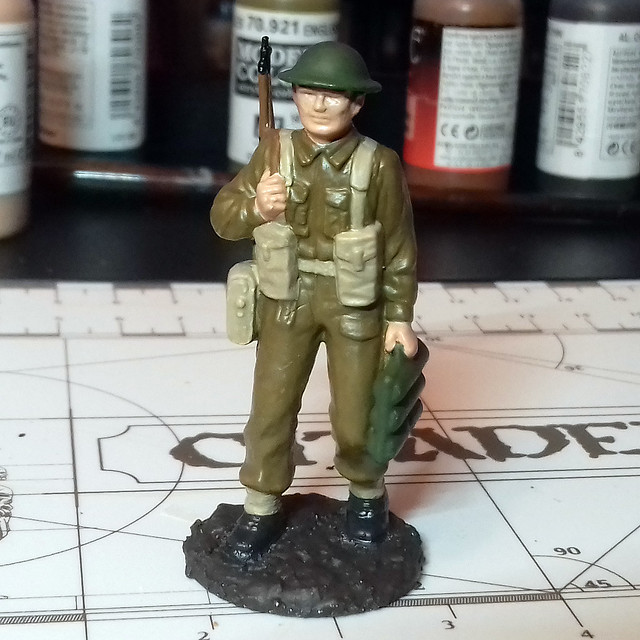
Finished the initial test figures...
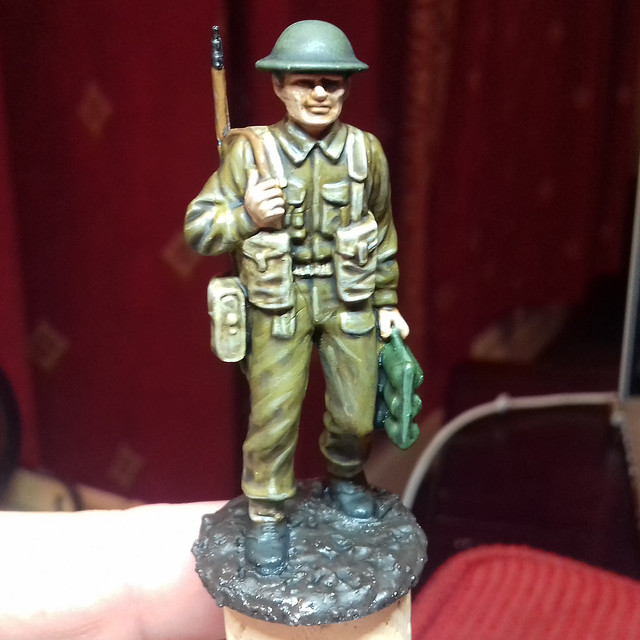
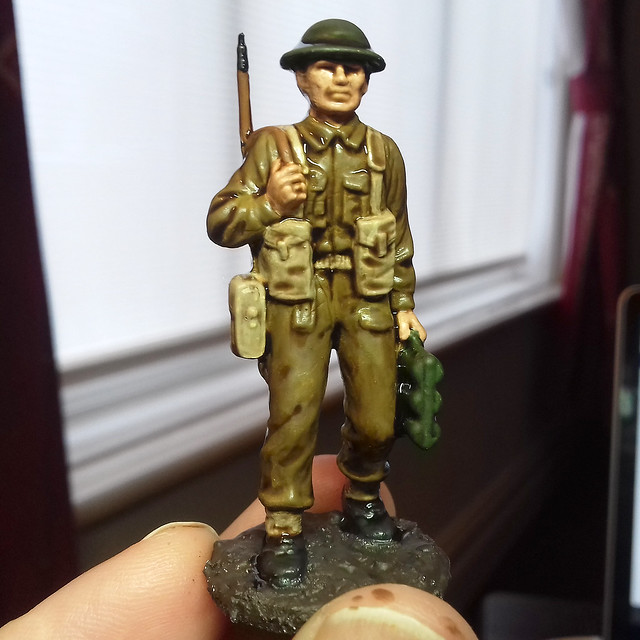
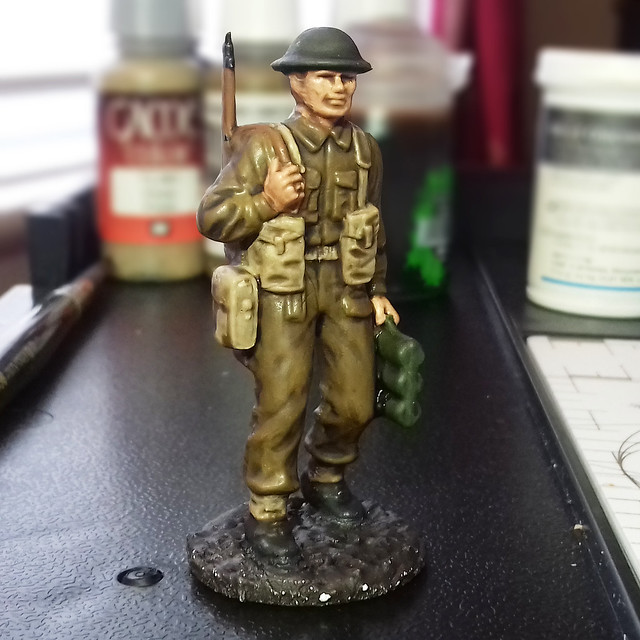
Well, about time I finished something! Because these were my first experiments with 28mm figure painting it took a bit longer than I expected, mainly because I changed my mind about my colours a few times.


Like I said in an earlier post, the colours aren't exactly historically accurate. Rather, I have modified the colour palette used to suit tabletop gaming (so the contrast and lightness is somewhat exaggerated). Having said that, I am quite pleased for my first attempt.


That done, now the real work begins...I shall be starting to put together my first Bolt Action Commando platoon!

Tuesday, 14 March 2017

Commando Figures - Basing

The whole purpose of doing this blog was supposed to be so I could document techniques and processes so I could come back later and remind myself how I did 'something'. Annoyingly, I didn't do this for my figure basing process so I am having to remind myself - again - how I did it the first time!

Above: One of my current (1/56) figures next to one of the (1/72) Germans that
I completed last year. I like the way I did the base, but I forgot to document just
how I did it!
After some examination of figures I had previously done I think I have a rough idea of the 'recipe'...

[Bear in mind that I don't create the base in isolation, I work on it as I paint the figure itself. It's not done in one go, but over a period of time finishing after the painting of the figure is completed.]

1. Base: The foundation of the 28mm base is a 25mm diameter disc, though - as I mentioned in a previous post - I like to base my Bolt Action figures on metal discs (in this case, 25mm steel repair washers).


2. Ground Effect: Next I build up the 'ground' with a rough application of quick drying PollyFilla. This I either mix with some dark brown paint or with Vallejo's 'Black Lava' compound so that the PolyFilla plaster is no longer white.


3. Base Colour: Once dry, I slap on some Vallejo Black Brown as my earth base layer.

4. Wash: Then I apply a black wash to pick out the nooks and crannies.


5. Rocks and stones: I'm not too fond of the fake 'flowers' that seem to be in fashion as base ornamentation at the moment. I prefer to keep things simple, just some 'moss' (or grass) and some random 'rocks'. I super glue some tiny pebbles I find in the back yard onto the bases. [Note: I may do this stage while laying down the Pollyfilla/Lava material so that the stones stick in the 'ground' instead of being glued on top of it.]

6. First High-Lights: I then start my highlight dry-brushing, with - first - a medium brown (Burnt Umber mixed with Khaki) and then I dry-brush a very light highlight on top of Khaki.


7. Grass: I don't bother with fancy static grass, just plain old flock from my local railway model shop (the cheapest mid-green colour).  I like a bit of 'earth' showing through...


8. Finishing Highlighting: As it is the grassy base is still a little flat and bland, so I then go in and do some extra highlighting and colouring just to pick it up a little. I did some gentle dry-brushing with Vallejo's Stone Grey and then added some spots of Citadel's Agrax Earthshade wash here and there for some extra depth or where I thought my 'ground' was becoming too light (the idea is to create contrast).

I also very lightly dabbed some spots of Vallejo Stone Grey onto the flock 'grass' to add some areas of bleached grass. Just for some variety in colour.

9. Glossing: Although this stage is actually to provide the paintwork with some protection and prepare the model for the addition of decals, a coat of varnish also helps to stick down that pesky flocking (which has a tendency to moult if you aren't fastidious with your glueing)!


And, there we go. The figure is now ready to have the shoulder patch decals applied and then fixed in place with a final coat of matt varnish. This will also take the shine off the model.

Conclusion...
I did notice that while this worked perfectly well for my smaller 1/72 war game figures, I think I need to add a little more texture to the larger 28mm scale disc base. In retrospect, this is probably why many modellers add 'flowers' and tall grass clumps to their bases.

I am still a bit adverse to flowers but will experiment with other texture additions in future figures.

Tuesday, 7 March 2017

Bolt Action British Commandos Part 6

Just some minor progress as I continue to experiment with my 28mm test figures. I'm slowly feeling my way with the 'Bolt Action' style of painting - which has been described to me as 'heroic' (in the vein of 28mm fantasy figures) - and I think I'm getting somewhere...

My four 'guinea pigs', brands from left to right - Artizan, Warlord, Black Tree & Dixons.
It's slow progress as I have repainted certain parts a couple of times as I adjust and refine my colours. And I have finally come up with a palette that I am happy with. Ironically, it's not entirely historically authentic.

Drab World War 2 Uniforms being what they were (with good reason), the earthy tones tended to blend at a distance. This is not necessarily so attractive for a tabletop game where it's nice for your army to be easily identifiable and distinct from your opponent. So I have exaggerated contrasting colours a bit to make these figures something of a caricature of WW2 British Commandos.


Overall, I'm pleasantly surprised and pleased with my progress. 28mm is turning out to be a very nice compromise between the 1/72 and 1/32 scale figures that I have worked on before, a nice amount of detail but not too big a 'canvas' (1/32 does take quite a bit of paint)!

Things left to do:

• Finish base terrain (add grass and some 'rocks')
• Maybe add some highlights to faces and berets
• Gloss figures and apply shoulder decal badges
• Apply light matt varnish coat to flatten gloss coat

Friday, 3 March 2017

Commando Raid!

Oh, nice delivery by Mr. Posty! Though, in a way, this arrived a little sooner than I might have wished it as I'm still tinkering with my Commando test figures...


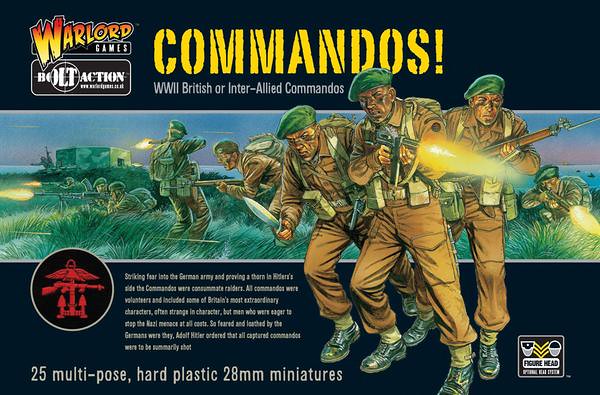
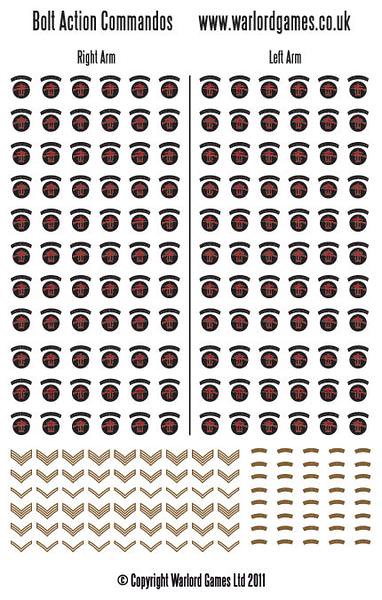
A useful advantage to buying the Warlord Commando starter set - aside from the cost - is that this set includes a set of decals for the Commandos' shoulder badges...


Should be interesting putting all these on (though I'm pleased to see that they include - in theory - enough decals to do 66 Commandos...IF you don't spoil any of the transfers!)

Still, I guess I now have to decide how my Bolt Action Commando force will be put together. At this stage, I am looking at just a modest 500 point army, so the core will be two infantry squads. And I know I want to take advantage of the Commandos strong points, particularly for close-in fighting, so one of those squads will be heavily SMG based (the other being rifle for longer range engagements).

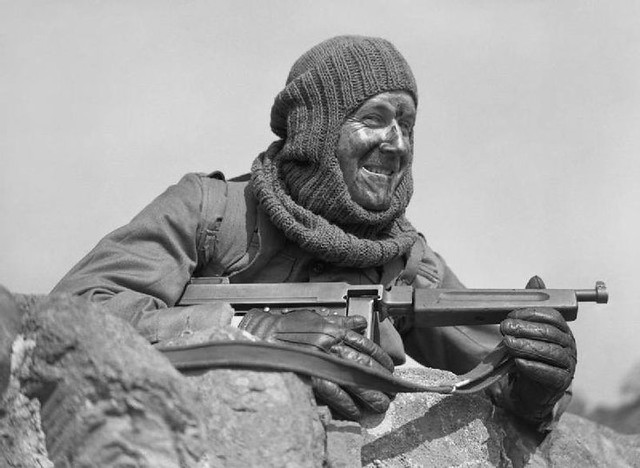
The 'coolness' of the knitted Balaclava helmet was a short lived thing! LOL
I'm sure my opponents at the Scarborough Games Society will soon show me (and take advantage of) any errors and weaknesses in my organisational skills! :)

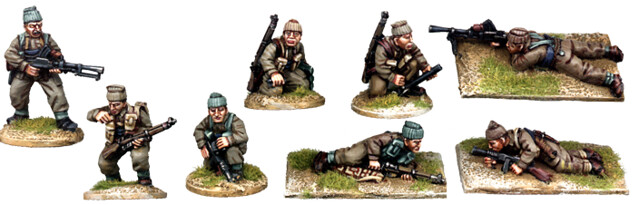
Another new arrival was a couple of figures I ordered from Black Tree Designs. While the bulk of my army will be made up from Warlord's plastic figures - to keep costs down - I still want special characters within my army to be ones from the Artizan Designs range. But, at the same time, I also wanted to have a look at other makes of 28mm Commandos out there.

Here's a little selection of some of the samples I've bought so I can compare them...


All of the metal figures I ordered are a smidgen taller than the Warlord plastics, but not as much as you might notice when they are mixed in together. The tallest figures are the Black Tree Commandos, which is a shame as this is the only range that includes things like silenced weapons and specialist demolition teams (the downside is that they are wearing the comforter - or 'watch cap' - instead of a beret).

The Dixons Miniatures figures are rather nice in their own way - and are closer in design to the Artizan ones if you want to mix and match - and they have some nice individual poses. I bought the officer with Colt 1911 (or possibly a Browning HP35) and the walking radio operator as they are something the other ranges don't have. One advantage of Dixon's Commandos is that the poses come with the options of headgear - beret, comforter or helmet.

Foundry Commandos
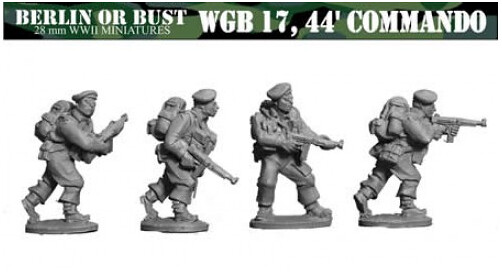
 I came across two other ranges - Foundry (wearing comforters) and Westwind's Berlin or Bust (wearing berets) - but they were both a bit pricey, with basic sets coming in at £11 so I didn't bother with them. But, they did look very interesting. Let me know if you know of any other 28mm WW2 Commando miniatures out there!
Westwind Commandos

Wednesday, 1 March 2017

Bolt Action British Commandos Part 4

Painting Tests of 28mm Figures - Base Colours
All the tinkering and cleaning up done, my two test figures are ready for priming. As an experiment, I decided to prime the figures using Humbrol's 'Dark Brown' Acrylic Spray...


Normally I would use the normal priming colours of either black, white or grey but I was curious to see if using a colour more in harmony with the overall tones used in the figure would be advantageous. These British Commandos will be predominantly Brown/Khaki uniform and tan flesh tones so a mid/dark brown base seemed logical.

Aside from this change, I am using the same basic colour procedure/recipe that I used in my first 1/32 test figure. So, I will be starting with the uniform and Vallejo's 'English Uniform'. This is pretty much standard for many figure painting tutorials for these figures I have seen (though some suggest a browner mix) and I have gone with this in the hope it goes a little browner after a wash is applied (as with my painting test).

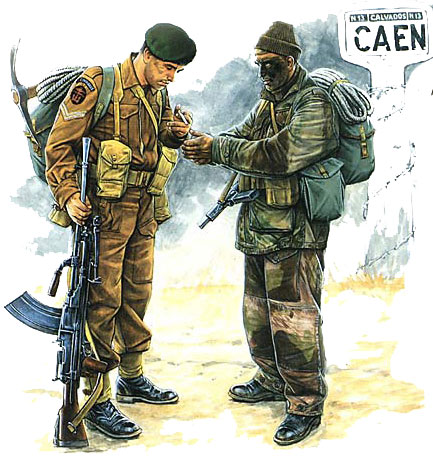
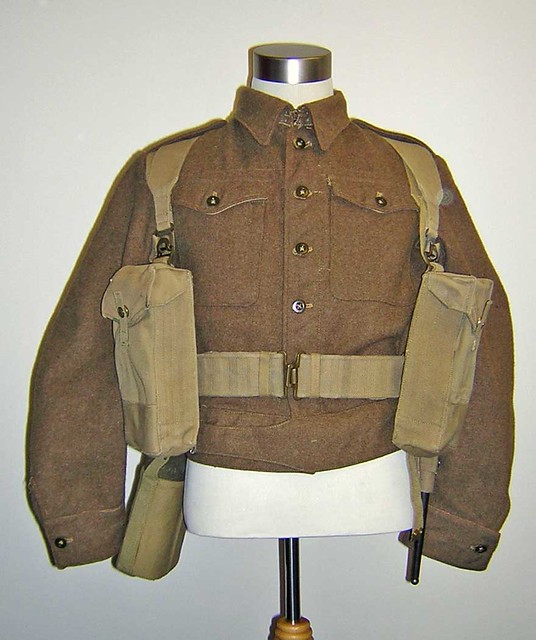
Colour rendition on the web is all over the place, but I
have decided to go with the above reference (left) for
my British Commando uniform. Source: Unknown.

Webbing Woes...
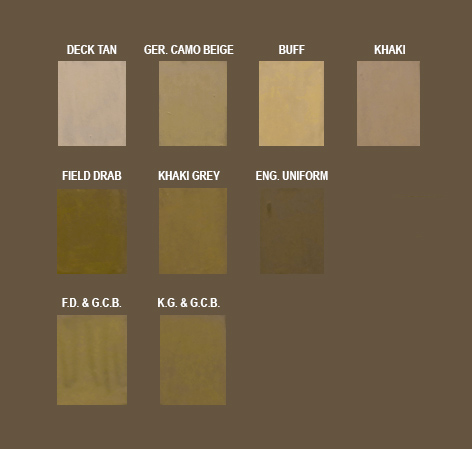
The webbing is *still* a bit of a quandary - do I do it early/mid-war khaki/beige or do I go for a later war khaki olive to represent webbing which has had 'Blanco' applied? In the end, I plumped for khaki as the majority of reference material showing Commandos I have found shows them with the khaki 1937 webbing set, even though the use of 'pea green' Blanco (a dye applied to the webbing) among some units became more widespread later in the war. But which colour to use for the khaki?

Here are some of my paint test swatches based on the Vallejo Model Color range of paints...


Infantry Set, Battle Order, Late War, circa 1944-45.
Source: www.karkeeweb.com
A very unscientific comparison leads me to believe that - from my swatches - Ger. Camo Beige is the closest match to the photographic sample from Karkeeweb.

Resulting Base Painted Figure
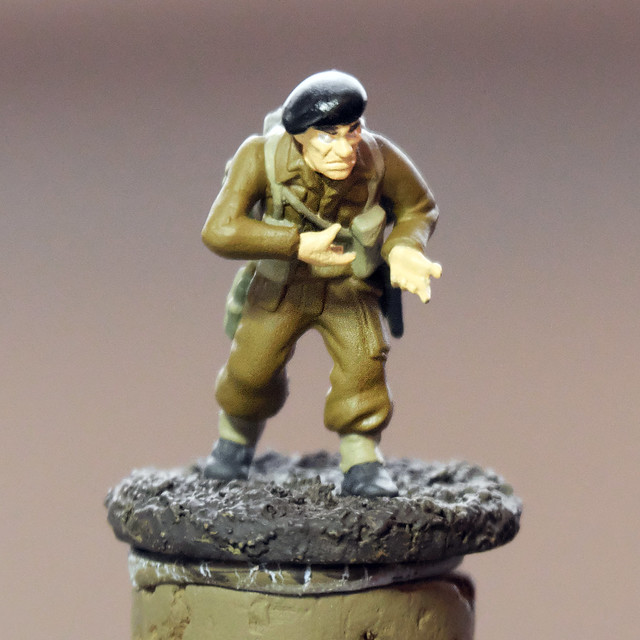
The basecoat stage always looks nice and clean and flat (I'm a graphic designer so kinda like the unshaded 'cartoony' look to this stage), and the colours are a little bright at this point. But, this is just the preparatory stage before shading...


Vallejo Colours used:
• Uniform: Model Color 'English Uniform' [921]
• Webbing (Khaki): Model Color 'Ger. C. Beige WWII' [821]
• Bergan Backpack: Model Colour 'Cam. Olive Green' [894]
• Bergan Trim: 'Ger. C. Beige'
• Webbing Items (Olive): 50/50 mix of 'Ger. C. Beige' and 'Cam. Olive Green'
• Boots: Panzer Aces ' Dark Rubber' [306]
• Flesh: Model Color 'Flat Flesh' [955]
• Beret: Model Color 'Black' [950]

I've gone for a mid-colour flesh tone rather than starting with a darker base. We'll see how that works out. I'll be applying a shading wash, so didn't want to start too dark.

For the boots and other black items, I've started using 'Dark Rubber' (a dark, bluish-grey) as a base. Again, once a wash is applied (black) it will give a subtle shading effect.

Finally, I have begun with a flat black base for the beret. This, of course, will end up being the famous Royal Marine Commando green beret - but I want a dark undertone to the green, which I will then shade and highlight so that will turn out (hopefully) a deep rich forest green.

Next: The shading washes and highlighting.

Thursday, 23 February 2017

Bolt Action British Commandos Part 3

Warlord 28mm British Commandos
I am pretty sold on the Artizan Commando miniatures (love the sculpting), but I want to do my next painting test on a figure of the correct scale, but then don't want to ruin one of the Artizen figures. So, I bought a sprue from Warlords range of 28mm plastic Commandos, it's handy that Warlord sell their sprues individually, but don't make the mistake I did and buy the figure sprue without also buying the weapons sprue! (I've had to wait a further few days until the weapons sprue arrived before I could get on with making my next test figure.)

Anyway, the postie brought the additional sprue I needed this morning, so let's have a look...

The additional British Army weapons sprue (£4).
I can see why people like 28mm, after doing 1/72 the extra detail that can be squeezed into 1/56 is very welcome, without the models being significantly bigger (like 1/48 or 1/35). It's a very happy balance between what's good for tabletop gaming and visible interest, 1/72 (20mm) figures are a little less interesting at tabletop distance (but that's a matter of opinion).

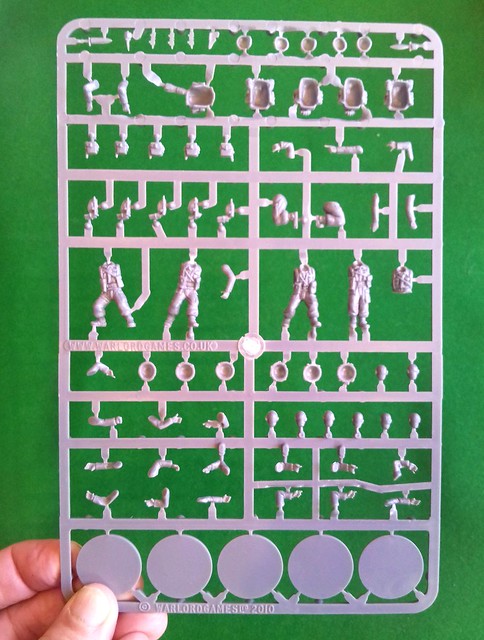
Warlord's 28mm Commandos sprue (£6). There are enough
parts to make 5 figures, 5 standing and 1 kneeling.
Close-up on the Commandos figure sprue.
Another difference between the 'serious' 1/72 models I have been doing and the gaming 28mm figures by Warlord is that these little chaps are full of fun, like little 3D caricatures or cartoons of soldiers. They have the look of characters straight out of the Commando comic or the Victor (if you are old enough to remember that). The poses are dynamic and somewhat over dramatic, but are completely in keeping with the fun nature of the Bolt Action game.

Metal or Plastic?
I suppose one of the questions that the Warlord sprues raise is, what is better, metal or plastic figures?

As I mentioned, I am smitten with Artizan's metal 28mm Commandos, but, of course, you get what poses you are given with them. Plus, there are a limited number of poses within Artizan's range. Therein is the disadvantage of metal miniatures.

Warlord's multipart plastic miniatures system allows a much greater variety of poses to be made, meaning that you need not repeat the same figure again in the same unit. You also have a greater ability to customise your figures and add specific weapon poses.

Under construction - One of the eight included choices of heads on the Warlord
Commando sprue. I haven't worked out the number of possible permutations
you can make with all the parts on the sprue...Suffice to say, it's a lot! :)
There is also the cost advantage of plastics...

Artizen's miniature work out at about £1.45 a pop, and while buying Warlord's figures by the sprue - as I did - works out more expensive than metal figures, the real saving is made when you buy a plastic starter set. Warlord's Commandos starter set is £24 and includes enough sprues to make 25 figures (which works out at 96p per figure).

So, are there any downsides to plastic miniatures over metal?

Well, it may be a bit of a personal preference, but I think the extra weight of the metal figures is something of an attractive attribute over their plastic counterparts. I worry that plastic miniatures might break when handling as they just don't feel durable.

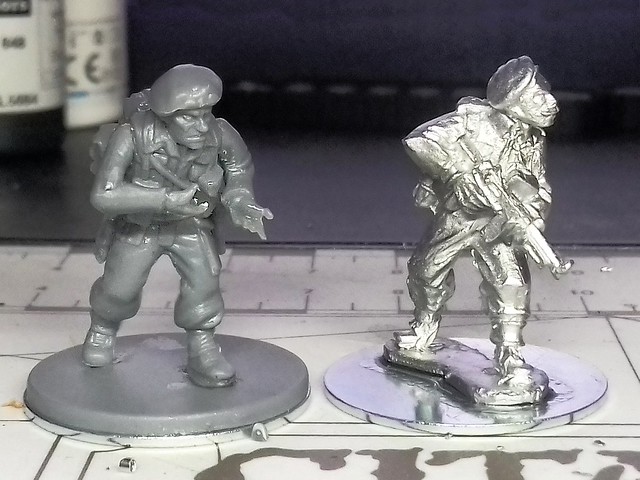
Left: A Warlord multipart plastic 28mm Commando (minus weapon, as I have
been advised to paint them separately). Right:  An Artizan one-piece metal
Commando.
Another issue with plastic miniatures - in my opinion - is that the interchangeable limbs and separate weapons and accessories are a bit fiddly to put together. And they aren't as interchangeable as they first appear. When putting together my first figure I had to try out several arms until I found a combination that seemed to look natural and that fitted the rifle I wanted. (There are no instructions or a guide to assembly with the sprues or on the Warlord website.)

Equipment comparison between Warlord plastic and Artizan metal figures.
The poor old Warlord Commando is very heavily laden!
(Incidentally, I did a straw poll on the Bolt Action Facebook Group and the consensus was almost exactly 50/50 when asked whether members prefer metal or plastics.)

The Finished Figure...
After much messing around - and referring to a couple of other modeller's blogs - I managed to piece together my test Commando. In all, there were 9 pieces in this little kit (and no pilot holes or pegs, so much of the limbs and equipment just 'hangs' where you glue it)!

I am not entirely happy with Warlord's flimsy plastic weapons and I think I prefer the chunky one-piece metal ones. Being an integral part of the figure sculpture the metal weapons look less breakable.

Basing
Just a quick note on basing. To compensate for the exceedingly light-weight plastic figure I decided to use 25mm Steel Repair Washers as bases. These not only give the figures a little bit of heft, but can also be used in combination with magnetic sheets (in case you want to 'stick' a group of figures to a magnetic strip so you can move the figures as a unit).

Just about there, my Warlord Commando is nearly ready for priming.
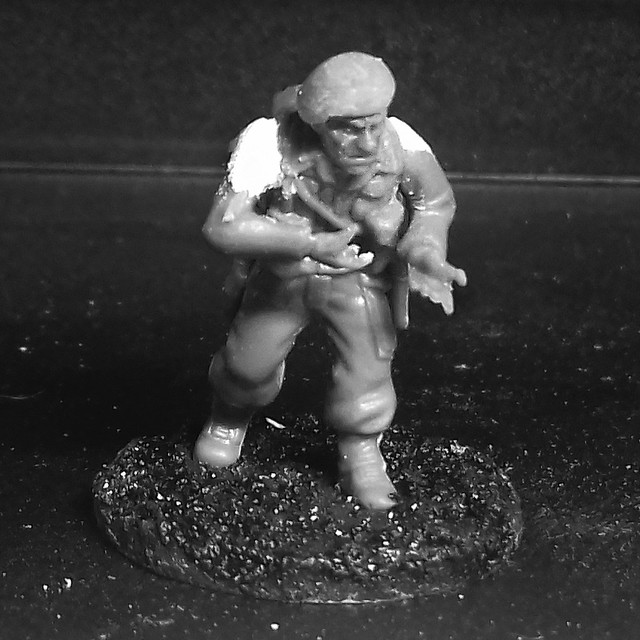
Despite the clean moulding of the plastic, it still needed some sand-
ing and filling where the arms join the body. I also sanded down
the awful beret, it looks a little better now.
Additionally, by using the washers as a base I can equalise the height of the Warlord and Artizan figures. The Warlord figures have no integral 'slab' stand, and fix directly to their disc base. While the metal figures generally come with a 'slab' stand attached. By adding the washer to both figures (with the Warlord's plastic disc base attached) the two makes of figure end up equal heights (see above photos).

Finally, I will be adding some ground effects by slapping on a thin layer of Pollyfilla (mixed with some of Vallejo's 'Black Lava', which has a nice gritty texture). This will not only give the figures an attractive terrain effect but will also disguise the different basing techniques.

Next: Priming the test models.

Wednesday, 15 February 2017

Bolt Action British Commandos Part 2

The results of my first paint test for this project allowed me to work out which colours I am going to use for my 28mm British figures...


I have some tweaking to do, but I want to try any further tests on an actual 28mm figure instead of another 1/32 plastic soldier. The scale of the brushwork for this sort of painting means it doesn't exactly work on a larger model, I'll only really know if it works when I apply it to a smaller figure.

My next practice figures - a sprue of Warlord's plastic Commandos.
So, I ordered a sprue of the Warlord 28mm plastic Commandos (yes, you can order them by the sprue) to try out this paint method on 'the real thing'. Though, I've actually chosen miniatures made by a company called Artizan Designs for my final 'army'. They are wonderful little figures, superior to Warlords - in my opinion- so I don't want to make a mess of them.

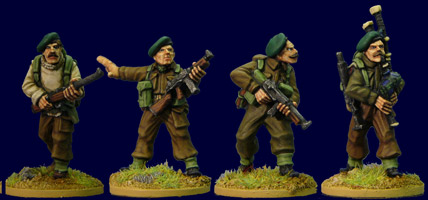
Artizan Designs wonderful and characterful 28mm Lord Lovat's Commandos.
I want to be absolutely sure I know what I'm doing before I put brush to these.
 
One of the things you might notice when you compare the above two pictures of Warlord's and Artizan's 28mm figures is both the difference in painting style and colour selection.

Actually, neither set of painted figures is all-together wrong (though I would probably take issue with Warlord's very light coloured webbing) as the real Commandos and British Infantry, in general, changed the colour of their webbing - from Khaki to a pastel Olive Green - in about 1944. But, I have read that both types and colours of webbing co-existed in use until the end of the war.

The painting style is a different matter. Artizan's painted example figures are far more blended in a naturalistic style, as opposed to the higher contrast style of Warlord's example (and, indeed, the guide I worked from). And, while I do not have a tutorial for how they achieved this look I do have Artizan's Painting Guide, which tells me the colours they used, and I have found a rather informative painting tutorial which gives an alternative method of painting these miniatures...


I'll be studying this tutorial before I try out my next painting test and I will try out both methods on the smaller scale in order to compare them. Hopefully, my Warlord 28mm sprue will arrive today.

Tuesday, 14 February 2017

Ooops, Diversion Ahead (Bolt Action British)

Those 2017 Resolutions didn't last long...I'm back to my old easily distracted ways already!

To be fair, my recent involvement in Bolt Action games probably made it inevitable that I would want a little army of my own to play with at the club (my 1/72 Bolt Action project is for home practising/learning the rules on the kitchen table). But which?

It may sound a bit 'boring', but I fancied good old British. Though I thought I would spice things up by doing commandos. This is probably because I still have fond memories of playing with Airfix's 1/32 plastic commandos in my garden as a kid!

Now, before I start collecting a little hoard of 28mm miniatures, I thought a painting test might be in order...
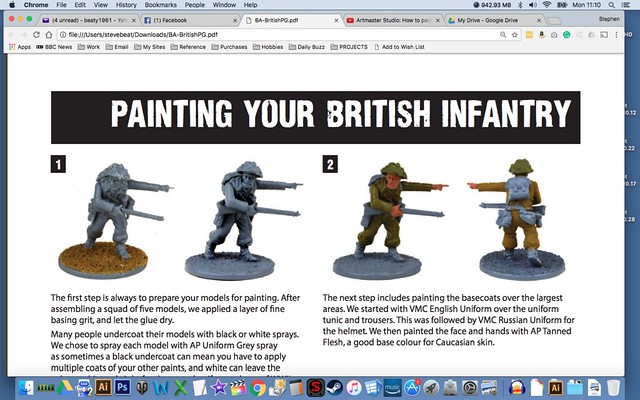
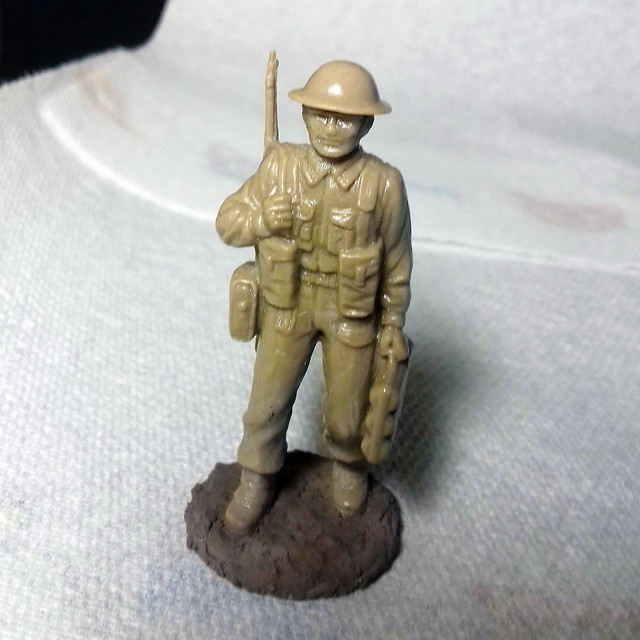
For my first attempt at painting a 'British Tommy' test figure, I'm using Warlord
Games Painting Guide...It has a good list of the Vallejo paints required.
By sheer coincidence, I happen to have a bag of Airfix's 1/32 British Infantry Support figures (think I bought them for the 1/32 Vickers), so these seem a convenient test figure for checking the British colour scheme...


As usual, with my Bolt Action figures, I mounted the figure on a metal base (a 25mm Repair Washer) and build up the ground with Polyfilla mixed with dome Vallejo German Camo Black Brown. In fact, I tried out Wilko's own 'Polyfilla' and that worked just as well as the real thing (but is cheaper).

Stage One - Priming and Base Coating
Next, I decided to go for a white primer as I want the colour to 'pop'...


I'm going to use Warlord Games British Infantry painting guide (available free on their website), as that is mainly based on the Vallejo Model Color paint system, which suits what I have. Though, I don't have all the paints they suggest I have near equivalents so I will have to do a bit of swapping colours around...


Colour recipe (British Infantry, mid-WW2):

Flesh base: Vallejo 804 - Beige Red
Uniform base: Vallejo 921 - English Uniform
Webbing base: Vallejo Game Color 72.061 Khaki
Helmet base: Vallejo 894 Camo Olive Green
Wood (rifle) base: Vallejo 72.043 Beastly Brown
Boots base: Vallejo Panzer Aces 306 Dark Rubber
Ground base: Vallejo 822 German Camo Black Brown

Stage Two - Applying a Shading Wash
These colours from the base of a triad of a colour system, going from a darker base to a mid-highlight, to a super highlight. However, the above base will be further 'dulled' down by the addition of an overall wash, which is designed to create shadow areas in the creases of clothing and between different material areas (outlining areas).

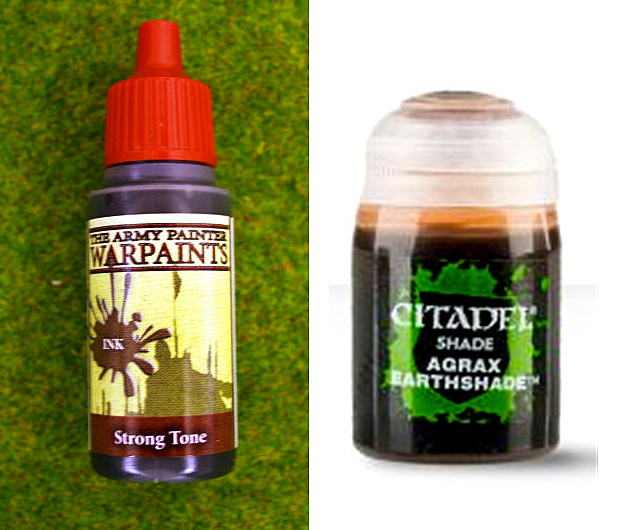
Warlord game suggests using Army Painter's Strong Tone Wash. Now, I've never used one of these 'quick shades' for figures, but I know lots of wargame figure painters swear by them for getting quick shading results. I looked it up (see above link) and it is rather pricey at £24.99 which I don't want to spend as it seems quite an invasive technique. Apparently, you can get a smaller bottle as an 'ink', for £2.25, which is more like an acrylic wash, so don't get the two confused.

Instead, I am looking at a Citadel product called Agrax Earthshade, which has been suggested to me as an alternative (particularly to the AP Strong Tone Ink, which from looking on YouTube looks almost identical)...


"Citadel Shades are specially formulated to flow over other paints and into the recesses on your miniatures, defining details and accentuating recesses. Once applied, they dry to provide very effective shading for your models."

Fingers crossed - this is why you do paint tests - here we go...(I'm a bit nervous!)
The wash has, indeed, toned down the base colours a shade or two. This is why
you must begin with base colours a shade lighter than what you want to end
up with.
As a first-time wash user, this technique seems to be something of a dark art, as you do get a bit of a fright when you first apply the liquid. The above photo shows the wash when it's still wet and as you can see there is plenty of pooling as the wash settles into any crevices in the model.

You can draw any excess wash out with your brush or a paper towel, and you can move it about a bit to more evenly distribute it across the model. I guessing that experience is needed to understand what is too much wash.

Now the awkward wait for the wash to dry completely and then we shall see how effectively it creates shadow tones in the folds of material...
Now dry, overall, it doesn't look too bad. Though, it definitely needs mid-tones
and highlights to be added as it looks very flat as it is.
It's still a bit jarring, compared to blending shadows. But, I'm determined to see this technique through to the end. Will the addition of the remaining 'triad' colours (two intensities of highlights) pull the whole thing together into a satisfying model? I hope so (but I do have a plan B, just in case).

Note: One final comment I should have added. While these sort of high contrast painting techniques are a bit unsubtle or exaggerated looking on a big 1/32nd figure, I think you have to bear in mind that they are really designed for 28mm (1/56) scale miniatures. And the effects are deliberately exaggerated so as to be seen at tabletop distance.