Showing posts with label basing. Show all posts

Sunday, 23 April 2017

Thursday, 23 March 2017 MW 1/72 GAZ AA Truck - Part 5


Right, I am now at the stage now where I have to think about both the truck's base and the accompanying base for its Flak 38 tow!
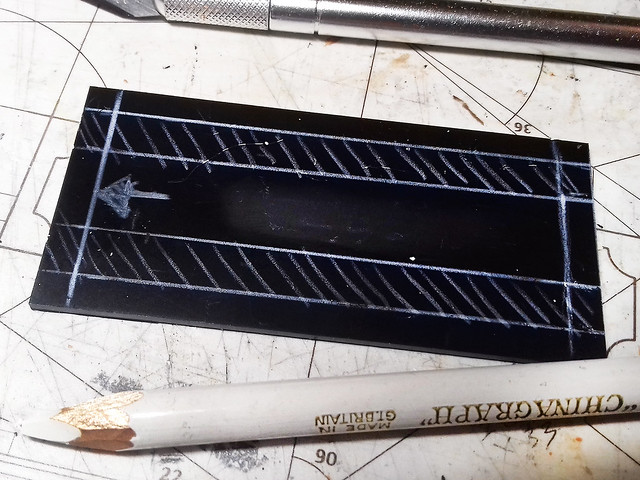

As a wargame model, this truck will be representing a unit in two modes; static (gun deployed) and mobile (gun being towed). So, there will be two different models of the Flak 38 and one of these will be made so that it looks like it is attached to the tow hook of this Gaz truck.

To begin with, though I start the truck's base in my usual manner...
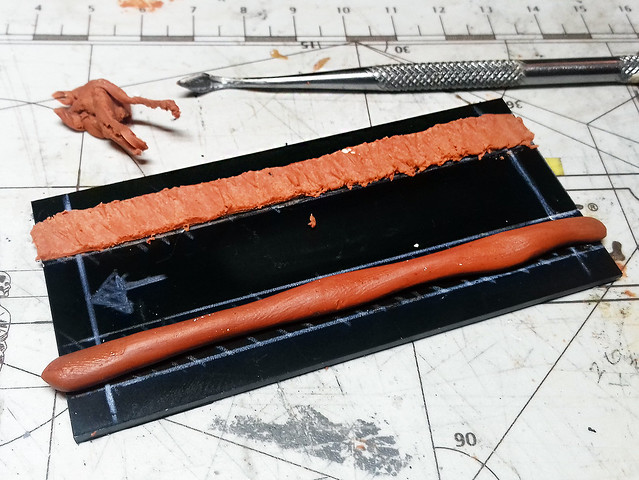

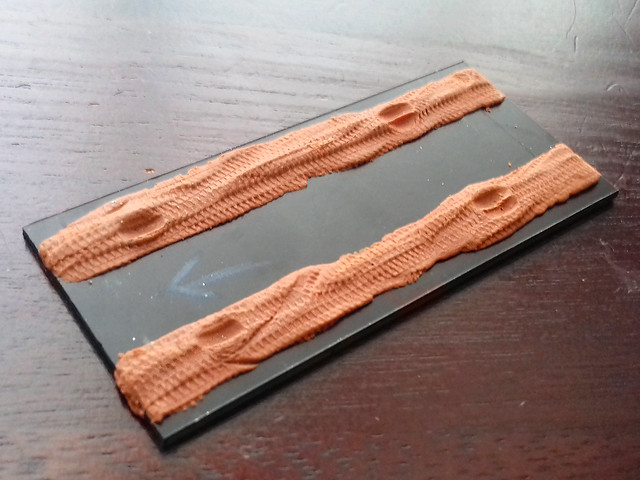
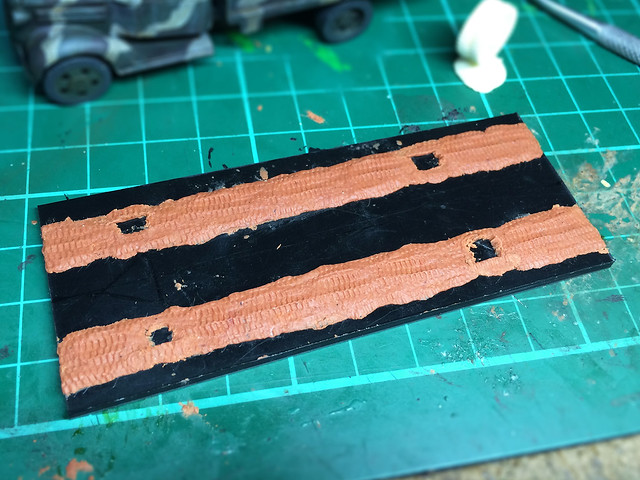
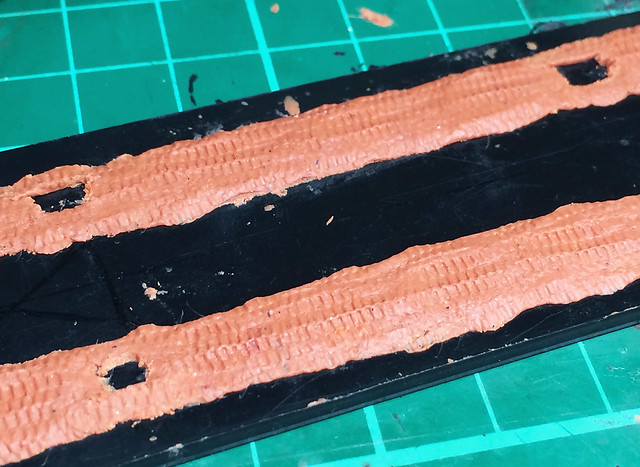
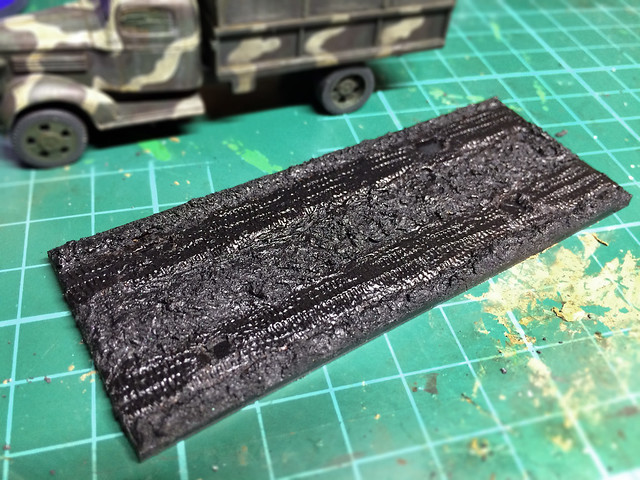
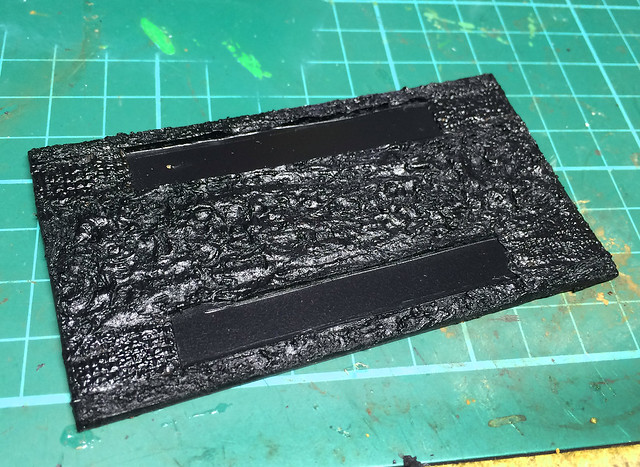
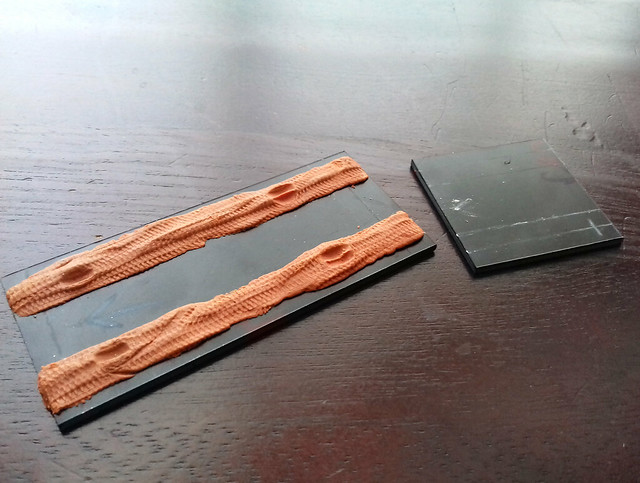
I'm pretty settled on my use of Milliput putty for the road tracks now. The putty takes the imprint of tire tracks very well. It also allows you to impress the wheels of your model into the putty for a better and more realistic placement. The tread was made by rolling a 1/72 diecast model truck back and forth over the putty...
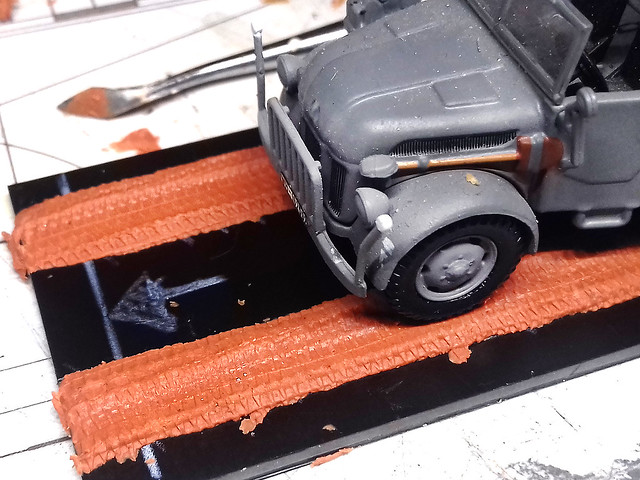
I used a diecast model that I have which has a nice tire tread pattern to make
the track patterns...

Next, I cut the second piece of plastic card to base the AA gun. You have to do a bit of measuring and working out of how big the base needs to be taking into consideration that the gun's tow bar will overhang the truck's base and attach to the truck's tow hook...

The idea is that when used in the 'mobile' (towing) configuration the two model bases will just be placed on the table immediately adjacent to each other (they aren't, however, connected in any way as I couldn't think of a way of doing that). So, when moving the models across the table you will have to move both parts in conjunction.
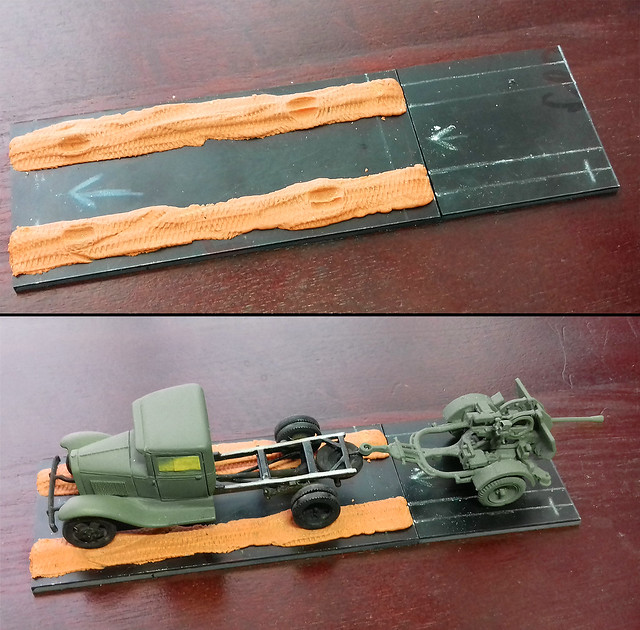

I suppose I could make a movement tray to put both parts in and then I can move them as one? Then, when the AA gun is deployed, I remove the mobile gun model off the table and replace it with the 'static' gun and its accompanying figures.

Anyway, on with the making of the base/s...

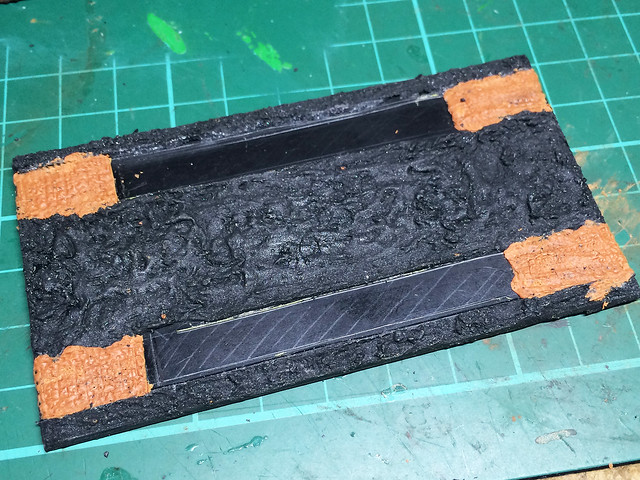
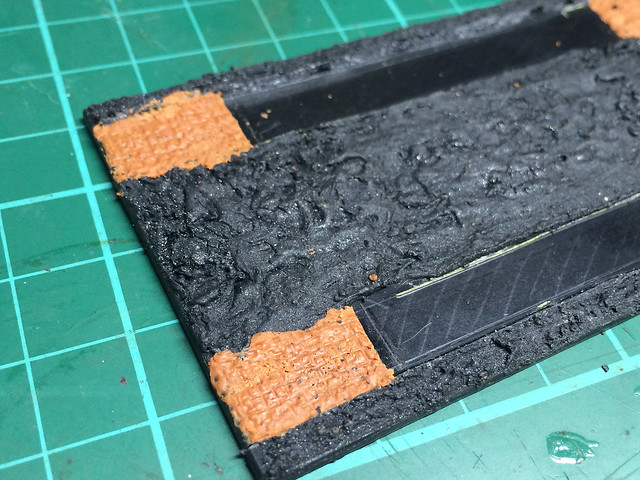
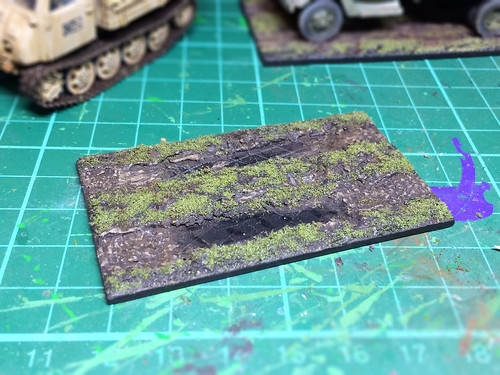
The two bases - now with their road tracks - should match and fit together as if one long section of road...
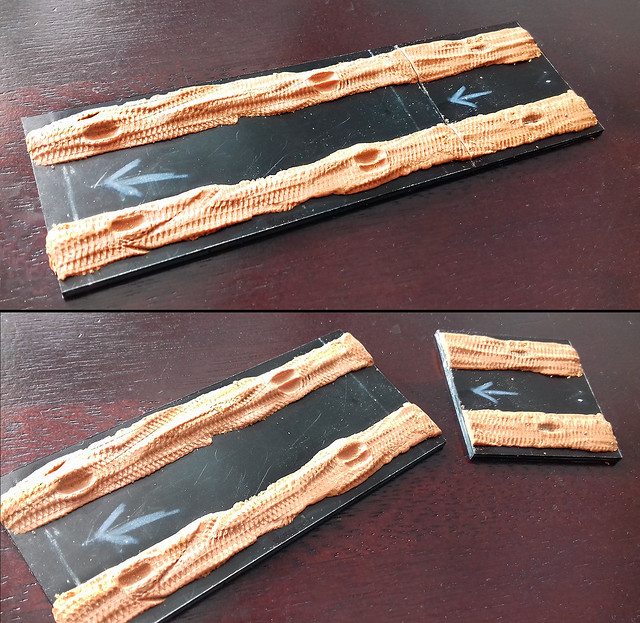

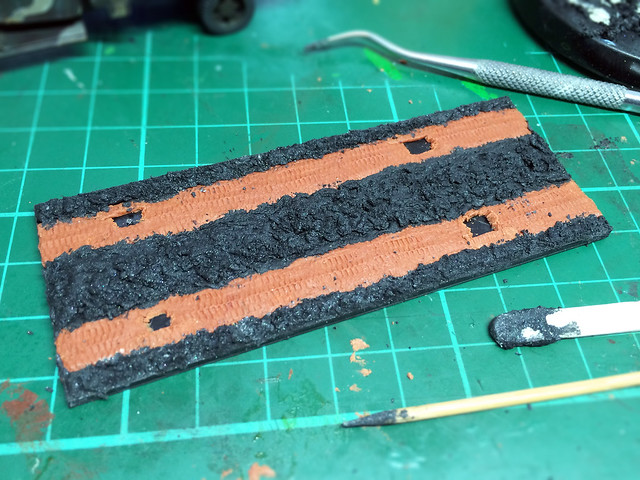
The next job is to and the rest of the ground terrain between and outside the road tracks. Now, obviously, I decided that all my Finnish models should be placed on a 'country road' base (my collection is based on the campaigns which took place between the summer of 1943 and late 1944 - part of the 'Continuation War' with the Soviets - which were conducted on the forested borderlands of Finland). And this look of rough earth and meadow will be created using coloured PollyFilla (quick drying plaster)...

I begin by mixing up my 'secret recipe'...Actually, it's quick-drying PollyFilla, fish tank gravel and a big blob of Vallejo's 'Black Lava'...
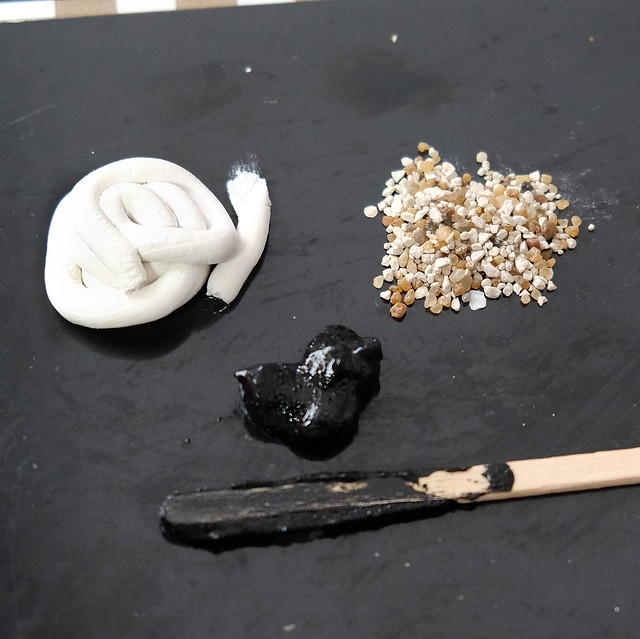

Mixed together the make a gooey, sticky, gritty substance that forms a lumpy uneven surface...It's a bit of a messy job, but someone has to do it!
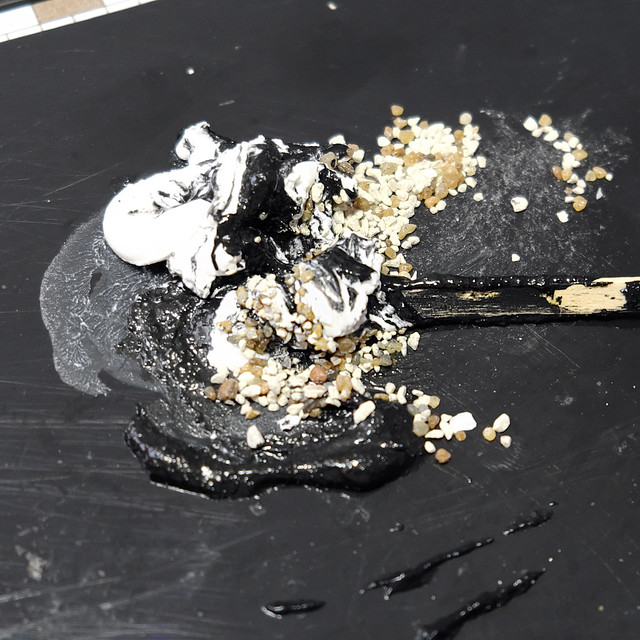

The resultant sticky mass is quite hard to work with, but - ironically - that's the very reason I like it because the resultant effect is always very random and organic (it sort of takes the heat out of trying to design something so that it does not look designed).


You just trowel the stuff on and it sort of just finds it's own 'look'. (Conversely, by the way, Vallejo's 'Black Lava' is great for creating nice flat and smooth Tarmac roads for dioramas and they also do a 'Sand' version for doing desert bases, too.)
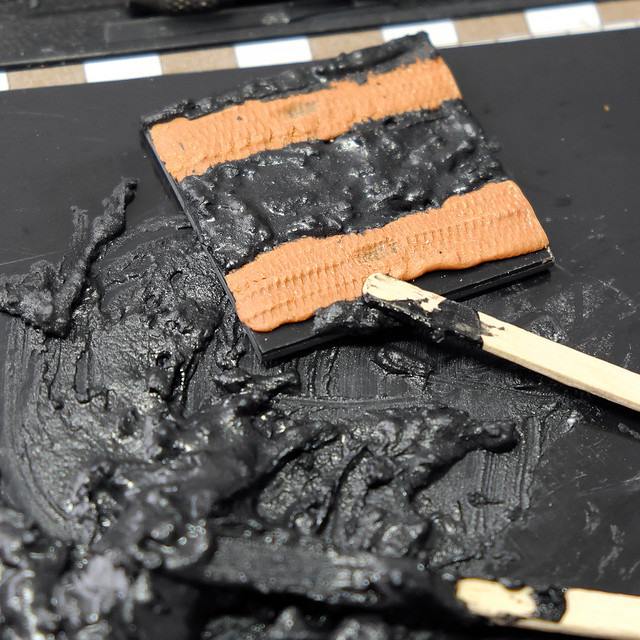

It takes a wee while to dry - a couple of hours - but dries pretty hard...But, whatever you do, try hard not to get this goop on anything you don't want it on!


Once dry, it's time to apply the primer coat. I simply use Wilko's own Satin Black acrylic spray, because it's cheap. It's OK for this sort of work, but probably a little too thick for priming models...
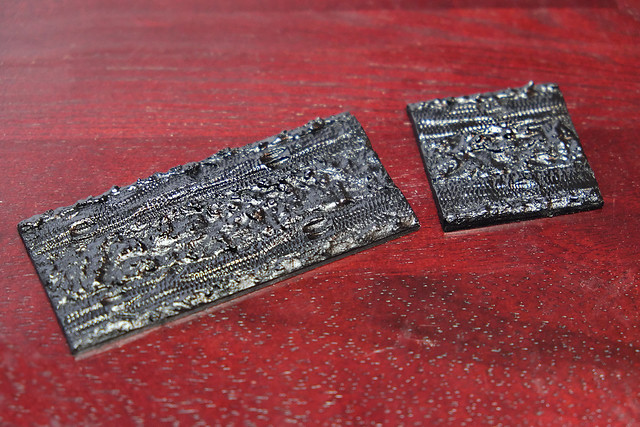

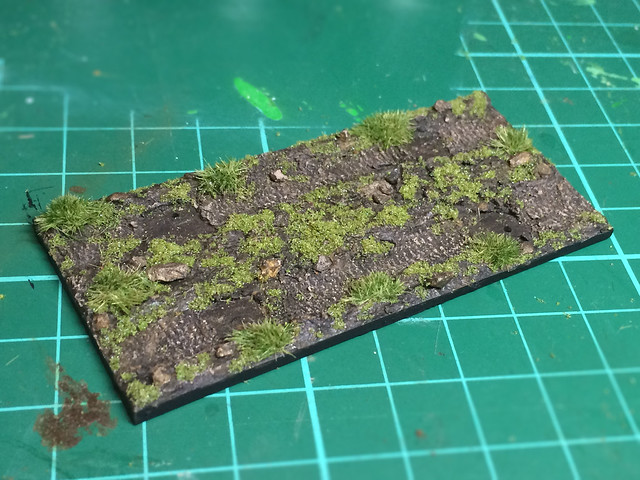
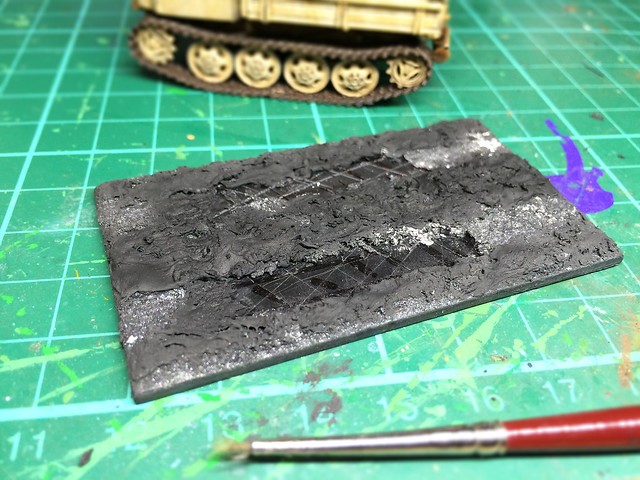
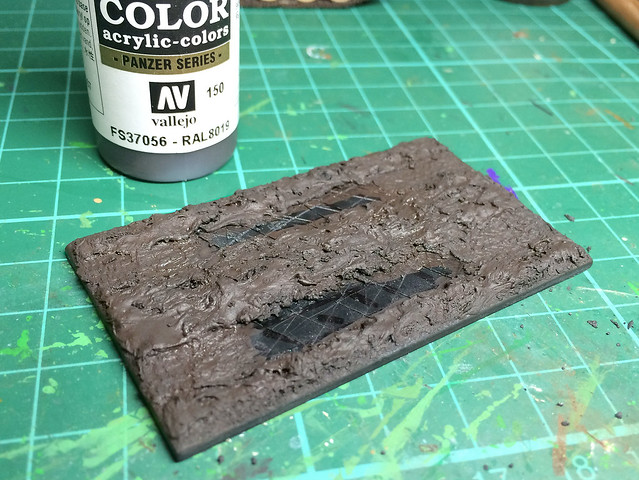
Time to start painting! I begin by applying a diluted coat (a thick wash really) of Vallejo's lovely 'Black Brown', and then I build up the shading of the 'earth' from there - dry-brushing dark to light, ending with a light dry-brushing of Vallejo's Stone Grey...
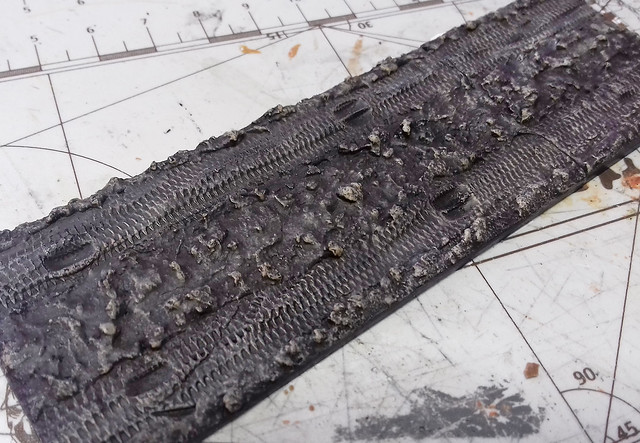

As you can see, I err on the dark side when laying down my ground colours. This is for two reasons, first of all, I want my 'earth' to be the black peaty type you find in northern coniferous forests, but, also, I want to get my 'grass' flocking on before I finalise my earth tones. I like an underlying dark base for my grass.
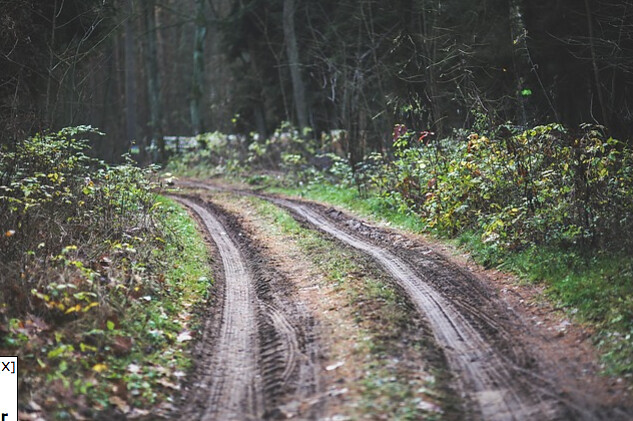


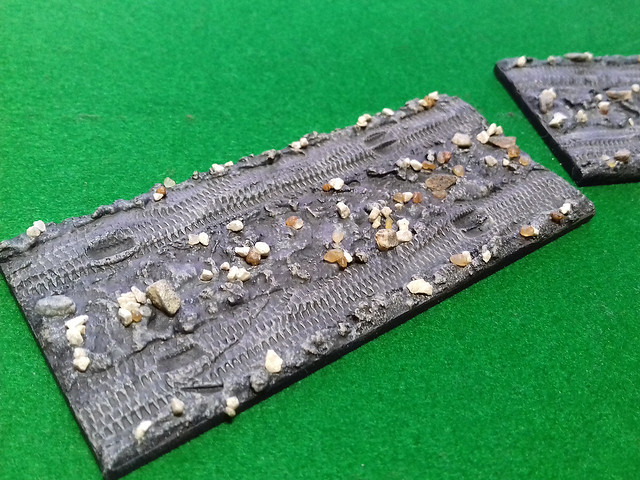
But, before I start to apply my flocking, I like to add some 'rocks' to my scene. These are just little chips of stones - I use fish tank grit and stones collected from the yard - which I glue on in random patterns across the ground-base...


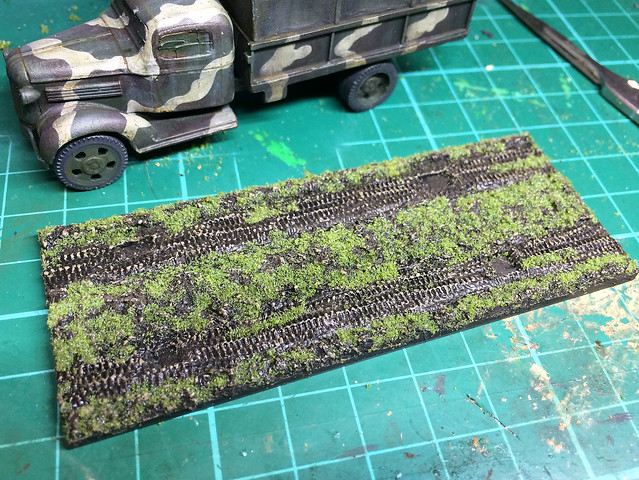
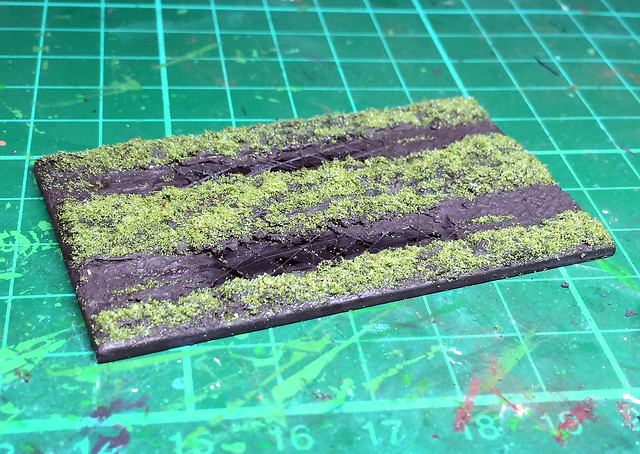
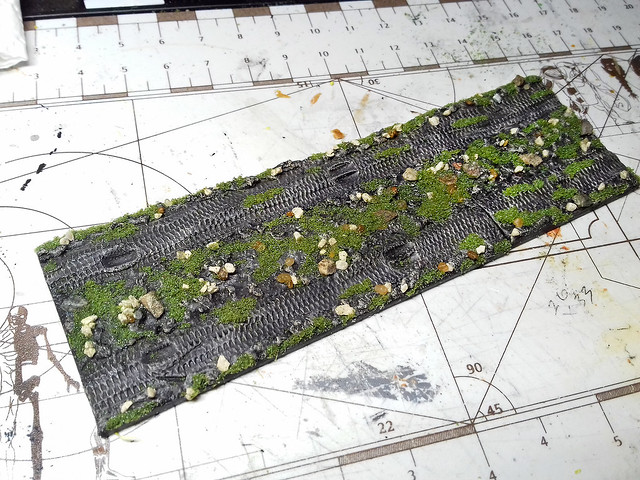
With the stony ground done it's time to add some 'grass'. I still don't have a very sophisticated technique for applying scale model grass - I don't have one of those fancy electric static grass applicators. I just sprinkle on some basic 'flocking' material onto some PVA glue in patches.

Even my flocking is pretty 'no frills', as I go for a single colour material (mid-green) and prefer to discolour it myself with small amounts of diluted paint rather than buying 'multi-tonal' flocking...

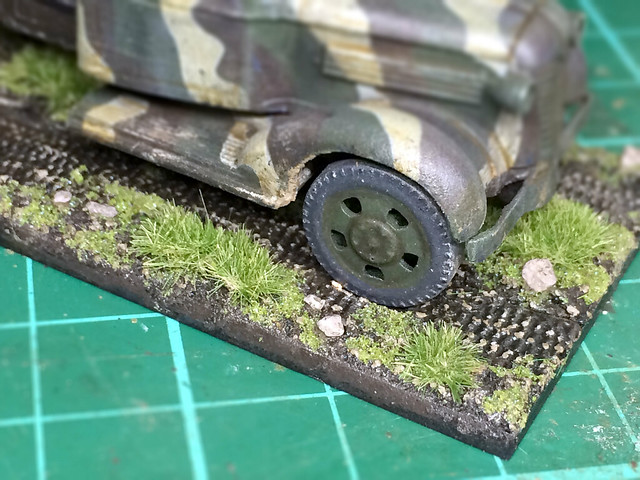
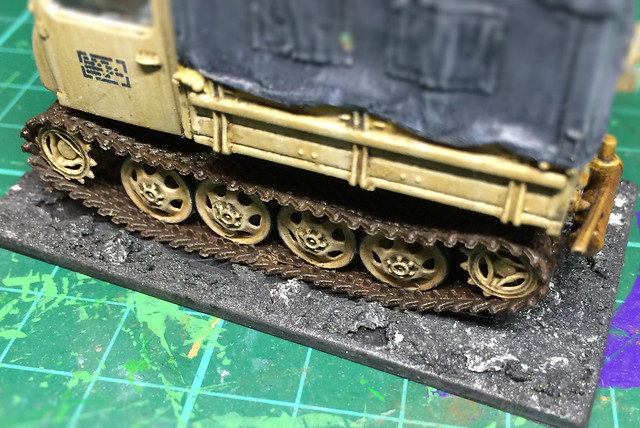
Well, nearly there...The final stage - before mounting the vehicle model and gun tow - is to 'weather' and add the last detail touches to the scene. I think it still needs some patches of more earth tones on both the muddy track and the grassy ground.


In Conclusion
The one caveat to this design - with its very dark colouring - is that I'm pretty much locked into this style for the project I'm doing (my Finnish project). Having done my first few like this when I was less experienced I now have to follow through with this same style for continuity sake.

I have learned a lot since I started modelling again and reckon I could make a better job of colouring the muddy earth now, even adding some 'wet mud'. But as a simple base for my models, it's fine (it's not a diorama).

Tuesday, 14 March 2017

Commando Figures - Basing

The whole purpose of doing this blog was supposed to be so I could document techniques and processes so I could come back later and remind myself how I did 'something'. Annoyingly, I didn't do this for my figure basing process so I am having to remind myself - again - how I did it the first time!

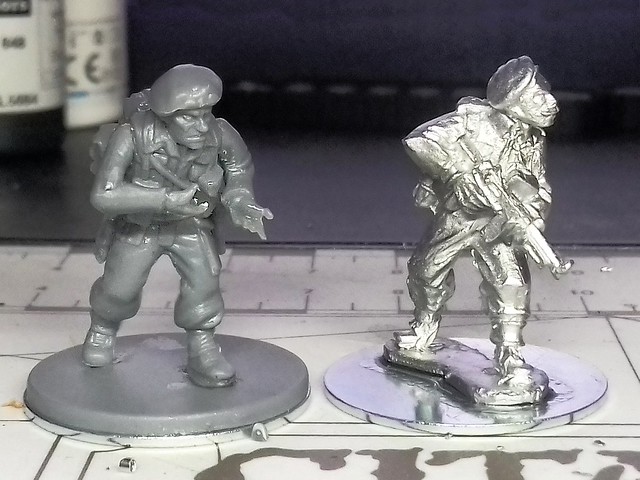
Above: One of my current (1/56) figures next to one of the (1/72) Germans that
I completed last year. I like the way I did the base, but I forgot to document just
how I did it!
After some examination of figures I had previously done I think I have a rough idea of the 'recipe'...

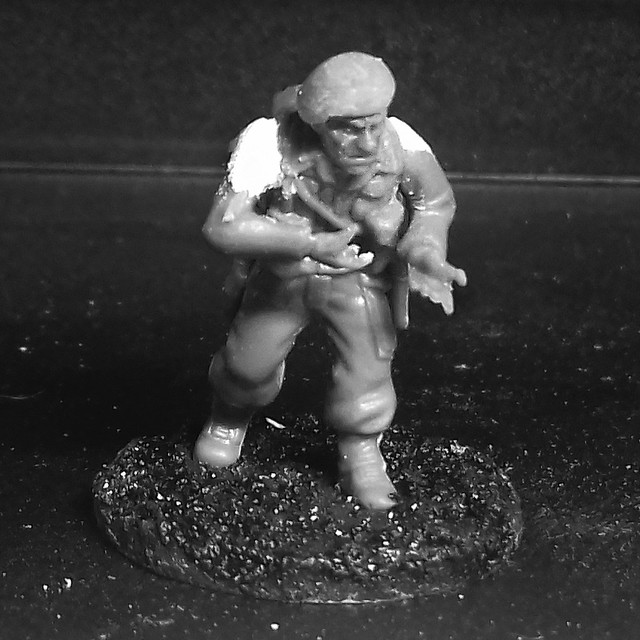
[Bear in mind that I don't create the base in isolation, I work on it as I paint the figure itself. It's not done in one go, but over a period of time finishing after the painting of the figure is completed.]

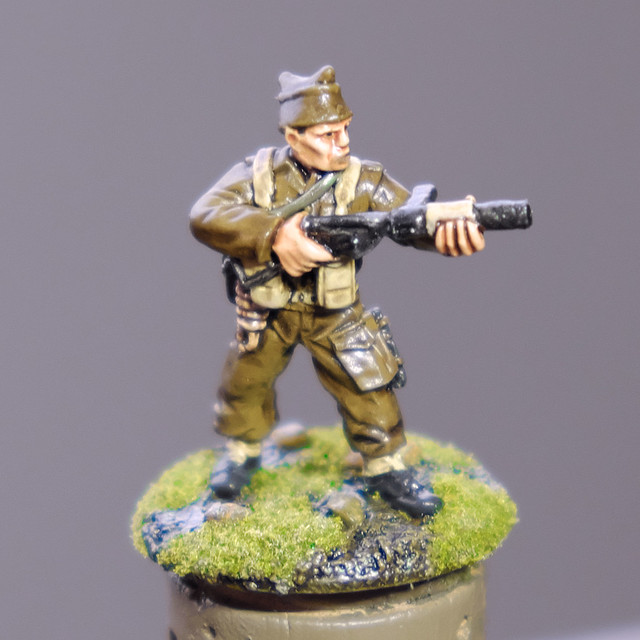
1. Base: The foundation of the 28mm base is a 25mm diameter disc, though - as I mentioned in a previous post - I like to base my Bolt Action figures on metal discs (in this case, 25mm steel repair washers).


2. Ground Effect: Next I build up the 'ground' with a rough application of quick drying PollyFilla. This I either mix with some dark brown paint or with Vallejo's 'Black Lava' compound so that the PolyFilla plaster is no longer white.


3. Base Colour: Once dry, I slap on some Vallejo Black Brown as my earth base layer.

4. Wash: Then I apply a black wash to pick out the nooks and crannies.


5. Rocks and stones: I'm not too fond of the fake 'flowers' that seem to be in fashion as base ornamentation at the moment. I prefer to keep things simple, just some 'moss' (or grass) and some random 'rocks'. I super glue some tiny pebbles I find in the back yard onto the bases. [Note: I may do this stage while laying down the Pollyfilla/Lava material so that the stones stick in the 'ground' instead of being glued on top of it.]

6. First High-Lights: I then start my highlight dry-brushing, with - first - a medium brown (Burnt Umber mixed with Khaki) and then I dry-brush a very light highlight on top of Khaki.


7. Grass: I don't bother with fancy static grass, just plain old flock from my local railway model shop (the cheapest mid-green colour).  I like a bit of 'earth' showing through...


8. Finishing Highlighting: As it is the grassy base is still a little flat and bland, so I then go in and do some extra highlighting and colouring just to pick it up a little. I did some gentle dry-brushing with Vallejo's Stone Grey and then added some spots of Citadel's Agrax Earthshade wash here and there for some extra depth or where I thought my 'ground' was becoming too light (the idea is to create contrast).

I also very lightly dabbed some spots of Vallejo Stone Grey onto the flock 'grass' to add some areas of bleached grass. Just for some variety in colour.

9. Glossing: Although this stage is actually to provide the paintwork with some protection and prepare the model for the addition of decals, a coat of varnish also helps to stick down that pesky flocking (which has a tendency to moult if you aren't fastidious with your glueing)!


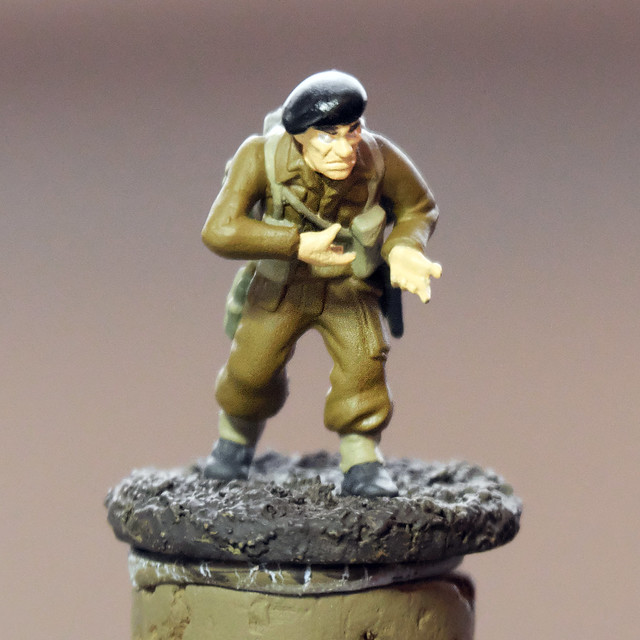
And, there we go. The figure is now ready to have the shoulder patch decals applied and then fixed in place with a final coat of matt varnish. This will also take the shine off the model.

Conclusion...
I did notice that while this worked perfectly well for my smaller 1/72 war game figures, I think I need to add a little more texture to the larger 28mm scale disc base. In retrospect, this is probably why many modellers add 'flowers' and tall grass clumps to their bases.

I am still a bit adverse to flowers but will experiment with other texture additions in future figures.

Friday, 13 May 2016

Minairons 1937 Chevrolet 1.5ton truck - part 9

[Like many of my posts, this entry is more of a reminder to myself how I did something. I realise it may be a little boring for third-parties reading it.]

Onto making the base. I like to do this just before I add the final weathering to my vehicles as I try to match the colour and shade of the mud and dirt of the base with the mud I add to the vehicle. I find this easier to do if I have the base finished first.


I've tweaked the process of making my base slightly, I now create the tyre tracks (or track tracks) using Milliput. This is just because the plasticine-like consistency of Milliput makes it easier to impress the tyre or track patterns into the modelling putty (which isn't as easy to do with the PollyFilla that I use for the rest of my base).


I've also started making small indentations in the track area for the wheels of the vehicle to sit, so that the truck tyres look slightly recessed into the mud (rather than sitting on top of the 'ground' as I had in some early models).

After that is the usual routine for painting and applying the 'grass' and weeds...

'Black Lava' ground


AV's 'Black Lava' compound is really supposed to be for making realistic tarmac roads, but I like its gritty texture and I add it to my PolliFilla to make a black-ish goop with which to make a rough earth base for my dioramas. It's a bit wild and flakey and come up with some nice organic textures.

Also, I like to start with a dark base, so having bare white PolyFilla doesn't work for me.

Black Primer
A quick squirt of HiCote Auto Black...


Brown-earth Base
Next, I apply a dry-brush coat of Vallejo's German Camo Black Brown, which is a nice dark muddy brown. I'm trying to retain a bit of the underlying black base colour this time, to emphasise the contrast in the detail and give more depth to my 'earth'...


'Weathering' the earth tones
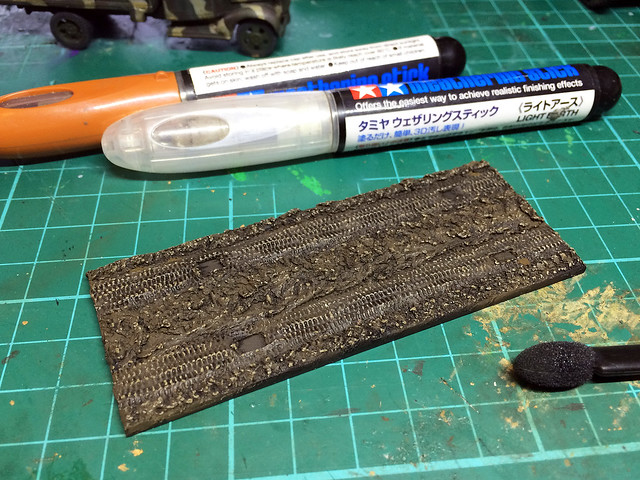
Weathering is perhaps not the correct term, but I am shading the highlights to give a - hopefully - natural weathered look to my ground texture. I used Tamiya's weathering sticks to achieve this, highlighting using their 'Mud' and then 'Light Earth' to give the varied tones I want...


Green, Green Grass
I've stuck to my very simple application of scenic 'grass', it's not very sophisticated or realistic but I am not tinkering with my 'system' of doing grass as I want all my Finnish project bases to look the same. Basically, sprinkling on just one colour/tone of scenic grass doesn't quite produce a really convincing grass effect - to do this I should be experimenting with mixing tones and maybe introducing 'static grass' medium to get a true grass. I will try this with future projects.


Stoney grounds and grassy tufts
The final thing I add is some 'rocks' and turfs of grass. The 'rocks' are just scale model railway track  'ballast' I think, but any old scenic stones will do. These are just individually glued on - randomly - using good old PVA glue...

Stoney ground. The front wheels need some more 'mud' applied to the very
bottom of the tyres to give the impression of the weight of the truck..
The grassy tufts are, however, specialist scale model scenic 'self-adhesive tufts'! You can get them in a variety of colours from eBay to suit your 'season'  mine are 'light summer' I believe. Despite them being advertised as 'self-adhesive' I do find that I have to secure them with a spot of - you guessed it - PVA!

Conclusion
Well, that's the base, though I do like to give the base a light spray with matt varnish as it helps to keep the grass in place.

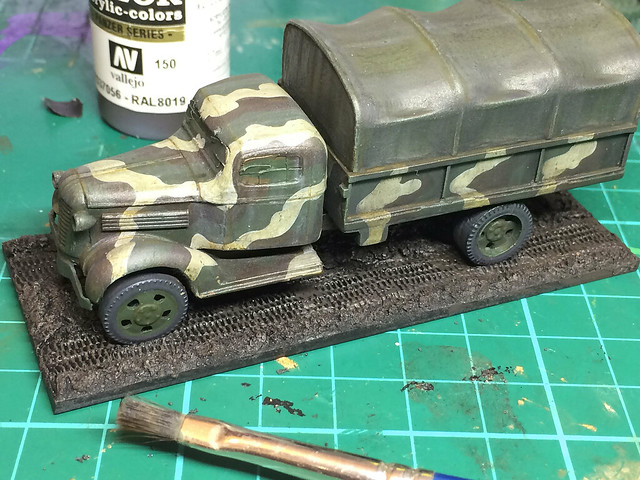
That done, I affix the truck to the base and then check to see if I need to do some 'touching up' to blend the truck into the ground. My early attempts at basing had my models looking like the were sitting on top of the ground, with now 'weight' to them. I know try to sink my vehicles' tyres or tracks into the ground slightly. It looks more realistic.

Sunday, 20 March 2016

Wargame vehicle base making

Despite the fact that I have developed a particular technique for making my wargame model vehicle bases, I decided to try something a little different. There was one small area of the base manufacture I wasn't happy with, that was the tracks on the ground.

One of my earlier bases. Primarily created with PollyFilla.
I make two furrows in my base surface to show a countryside 'roadway' and on this, I try to imprint a pattern of tyres and tank-tracks to give it a used look. Now, up until now, I have created the basic 'ground' using PollyFilla, which was then painted and this worked OK. But, it was a bit difficult to imprint the vehicle tracks into this quick-drying plaster.

The problem with plaster is that it remains a little too 'squishy' right up to the moment it sets hard. You have to try and catch the plaster just at the moment where it is turning and is semi-hard to press a good pattern into it - too soft and it's like trying to press a pattern into butter!

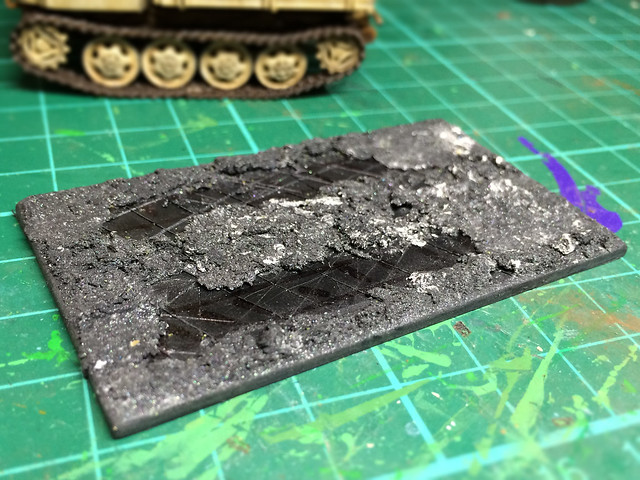
So, I'm trying out a different approach where I make the majority of the ground as normal - with PollyFilla - but then leave the strips where I want to make a track pattern bare and then I used Milliput (Terracota) to make small areas where I could press my patterns into...


Milliput has the consistency of plasticine when it's mixed and so is far more conducive to having patterns pressed into it...


Prints are far more defined and easier to make and if you make a mistake or aren't happy you just smooth the putty over again and have another go!

Now, there is a downside, Milliput can take hours to dry properly. My PollyFilla technique was dry in 20 minutes and you could have the whole base-making process done in a couple of hours (working at my speed). This new technique demands a little more patience but does pay off with a clearer and more satisfying track imprint.

The rest of the process is the same as normal, I apply a base coat, then an earth coat, weather and then apply my grass (and maybe some grass tufts and rocks). So I won't bore you with this.

I'll see how this (below) turns out and if I decide I like the effect then I will just have to remember to produce the track as a job I do last-thing before going to bed, so it's dry in the morning.

Sunday, 24 January 2016

Chevrolet Radio Van conversion - Part 9

On the final stretch now. My Chevy van nears completion as I go a bit mad with the weathering!

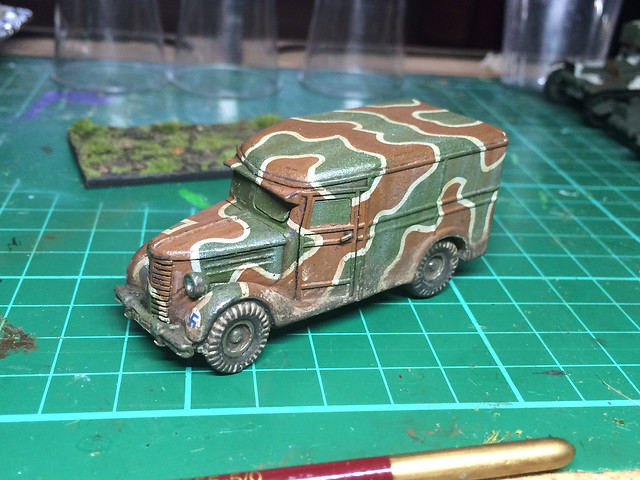
I decided from the start that I wanted a really dirty, war-weary vehicle this time. The reasoning behind this being that, by 1944 my 1939 vintage Chevrolet van would have seen better days, and, therefore, the weathering would be pretty heavy.


As you can see, the van is the worse for wear with chipping and plenty of mud and dirt. In fact, I had the usual worry about when enough was enough. Hopefully, I haven't gone too far.

All that's left to do is apply the last coat of varnish (matt) and the removed the windscreen masks. At this point, I'll have to decide how I will deal with the windows - I guess they should be dirty too.

I also made the base for the model. The usual process...


I have a feeling I should be looking to improve my 'grass' technique, but the problem is that I want this base to match those I have already done. So, I can go changing my approach too much or start using a new static grass medium.

Well, that's about it. Last thing to do will be to add the headlamps using some PVA. I'll pop in a couple of drops of Formula '560' Canopy Glue by Pacer, these should dry crystal clear and make nice 'glass' headlights.

Next: The completion photos (I hope).

Wednesday, 28 October 2015

1/72 Steyr RSO - The last leg

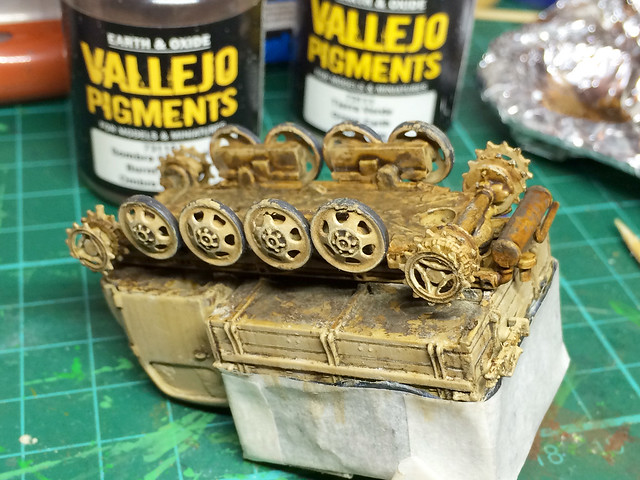
The last touches to the vehicle body are just some 'cosmetics' - the addition of some dirty and mud to the underside...


Having finished the underside I can now add the tracks. in doing this I have to use some strategically placed spots of superglue in order to give the impression of realistic track droop...


This all worked out OK, I suppose, but the vinyl tracks deform very easily and I hate the obvious join. Still, I guess this is one of the downsides of die-cast models compared to quality plastic kits.

And lastly...

Making the model base
Well, you know the routine by now, although this base will be slightly different because of the tracks (rather than the usual wheels). So it will be interesting to see how this will work out.

I begin with the usual rectangle of black plastic sheet, cut down to give a 5mm border all round the circumference of the vehicle to be mounted. I then start daubing on some Polyfilla, which has been coloured black by adding some acrylic paint, to represent a muddy road or country track...


I try to leave a flat area without any 'mud' for the tracks (or wheels when doing trucks) to sit on. The reason for this is so I can build up some mud around them so they appear to be depressed into the ground. It also gives me a good piece of the bare base with which I can glue my vehicle securely.


A quick check with the vehicle in place gives me an idea of how much more 'mud' I need to add and where to add it. I want to make sure the vehicle tracks look like they are pressing into the ground (Polyfilla is excellent stuff, I particularly like the quick drying version that comes in a tube)...


With the 'mud' added right up to the tracks now I can get onto painting the base and adding grass. My basic earth coloured coat is Vallejo's [822] German Camo Black Brown...


After a light wash of very dark brown to pick out the detail and texture in ground I add the grass. This is a simple sprinkle of static mid-coloured grass on top of a thin mix of watery PVA glue...


Grass sown, it's onto creating the mud tones. For this I have been using Tamiya's Weathering Sticks (as I got them cheap) - I lay down some of Tamiya's 'Mud' and then highlight it with Tamiya's 'Light Earth'...


And that's that really. I'm ready to mount the RSO and then all that's left to do is take the completion photos.

Improving die-cast models to fit in with plastic models has it's own challenge, but I enjoyed this project. Which is probably just as well as I have a small collection of other 1/72 die-cast vehicles I will be converting for my Finnish Continuation War project.

But, it will be nice to have a break and get back to a bit of kit making..

Wednesday, 9 April 2014

Finnish infantry v.2 - guinea pigs

Although I have chosen a set of figures to act as my 'test squad' I have now chosen an additional set of figures to act as guinea pigs, to try out painting strategies and shading techniques. I don't want to risk ruining my nice Pegasus figures trying out new things so I thought I'd sacrifice some of the Strelet's Finns instead.

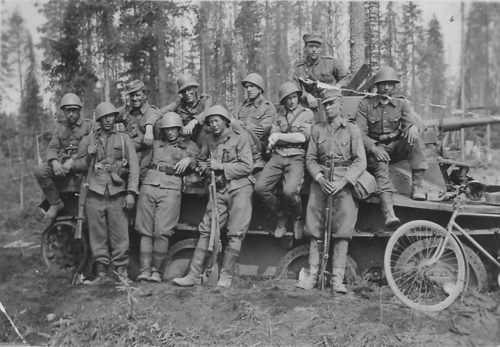
A nice reference photo of Finnish infantry posing in front of a destroyed
Soviet BT-5 tank. This tank and the proliferation of Czech and Swedish style
helmets means this was probably taken in the early part of WW2.
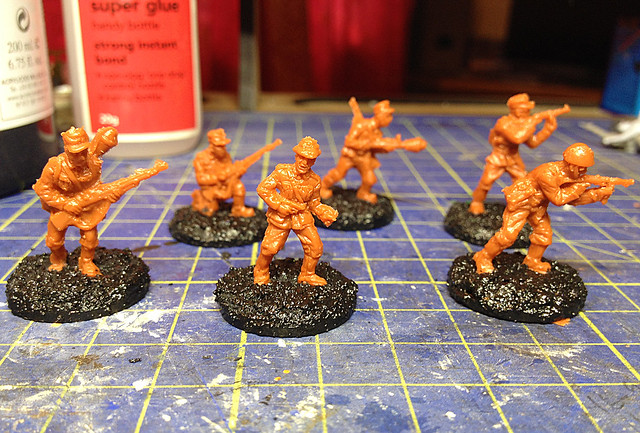
I chose six of the better poses from the Strelet's pack - the only good poses really - and prepared them for painting. The first stage being, of course, the basing of the figures.

Extra note on prepping figures: I neglected to mention that as part of the preparation of the Strelet's figures that I had to do some cleaning up on each figure. Being the softer plastic type soldiers they have a fair bit of flash and seam lines, this needs to be removed. And being soft plastic you can't sand or file off the seams - which 'rags' up the plastic - but instead you have to shave the flash off with a scalpel or sharp craft knife blade. This is all a bit tedious and never very satisfactory and is another reason the Strelet's figures are not ideal.

I did a bit of Googling and I believe that for 1/72 wargame figures a base the size of a 1p (UK) coin is the most appropriate size. At this point wargamers usually warn that using actual 1p coins is illegal, but I think that is just because they like the idea of doing something that's perceived as being a bit 'bad'! :)

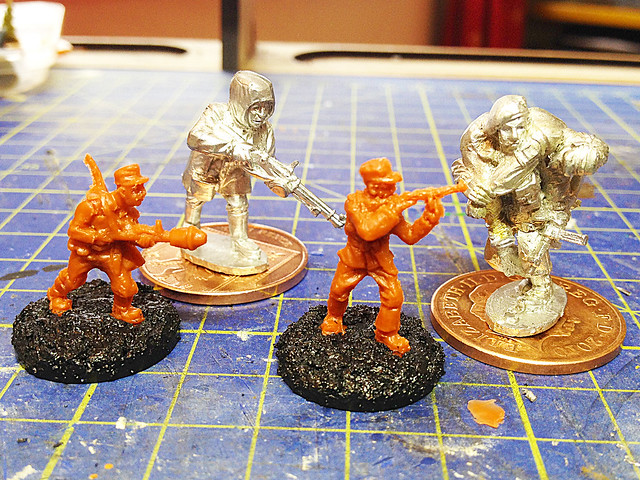
Anyway, the Bolt Action game is designed to be played with 28mm (1/56) scale figures and these, being larger, can be based on a 2p sized disk. But I am sticking with 1/72 - which I am told works just as well with the rules - but it's interesting to compare the differences in scales (I received a couple of complimentary 28mm Bolt Action figures when I bought the rule books)...

1/72 scale figures versus 28mm (1/56) scale figures. I think that the faces
of the larger 28mm soldiers are a lot more interesting and expressive. And
being bigger they must be a little easier to paint!
I can see why 28mm figures are probably used. Bolt Action is primarily a infantry squad based tactical game, so you can get away with larger figures without needing a huge game table. But also, I think the designers realised that the slightly larger figures gives players more latitude for creative painting options - the larger soldiers mean more expressive faces and that gives the game a whole lot more character.

Anyway, back to basing. I took my '1p sized disk' (lol) and stuck my little soldiers to it using Wilko's Super Glue. They are more or less fixed dead centre, but where weapons overhung the disk I did off-set the figure slightly, moving it back a bit so there was less of a overhang. It's a visual thing and a matter of what you think looks right.

Once the glue dried I then added texture by slapping on some quick dry Polyfilla with some added sand for texture. I also mixed in some AV Black Lava terrain texture material to turn the Polyfilla black.

AV's Black Lava is funny stuff, but it's name is very apt. It's a glossy black GLOOPY substance with a gritty texture and is ideal for laying down a sloppy muddy ground texture. It's acrylic based - I think - and washes off with tap water.

When my Polyfilla 'ground' dried I gave the bases and the edges of my '1p sized disk' another light coat of the AV Black Lava, just to add some extra grit to it. I know that the other way I could have done this would have been to simply coat the surface of the disk and the base of the figure with PVA and then sprinkle the glue with sand, and perhaps this would have resulted in a similarly gritty effect, but I'm experimenting.


OK, while I wait for this last base coat to dry I will decide what primer base colour to paint my based figures. As with vehicle model base coats there are arguments for either a white or a black primer colour, but I was swayed by the following painting tutorial so may go with white...


NEXT: Primer coat and main base colours.