Wednesday, 17 September 2014

Pegasus 1/72 German Army Truck - Part 7

Onto the canvas tilt...
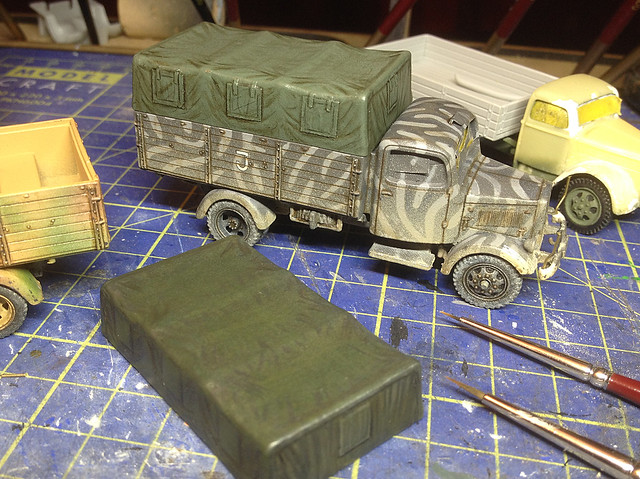
Now I had a bit of trouble here, although I have done a few canvas tilt covers now they have all been light 'khaki' coloured which lends itself to my 'chalk' technique. These German trucks have darker grey/olive drab canvas cover.

Now I should begin by saying that I have found that airbrushing doesn't work for me with canvas covers. Maybe I don't have a steady hand, or maybe my airbrush isn't fine enough, but for-whatever reason I cannot seem to get the same subtle effects that other modellers seem to be able to get using an airbrush...

My previous effort - ZiS-6 - at a canvas cover using Conte crayons. I found it
my easier to do a lighter coloured canvas colour than I am doing my current
darker colour one. The contrast of colours seems to suit a lighter tone.
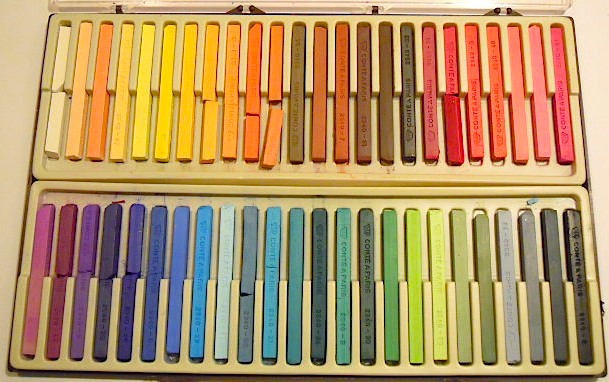
I *think* it has something to do with scale and the amount of folds in the material. At 1/72 scale I am simply happier that I can 'paint' subtle folds in fabric using my Conté crayon technique rather than spraying on very fine lines of paint. Conté crayons are a chalky - not waxy -crayon which breaks down into a powder that's not unlike women's powder make-up in consistency (I am guessing here - I don't have a lot of experience with make-up). Therefore the greatest quality of it is that it can be blended to create subtle gradients of colour and faded like a colour tint.


So, the process I've adopted is as follows (more or less)...

1. After base coating the canvas with a mid-colour version of my target colour I begin to work into the shadow patches using a dark wash. I also outline any features - like the tilt 'window flaps'...


This looks a bit 'cartoony' at the moment as it just two colours - the mid-green and the shadow colours. I then give this a quick spray of satin varnish to protect this layer before I start the high-lighting with my Conté crayons and pencils - this is done so I can easily wipe off any crayon that I'm not happy with.

2. I begin to loosely sketch on lines of high-light on the crest of any folds in the 'canvas'. Just gently drag your crayon over the raised surfaces in the canvas in a similar way to dry-brushing - which is another way I could have done this, by the way. But the difference between my chalk technique and dry brushing is what happens next...

Note: The canvas looks darker because of my lighting - it's actually the same
mid-green as the picture above.
Having drawn on my stripes of white chalk I then start to blend the chalk into the background, creating gradients of highlight. You cannot help the crayon powder spreading, by the way, it just happens, so your whole 'mid-colour' base tends to go a shade lighter in the process.

You may find that the effect is too subtle and a lot of the chalk disappears while blending. Don't worry, just keep re-applying in layers until you achieve the effect you want (I had to go around the canvas two or three times, repeating the application of the chalk until it reached a level of high-light that I wanted).

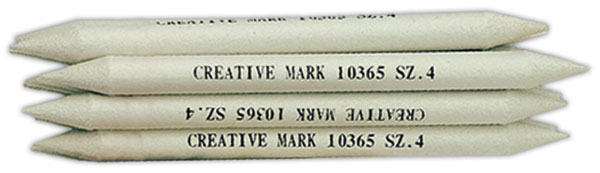
To blend pastels or Conte crayons or chalks I use a paper based blending 'stump'.
A paper-based  'pencil' which can be sharpened to a point for fine blending and
also to clean the point between colours.
3. Now, as you will have found by this point, chalk is a very nebulous medium - easily wiped off by accident. Therefore you have to seal the medium before going further with another light coat of your chosen acrylic varnish (I find satin works best for me).

This also has the effect of 'flattening out' the rather chalky texture and graininess of the blending as well as protecting the chalk while you add more shadow wash or work into the medium tones.


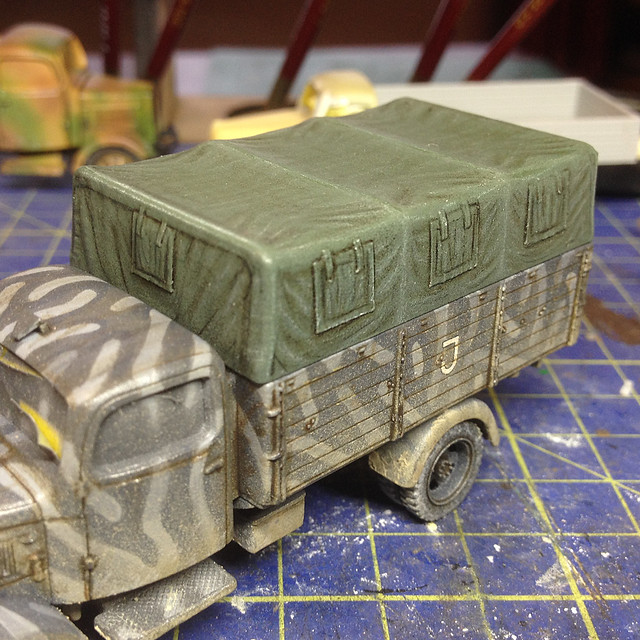
I'm probably less happy with the effect so far on this one than I was with my previous khaki coloured canvas covers. Maybe it's because I overdid the wash outlining which makes the 'window flaps' look drawn on. I shall have to use a lighter wash for this in future.

It's a sort of 'Pontoon' ('Black Jack') situation really - as a lot of weathering is - and at this point I choose to 'stick'. Yes I could fiddle around a bit more gambling on a better effect, but I could also 'go bust' and spoil what I already have.

Next: Last stage - the windscreens.

Saturday, 13 September 2014

And sometimes I just get it plain wrong...

History is difficult - even for model makers!
One of the reasons I like model making is that it involves - like it or not - a bit of research. I like research, maybe that means I am an inherently 'nosey' person, as I find nothing more relaxing than spending time trawling though books and websites for tidbits of useless information!

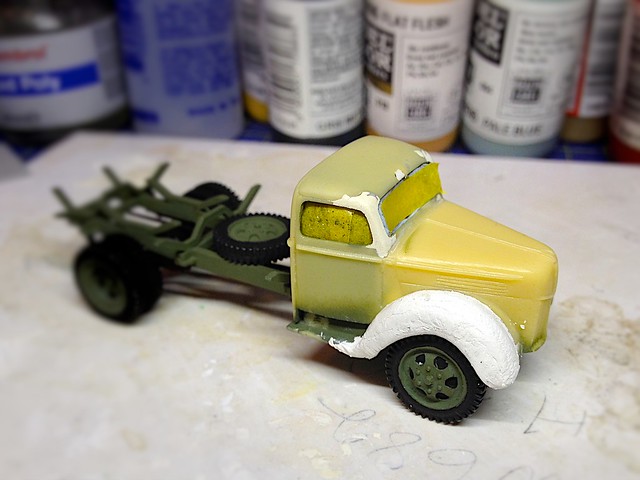
This is where I was with my MT V3000. I had started to make a new shaped fender using
Milliput putty to make the truck look more like the American version of the V3000.
However, this can be a double edged sword. Take my ModellTrans Ford Werkes V3000S conversion project - I had stated that I needed to further convert this conversion because 'it was the wrong type of V3000' truck (the German made one and not the American one as used by the Finns in WW2).

Well...I was wrong. (Or at least right and wrong.)

While researching another Finnish army vehicle I accidentally came across a photo in the fantastic SA KUVA archive that completely disproved my contention that the Finns *only* used the American production model of the V3000 truck. While initially in the war the Finns did source their V3000s from America (before they 'changed sides' and joined the Axis in 1941) they later received German-made V3000s as part of a delivery of equipment from their new best buddies, the Nazis.*

* (It's a complicated story, which I am just reading about in Henrik Lunde's history 'Finland's War of Choice: The Troubled German-Finnish Coalition in World War II'.)


From the SA KUVA archive - this photo shows a long convoy of German-made
Ford V3000s - part of a purchase - I believe - that included StuG III assault guns.
This enlargement clearly shows the features which mark this out as a later model
German Ford Werkes V3000 - note the single piece windscreen and 'flat' fenders.
Anyway, the point is 'never say never' - someone is bound to come along and make you look an ass.

So the Finn's did have German V3000s, which means I don't have to convert my HobbyTrans conversion into a shoddy take on the American production model truck...Bugger (or 'hooray')!

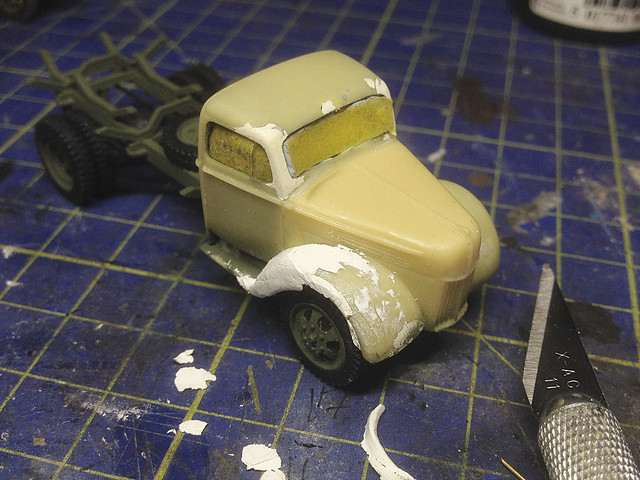
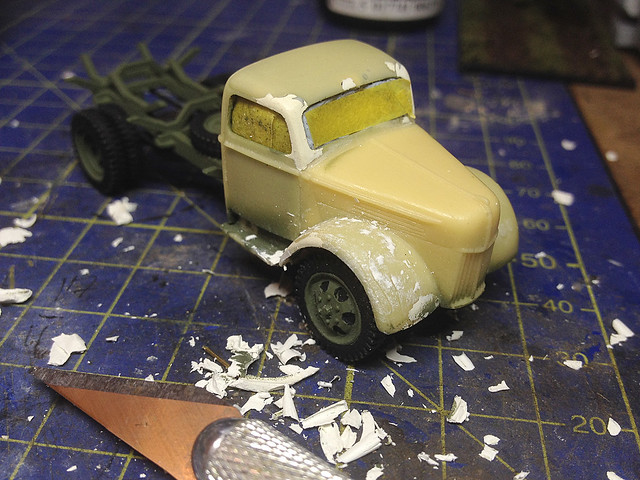
Luckily the Milliput just peeled off, it doesn't melt and stick to surfaces like
poly glue does. So it was a case of just chipping the hardened putty off.
Off with the Milliput - luckily I only had time to modify one of the fenders and the Milliput chipped off the resin model quite easily as it was applied to a smooth surface and so didn't 'glue' itself to the model.

Phew! Back where I started, now I can get on with finishing this model.
So there you go. Proof, were proof needed, that I ain't as clever as I thought I was. A big thank you to the chaps at the Axis History Forum who have been a big help in my research of things pertaining to  the Finnish Continuation War and put me on to the photo I found at SA KUVA.

Wednesday, 10 September 2014

Final candidate for YaG-6 model - a Yag-6!


Perhaps the hardest motor unit to populate in my Finnish army project has been the heavy artillery company. Under the Rapid Fire war game rules I don't actually have to include a heavy artillery unit as - really - this would be an 'off table' asset available only as a virtual bombardment and not as physical attributes. But I am fascinated by the huge variety of assets the Finns deployed during WW2 and so couldn't resist trying to model as much of their order of battle as I could.

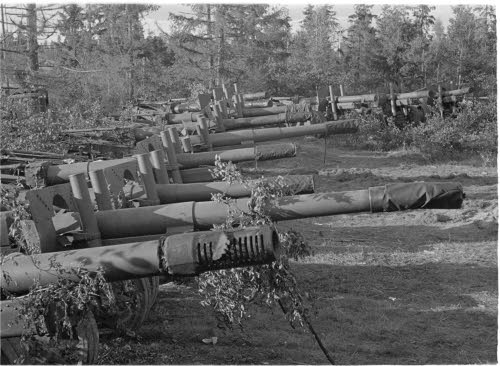
The Finns captured large quantities of Soviet equipment. Here a large number
of 152 mm howitzer model 1937 are gratefully lined up by their new Finnish owners!
Source: SA KUVA - Photo No. 43755 
The Finns did employ a large number of very big artillery pieces - from heavy field guns to super-heavy howitzers in calibers from 150mm to 210mm [see Jaegar Platoon web site for reference] and - obviously - they needed equally large vehicles to pull them. Though there is limited data (available in English) as to quite what many of these vehicles were there are tantalising hints over on the SA KUVA Finnish WW2 photo archive - among these I found some picture of a likely towing vehicle in the form of the mighty YaG-6.

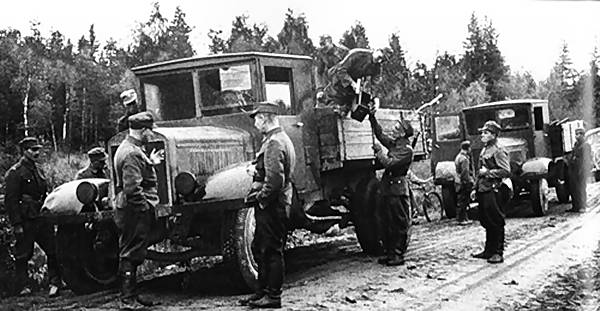
Two Soviet YaG-6, 5-ton, 4x2 trucks fell into Finnish hands. Machines of this
power must have been greatly prized. Source: SA Kuva
Now, until recently I was in something of a quandry as I knew I wanted to include an example of this vehicle in my line-up but I just couldn't find a plastic model of the Yag-6 in 1/72 scale.

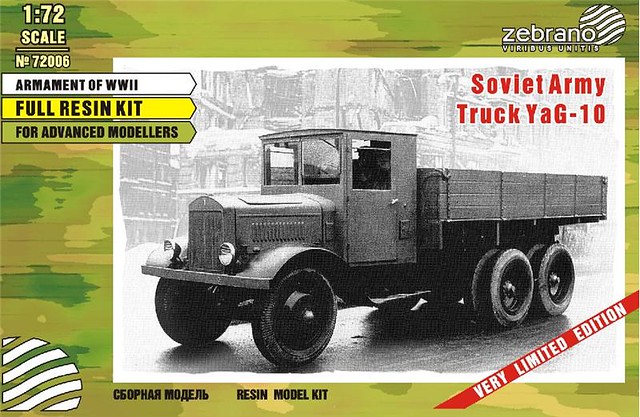
I have contemplated converting an Italeri Lancia 3RO, which is generally similar to the YaG and I did eventually find a 1/72 Zebrano YaG-10 - the bigger 6x2 version of the YaG-6 - which could be easily modified by removing one of the rear axels turning it into a 4x2. But the Zevrano YaG-10 is such a lovely looking kit that I just didn't have the heart to butcher it.

Zebrano's YaG-10 - the bigger brother to the YaG-6. For some reason they gave
this kit full-colour box artwork. And as far as I know ALL Zebrano's products
are 'very limited edition'.
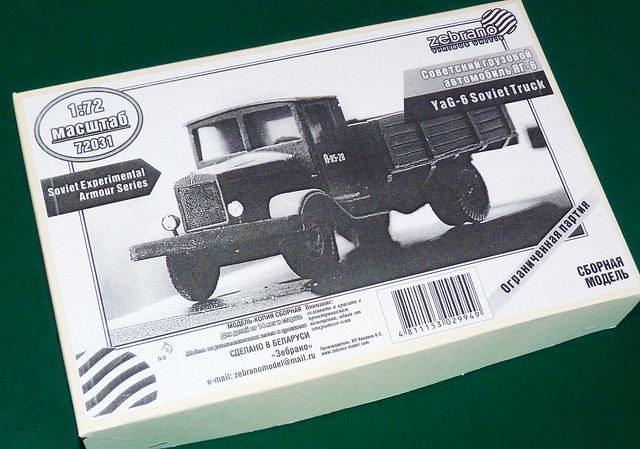
In the end, as luck would have it, I managed to find a Zebrano YaG-6. I tracked it down to a model retailer in Germany and snapped it up before I had time to feel guilty about spending €26 (yikes)!

About the Zebrano YaG-6 model
Zebrano seems to be a Russian company that specialises in short-run resin models. However, they appear to be relatively advanced in the complexity of model they do and have a working relationship with the well-known company of PST for whom they seem to prototype a lot of kits for.

Anyway, their YaG-6 turned up in a very plain cardboard box with a simple monochrome photocopied label stuck to the lid. No frills at all with this kit, and the contents continued that frugal theme...


The instruction sheet was - again - a simple photocopy and resin parts were packing in various little plastic bags. There was a single sheet of bubble-wrap to give the parts some protection, quite important as unlike plastic injection moulded kits all these parts came loose and without sprues.


I don't have a lot of experience with these 'high quality' display resin models, but even so I was impressed with the number of parts included in the kit and amount of detail there seemed to be.


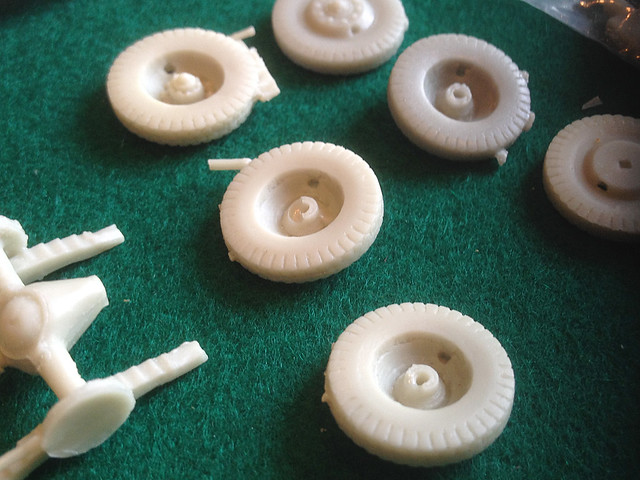
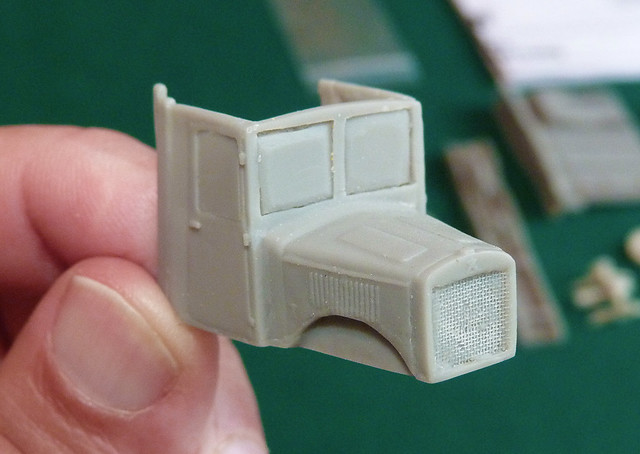
The two parts I examined first were the wheels and the cab. I was glad to see that there was adequate amounts of detail imprinted in the resin, but it wasn't quite as much or as sharp as some of the better makes of plastic kits. The tread on the tyres, for example was a bit shallow and vague for my liking and the cab has a couple of large slabs of superflous resin attached to it's rear which would have to be removed. Additionally, the cabs windows were filled in and you will have to cut those out too.


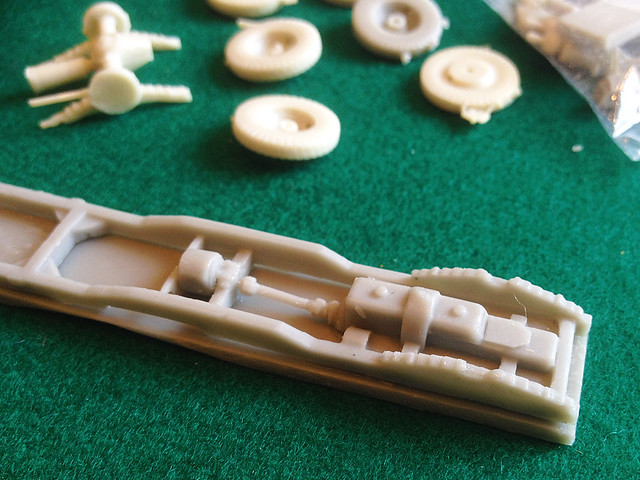
The chassis was more or less one piece, including the lower engine block and front suspension, but I can live with that as it's not really on show. One thing I was really pleased about was that Zebrano included a transparent sheet for the windshields, not only that but they printed the shape of the windows onto the sheet so you have a guide for cutting. Nice.


As I said, there are plenty of parts (I haven't counted them yet though) so I will have to take things slowly and carefully, particularly because thin resin parts have the reputation of being very brittle and easily broken. Still, I do feel - at least - that I got plenty of parts for my money (just as well really).


Good value for money? Well, that's a relative thing - I wince at the thought of how much I paid for this kit, but there again nobody else makes a YaG-6. The cheaper option - for war gaming - would have been to use an Italeri Lancia 3RO as a stand-in if you really want to include a YaG in your line-up. But...Well...I've spent the money now! :)

Next: Basic construction and the cab interior.

Monday, 8 September 2014

Pegasus 1/72 German Army Truck - Part 6

Weathering and chipping...
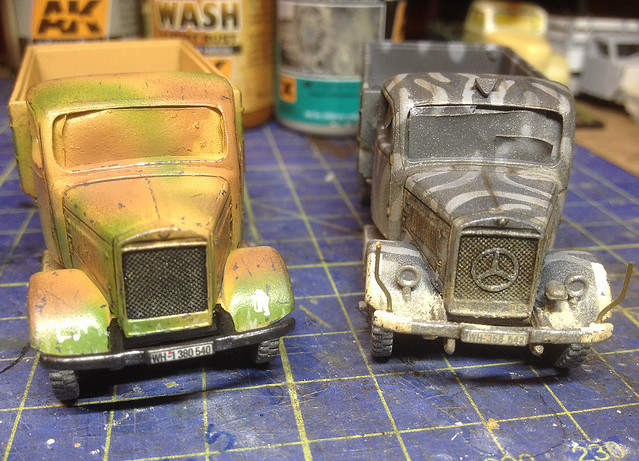
Having weathered the underneath of the trucks it's time to work topside and add some character by means of dirt and scratches.  I started with a light airbrushing of dust (Vallejo's Model Air Yellow Sand)...

Light dusting of...er...'dust', then onto the pin washing.
This just gives a little film of dirt around the bottom edges of the trucks. Then I start adding the chipping. Now I suppose you could argue that you should do the chipping first THEN add a dust film, but I did the chipping second so it stood out (I could always spray a light coat of dust over that if I want to tone down the chipping scratches). I then did the pin-washing to accentuate all panel lines - as usual I used AK's Dark Brown Enamel Wash [AK 045] for this.

I then used Vellejo's German Grey (995) for the 'chips'. It's a dark slate grey which should give the impression of unpainted steel showing through the scratched top coat of paint. Now this part is open to interpretation and I would suggest you use a good reference photo when weathering and chipping or - like me - you may be tempted to go a little over the top (I like the heavily weathered look, but I am aware it can look a little gimmicky). So, sorry if my chipping isn't to your tastes!


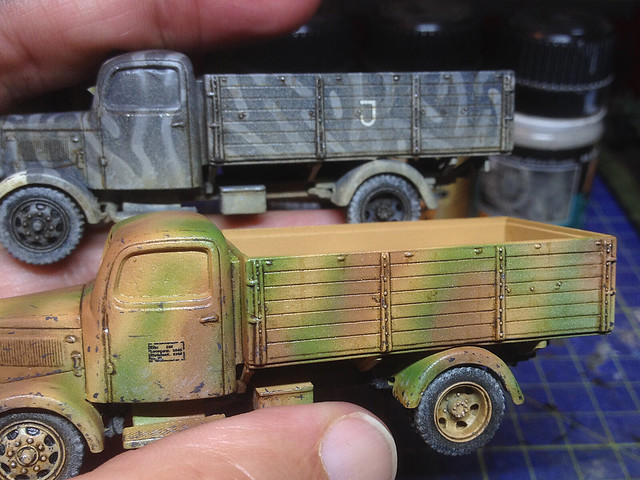
Now, obviously, this dark chipping works great on light or medium coloured vehicles, less so though where the vehicle colour scheme is predominantly dark - as in the case of my second truck. There didn't seem much point in trying to paint on dark grey scratches on a dark grey truck! But where there are light patches and white decals I did add few grazes and spots.

The wood panels on the flatbed were next to get some attention.

Pin washing between the planks of the cargo flatbed. It makes them stand out.
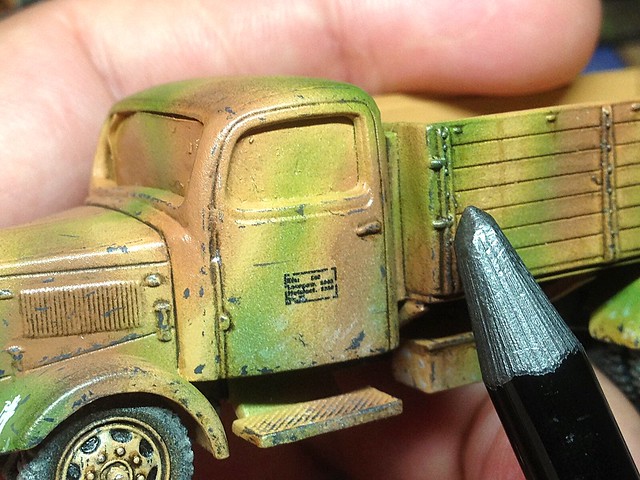
And finally, I like to finish metal surfaces by running a graphite pencil over 'sharp' and 'worn' edges. The graphite can be polished up to give a metal shine that really gives the impression that there is a metal body under the top coat of paint. Also, I like to use the graphite in powder form too by simply sanding the pencil 'lead' so that I have a tiny amount of fine graphite which I can judiciously brush on to the surface to give a metallic sheen where I think it is appropriate.

Just finishing the wear & tear on the drivers step. The graphite
pencil gives the impression of the top paint being worn away.
This finishing effect is great for tank hulls where paint coats where thin and the metal bellow just starts to show through. On trucks I like to use this on the cab exterior, especially on the roof. But less is definitely more with this technique!

...Taking stock as we approach the final hurdle...
The last part of this project will be the painting of the canvas tilt cover and the fitting of the windshields. This will be the next - and hopefully the last - instalment of this blog tutorial.

As I have said in this post though, weathering and chipping are very much a personal thing. More than any other part of the model-making process this is your chance to be creative and express your own tastes. Yes, you can adhere strictly to historical photo reference but - in effect - in the weathering of a model you are trying to tell a story about that model.

I think I forgot to mention, the Mercedes badge on the right is
simply made out of paper! I printed out the shape and then cut
it out and stuck it on with PVA!
In weathering my German Army Trucks I was attempting to say something about the German army post-D-Day so I perhaps exaggerated the wear and tear to suggest the 'fatigue' that must have been affecting the Wehrmacht by this stage in the war. But again, this was a subjective impression.

In effect, you are actually being a little 'artistic' (with a small 'a') - and I like that.

Saturday, 6 September 2014

Die cast with a vengence

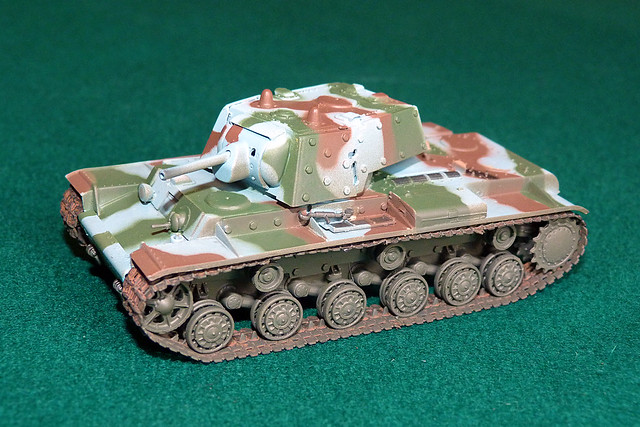
KV-1E captured by the Finns in 1942 and used against it's former owners!
Source: Precision Panzers
I know it seems that all I do is trucks. Trucks, trucks and more trucks! Unfortunately, due to the nature of the project I am trying to do - a war game army based on the Rapid Fire rules - I'm afraid I will need quite a few trucks (about 15 to be exact). But, of course, there will be other things in the army, it's just that I am a bit meticulous and am working through the army order of battle from the top down, so it's transport, tanks, artillery and then infantry.
What's going on? That's not a truck!
That said, while putting my transport pool together I have been collecting bits and pieces for my other units. And the good news is that I have just completed my first unit inventory that isn't trucks! :)

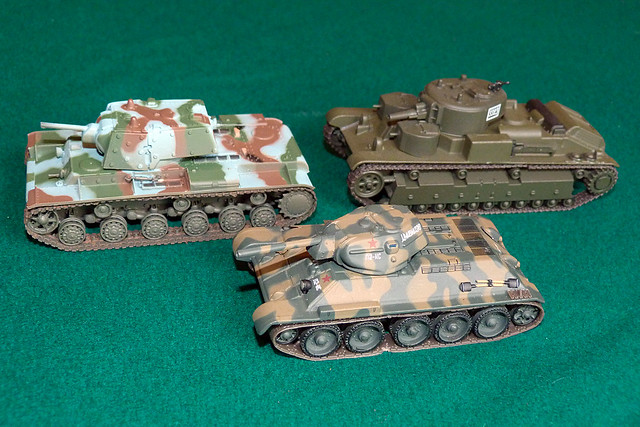
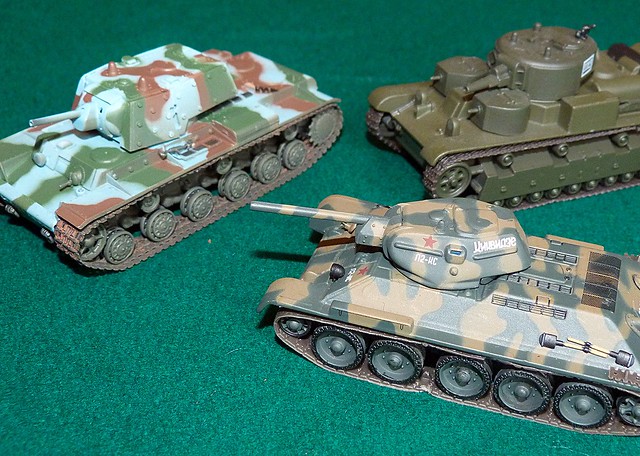
I've been keeping my eye on eBay for potential bargains and my patience has been rewarded as over the course of a year or so I have picked up three 'die cast' tank models that are what I needed to make up one of the Finnish Continuation War 'heavy tank' companies. Today the last of the three tanks I needed arrived - an Easy Model 1/72 KV-1 Model 1941 Heavy Tank 'Finnish Army' and it only cost £6.

This will join the die-cast Fabbri T-28 and Altaya T-34/76 I have already collected and I admit it is a eclectic collection. But beggars can't be choosers and the Finns were desperate for 'modern' armour during WW2 so they put whatever Soviet tanks that they captured into service.


Obviously you might think that this isn't a very effective 'heavy' tank force - especially by 1944 - and that's fair comment. The T28 was already obsolete when the Soviets used them against the Finns in 1940, the KV-1 was really past it's best by the end of 1942 and the 76mm gunned T-34 was superseded by the 85mm gunned T-34/85 at the back end of 1943. And in any case, by late WW2 only the KV-1 could had the stature to really quality as a 'heavy' - and none of these three had a gun that could compare to the real heavies of the period that were sporting guns of calibers from 88mm to 122mm (a 76mm gun, or thereabouts, was classified as 'medium' by the end of the war)!
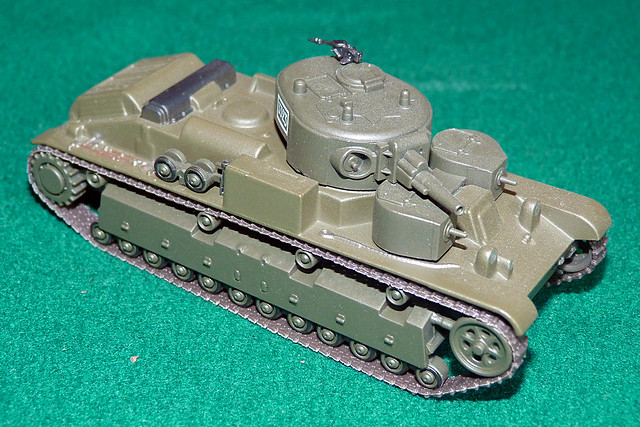
A metal die cast Soviet 1940 T-28E (by Fabbri) which I found going cheap on eBay.
It's a simplified model but the tracks are rather nice. By 1944 this outmoded tank
type couldn't have been more than a mobile pill-box.
But...The Finnish front was not the main theatre of battle during World War Two. So while, by 1944,  the Soviets were rolling westward towards Berlin with 122mm armed IS-2s they were still deploying mid-war types against the Finns. So, in all likelihood, by the late Continuation War (Summer 1943 to September 44) the motley collection of Finnish 'heavies' were facing - in the main - second-line Soviet tanks, like lend lease Churchill IIIs (of all things).

Although the Soviets deployed numbers of their very potent T-34/85 (85mm gunned)
medium tank against the Finns in 1944 they also relied on older types, like this
lend-lease British Churchill III. This meant that the Finns were just able to hold their
own (mainly thanks to the heavily forested, non-tank friendly, geography).
"While Finnish Army considered T-28 to be obsolete already in year 1942, the very limited number of medium and heavy tanks in Finnish use forced also these tanks to be kept in combat use. T-28E tanks that were in operational condition took part to some of the battles that Tank Brigade fought in summer of 1944, but due to their obvious weaknesses they were apparently often retained further back and used mainly as fire support for other more modern tanks and assault guns." [www.jaegerplatoon.net/]


Diecast metal 1/72 Altaya T-34/76 (1941). Although this early model T-34 was
essentially obsolete by 1944 that was only because of it's turret/gun combination. It
was superseded by the 85mm gunned T-34/85 but the chassis remained technically
advanced and the Finns must have appreciated it's 76mm gun. 
About the models
Quality wise all of these models are more than acceptable for war gaming. All the external detail is there, albeit moulded into the surface and some simplification has been done. Having said that they are a better standard of detail than, say, and Armourfast or PSC plastic quick build model.
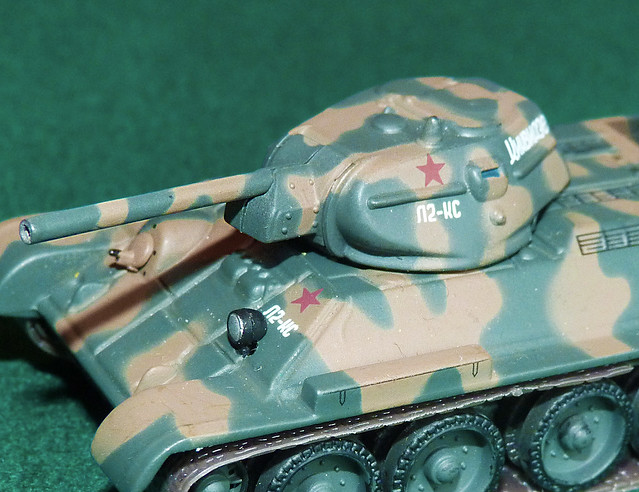
As you can see with the Altaya T-34 practically all the surface detail is moulded
onto the hull as a one-piece component. But even so, with some judicious painting
it should come up as looking fairly nice.
The Finnish colour scheme for the T-34/76 m41. This also shows how the Finns
'clipped' the original fenders (mud-guards), I guess because of the heavy mud
encountered in the forests of their country.
The Altaya T-34 and Fabbri T-28 are both metal die-cast models, while the Easy Model KV-1 is plastic. Having said that I am impressed with the running gear of the Easy Model, the road wheels and tracks are very nicely done (as are the tracks on all the models, although the T-34's are badly joined).

Painting schemes are all adequate for their intended purpose, but only the KV-1E is actually in a 'Finnish' period camo. But, unfortunately, the grey they have used is actually a distinctive blue-grey (my harsh flash fools you into thinking it is the proper mid-grey). So all three models will have to be completely repainted.
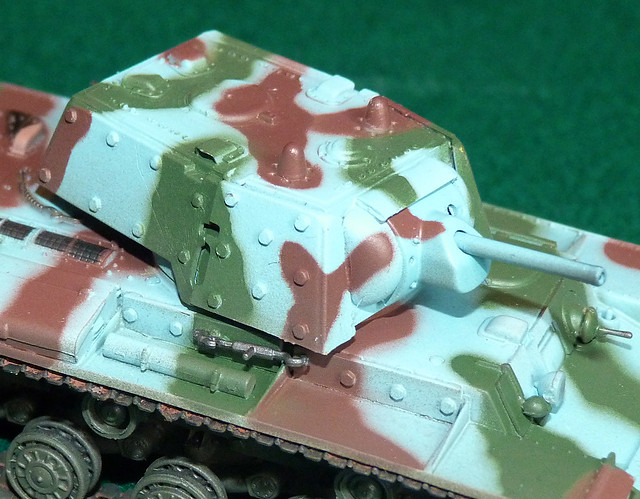
This photo without flash better illustrates the blue-grey colour
that has been used on the Easy Model 'Finnish' KV-1. This is
not correct, rather it should be a plain mid-grey.
Along with the cosmetic paint work there are also some details that will have to be made to make these tanks distinctly Finnish. The Finns modified their captured tanks to suit their tastes, this mainly affects the KV-1 and T-34 as the Finns fitted different shaped fenders and different headlamps. The T-28 is pretty much ready to paint.

Picture source: Armchairgeneral.com

Conclusion
Using die-cast or 'ready made' models for war gaming is a no-brainer when they are of this quality, especially if you are willing to wait for bargains to come along on eBay. Obviously if you want a certain level of historical accuracy you might have to do some re-hashing, but it's still less work than a plastic kit.

From a display modeller point of view there may still be some merit in looking at die-casts, especially if you can get hold of models that aren't necessarily available in 1/72 plastic kit form, like the T-28 (there is a very expensive resin Solfig T-28 kit out there, if you can find it).


I'm very pleased with this little collection and look forward to painting them. Despite the variation in types they should it should look a very smart unit when they all have matching Finnish three-colour camo added.

[Incidentally, the Rapid Fire rules for a Finnish Continuation War period order of battle allows for two such 'heavy' tank companies. But to further illustrate the ad-hoc armour inventory of the Finns the KV-1 should be replaced with a T-34/85 (arguably the most potent tank available to the Finns) and I will replace the T-34/76 Model 1941 with a T-34 Model 1943.]
Wednesday, 3 September 2014

Pegasus 1/72 German Army Truck - Part 5

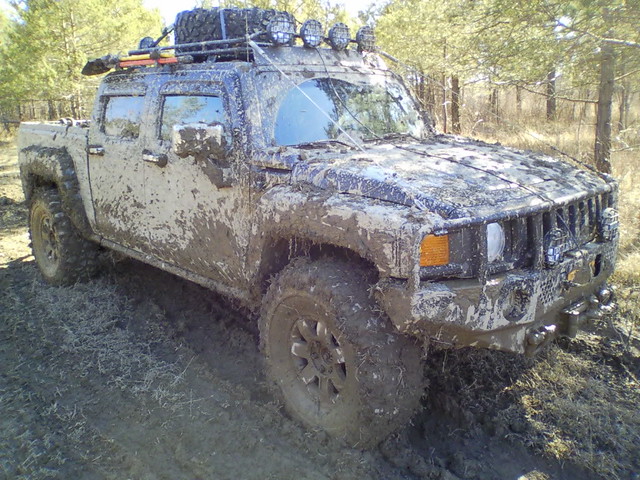
Another small stage in the ongoing process of making my two Pegasus German Army Trucks, adding mud. Not just any mud, mind you, but a dried dusty grey clay mud! ;)

No, not a WW2 German army truck, but I couldn't find a colour reference photo
that illustrated the type of mud I was after!
I decided to experiment with a technique using weathering powders to apply mud after watching this YouTube tutorial by Scale Model Medic...


The modeller in this video has gone for a earthy brown mud but - as mentioned - I wanted a sort of dusty grey clay. To achieve this I simply substituted a brown weathering powder with Vallejo's Green Earth (73111) pigment, this is a slightly sage green tinted clay grey. I applied my mud using the PVA glue method explained in the video.

However, before I actually began applying my powdered 'mud' I did decide to do some basic airbrush work to ensure I covered all the nooks and crannies of the chassis framework...


The chassis on the right in the above photo shows the base colour coats prior to airbrushing, which I did using a Vallejo Model Air sand colour. So adding my powdered mud is now a case of deciding how textured I want the layer of caked on mud to be...


I decided to go for it and texture quite heavily, covering practically all the basic painted coat. Having said that (as you might ask 'then what was the point of the base coat at all') where the 'mud' is applied thinly you can make out different shades of colour giving patches of light and dark 'mud'. This is rather nice as it gives the impression of differing levels of dryness.

I could take this idea one step further by adding some clumps darker slate grey 'mud' to indicate wet mud. Or, indeed, I could add different colours of mud - maybe an ochre or brown mud - to suggest that the truck has been driven through different terrain, it's all a matter of taste.

Next: The wheels get the same treatment before attaching them, then it's onto weathering the top half of the trucks.

Tuesday, 2 September 2014

1/72 Ford van - exciting model from Minairons

A van? Exciting? OK, so maybe if you are Derek Trotter the thought of a shiny new(ish) van might get your blood pumping, but really, as a military vehicle the idea of 'a van' just doesn't sound all that great does it?

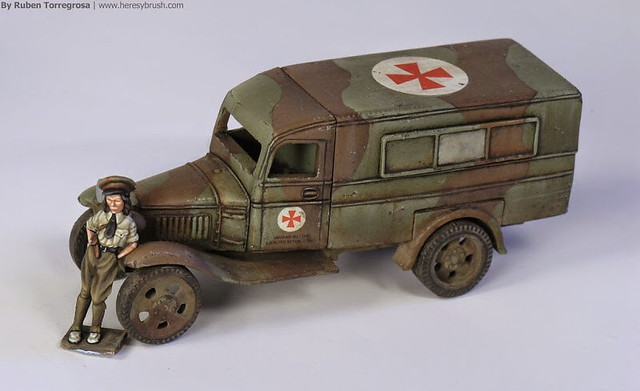
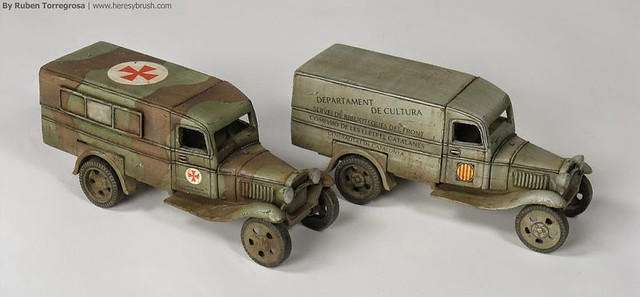
Well think again chaps. Minairons - who specialise in Spanish Civil War models - are about to release a wonderful inter-war Ford AA van and this is such an unusual subject that I for one think it is very exciting! Obviously how excited you will be will depend on whether your area or period of interest includes the need for some pre-war commercial vehicles.


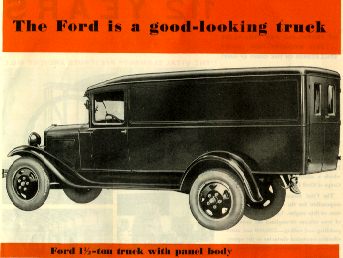
The Model AA Ford trucks were built from 1927 to 1932 but in huge numbers and exported - and licence build - in various countries. It was built in a wide variety of formats, from standard falt-bed truck to 'funeral coach' (hearse) and from a box van to ambulance - and it is the latter that Minairions have modelled. (One interesting point to remember is the the Ford AA was the basis for the Soviet built GAZ AA series of trucks which were built well into the 1940s.)

Obviously, from a war game point of view these 1930s Ford vans would make for some terrific pieces if your are in to either inter-war conflicts or early WW2 scenarios. I imagine the Very British Civil War enthusiasts will be snapping them up as commercial vehicles pressed into militia service.

Beautifully painted by Rubén Torregrosa, Minairon's Ford AA van can be made
into an ambulance by adding the included side window panels.
From my point of view, and you can probably guess my intensions, I will be using these as Finnish Army vehicles for my Continuation War project. Commercial vehicles were the mainstay of the Finn's motor pool and although I don't have any reference photos showing the Ford AA van in use by the Finns you can imagine this is just the sort of light commercial vehicle they would have used.

I need two such light vans, one to use as an ambulance (although the Rapid Fire rules don't require that such an auxilary vehicle be used as part of the game) and another as a radio van for my forward observers to use (RF mentions the use of a car in this role, but they say tomatoe - I say tomato)!


So, there you go - a lovely little model which will be available from mid-September - I'm afraid I don't have any idea what the price will be as yet, but expect a review of this kit as soon as it is on the market.

Official Minairons web site: www.minairons.eu/en/