Showing posts with label Pegasus. Show all posts

Sunday, 12 October 2014

Pegasus 1/72 German Army Truck - Part 8

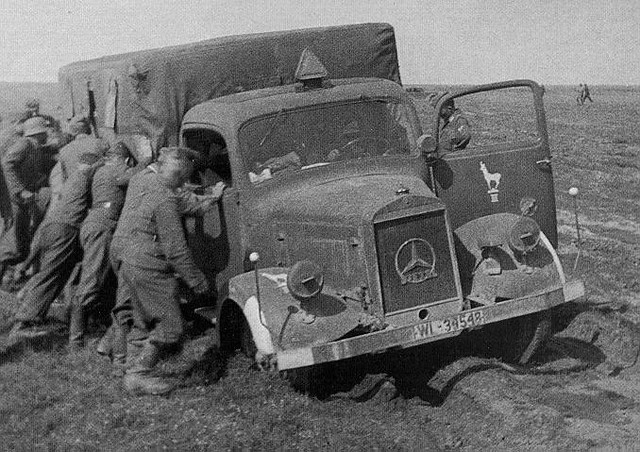
Mercedes L3000s stuck in the mud. Source: Autogallery.org.ru

Nearing the finishing line! (I always find this stage of making a model both exciting and rather disappointing. Sometimes I almost hate finishing a model because I have enjoyed the modelling process so much...Which is probably why I have a lot of unfinished models laying around my workbench!)


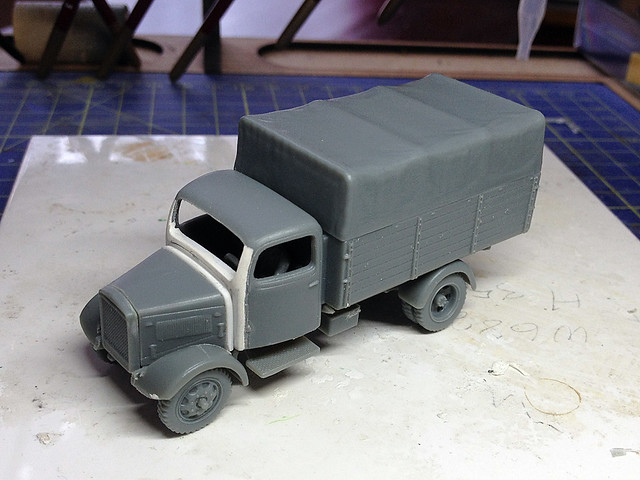
All that's left to do on my Pegasus German Army trucks is fit the 'windows'. And this is probably the fiddliest part.

As mentioned in my introduction to this project, the Pegasus 'quick build' trucks do not come with any transparent plastic parts for windows or headlamps. As these models are predominantly designed for use by war-gamers the notion is that widows are rather superfluous (or that the war gamer may opt to fill in the cab as a solid component and paint on faux windscreens).

I, however, am trying to make these pieces look more like display models so am adding some home made windscreens. The process is simple really - cut out some spare transparent plastic and glue the pieces into place. But for what it's worth here is my procedure for doing this...

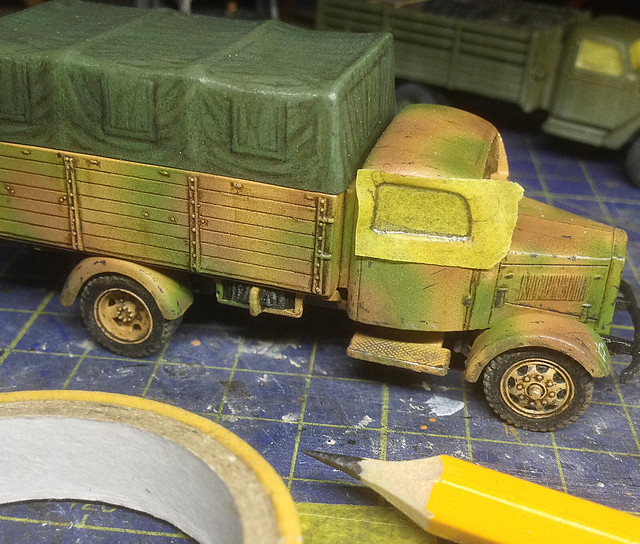
1. Draw window template.


I do this with a good point of a pencil onto a piece of masking tape so I get as close to the edges of the window-frame as possible. You can see how the pencil has pushed in the tape so I actually get an impression of the inside of the frame.

2. Transfer outline to transparent plastic.


I trace the shape of the window frame onto the transparent plastic. When I began modelling I bought sheets of transparent modelling plastic, that was before I realised that just as good quality plastic can be found on the blister-packs of much of our shopping!

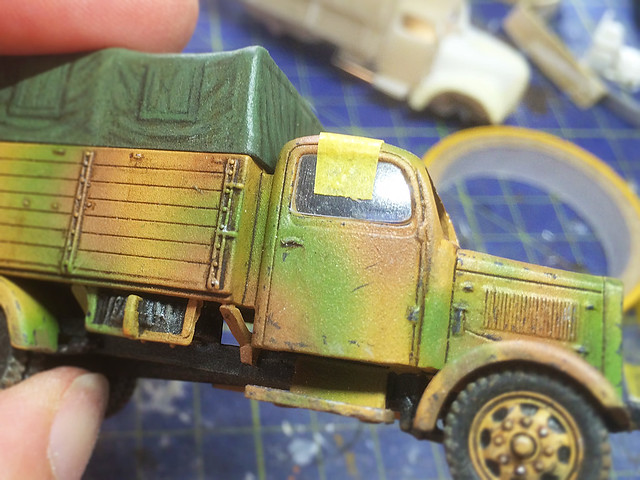
3. Fitting the window panes.


The first window pane you do will need a bit of sanding to fit exactly. But once you have done this simply use this window as the template for your second side-window. By the way, the masking tape tabs are just to stop the windows falling into the cab (which is annoying), they also help hold the windows in place once they are glued.

For glue I use a PVA derivative called Formula '560' Canopy Glue by Pacer. I'm still not entirely convinced that this is any better than good old fashioned PVA, but the claim is that it dries 'crystal clear'. But I have found this is down to how much you use - the more there is the less likely it is to dry perfectly clear.

Lastly, I am considering doing some windscreen wipers and so might want to paint on some muck and dust so that you see where the wipers have wiped! What could possibly go wrong? :)

Next: Well, the next time you see these trucks they should be finished!

Monday, 8 September 2014

Pegasus 1/72 German Army Truck - Part 6

Weathering and chipping...
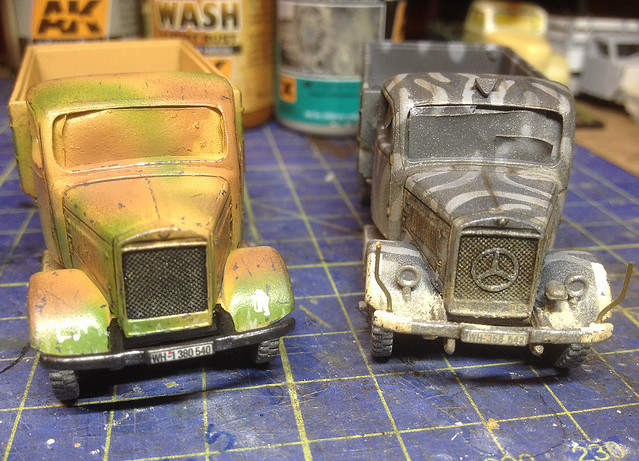
Having weathered the underneath of the trucks it's time to work topside and add some character by means of dirt and scratches.  I started with a light airbrushing of dust (Vallejo's Model Air Yellow Sand)...

Light dusting of...er...'dust', then onto the pin washing.
This just gives a little film of dirt around the bottom edges of the trucks. Then I start adding the chipping. Now I suppose you could argue that you should do the chipping first THEN add a dust film, but I did the chipping second so it stood out (I could always spray a light coat of dust over that if I want to tone down the chipping scratches). I then did the pin-washing to accentuate all panel lines - as usual I used AK's Dark Brown Enamel Wash [AK 045] for this.

I then used Vellejo's German Grey (995) for the 'chips'. It's a dark slate grey which should give the impression of unpainted steel showing through the scratched top coat of paint. Now this part is open to interpretation and I would suggest you use a good reference photo when weathering and chipping or - like me - you may be tempted to go a little over the top (I like the heavily weathered look, but I am aware it can look a little gimmicky). So, sorry if my chipping isn't to your tastes!


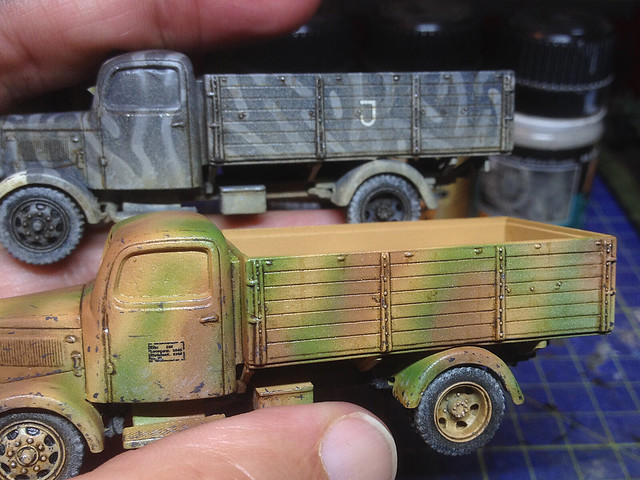
Now, obviously, this dark chipping works great on light or medium coloured vehicles, less so though where the vehicle colour scheme is predominantly dark - as in the case of my second truck. There didn't seem much point in trying to paint on dark grey scratches on a dark grey truck! But where there are light patches and white decals I did add few grazes and spots.

The wood panels on the flatbed were next to get some attention.

Pin washing between the planks of the cargo flatbed. It makes them stand out.
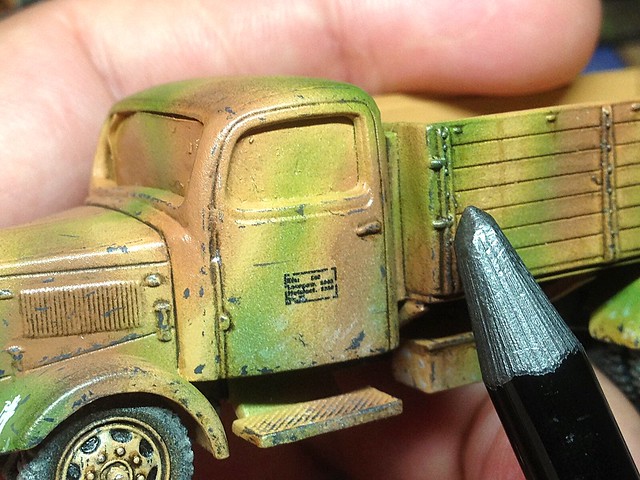
And finally, I like to finish metal surfaces by running a graphite pencil over 'sharp' and 'worn' edges. The graphite can be polished up to give a metal shine that really gives the impression that there is a metal body under the top coat of paint. Also, I like to use the graphite in powder form too by simply sanding the pencil 'lead' so that I have a tiny amount of fine graphite which I can judiciously brush on to the surface to give a metallic sheen where I think it is appropriate.

Just finishing the wear & tear on the drivers step. The graphite
pencil gives the impression of the top paint being worn away.
This finishing effect is great for tank hulls where paint coats where thin and the metal bellow just starts to show through. On trucks I like to use this on the cab exterior, especially on the roof. But less is definitely more with this technique!

...Taking stock as we approach the final hurdle...
The last part of this project will be the painting of the canvas tilt cover and the fitting of the windshields. This will be the next - and hopefully the last - instalment of this blog tutorial.

As I have said in this post though, weathering and chipping are very much a personal thing. More than any other part of the model-making process this is your chance to be creative and express your own tastes. Yes, you can adhere strictly to historical photo reference but - in effect - in the weathering of a model you are trying to tell a story about that model.

I think I forgot to mention, the Mercedes badge on the right is
simply made out of paper! I printed out the shape and then cut
it out and stuck it on with PVA!
In weathering my German Army Trucks I was attempting to say something about the German army post-D-Day so I perhaps exaggerated the wear and tear to suggest the 'fatigue' that must have been affecting the Wehrmacht by this stage in the war. But again, this was a subjective impression.

In effect, you are actually being a little 'artistic' (with a small 'a') - and I like that.

Monday, 21 July 2014

Pegasus 1/72 German Army Truck - Part 1

Preface: Last week I started what I hoped would be a very quick 'bodge' conversion of a Pegasus 'German Army Truck' into a Finnish c. 1940s Volvo 'Roundnose'. Well this project didn't get far before it ran into a problem - in short, the Pegasus truck seemed - in my opinion - a little over-scaled for 1/72 and appeared larger in comparison to the other trucks I have in my Finnish collection.

And so, I have ditched this Volvo conversion until I find another suitable donor vehicle and have decided to build the Pegasus kit 'as is' to make a German Army truck for my Bolt Action collection instead.


The Pegasus German Army Truck - background
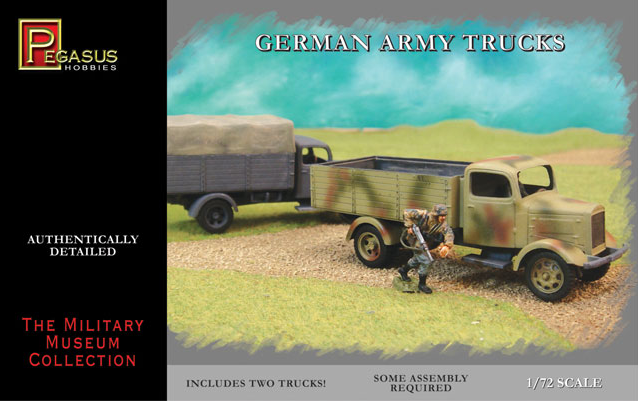
As mentioned in my Volvo 'Roundnose' preamble the Pegasus German Army Truck is not the ubiquitous Opel Blitz that many models and war-gamers seem to think it is. It is, in fact, a simplified model of the Mercedes L3000 4x2, a 3 ton cargo transport produced by the Germans between 1938 and 1942.

Top is the Mercedes L3000 compared to the Opel Blitz at the bottom.

This is quite crafty on the part of Pegasus as the 1/72 market is already well-endowed with good quality Opel Blitz kits so producing a 'easy build' kit of the Mercedes means their product does not compete with the multitude of Blitz kits. Which is good for us modellers.

Incidentally, to make this model a true 'Mercedes' all you would have to do is make a tiny Merc badge for the front radiator (I believe Pegasus doesn't call it a Mercedes for licensing reasons).

What's in the box?
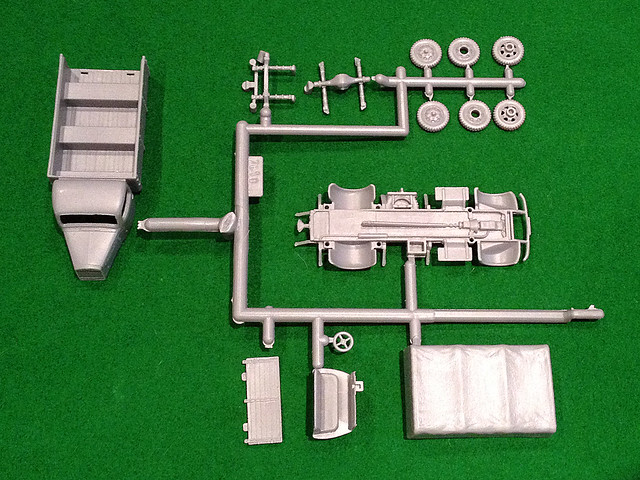
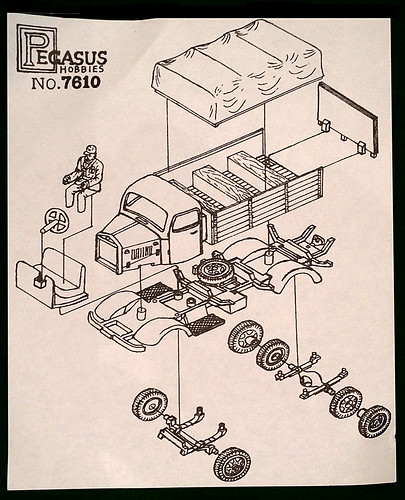
There are two sets of sprues - allowing you to build two vehicles - each of which has just 15 components. Really, you can bang together this simple model in minutes.

One thing that's missing there is the driver figure. He seems to have gone
AWOL! There are two identical sprues like this in the box.

However, don't be fooled into thinking that this means a huge sacrifice when it come to detail. Sure, a lot of the smaller parts of the real truck have been excluded - things like headlamps, horns, tools, etc - but what detail there is on the parts included is very nice and crisp.

I'd say that if you wanted to you could build this kit into a very acceptable display quality model by adding the small extra items which aren't included. A nice proposition as the Mercedes truck is only available in kit form in 1/72 from some of the more expensive and niche resin/short-run manufacturers.

Construction
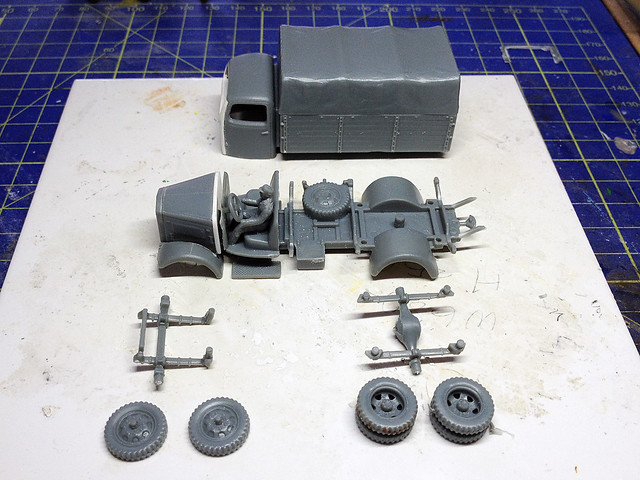
Well, obviously, the first of the two trucks I built from the box is actually a 're-build' as I had already started modifying it to make the Volvo conversion I had planned! (So, annoyingly, I had to stick back together parts I had already cut apart...Luckily I hadn't thrown any of these bits away!)

The reconstructed truck (had to use some plasticard to put the cab and bonnet
back together again) nearly ready for assembly again.
Everything goes back together again very easily and it's a very crisp model.
Obviously I will have to use some putty to smooth out my repair job.

But the second I built exactly as the instructions recommended (at least to begin with). As with their other 'easy build' WW2 truck - the equally unsparingly named 'US Army Truck' - there are no windscreens included in the kit (nor any decals for that matter). But I am getting used to cutting out and fitting transparent plastic windshields now (the trick is to cut out a paper template so you can check the fit first).

Honestly, I can't say much about the construction as there isn't much to do. Everything goes together well and I didn't encounter any problems - and hardly any flash or mould lines at all! So this model is ready to paint in minutes if you want.

Painting
The box art gives a very unspecific colour scheme, but there again there is just so much colour reference material available on the 'web' that you shouldn't be short of inspiration. Admittedly the Mercedes is a little rarer than it's more famous Opel stablemate, but I think Blitz paint schemes would be quite suitable for this model. Specific unit information - and the related decals - is quite another thing though.

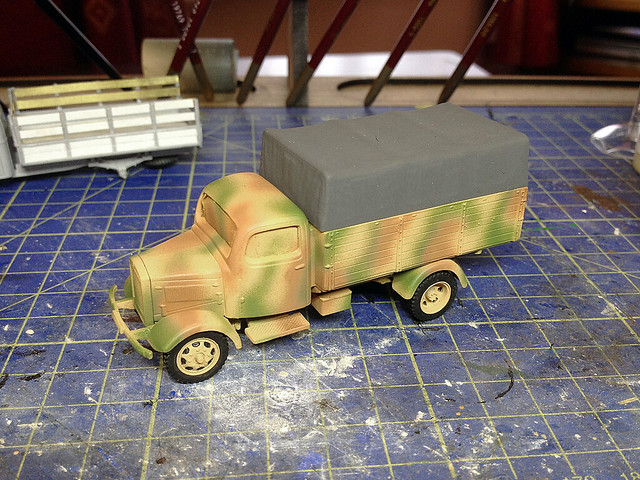
My repaired version of the truck will have a German three-colour camo scheme
with the standard 'Dunkelgelb' (dark yellow) base. But before you begin the
exterior painting you have to paint the cab interior first.

The spray I used was Humbrols 'Sand Yellow' which turns out to be an exact
match with Vellejo's 'Desert Yellow' (977), great for touching up. I never really
understood the German's use of Dunkelgelb, it seems such an illogical
colour for anything but the desert yet it was used widly use in Europe.

My very first attempt at a German camo pattern and my first attempt at
airbrushing a camo pattern freehand! It's a bit slap-dash but I'm rather
pleased with the outcome.

What do I think of them so far?...(Not rubbish!)
This a surprisingly nice model. Like their 'US Army Truck' Pegasus allows the war-gamer to bang together a really tidy representation of a 'generic' WW2 truck quickly and cheaply, but with some degree of quality. Yes, I think it is a little big and you may find it looks a little odd beside some of your other vehicles in the same scale, why this is I do not know.

The cab of the Pegasus 'Merc' (far right) compared to two other 1/72 truck
cabs. Left is the Pegasus 'American Army Truck' and in the middle is a
Valiant Ford V3000. As you can see the other cabs are significantly
narrower.  You can see how the 'Merc' looks almost a bigger scale.

I am happy to use this model in combination with my PSC Late War German soldiers as they are somewhat chunky for 1/72 as well, both laying at the upper end of 1/72 scale.

Next: I finish off the trucks and while I'm at it add some extras to the second example to show what can be done to make them a little more accurate.

Wednesday, 9 July 2014

Next Finnish truck - Volvo 'Round Nose' Conversion Part 1

The next truck in my 'Rapid Fire' Finnish Continuation War project will be a quick-build (hopefully). It's going to be a very simple conversion intended to look like a Volvo LV127 'Roundnose'. I've seen a few photos of these trucks being used by the Finns during WW2 and so decided to add another somewhat exotic make (in that it's not readily available as a plastic kit) to to my already eclectic collection of Finnish logistics.
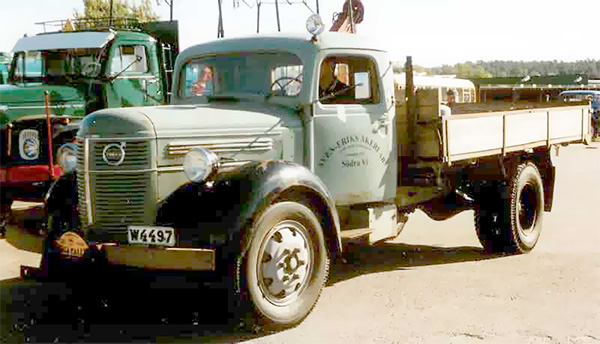
My next task - the Volvo LV-127 'Roundnose', 1943. Source: Wikipedia
The "Roundnose" was introduced in the autumn of 1939, in conjunction with the outbreak of the Second World War. The truck was originally built in three versions. The smallest LV120-series had the same side-valve engine as the Sharpnose. The larger LV125-series and the sturdier LV130-series had the same overhead valve engine as its predecessor LV90.[2] During the war, many of these trucks were equipped with wood gas generators. [Source: Wikipedia]
The term 'Roundnose' was given to this design because of it's beautifully rounded grill and to differentiate it from it's predecessor, the so called 'Sharpnosed' Volvo truck. But you probably figured that one out yourselves!

These Swedish imports were classified as 'medium' class trucks and had 90hp petrol engines - this compared to the 76hp of the Opel Blitz and 95hp of the Ford V3000 V8 (which was probably the most numerous truck available to the Finns). So the Volvos provided the Finns with some much needed motorised muscle.
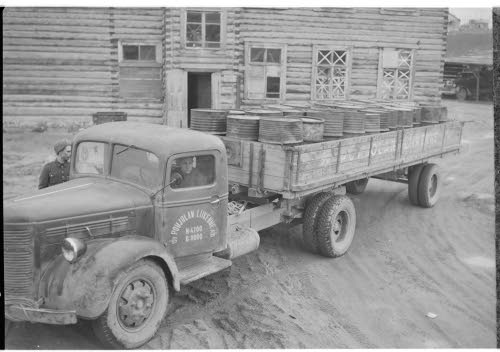
A wartime Finnish army Roundnose, still in it's original civilian commercial
markings. I have been unable to determine how many of these Swedish trucks
were civilian vehicles pressed into service and/or how many were specially
purchased for the Finnish army. Photo source: SA-Kuva

The Conversion job
Ok, potted history over, how will I make my Volvo Round Nose? Well, as simply as I can - I am not trying to make a display quality conversion here, so no refering to authentic blueprints and scratch building. Instead I intend a quick and dirty conversion of another truck kit which bears some superficial resemblance to the Volvo. Simples!

Looking at photos of the Roundnose it immediately struck me that there was a vague similarity to the German Opel Blitz. By sheer co-incidence someone else had already had the same thought as I did. While searching for some reference on the Volvos I came upon this photo of a nearly identical conversion job in the 'Lead Adventure Forum'...
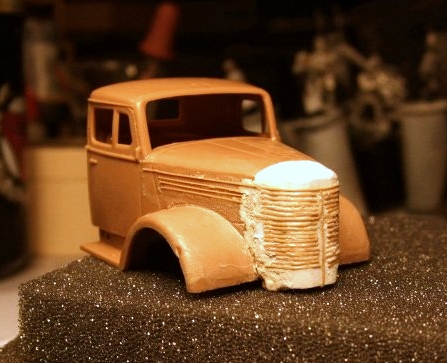
Source: A modeller going by the name of 'Hammers'.
The modeller - who went by the username of 'Hammers' - seems to have come to the same conclusions as I have regarding a donor model and has built a 'round nose' onto an Opel Blitz model. His conversion was, according to the thread description, for a Swedish army vehicle and was in 1/48 scale.

My donor kit will be - in keeping with the quick build theme - a Pegasus 'German Army Truck'. Few parts to muck about with, nice sturdy 'wargaming quality' construction...
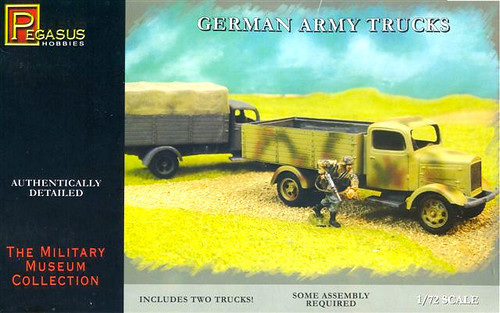
Pegasus 'German Army Truck' - a simplified Opel Blitz type.
Technical note: Pegasus's 'German Army Truck' - What is it? Not important for this project but there is something of a difference of opinion among modellers about just which truck Pegasus's model is supposed to represent. Many suppose it is a simplified Opel Blitz (Opel 3.6-36 S), but other's point out it bears a greater resemblance to the Mercedes L3000A, 3-ton, 4x4 truck.


The Mercedes L3000A 3-ton, 4x4, Cargo. Source: Unkown
The main differences between the Volvo and my chosen donor is - or course - the bonnet and grill of either vehicle. To get my German Army Truck to look like the Volvo I will have to do five things:

1. Detach the current bonnet and grill section from the cab element.
2. Make a new firewall plate that sits between the bonnet and the cab.
3. Remake a new bonnet hood, narrowing it slightly and removing the side vents.
4. Make a new 'Roundnose' grill and fix it n the new bonnet.
5. Reattach new bonnet and grill onto the Pegasus 'German Army Truck' cab.

So, here we go. Let's make a Roundnose!
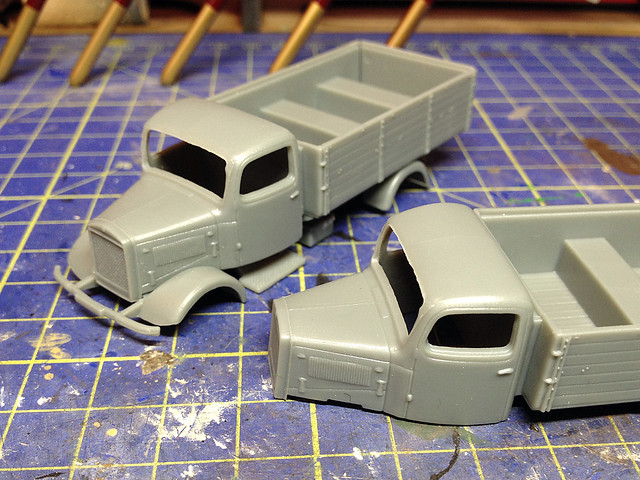
The Pegasus 'German Army Truck' cab and bonnet detail.

Having separated the bonnet from the cab I now have to reconstruct the part of the cab where the bonnet joins it - as this are on the Volvo was flatter - and make a new bonnet that is slightly narrower and straighter than the German truck was. I began with a flat 'firewall' plate between the cab and the engine...

I smoothed off the join between the firewall plate - plasticard - and the cab
and while I was at it I rounded out the windscreen with Milliput to make it
look a bit more Volvo.

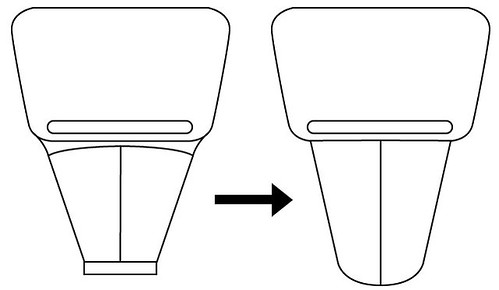
Next, trim the original German truck bonnet down - this isn't exactly the same shape as the Volvo's bonnet but we will fudge this! The German bonnet is more 'V' shaped (if you look at it from above) and comes down to a narrower grill, but to save a time-consuming scratch-build I will be reutilizing the old bonnet with some minor modifications.
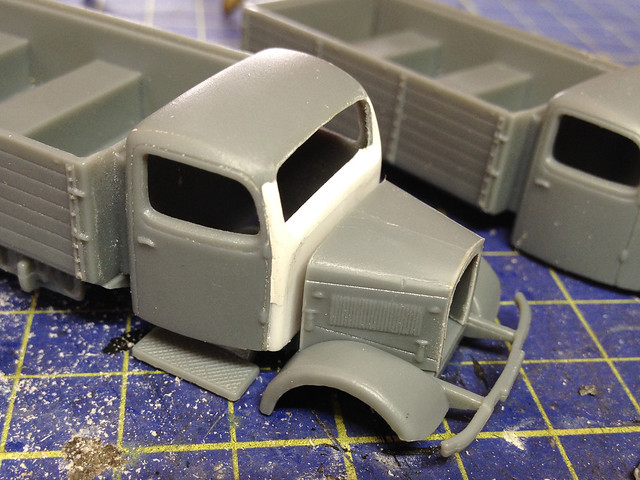
Chopped and smoothed off the old German Truck's bonnet back and front.  The
gap between the cab and the bonnet will be filled and I'll start looking for a
cylindrical item to use to make the 'round nose'.


The round nose will be the hardest part of the conversion I guess so I'll take a break here before I begin work on the grill, but you get the idea.
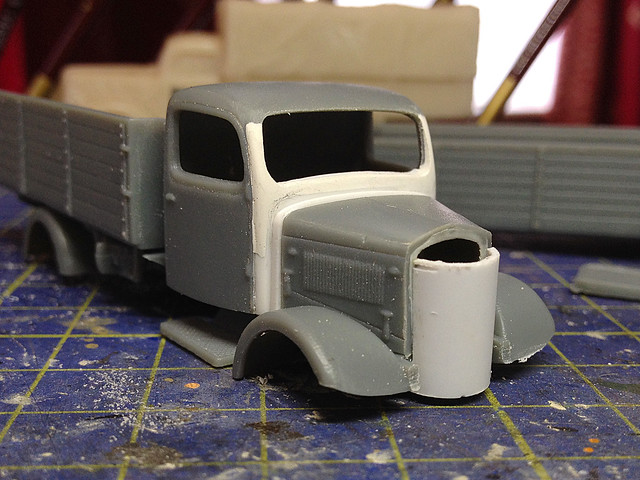
I've temporarily stuck on half-cylinder to get an idea about measurements
for the next stage of the build. There'll need to be more tweaking!

In Part 2: Making the new bonnet and grill.

--------------------

Reference:


Tuesday, 8 April 2014

Finnish infantry v.2 - test squad

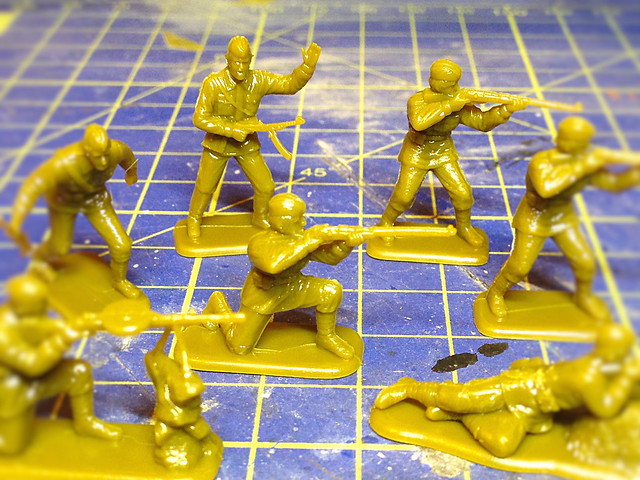
I've picked out some figures from the Pegasus Soviet infantry in summer dress set to act as guinea pigs for my Finnish infantry. I particularly liked the poses of these figures; four rifle infantry, an NCO with SMG, a sniper and a soldier with an LMG...


There's a bit of variety here as aside from the individual soldiers the LMG will be have to be mounted on a larger custom base and the sniper will have to be part of a two man team (I have to find a suitable 'spotter').

I really like the sniper, it's a fantastic pose - I may try to pop on a scope - but I will have to read up to see if there are any Bolt Action rules that specify the exact size of bases for teams and crew served weapons. Really looking forward to doing these, but also a bit nervous as I've only done a few figures so far...


Next up: Basing the figures.

Saturday, 5 April 2014

Finnish T-34/85 - déjà vu...Again!

Having reactivated my T-34/85 work for my Finnish I thought this was going to be an easy and quick project. After all, I had already started a Finnish T-34/85 model using the PSC 'quick build' kit...But therein lay the dirty big spanner in the works...

Can you get a plastic spanner? If you could, then I bet it would look like
the PSC's T-34/85 tank!
I already knew - after just a cursory glance - that this model was not the best. There were a few problems, some of which were due to my amateur modelling, but some down to PSC's design. Not a good start, but I was willing to overlook or work around some of these issues until I decided to revisit my original blog posts about this PSC kit and some of the other 'quick build' T-34/85s that I had looked at...


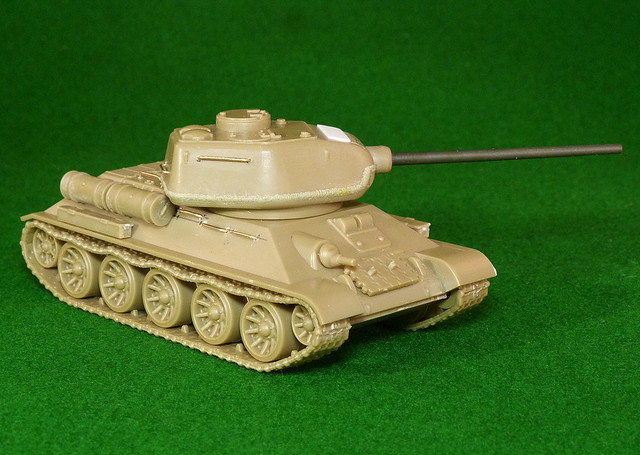
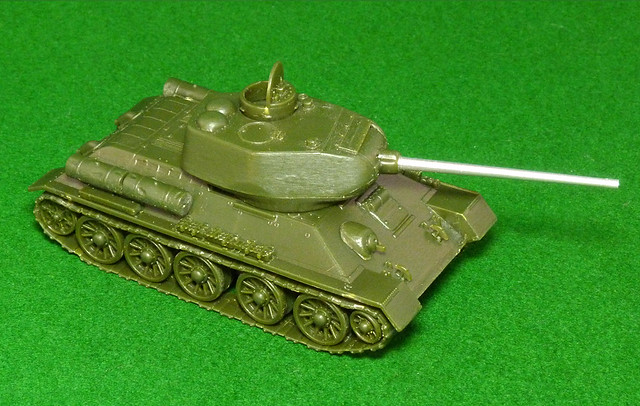
Long story short(ish) - I had originally concluded that the Pegasus T-34/85 was the best of the 'quick build' '85 kits around, much better that either the Armourfast or the PSC '85s. So I went through my draws and pulled out the Pegasus '85 and guess what? Yep, it's definitely the better model!

The Pegasus 'easy build' T-34/85, a cheap and cheerful gem!
It turns out that at some point I had already rectified what I thought was one of the major failings with the Pegasus '85 kit and had replaced their weedy plastic 85mm gun with a nicely turned aluminum one. This kit is now a very nice representation of the Soviet medium tank without resorting to a more expensive 'display quality' kit (you get two of these war game quality Pegasus tanks for £8.99).

I should say that having looked at the PSC '85 again after so long it's failings seems to be immediately apparent to me, perhaps because of fresh eyes. The most obvious fault being that it seemed slightly over-scaled compared the other two T-34/85 models I have - I am sure if I measured it I would find that it is indeed to big.

...Arse biscuits!

What this means is this isn't going to be the quick job I thought it was going to be and I will now have to start my Finnish '85 project again with the Pegasus T-34/85. 

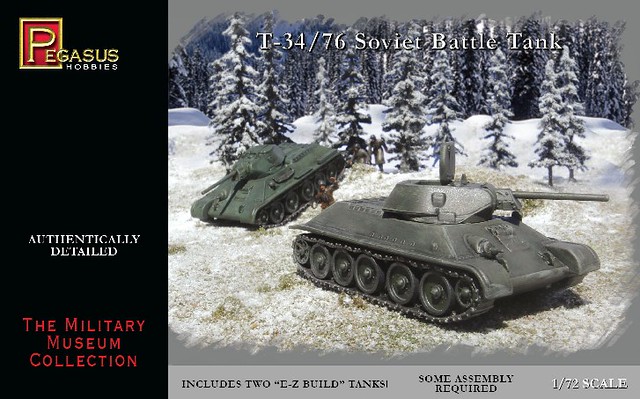
Postscript: When I first did my 'easy build' T-34 comparison reviews I eventually concluded that while the Pegasus T-34/85 was the best of the '85 kits that I would chose Armourfast if I wanted the earlier T-34/76 model (Pegasus didn't make this version). However, fast forward to now - Pegasus now make a 34/76 and if they have done as good a job with their '76 as they did with their '85 then I think they have the easy build T-34 market sewn up (they just need to do a T-34/76 m1943 now to nail it)!

Wednesday, 30 October 2013

Battle of Berlin vignette, Part 4

More trouble with rubble!

...Getting tired of this yet?  ;)

OK - for those of you who haven't lost the will to live I continue adding debris and damage to my street scene...

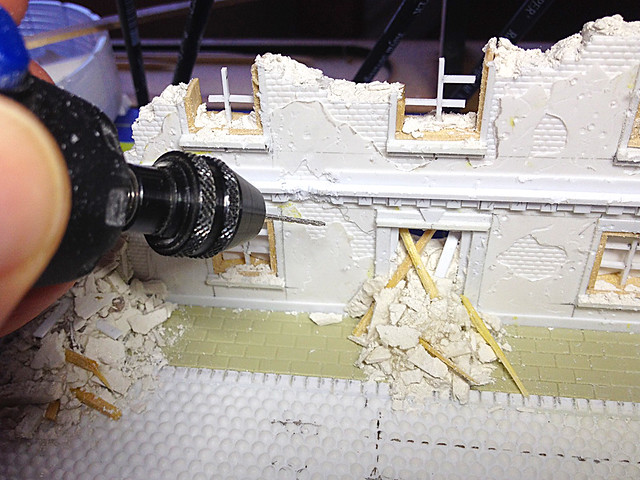
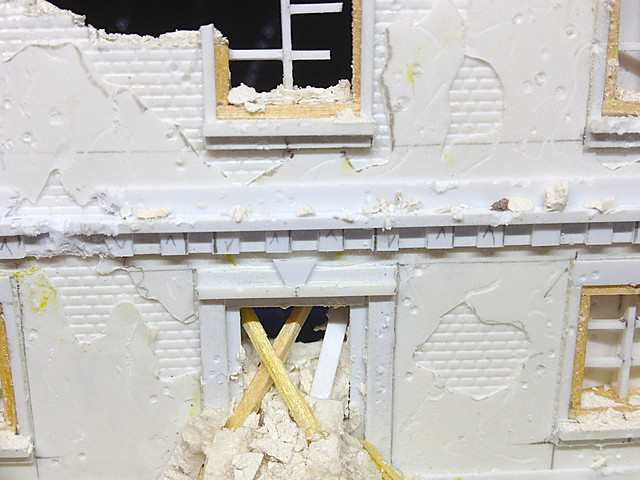
First of all I let my trusty Dremmel loose on my buildings facade. There are several things I want to do - add bullet holes, cracks in the plaster and damage to the frontage where falling masonry has broken lintels, etc...


As with everything else, it's sort of a case of knowing when to stop - hopefully I haven't over-done the damage.

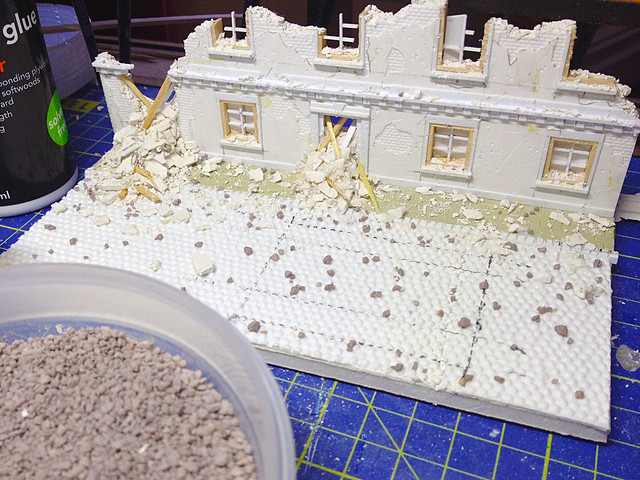
Now, the facade done I move onto the debris on the street itself. Doing random is quite hard I think - so fingers crossed my random debris doesn't look too unrealistic...


It all looks a bit funny, but I'm hoping that's because it's not painted yet - SO I better get on with the painting!

Monday, 28 October 2013

Battle of Berlin vignette, Part 3

Well here we go...Let's get ready to rubble!

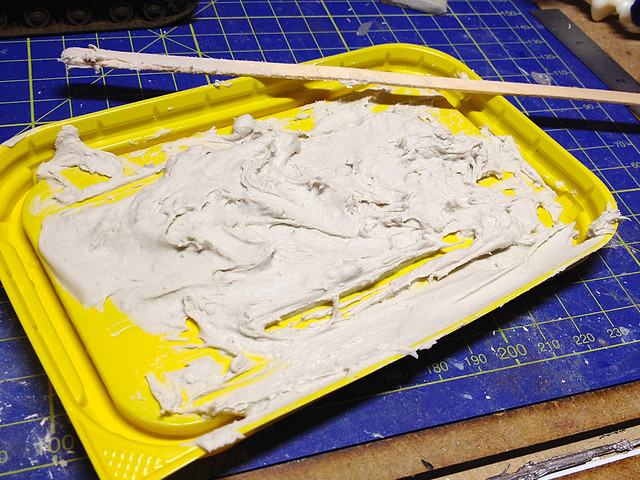
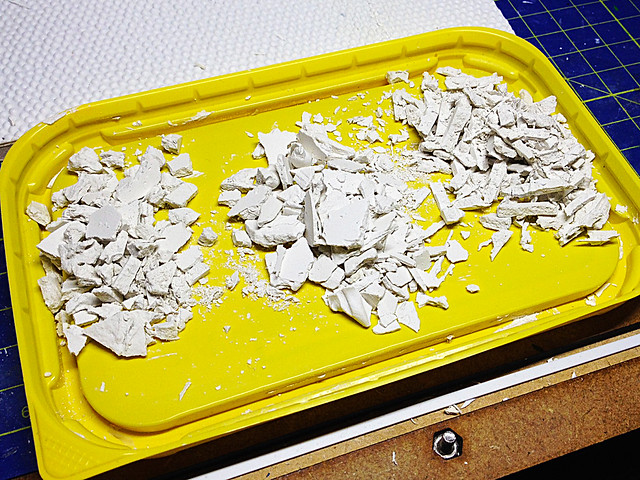
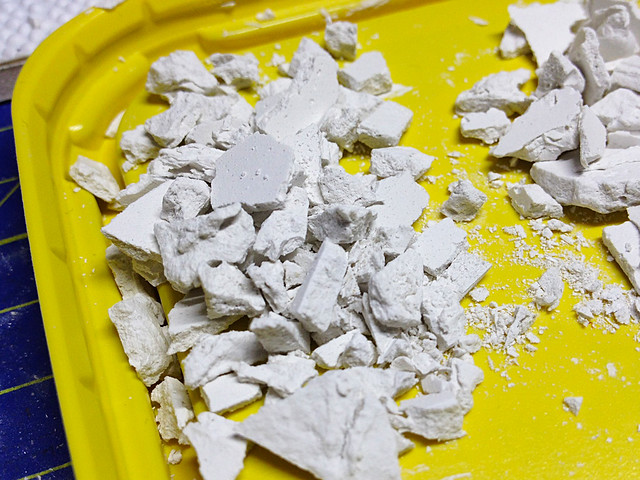
Just to recap, I started my 'rubble' off by squeezing a lump of quick dry Pollyfilla into a discarded margarine lid...


Once dry I started to break up the lump into smaller 1/72-looking lumps - one tip is not to make your layer of Pollyfilla too thick, try to imagine the scale size of a wall or a floor, that's the thickness you are aiming for. I tried to grade my 'lumps' into big, medium and small...


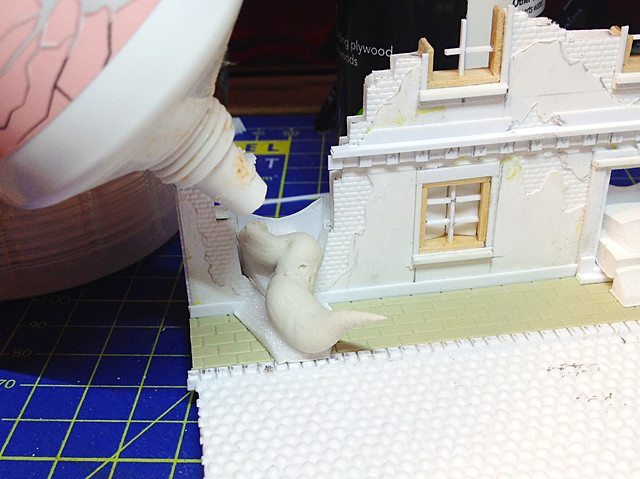
Now, rubble ready I now have to prepare my backdrop to make it ready to place the rubble on. The two main features will be masonry spilling through gaps in the wall - a hole blown in the wall and the main doorway. I began by building up some of the 'spills' with some foam-board off-cuts...


Pollyfilla time again! I'm using this as a medium with which I can stick my rubble to the backdrop...


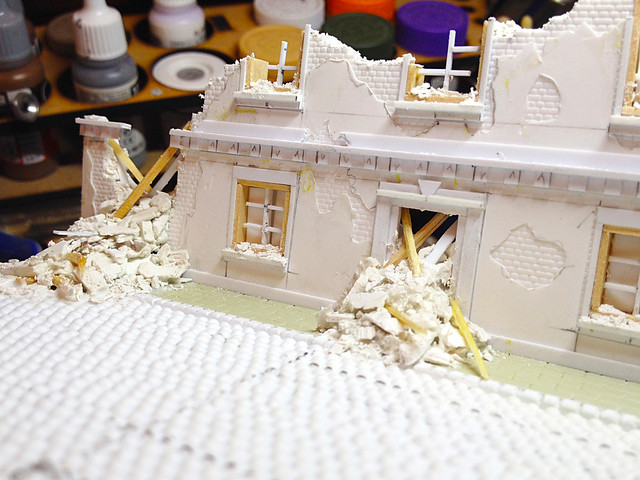
Then just sprinkle on the scale rubble, pressing it lightly into the still wet Pollyfilla. Just a little at first and then let the Pollyfilla dry, then add additional rubble on top of that using PVA glue, building the fallen masonry up in layers until you feel it looks realistic. I also added in some strips of plastic and wood to look like fallen interior planking...


Once I had the two main exterior mounds of masonry done I turned my attention to adding some rubble to the building facade itself. I applied some smaller pieces of the ground up plaster to the edges of the wall - sticking it in place with some Pollyfilla - and sprinkled some more dust and small lumps to window sills and lintels...


Nearly done. All that's left to do is to scatter some bits and pieces of my plaster rubble and wooden strips over the street. I've marked out where the tank tracks will be so I know where not to put any debris. I'll probably wash the street with a thin mixture of PVA and then sprinkle some of the smaller gritty pieces of plaster here and there and then glue in the larger lumps individually.

Well, that's that. Once all the rubble and detritus is on I'll spray on a grey base-coat before starting to paint the backdrop.