Showing posts with label X-Ref: PST/FinnGAZ55/1115. Show all posts

Tuesday, 31 January 2017

Gaz 55 Ambulance - Part 6

The Great Green Debate (Still Haunts Me...)
Time to put paint to plastic. I'm a little nervous about this as I feel very rusty, and my airbrush breaking did not help the situation (back to rattle cans and brush painting for the foreseeable future).

This next stage in my Gaz 55 project is to lay down the main colour block, or base coats. I'd picked my preferred colour scheme and had originally intended to airbrush on a coat of Vallejo's Model Air 'Russian Green', but with no airbrush, I had to revert to Humbrol's 'Matt Light Olive' Acrylic Spray can for the basic green coat.

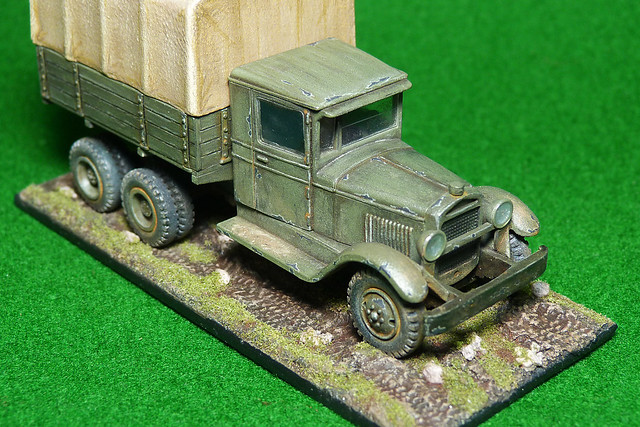
This has pros and cons, proper 'Russian Green' is usually considered to be a deeper, richer green, as can be seen from my YAG 6 Heavy Truck model...

Vallejo's 'Russian Green' was used on this truck, it has nice rich yellow tones,
and seems like a deep and warm green.
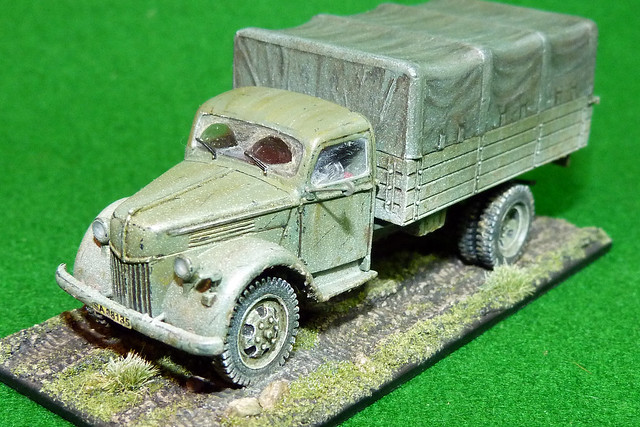
But, Humbol's 'Light Olive' is a 'bluer' medium olive which can be modulated to take on a darker tone, once weathered, as in this example...

Humbrol's 'Light Olive' is a versatile generic olive that can be modified to take
on different tones of green with washes or filters. But, basically, it does have
a slightly colder cast to it. I also 'dirtied' this Zis-6 up a bit!
When I did my research for Finnish war-time trucks, my main point of reference was this photo of a very rare museum example...


Again, here, I used Humbrol's 'Light Olive' but then modulated it with the
previous reference photo in mind.
You be the judge of which green paint - 'Russian Green or 'Light Olive' - is closer to this original example. Sadly, there just aren't enough original example of Finnish military colour schemes left to be definitive about this, and there is as much a debate about Finnish colours as there is with those other great modelling controversies of what constitutes 'Olive Drab' or, indeed, what 'Russian Green' is.

My preference leans toward the 'Light Olive' approach, and with this in mind, I was quite happy with how my Gaz 55 came out after it's base coats were added...
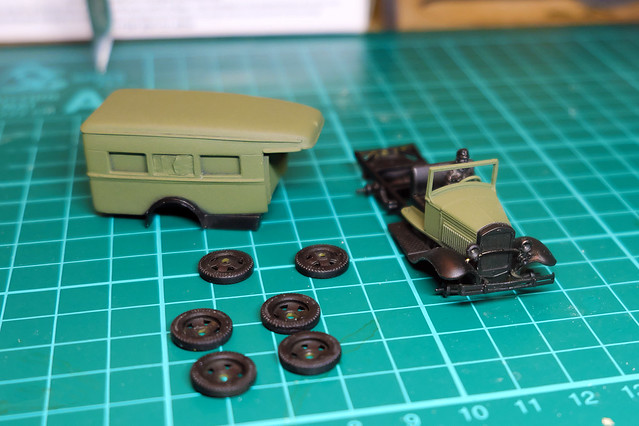

The black and green two-tone scheme I am going for an original Soviet scheme, the Gaz being a vehicle that was 'liberated' from its previous owners by the Finns. So, I may modulate this olive green to be a bit darker, similar to the Zis-6 truck example that I picture above. Or, I may try a bit of filtering with a 'yellow' to create a deeper 'Russian Green' effect...We shall see...

Friday, 20 January 2017

Gaz 55 Ambulance - Part 5

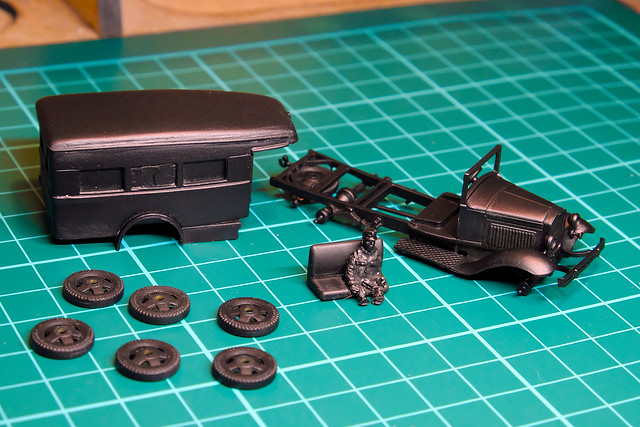
Primed and ready to go!
Some progress with the Gaz 55, despite being particularly ham-fisted and breaking a couple of small parts off a couple of times, I eventually managed to complete my construction of the major assemblies and got the model primed. On a recommendation, I tried Tamiya's Matt Black Acrylic spray can to prime this time...


It is a fairly smooth coat - my usual primer is Halfords or Autocar black, which can be a little thicker - but I am slowly starting to think that the way forward may be to spray on a primer using my airbrush. I may try this on my next model using something like Vallejo's Model Color Polyurethane Primer (I'll still stick to black though).

Incidentally, you may have noticed that the doors are missing from the above photo, this is because they will need careful fitting once the chassis and ambulance body are put together. There may be a bit of sanding and trimming needed to get them to drop in properly, so I'm holding off priming the doors until that's done.

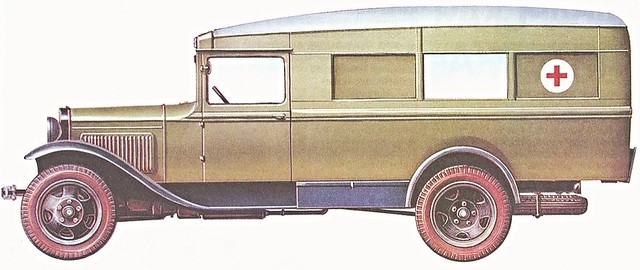
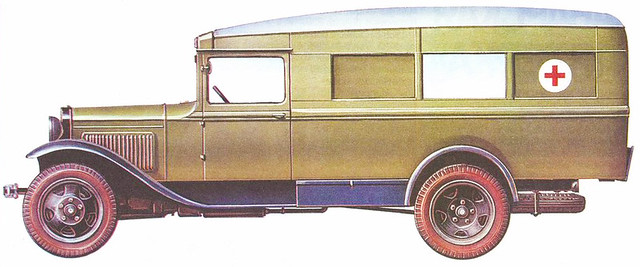
Next: On to the masking of the vehicle body, ready to airbrush on the Russian Green coat. Here's an illustration of the colour scheme that I'm going for...

Sunday, 8 January 2017

Meanwhile...One step back - Gaz 55 Ambulance

While I spend an inordinate amount of time cleaning up the resin parts of my Hunor Ford, for a bit of relaxation (!), I thought I'd dust off the PST 1/72 Gaz-55 Ambulance I started last year (just before I went into hospital).

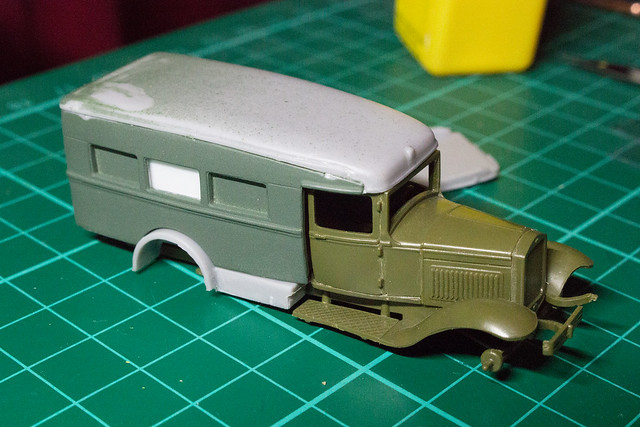
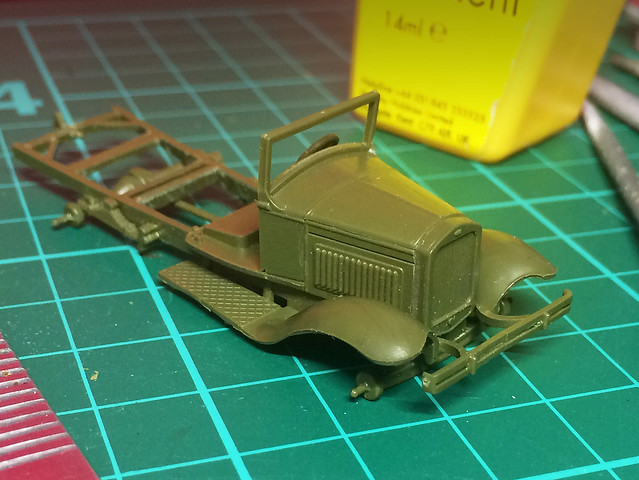
To recap, I hit a bit of a brick wall with the PST kit as it wasn't long into the assembly that I discovered that some things didn't fit like they were supposed to. Namely, the ambulance body didn't mate seamlessly with the Gaz truck cab.


If, as I did, you assemble the chassis and truck cab and the ambulance body as two separate major components and then try, then, to fit the two together then you are in for a nasty surprise...


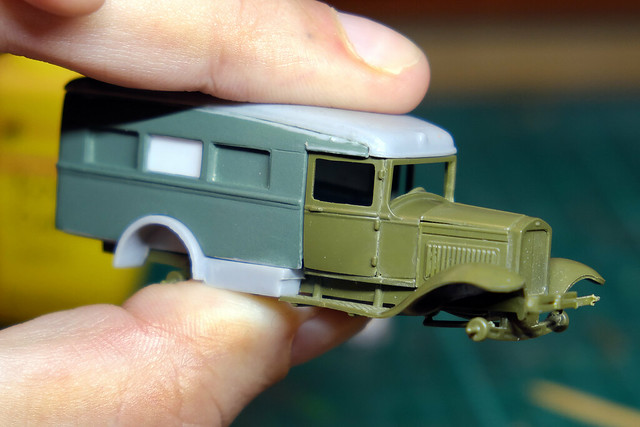
You'll notice that the cab's doors do not meet the ambulance body flush, instead, there is a recess of about a half a millimetre between the two assemblies. I guess it was my fault for trusting PST and not doing a dry fit first, I stupidly thought that this would be a straight forward build. When will I learn that there's no such thing as a straight forward build!

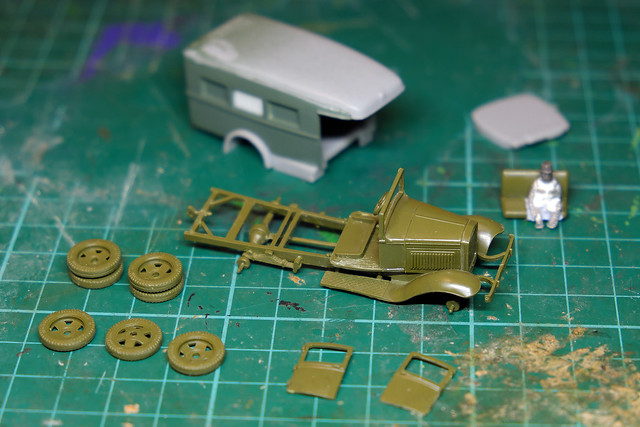
Anyway, I now feel ready to return to this project, but in order to get it to completion, I first had to take a step backwards and disassemble the cab by removing the doors again...


Now, the tricky part begins - working out the best way to align the doors and fit the major components together. To begin with, I tried refitting the doors first just to see if they could fit seamlessly with the ambulance body...


Well, that looks OK, but it isn't an easy fit. It may be easier if I get the ambulance body and chassis correctly mated together and then fit the doors last.

There are a couple of other issues that means I may have to do some more filling and trimming and jigging about to get everything to align properly. At the moment, with the body and chassis together the wheelbase is slightly too short (by a fraction of a millimetre) and so the rear axel is not central to the rear wheel arch.

One of the other issues is that the cab's running boards are warped. I may try softening them with hot water and then I'll attempt to straighten them out again...


I've also created a driver figure. He's a bit of a Frankenstein, the body is a 20mm (1/76) driver figure by S&S Models while the Head is a 1/72 Hat Austrian infantryman. As I have mentioned before, in order to fit a figure inside a 1/72 scale truck cab I have found that you have to go for a slightly smaller sized figure, even then I have had to amputate his feet!

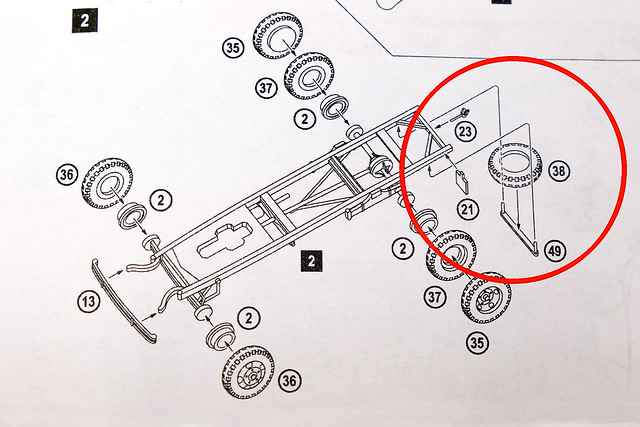
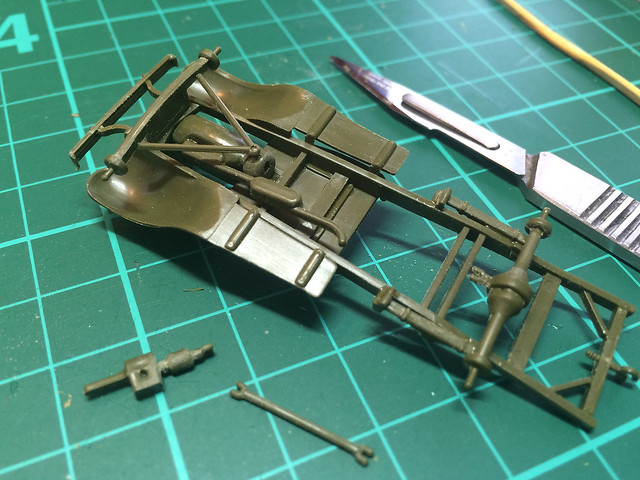
The underside of the chassis is almost complete aside from the spare wheel. The PST instructions are a bit vague about how exactly this attaches to the rear of the chassis. BUT, I happen to have a Military Wheels 1/72 Gaz AA truck kit and it's instructions show where the spare wheel goes and how it's attached to the chassis...


All good, just one final thing for this session and that's to apply some modelling putty to some of the gaps in the ambulance body component...


Well, that's it for today. Once the Milliput putty has dried I will sand it smooth and then start to give the components a primer coat. Then it will be on to painting cab interior (and driver) ready for assembly.

Sunday, 28 August 2016

Gaz 55 Ambulance - Part 3

Today I moved from the construction the driver's cab to assembling the ambulance enclosure. This looks a pretty simple construction of four walls, a roof and a floor but I want to modify it slightly in light of some reference material I've found...


Note that two of the three rear windows have either been boarded up or they have integral shutters which can be closed. I have checked various other sources and this configuration is quite widespread (one of the two windows on the rear doors is also similarly covered).

Find out more here: Engines of The Red Army in WW2 - Gaz 55 Ambulance

(I also noticed that the roof on these vehicles seems to be painted or covered with a gray material. But, I will look into this a little later.)

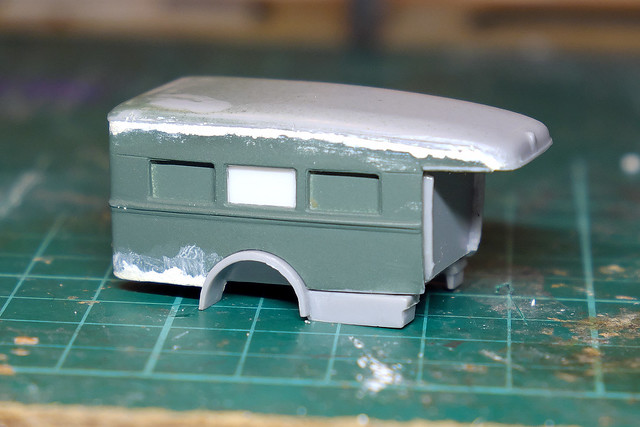
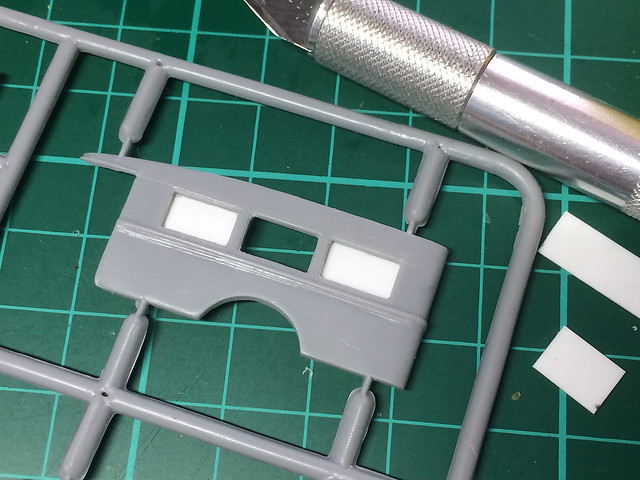
So, first job was to cover the closed panels...


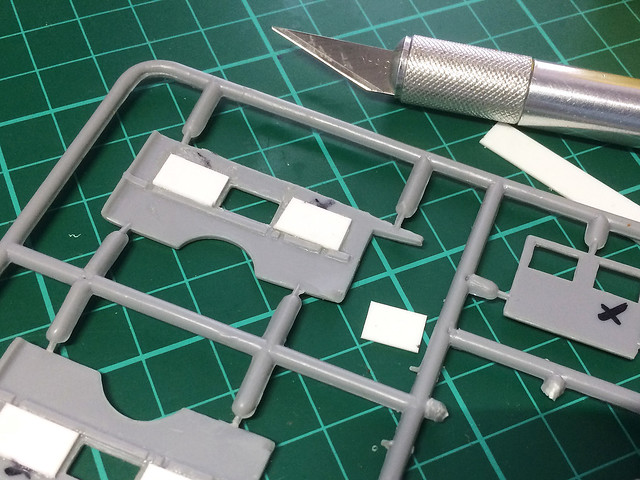
Now, I had to think about how would make the 'white' semi-opaque windows. I decided to fill these empty panels with some very thin white plasticard and cover these with an even thinner rectangle of transparent plastic over the top of it to give it a glass-like look.

But, before I installed these panel windows I thought it easier to spray the base green colour first as trying to paint the window sills after the windows are fitted would be a pain. I would then mask out the windows before continuing the painting of the ambulance.


Preparatory base coat done on the rear bodywork, it's time to try and fit all the rest of the body components together. Now, this is where things started to go a little awry!

First of all, the ambulance body parts don't actually fit all that snugly, not horrendously bad - but not terribly well either. But, when you try and put the assembled ambulance body onto the chassis and join it to the driver's cab, you have to wonder if they are part of the same kit.

In actual fact, of course, they are not (exactly) part of the same kit, as the grey ambulance body sprue is a separate addition to the green Gaz truck sprues - designed and manufactured as an after-thought. So - long story short - you will end up having to do a lot of work to get all the vehicle's major parts - chassis, front upper body and rear upper body - to fit together like they should.

As you can see, the Gaz 55's cab merges seamlessly into the ambulance body.
Unlike my PST Gaz 55 model which is - funnily enough - a bit of a car crash.
And this is where I will leave things...

As you can see from the above picture, I will have to play with all the parts and move things around - and possibly file and trim bits here and there - to get the ambulance body to mate seamlessly with the cab section. Oh, joy!

Tuesday, 16 August 2016

Gaz 55 Ambulance - Part 2

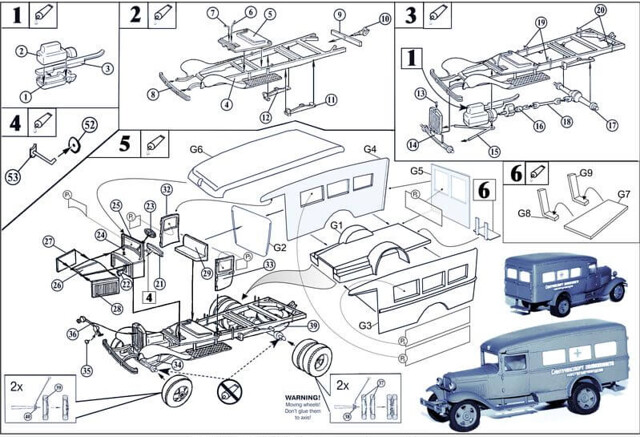
Got some work done on the construction of the Gaz, and have some opinions about PST's components. The sprues are a little too over-populated for my liking and, to make matters worse, PST do try to do some components which are maybe too small and too fragile for plastic in 1/72 scale.

Sometimes, PST seem to over-engineer things, like the drive shaft. Why make one
component when three will do? To be fair to them, this may be so you get the
utmost level of detail on this part, but it does make things a bit fiddly.
Were this kit Dragon or Trumpeter a lot of these fiddly components would probably be on a separate photo-etched brass sheet. I guess that PST's priority is keeping the cost of the kit down, so they include some tiny parts on the plastic sprue. This pleases the carpet monster!

That aside, I do love the early WW2 Soviet trucks, they always put me in mind of the old TV series 'The Waltons'! Of course, the reason this would be is because these Gaz vehicles were all licence-built copies of the 1920/30 American Ford light trucks...


The other minor niggle with PST's mouldings is there is a bit of warping of components. The chassis is quite twisted and the fender footplates are a bit warped too.

The small imperfections can be easily rectified, though I did giggle when I heard that ZEBRANO may have had something to do with the design of this kit (they seem to do a lot of collaboration with PST). This brought back bad memories of their horrendous 1/72 Yag-6 Soviet Heavy Truck that I made...Oh, dear me! :(

Still, as long as you take this kit very carefully (the main instruction panel is just a jumble) you should be OK. It's been enjoyable so far.

Sunday, 14 August 2016

A break from planes - GAZ Ambulance

My short attention span strikes again! I need a break from aircraft so I rummaged in my stash (oh er, matron) and found a nice little PST GAZ Ambulance...


Technically, this kit will be part of my Finnish Continuation War project, although under the Rapid Fire wargame rules for this conflict there is no requirement to add an ambulance. But, I know for a fact that the Finns did have at least one of these Soviet-made vehicles in their inventory ('liberated' from the Red Army), and there is a nice photo of it available on the SA KUVA archive. So, I just fancied adding one to my collection.

Source: SA KUVA

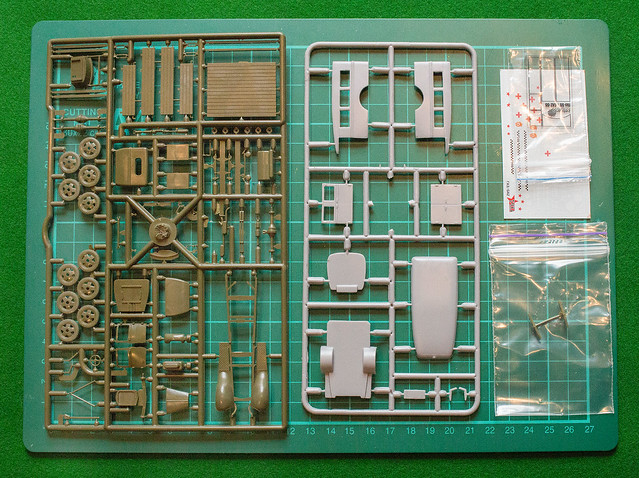
What's in the box?
As usual with PST kits, the sprue complement is something of an eclectic mix made up from a basic sprue set from PST's GAZ light truck kit with the special additional sprue which has the ambulance components on it. I always appreciate PST's 'modular' approach to kit variations as it always means some left over parts that I can add to my spares box!

The main green sprue is PST's basic GAZ truck parts and the gray sprue is the
additional parts to convert the basic truck chassis into the ambulance version.
(Incidentally, in case you were wondering, there are enough parts on the green sprue to make up an ordinary GAZ light truck, with a cargo flatbed.)

One thing I appreciated was the inclusion of a sheet of transparent plastic with the 'glass' parts marked out on it. This will save me a lot of time making my own windshields.

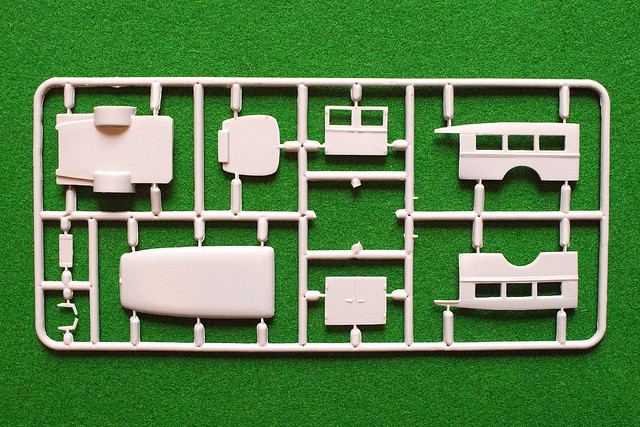
The 'ambulance sprue' has all the parts that will replace the normal cargo flatbed on the GAZ chassis. Each side has a three-panel window, but I'm still a bit unsure whether these 'windows' should be opaque white or transparent. I will have to do some research.


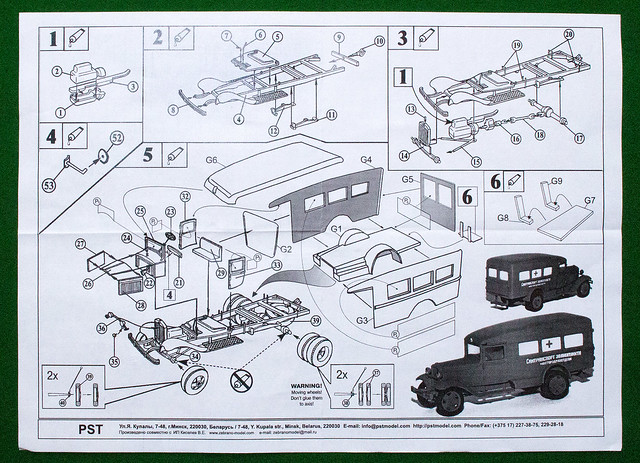
Finally, the instructions are the normal PST 'photocopied' pieces of A4 paper. Perfectly useable but the quality can vary...


Directions for decals and colour scheme are left to the box artwork I'm afraid. This is a shame as there are a reasonable amount of decals and some more precise instructions for their application would have been helpful. I suppose I will have to rely on online reference.

So, fairly much the usual pros and cons for a PST kit. But, to end on a positive note, the quality of plastic is good and there is an absence of flash or any noticeable deformations. Looking forward to making this.

Thursday, 5 November 2015

November's stash additions - Part 1

A couple of additions to the stash this month, the first of which has just been delivered. The other is still in transit from sunny Spain!

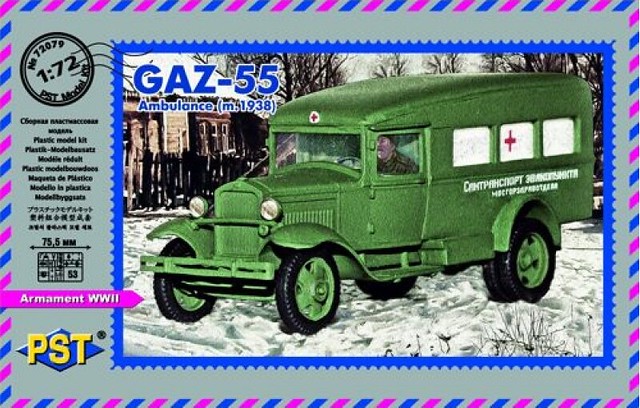
This morning I am rather pleased to be the recipient of one of PST's more recent models - a lovely GAZ-55 Ambulance (m.1938). Though, there are some mixed feelings attached to this model as I had already bought a similar one from Minirions a couple of months ago. Let me explain...

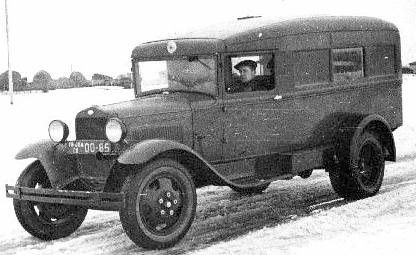
It all started when I spotted this photo while trawling through the indispensable SA-Kuva photo archive.  The picture shows a captured Soviet GAZ ambulance being used by the Finnish Army.

Source: SA-Kuva [44306 - Gaz 55 Ambulance]
Quite by chance the model maker Minirions had just released their 1/72 Spanish Civil War Ford AA 'Bookmobile' model, a wonderfully charming little kit...


It so happens that the Soviet GAZ-AA truck series - of which the GAZ-55 is a member - is a licensed copy of the Ford-AA Model1929 (hence the similarities). So, I immediately ordered the Minarion's kit with the intention of converting the Ford AA kit into its Soviet relative.

All fine and dandy - in fact, I was going start this project next - but then, a few weeks ago, I saw this on the eModels (UK) web site...


A bit of a quandary. What to do - proceed with my conversion plan or buy the proper kit?

What clinched my decision was that - by sheer coincidence - I happened to come up with yet another 'cunning plan' for the Minairion's kit (based on yet another piece of photographic reference I happened to come across). This meant I could go ahead and buy the PST GAZ-55 after all.

This is quite a nice outcome as I remember having fun making my PST ZIS-6 truck, it was a nice kit and went together very nicely. Therefore, I am looking forward to making this GAZ.