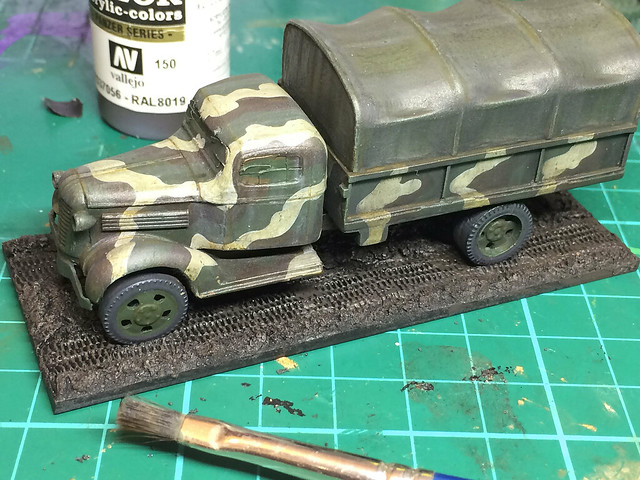
Onto making the base. I like to do this just before I add the final weathering to my vehicles as I try to match the colour and shade of the mud and dirt of the base with the mud I add to the vehicle. I find this easier to do if I have the base finished first.
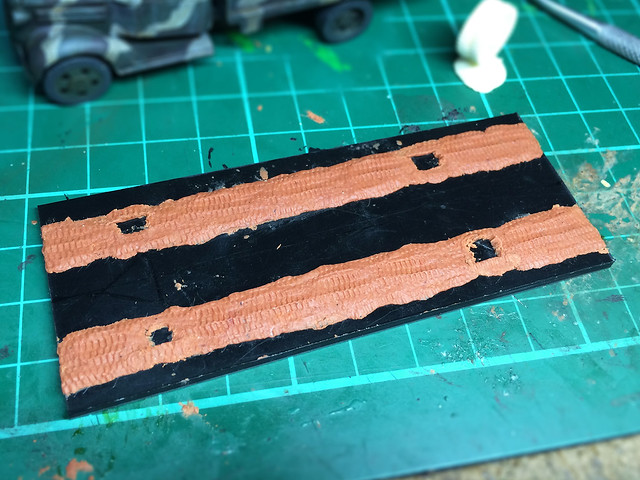
I've tweaked the process of making my base slightly, I now create the tyre tracks (or track tracks) using Milliput. This is just because the plasticine-like consistency of Milliput makes it easier to impress the tyre or track patterns into the modelling putty (which isn't as easy to do with the PollyFilla that I use for the rest of my base).
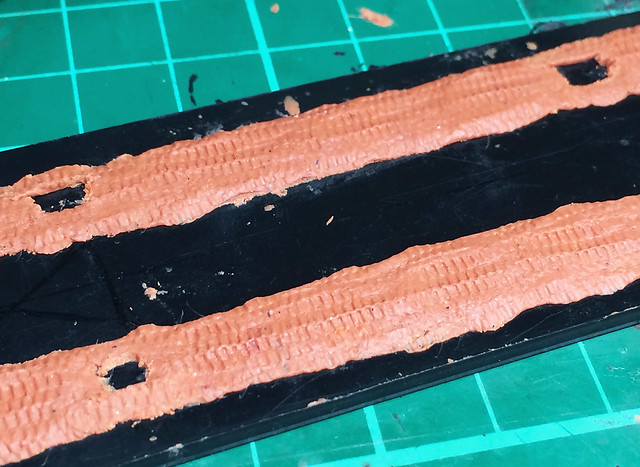
I've also started making small indentations in the track area for the wheels of the vehicle to sit, so that the truck tyres look slightly recessed into the mud (rather than sitting on top of the 'ground' as I had in some early models).
After that is the usual routine for painting and applying the 'grass' and weeds...
'Black Lava' ground
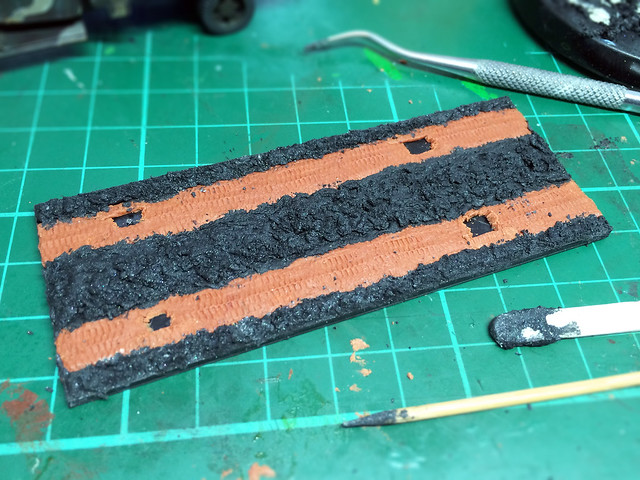
AV's 'Black Lava' compound is really supposed to be for making realistic tarmac roads, but I like its gritty texture and I add it to my PolliFilla to make a black-ish goop with which to make a rough earth base for my dioramas. It's a bit wild and flakey and come up with some nice organic textures.
Also, I like to start with a dark base, so having bare white PolyFilla doesn't work for me.
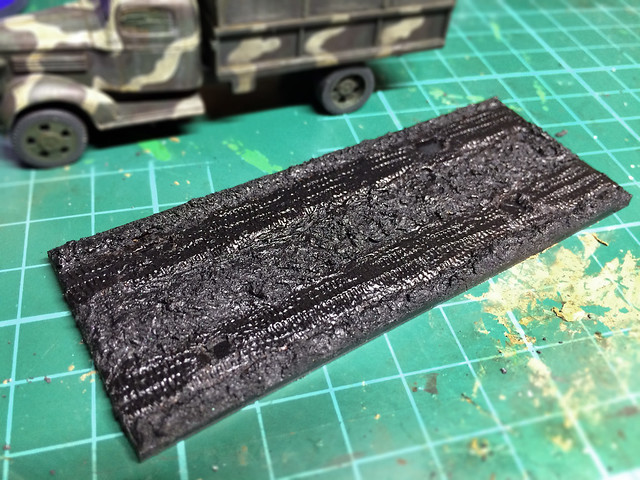
Black Primer
A quick squirt of HiCote Auto Black...
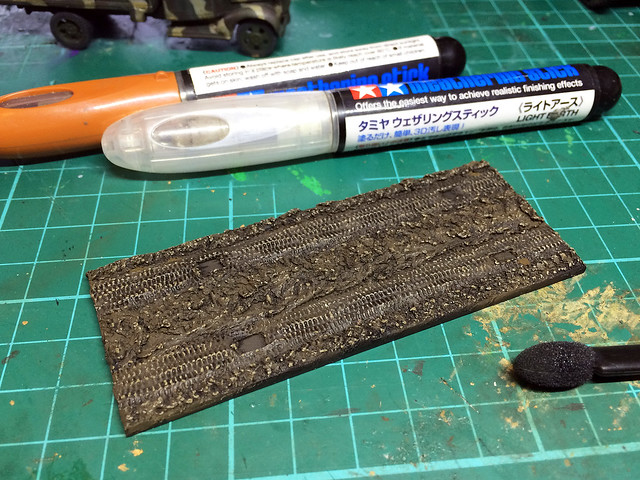
Brown-earth Base
Next, I apply a dry-brush coat of Vallejo's German Camo Black Brown, which is a nice dark muddy brown. I'm trying to retain a bit of the underlying black base colour this time, to emphasise the contrast in the detail and give more depth to my 'earth'...
'Weathering' the earth tones
Weathering is perhaps not the correct term, but I am shading the highlights to give a - hopefully - natural weathered look to my ground texture. I used Tamiya's weathering sticks to achieve this, highlighting using their 'Mud' and then 'Light Earth' to give the varied tones I want...
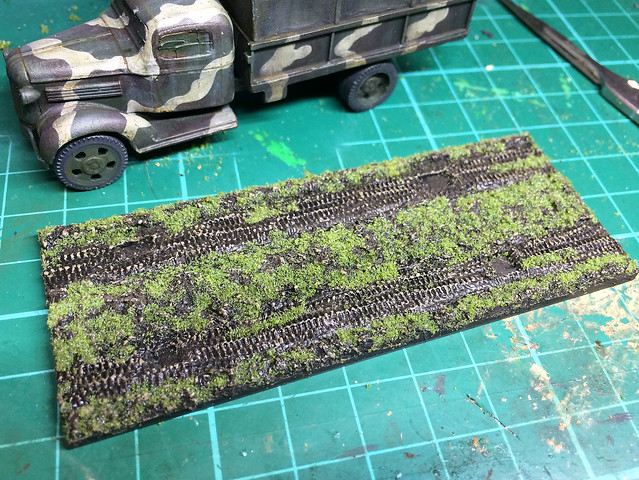
Green, Green Grass
I've stuck to my very simple application of scenic 'grass', it's not very sophisticated or realistic but I am not tinkering with my 'system' of doing grass as I want all my Finnish project bases to look the same. Basically, sprinkling on just one colour/tone of scenic grass doesn't quite produce a really convincing grass effect - to do this I should be experimenting with mixing tones and maybe introducing 'static grass' medium to get a true grass. I will try this with future projects.
Stoney grounds and grassy tufts
The final thing I add is some 'rocks' and turfs of grass. The 'rocks' are just scale model railway track 'ballast' I think, but any old scenic stones will do. These are just individually glued on - randomly - using good old PVA glue...
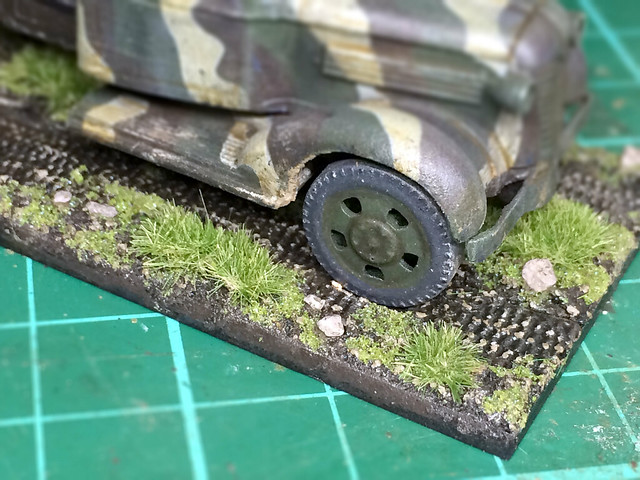 |
| Stoney ground. The front wheels need some more 'mud' applied to the very bottom of the tyres to give the impression of the weight of the truck.. |
Conclusion
Well, that's the base, though I do like to give the base a light spray with matt varnish as it helps to keep the grass in place.
That done, I affix the truck to the base and then check to see if I need to do some 'touching up' to blend the truck into the ground. My early attempts at basing had my models looking like the were sitting on top of the ground, with now 'weight' to them. I know try to sink my vehicles' tyres or tracks into the ground slightly. It looks more realistic.
No comments:
Post a Comment