Showing posts with label X-Ref: DIO/BoB/0913. Show all posts

Thursday, 21 November 2013

Battle of Berlin vignette, Part 9

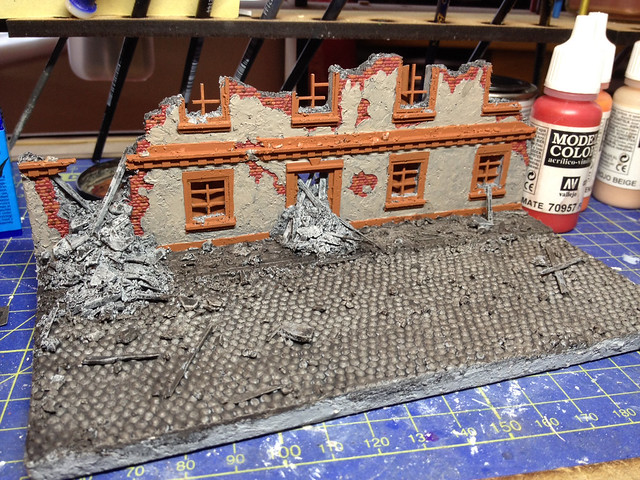
I might as well post up this minor bit of progress. I've coloured the rubble...


All that's left to do on the back-drop now is to *maybe* add some dust around the piles of rubble spilling onto the street. It's a bit too 'clean' at the moment and I would imagine there would be a lot of dust from the falling masonry. I'm just trying to think of a subtle way of doing this - photo spray mount and talcum powder?

Wednesday, 20 November 2013

Battle of Berlin vignette, Part 8

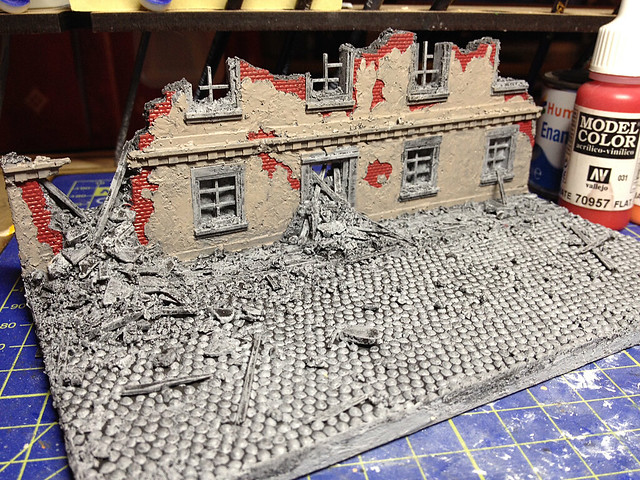
Back to making some forward progress (as opposed to whatever I was doing before)! Anyway, I feel I'm back on track again with my Battle of Berlin vignette and am continuing to work into the painted detailing now.

The first stage was to lay down my flat areas of colour ready for what you might call the 'weathering' effects to be applied. I finally decided on what colour to paint the lintels and window sills, based on a nice reference photo I found of a partially destroyed building from Dresden. I thought the red-brown colours would lift the diorama and compliment the brick-work (my alternative was to go with shades of mint-green to contrast with the terracotta bricks, but in the end I thought this would be a bit too much)...


Were I doing a vehicle I would say - as mentioned - that I was now on the 'weathering' effects stage. All the usual techniques are employed in the usual order - pin-washes, dry-brushing and some highlighting...


Dry-brushing tones down the bright re-brown paintwork a bit, which is good as it makes it look a bit faded and weather-worn. it also adds a little highlighting to the edges of the ornamentation which gives the detail some additional definition.

NOW...I begin to work into the painting and detailing of the rubble itself. I don't want it all being just a dirty grey - there would be bits of painted wall and wood and bricks in the rubble - but also I want the rubble to stand out against the pavement and the street.


I'm still a little unhappy with the street cobbles, I think they are still a little to light coloured - I really want a darker slate grey effect. So I had a go at darkening them down with some conte crayon dust.

Hopefully I am on the home straight now with this - some more little details and colouring and I can start thinking of mounting the ISU-122 in place!

Friday, 15 November 2013

Battle of Berlin vignette, Part 7

Sorry chaps, it's one of my 'one step forward, two steps back' posts...Well, one step back really...

Despite the rather nice effect I got with my black wash I decided it wouldn't produce the look that I was after. So I started again.

I have started painting flat base coats on the main sections of the vignette, and then I will repeat my black wash - lightly - on top of these.


I will be repainting the street cobbles a darker grey and then the lintels and window-sills a contrasting shade to make them stand out against the buff colour I have painted the walls.

Monday, 11 November 2013

Battle of Berlin vignette, Part 6

I decided to start the painting stage of my Battle of Berlin back-drop with a pretty heavy black wash. I wanted to get a lot of 'dirt' into all the nooks and crannies. For a change I used a Humbrol matt enamel and made a very thin wash using quite a lot of thinners.

My plan is to lay down dry brushed coats on top of this, so I wanted the darkest layer first - with all the little cracks and crevasses heavily shaded. To be honest - as usual - I am just playing this all by ear, but I figured it was best just to slap on the wash and see what happened...


I don't think it's too bad a start - I kinda want a 'dirty' looking vignette. The wash worked particularly well with the plaster wall...


Now, I think I will start by dry-brushing the building's wall, pavement and road and then I will start painting the detail with a little more care.

Saturday, 9 November 2013

Battle of Berlin vignette, Part 5

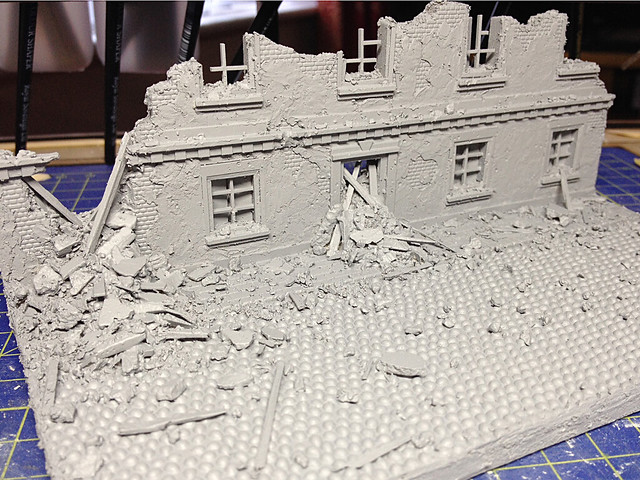
Unfortunately I had to back track a bit with this project. As I feared I had over-done the 'damage' to the facade, this became clear when I sprayed on the grey base coat. Just one of those things I'm afraid. However, the easy remedy for this was just to quickly skim some Pollyfilla over the surface which hid some of the superfluous marks...


...This actually turned out to be one of those fortuitous accidents as the Pollyfilla coat turned out to be a really nice touch. Being quick dry plaster it had a tendency to crack in places, adding to the impression of damaged masonry!

Once satisfied - this time - with my facade it was back to the spray booth again for another coat of mid-grey acrylic primer...


OK, now it's time to start planning my painting strategy! :)

Wednesday, 30 October 2013

Battle of Berlin vignette, Part 4

More trouble with rubble!

...Getting tired of this yet?  ;)

OK - for those of you who haven't lost the will to live I continue adding debris and damage to my street scene...

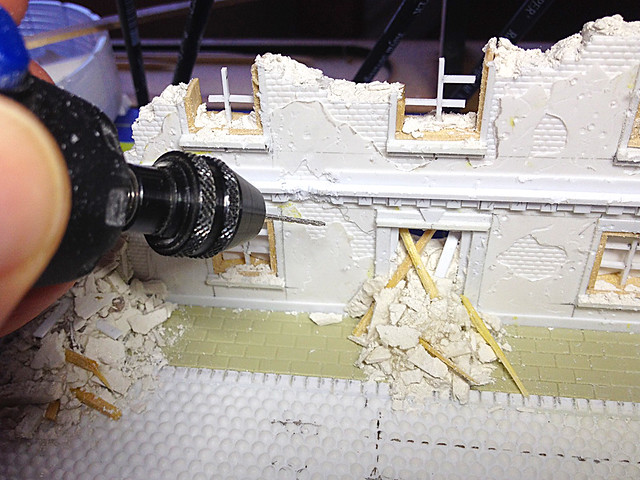
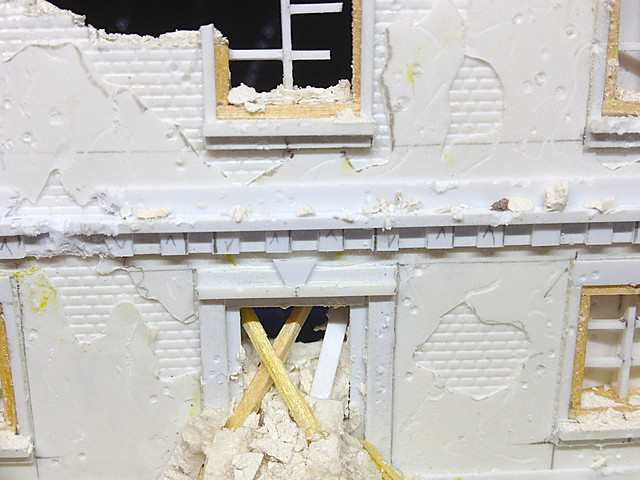
First of all I let my trusty Dremmel loose on my buildings facade. There are several things I want to do - add bullet holes, cracks in the plaster and damage to the frontage where falling masonry has broken lintels, etc...


As with everything else, it's sort of a case of knowing when to stop - hopefully I haven't over-done the damage.

Now, the facade done I move onto the debris on the street itself. Doing random is quite hard I think - so fingers crossed my random debris doesn't look too unrealistic...


It all looks a bit funny, but I'm hoping that's because it's not painted yet - SO I better get on with the painting!

Monday, 28 October 2013

Battle of Berlin vignette, Part 3

Well here we go...Let's get ready to rubble!

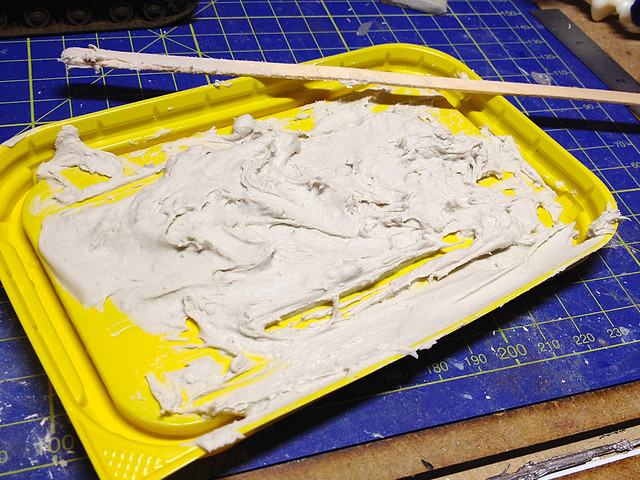
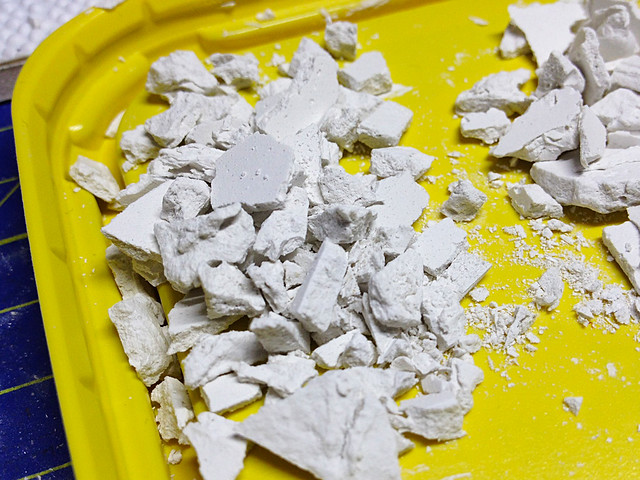
Just to recap, I started my 'rubble' off by squeezing a lump of quick dry Pollyfilla into a discarded margarine lid...


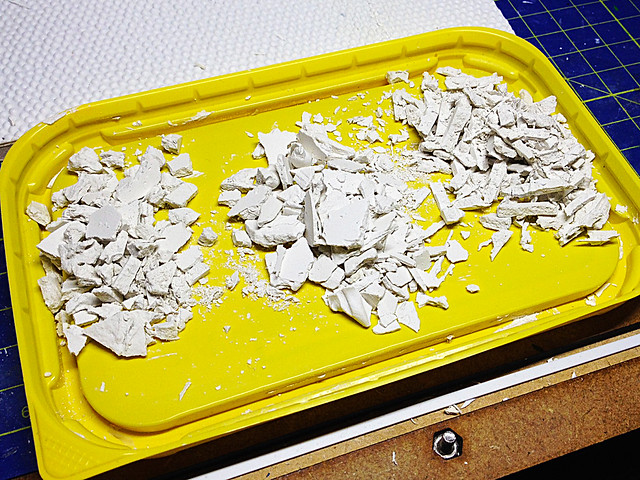
Once dry I started to break up the lump into smaller 1/72-looking lumps - one tip is not to make your layer of Pollyfilla too thick, try to imagine the scale size of a wall or a floor, that's the thickness you are aiming for. I tried to grade my 'lumps' into big, medium and small...


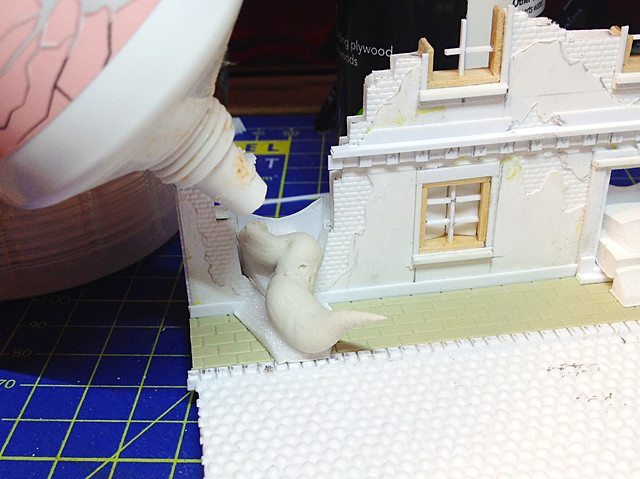
Now, rubble ready I now have to prepare my backdrop to make it ready to place the rubble on. The two main features will be masonry spilling through gaps in the wall - a hole blown in the wall and the main doorway. I began by building up some of the 'spills' with some foam-board off-cuts...


Pollyfilla time again! I'm using this as a medium with which I can stick my rubble to the backdrop...


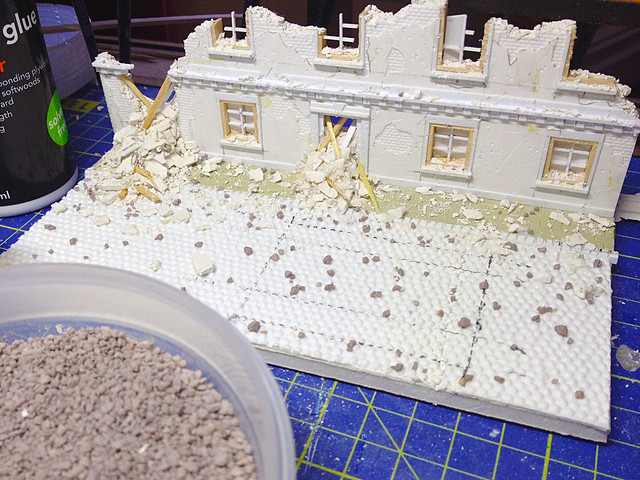
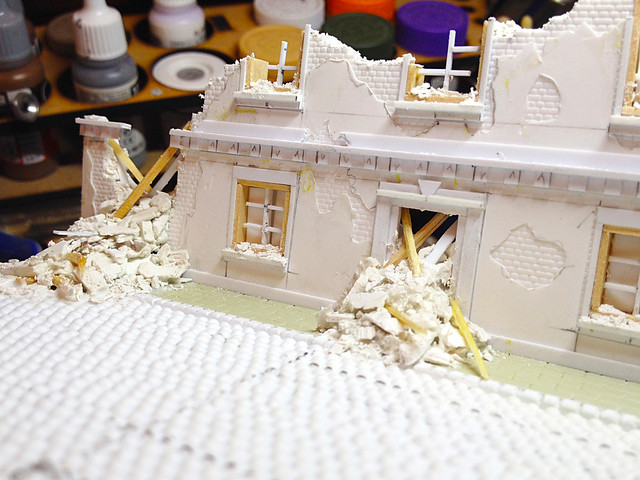
Then just sprinkle on the scale rubble, pressing it lightly into the still wet Pollyfilla. Just a little at first and then let the Pollyfilla dry, then add additional rubble on top of that using PVA glue, building the fallen masonry up in layers until you feel it looks realistic. I also added in some strips of plastic and wood to look like fallen interior planking...


Once I had the two main exterior mounds of masonry done I turned my attention to adding some rubble to the building facade itself. I applied some smaller pieces of the ground up plaster to the edges of the wall - sticking it in place with some Pollyfilla - and sprinkled some more dust and small lumps to window sills and lintels...


Nearly done. All that's left to do is to scatter some bits and pieces of my plaster rubble and wooden strips over the street. I've marked out where the tank tracks will be so I know where not to put any debris. I'll probably wash the street with a thin mixture of PVA and then sprinkle some of the smaller gritty pieces of plaster here and there and then glue in the larger lumps individually.

Well, that's that. Once all the rubble and detritus is on I'll spray on a grey base-coat before starting to paint the backdrop.

Saturday, 26 October 2013

Battle of Berlin vignette, Part 2

Right, time to start detailing the backdrop for my ISU-122 vignette. As said, I'm not going into a lot of research for this - I just want something that looks like a generic 'bombed out' building. I know I want it to look like it's the shell of a building, well just a wall really, and that I want rubble spilling through the gaps in the wall.

First thing was to start adding some of the architectural details, nothing fancy and everything was quick to apply. The bricks are from a HO/OO model railway texture sheet (dirt cheap)...


The lintels and window sills are all just off-cuts from some plastics strips I had - all pretty straight forward. BUT - at this stage I started to get a little ambitious (always a bad thing) and fancied peppering the walls with bullet holes, so I did go looking for some reference material and found this...


Having seen a few Berlin WW2 period building now I realised that they all seemed to have plaster cladding facades, not brick as I originally intended. This is bad and good, the down side is it will mean a little more work, the good side is that if I clad my wall I can jab holes in the cladding to make more realistic bullet holes.

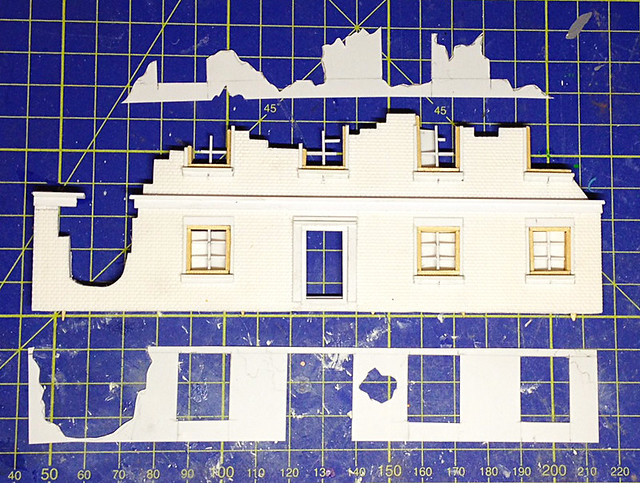
What I decided to do was this - I used some very thin sheets of plasticard to cut a top layer which will be glued onto my brickwork, BUT I have cut random holes in this layer so you can see the brickwork THROUGH this layer...

(You will notice that I added some broken window frames and some shutters behind the lower floor windows. Easy but adds extra realism.)

A bit messy, but that doesn't matter as it's supposed to be messy!


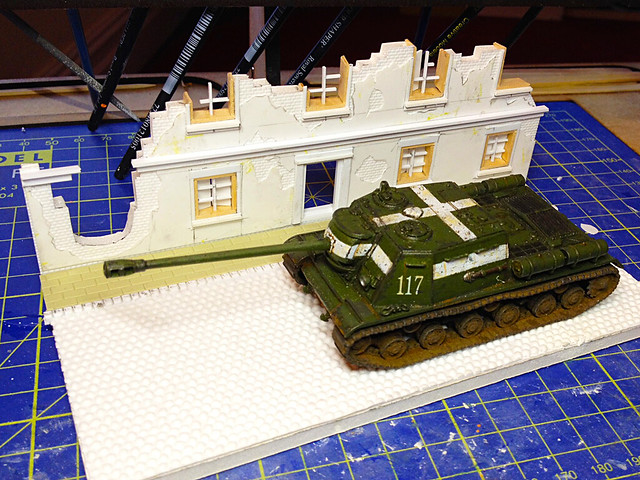
Now, I fix the wall to my diorama base and I'll just pop on my ISU-122 to check scale and placement...


Yep, that looks OK...And so, it's on to adding the rubble!