Still, nice bit of progress on the van bodywork...
 |
| At this point, I could turn this van into a variety of auxiliary vehicles. It could be an ambulance, or a light cargo vehicle or how about an ice-cream van? ;) |
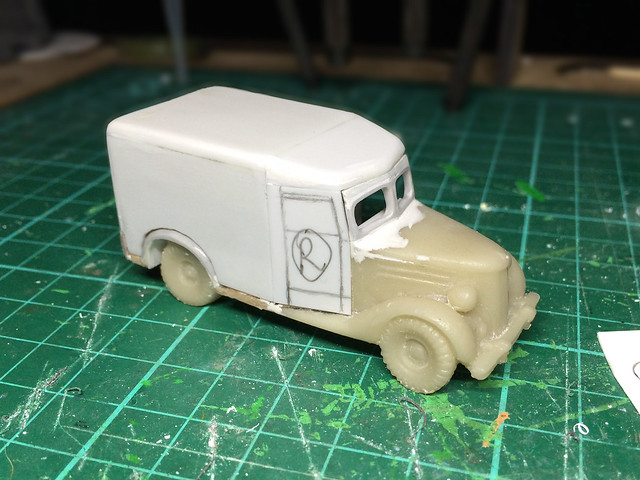
Yay! Finally starting to look like a van. I've started marking the doors ready for cutting out the windows. Once this is done I can get on with finishing the cab interior.
Being able to see through the windows means I have to give my model a basic interior. It's not very accurate or detailed, but it will do...

One thing I have realised after doing about a dozen truck now is that when it comes to adding a driver figure a 1/72 scale vehicle rarely has interior space enough to add a 1/72 scale figure. I'm not sure if this is something to do with the thickness of the plastic used to create the cabs but I inevitably have to use a 1/76 scale driver figure to fit into the space provided. (The better quality kits seem to get this right, the cheaper model seem to use thicker plastic.)
In any case, this 'cheat' isn't too noticeable through the windscreen.
Right, I can actually paint the interior now, before I close the cab up. Again I won't spend too much time on this as it will not be altogether distinct through the plastic windscreens. All I need is a rudimentary impression (obviously were I doing a display quality model I would be absolutely conscientious about all aspects of the painting, whether fully visible or otherwise)...

First note on Colour scheme: The basic scheme for most Finnish transport vehicles was a plain 'moss green' or faded version of said (which I have been interpreting by the use of Humrol's Light Olive Green). Finnish armour did use a three-colour camo pattern, but all other of their military vehicles seemed to use either an easy to apply green or in some cases an ad-hoc and hastily applied two-tone camo pattern.
There was apparently no guidelines for unit level application of camo on transport vehicles. Units (and even individuals in some cases) seemed to add their own 'camo' as they saw fit...
 |
| Source: SA-Kuva [Picture 167155] |
I'd like to add this aspect of Finnish army transport into my collection so I'm going to have a go with my radio van. The only question is - what colours do I use?
Black civilian and commercial vehicles *seem* (this is my guess) to have gotten a quick pattern of moss green paint* over the top to create a two-tone scheme. This may be the case in the above photo. Those with more colourful liveries seem to have been given an all-over moss green coat (or were whitewashed in winter).
 |
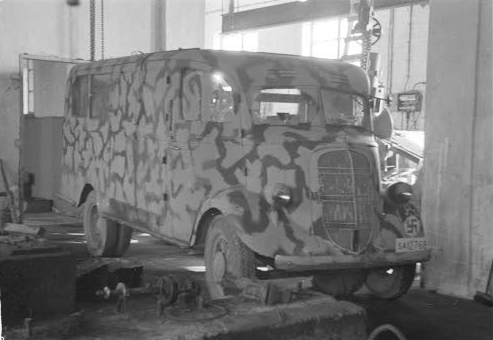
| Finnish Ford V8-51 - the earlier in the war the more slap-dash was the 'camo' application (green over black possibly). Source: SA-Kuva 42567 |
*Note: Some enquiries over at the Axis History Forum have resulted in a suggestion that the light colour may have actually been a field grey!
In short, I may have to 'guess'!
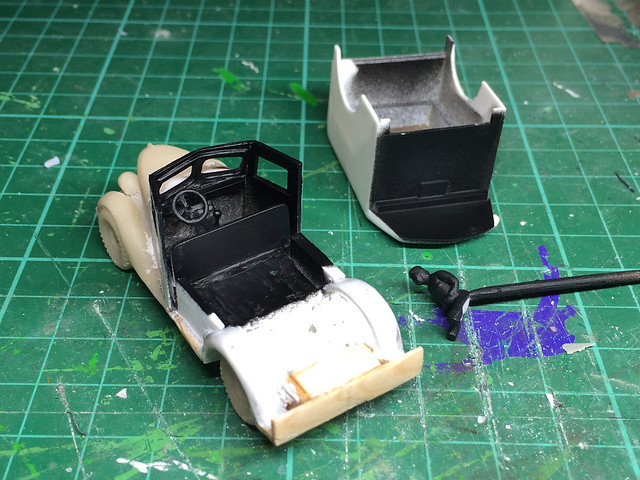
First paintwork - Cab interior
OK, I realise I meander on, but I am thinking out loud so I can reassure myself of how to proceed. I'm going for the black with green camo scheme though this infers that the cab interior was probably its original black. Black seems a good shade to start with for an interior whatever the eventual top colour anyway...
Next I painted my wee driver figures (I happened to be working on a driver for another vehicle as well). I'm really fudging these figures, they will be partially hidden inside the cab and only visible - eventually - through a dirty plastic 'windscreen', so I'm taking some liberties...
 |
| Well...They will be only barely visible! |
(I wish someone would bring out a cheap set of generic 1/72 driver figures. The sets I have found are quite expensive and tend to be specifically for particular nations, with the appropriate hats/helmets.)
With the driver painted it was time to paint the cab interior. Again, I've kept it simple with just a basic coat followed by a wash for shading. I also painted the cab's rear wall which is a part of box body of the van...

Neary there. But there's one final element of making the cab that's a bit of a tricky so-and-so - making the windscreens.
This is not my favourite job as so much can go wrong. Each window has to be custom made to fit its equivalent window space and during the fitting it's easy to scratch the plastic if you aren't careful. Therefore, I will allot this process it's very own post.
(Note: I won't glue the driver figure in place until I have installed the windows.)
I really like your conversions :)
ReplyDelete