Wednesday, 14 January 2015

Beats of War v-blog review of PSC Churchill tank

I'm posting this up not because I'm particularly a Chruchill fan, or because I think it's a terrific review, but because it's an interesting little move which highlights the different set of requirements and preferences of war game modellers as opposed to those of display modellers.


Despite the Churchill being a technological dinosaur I can see that there is a certain Steampunk-ish attractiveness to the design that would make you delight in fielding these in a game. The real tank, however, was probably less welcomed (Churchill himself despised his armoured name-sake) but it did a certain amount of sterling service, particularly in one of it's 'Funnies' specialist configerations.

Anyhoo, nice to see a model review like this on a video blog like Beasts of War as it opens up an important historical era to young gamers, which is important.

Endnote: I have made several comments about PSC kits when I have made them about them being slightly over-scaled compared to other '1/72' kits on the market. So, it was interesting to hear the opening statements by the reviewer where he mentioned that the scale was '1/72 or possibly 1/73' - even war gamers notice that PSC have 'gone their own way' with scaling! Although I think he has it confused as I think PSC kits are more like '1/70'.

Saturday, 10 January 2015

ModellTrans V3000 debrief

After building a dozen of so kits I feel that this ModellTrans based model is perhaps my first acceptable display quality model, all my others were - to varying degrees - experiments and practise models. As such I thought it would be nice to do a proper project debrief and discuss some of the issue concerning the building of this Modelltrans conversion.

In the beginning...
My first impression of the Modelltrans was one of disappointment. When it arrived the cab component was broken and the broken parts were missing, this complicated what I was hoping would be a fairly straight-forward conversion.

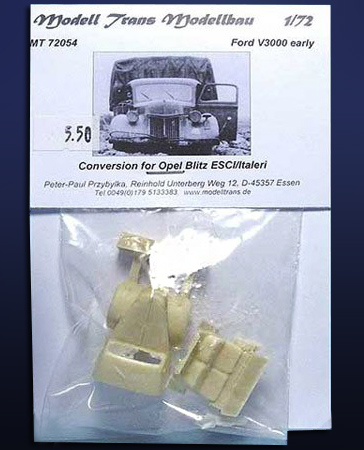
Left: How the MT V3000 conversion kit was supposed to have been delivered to me. It wasn't, mine came in just a small plastic bag - no labelling - and was broken to boot.

The next disappointment was that I couldn't accurately identify exactly which version of the Ford V3000 this model was supposed to be. My MT V3000 came without the package label, which points out that this is supposed to be a 'Ford V3000 early'. This - as it turned out - was an important omission.

(This is likely NOT ModellTran's fault - I get the feeling that my example was on the back of someone's shelf and I was the unlucky sucker who got the short end of the stick! As it was from Eastern Europe I wasn't going to send it back.)
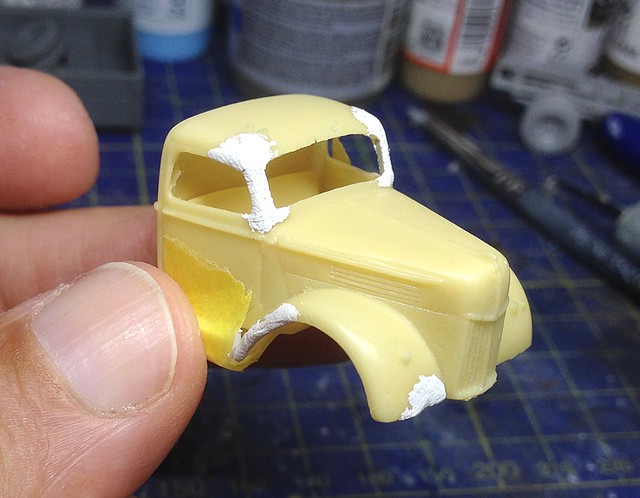
First job, repair the broken MT cab. A frustrating start...
The build - MT meets Italeri...
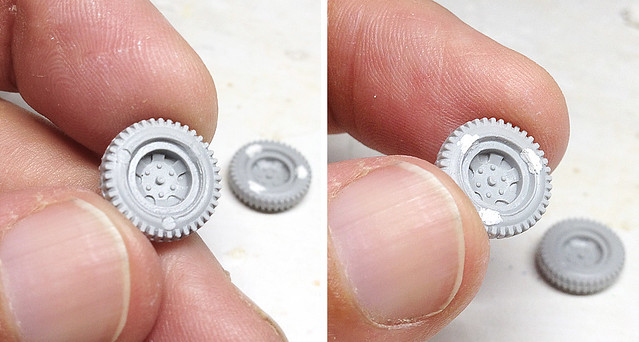
I easily located the cheap Italeri Opel Blitz (kit #7014) needed to complete this conversion on eBay. It isn't the best Opel Blitz model out there, but it's not the worst either - the chassis is particularly nice and fairly well detailed. However, two parts that you need for this conversion that aren't so well done are the canvas tilt, which lacks detail or character, and the wheels, which have some noticeable mould impressions in them.


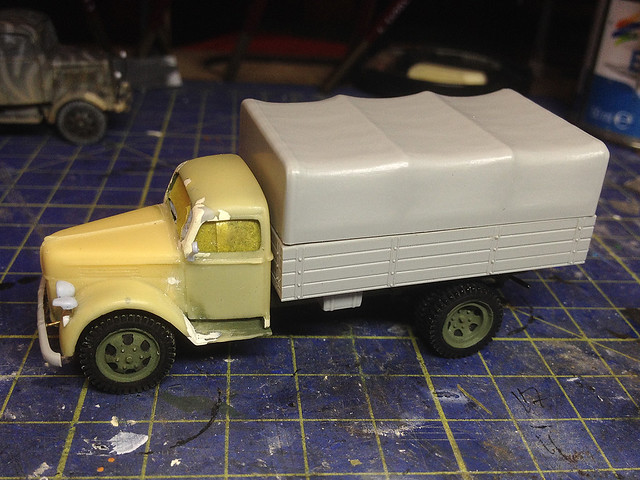
The conversion process is pretty straight forward in theory, the MT kit only has two main parts (and some minor ones). These are the MT V3000 cab which consists of the cab exterior and a cab floor and seating. Sadly there were not instructions - I guess MT thought its should be so obvious that it didn't need directions - but the mating of the MT cab to the Italeri chassis was not as easy as expected and needed some amount of tinkering to achieve a secure fit...
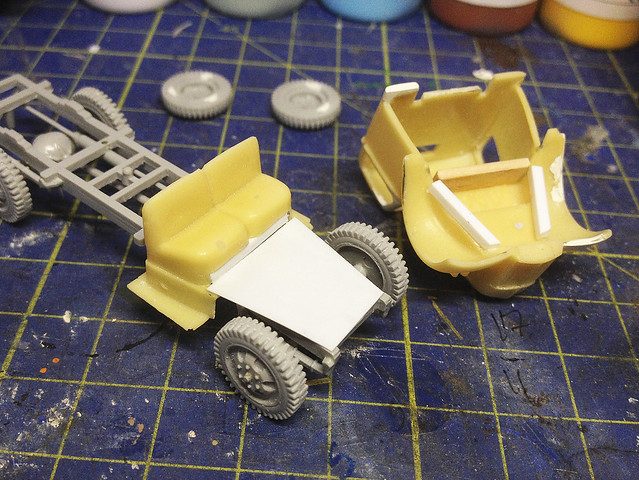
You have to work out how best to mount the MT cab sections on the Italeri
chassis yourself. I constructed a platform and frame solution.
Important! At this point I made a important mistake. In short, I felt the cab sat too high on the chassis, this idea was due to my thinking that the MT V3000 was based on the American pre-war model. So, I lowered the cab...Bad move as it turned out. The MT V3000 is, in fact, supposed to be the early model German Ford Werkes V3000, and therefore does sit higher with more space between the front wheels and the mudguards.

One step forward, one step back
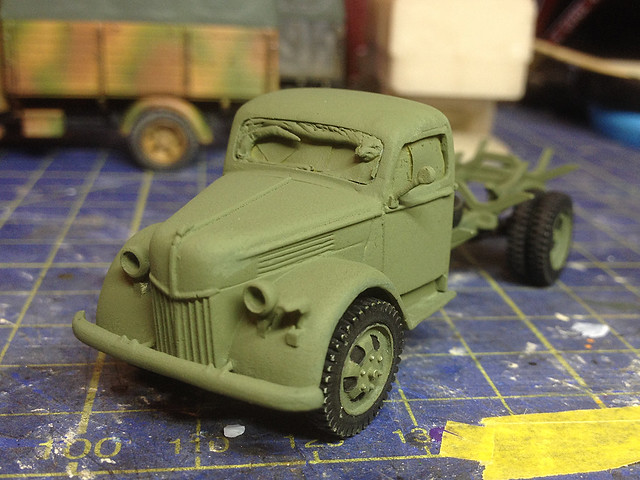
Compounding my mistake - by lowering the front suspension - I began 'improving' the fenders to make them more like the 'early' V3000's deeply rounded mudguards...
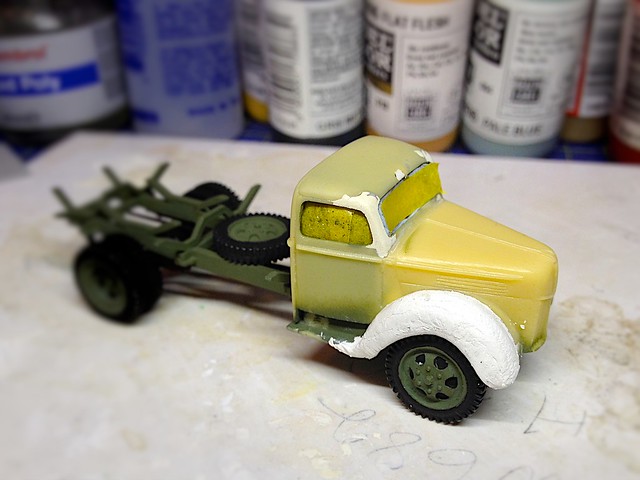
Wrong, wrong, wrong! (...Wrong!)
It was at this point I finally realised that the while the ModellTrans conversion was supposed to have been the 'Early' German version the MT's fenders were the wrong shape, or at least an ambiguous shape as they look neither exactly like the 'early' or 'late' version mudguards. But having decided that I wanted the the German version with the later simplified fenders I then had to do some 'cosmetic surgery' to remove my home-made 'early' rounded fenders. This got me back - roughly - to where I should have been...


But there was still one thing wrong - having lowered the cab it now sat too low for the German 'late' version (this is what you get for trying to be 'clever')!

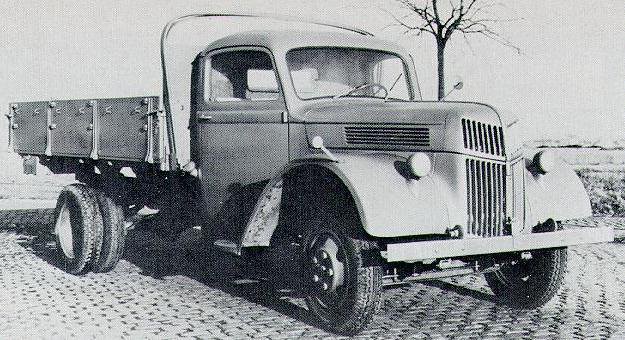
 Note: If I wanted the *accurately* modelled 'early' fenders you would have to modify them with modelling putty like I had started to (above) OR if you want an accurate set of 'late' fenders you will have to thin and straighten out the MT mudguards as per this reference photo...
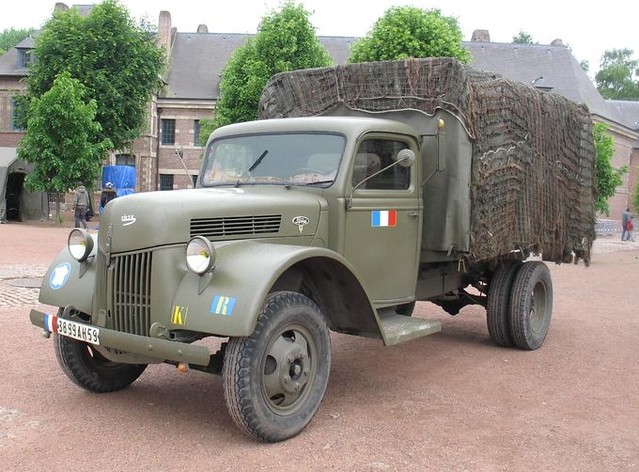
This reference photo shows a late model European V3000 with the simplified
(flat) front fenders and the high sitting suspension.
Photo source: Maquette Garden
So, it was back to the workbench once again with a modification to my front suspension to re-raise the height to be more in keeping with the 'late' model European V3000...


In conclusion
As you can tell, I made a hash of what - really - should have been an fairly easy conversion. Yes I wasn't helped by the lack of instructions or labelling - which had me barking up the wrong tree - but if I had done a bit more research online about what the MT kit was I would have saved myself a lot of time.

My foolishness aside I am actually quite pleased with the outcome, and did enjoy making and painting the kit. It is a nice option if you really want to add a German V3000 to your collection - just don't fall for MT's assertion that it is a 'early' version of the truck (which had deeply rounded fenders), it isn't. This is what a real early version looked like...

An example of an 'early' V3000 with it's deeply 'rounded' fenders.
Photo source: 9thsspanzer.com
The main issues I would raise relating to the actual conversion kit (rather than my mistakes) were:

• Lack of thought-out design to secure the MT cab section to the Italeri chassis
• Ambiguous MT fender designs - which look neither 'early' or 'late'
• Badly moulded Italeri wheels
• The Italeri front-bumper is OK (but still not quite right) if you are doing an 'early' V3000 but isn't the right shape at all for the 'late' model (but I ignored that and used it anyway).

But as long as you are aware of these issues a good job can still be made of the conversion.


On the positive side, the ModellTrans conversion is a quick and easy way of you getting a Ford V3000 into your collection. Currently there is no V3000 plastic kit available in 1/72 (though there are lots in 1/35) and this is a real shame as it seems that 1/72 kit manufacturers are restricting Braille Scale modellers to the idea that the only WW2 German truck was the Opel Blitz!

The Ford V3000 was a very interesting and important truck. Not only was it a numerically popular design it was one of the few vehicles that was being simultaneously manufactured by both the Axis and Allied sides during the early-mid half of the war! You were just as likely to see a V3000 being rode into action in the Western Desert by either the British 8th Army as you were the Africa Korps! It was used - Lend Lease - by the Soviets while the Dutch and Australians used it in the far east where captured examples were subsequently used by the Japanese!

So, if you want to feature the V3000 - in whatever army you are interested in - the ModellTrans/Italeri conversion kit is the easiest and cheapest way to do this.

Left: Hunor have a V3000 short-run resin kit available but this is about $29 plus shipping. This is a accurately modelled 'Late' German version. Still, that's your only kit alternative, but you have to search hard for it.


All in all, I am very happy with the ModellTrans V3000 conversion kit - despite my meandering diversions! At just €5.91 (plus shipping, plus the cost of the Italeri Opel Blitz) it's a reasonably priced modelling adventure.

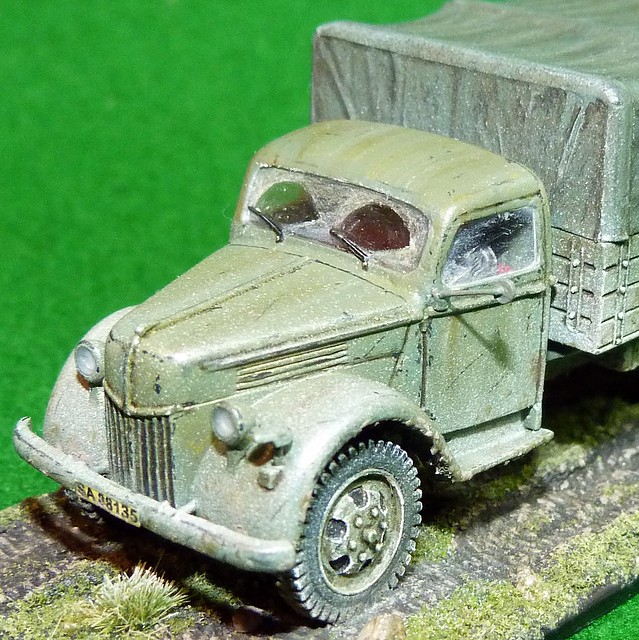
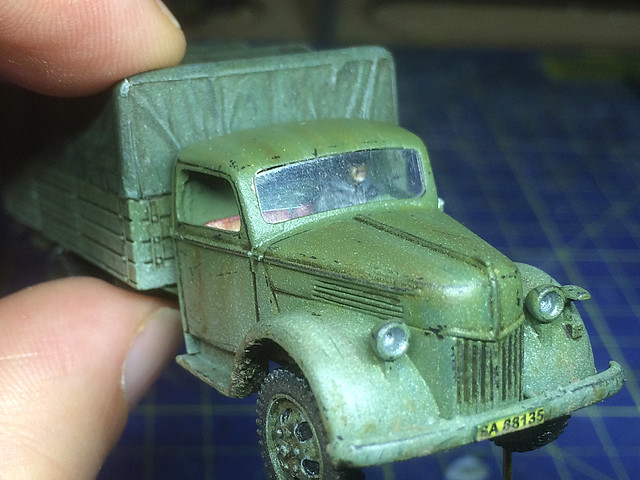
All that's left for me to do now is to take those all important completion photos. Teaser below...


Related/useful Links:

• ModellTrans Modellbleu offcial website
• ModellTrans catalogue at Henk of Holland review site

• Conversion kit available from: 'Tank Models' store, Poland.

Tuesday, 6 January 2015

ModellTrans Ford V3000 - Part 8

Nice shot of a German model Ford-Werke V3000s (late model).
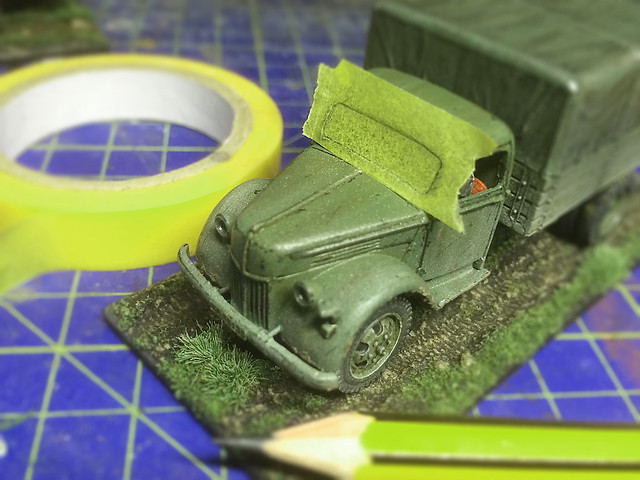
On the last leg of this model. Today I am working on finishing the tilt canvas shading, highlighting the model, adding the gaming base and fitting the windshield.

The Canvas Tilt
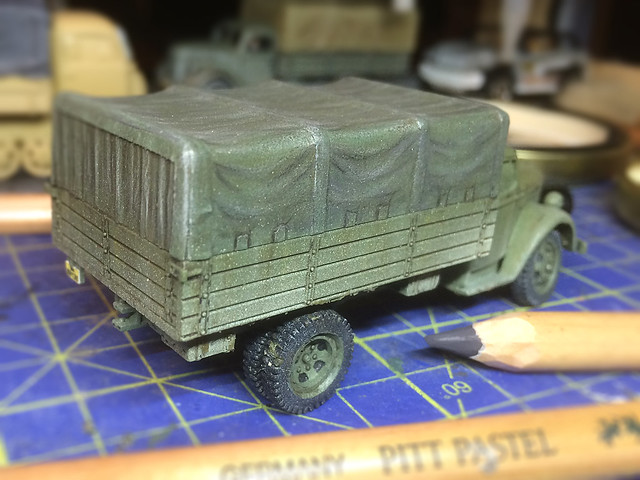
The canvas tilt was a part that was donated by the Italeri Opel Blitz part of this conversion. It wasn't the best model of a canvas cover and had little moulded detailing and was very smooth. I would have preferred some wrinkles and folds, but no.
A photo of the Italeri tilt cover before painting. A bit featureless and smooth.
Therefore, any character I could give this 'canvas' would have to be done using paints or other colour medium. In the end I settled for using a set of Faber-Castell Pastel Pencils over a matt coated primer base. This was the same technique that I used on my Pegasus German trucks, the tilt covers of which were similarly crude.


I could have just as easily used soft Conte chalks but I preferred the pastel pencils because I could sharpen them to a point for drawing on fine detail and outlines.

Highlighting and touching up
Last thing I do [with regards to painting] is touch up small bits I am not so happy with or think need sprucing up. With handling some delicate effects can wear off, or adding a layer of varnish can dull down some others. I also add the brightest highlights with pure white - obviously this needs to be done sparingly.

Things like the rims and sharp edges look nice with a 'reflective highlight'. The top of small bolts and rivets too, plus the edge of the tread on the tires are all places that can be lifted up with a bit of white. I use whatever seems most fitting, a white pastel pencil when I want to blend the 'shine' slightly or, for extreme highlights, white acrylic paint.

Oh...And there was one last bit of tinkering! Axel modifications.
One last very annoying - and embarrassing - modelling climb-down is the realisation that my original opinion that 'the cab sat too high on the chassis' was, in fact, complete nonsense. Sorry MT, you were right, I was wrong! I am now having to modify the front axel to raise the cab/chassis back up again - this involved cutting off the wheels and inserting a new lower axel so that the fenders have more space between them and the wheels. Bummer!

Gaming base
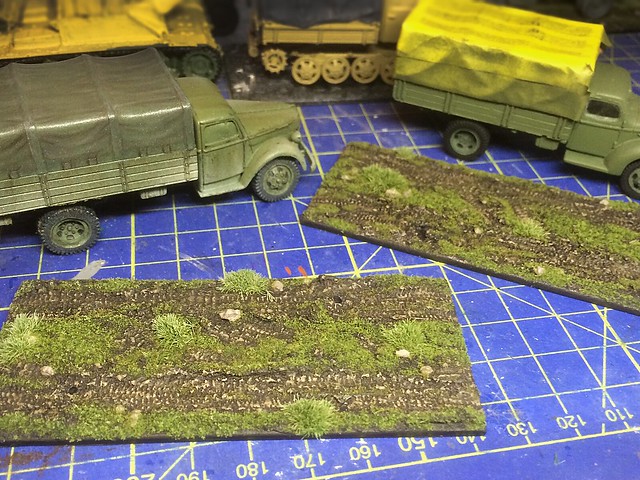
As usual with this particular project I am adding a 'gaming base'. I cut a rectangle of plastic card with a 5mm overhang around the 'footprint' of the vehicle. All my medium trucks are turning out to require a base that is 40mm wide, but length varies depending on the type of wheelbase of the vehicle.

I think I have the technique for doing these bases pretty much off-pat now. A Pollyfilla 'ground' is given some wheel tracks when nearly dry (I have some spare wheels with deep treads I keep especially for this). Then, when completely dry, I give the ground a coat of dark brown which I then dry-brush with medium brown and then highlight with a light brown (to give a dry mud effect).


On top of my muddy earth terrain I glue some random rocks and then add a sprinkling of static grass. Finally I add a few clumps of tufty grass. The whole thing gets a spray of varnish when complete.

Windshield
Probably the thing I enjoy least is having to make my own model windscreens. Quite apart from the fiddly custom cutting and fitting there is always the chance I get glue in the wrong place when installing them (a common issue for a Kitnoob like me).

I've done this a few times now so have a process worked out - with trucks anyway - but I still get very nervous doing it. (I just realised, in fact, that I have not made one truck yet that has a factory-made set of windscreens!) I trace the shape of the trucks windows onto some masking tape then lay a pice of transparent plastic over this and draw the shape onto the plastic, then cut it out. Simples! (I wish!)


So, the only thing to add here is that while when I started modelling I thought I needed to buy 'special' sheets of transparent plastic from my local model shop for this (which were expensive) I now use any old transparent plastic from our packaging recycle bin!

This is the bit I don't like, custom fitting of the windscreens. You pop them in, take
them out again, sand, pop them back in, take them back out, etc, etc, etc...
One way I might try and improve this process - but it adds another stage - is to cut out a carboard window from my outline drawing first so I can make the initial fitting and adjustments. Once the cardboard window fits I use that as the template for my clear plastic window, should save a lot of sanding.

Mounting the model
I like a nice secure mount so I don't just glue the model to the base. I drill holes into one of the front tires and one of the rear ones and insert a small piece of metal rod. I then drill holes in the base itself and inset the vehicle tire's metal rods in these holes. I then glue the rods into the base - this makes for a very firm mounting of the vehicle to my base.

I insert two rods like this, one in the front-left tyre and one in the rear-right.
(I should add that I do cut the rods to fit the thickness of the base!)
And finally...
At this point - which could technically be termed 'the completion' - I take a long good look at the model from all angles. I look out for tiny mistakes that can be easily rectified by a touch or paint or any chips or scratches. Anything that is amiss I try and put right before deciding whether the model require one final light spray of varnish - also, I might decide to tone down previous varnish coats of satin if they are proving too shiny with a very light squirt or matt varnish.

But otherwise, this is the end of the project...Except for the completion photography of course!

Thanks for bearing with my long-winded project posts.

Tuesday, 30 December 2014

Airfix 1/72 Curtiss P-40B - Preparation

You say Warhawk, I say Tomahawk...
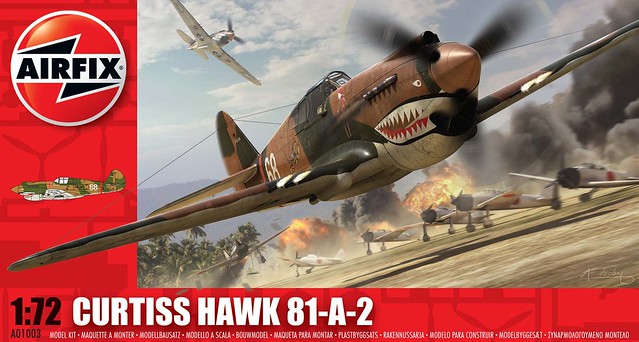
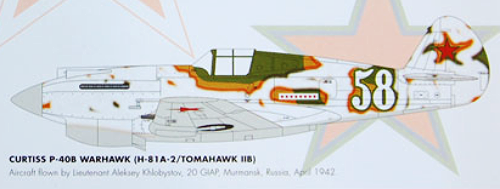
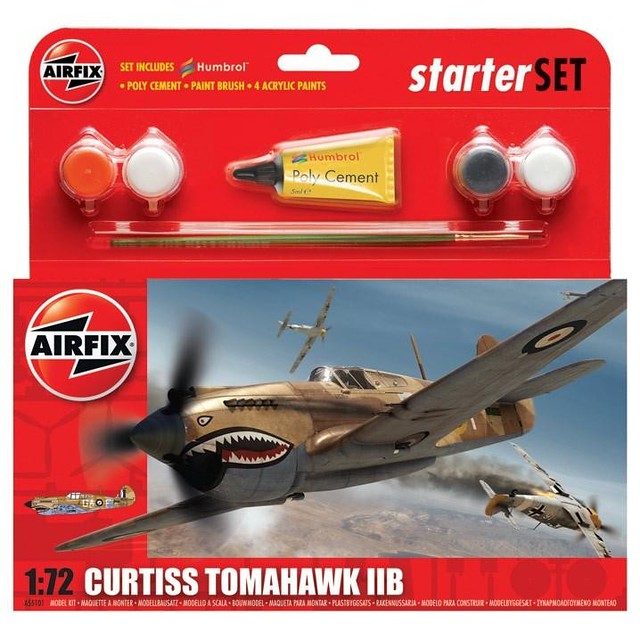
Before I start I should point out an elementary faux-pas that I made. I thought it would be nice to buy the other Curtiss Hawk based kit in Airfix's catalogue, the Curtiss Hawk 81-A-2 (#A01003) to go with my Christmas Curtiss Tomahawk IIB (#A55101) Both models sport the famous 'Shark Mouth' nose art and I liked the idea of a matched pair of 'sharks'...

The American Volunteer Group - 'Flying Tigers' Hawk.
The RAF's 112 Squadron  - originators of the 'Shark Mouth'.
However...It turns out that they are actually both (nearly) the same aircraft! Apparently - so I am told - the Curtiss 81A-2 is simply the manufacturers designation for the export model of what the USAAC called the P-40B model and what the RAF called the Tomahawk IIA (Tomahawk being the Curtis name for export models). The main difference between the Tomahawk A and B models was improved self-sealing fuel tanks which would not be visible in the kit form.

So don't make the mistake I made and think they are totally different versions of the P-40, from the Airfix model point of view they aren't! (I checked, they are indeed the same sprues!)

The Curtis P-40B (or export 81-A2) was the second model in the P-40 series with only
minor internal differences with the third - Tomahawk IIB - making the Airfix kits identical.

Confused? I was, but if you really want your brain to explode then consider this - Airfix have released the 81-A2/Tomahawk IIB kit as a Warhawk P-40B with USAAC Pearl Harbour decals in a 'Dogfight Doubles' set with a Mitsubushi Zero! So they are using the same kit for three - albeit very closely related - variations of the Curtis Hawk series of fighters!


...Sorry, can't resist and add that I've discovered there are actually FOUR Airfix P-40s! Airfix Club members had exclusive access to an additional P-40 scheme...


Research - Readying for the build
Right, variant confusion aside the first job is to start researching my build. I started with the Tomahawk as I am currently reading Derek Robinson's 'A Good Clean Fight' (boy's own adventure in North Africa in 1942 for grown up chaps).

Now, I've already mentioned in an earlier post that I have collected together some very nice book reference about the real P-40 series of fighters, of which I can thoroughly recommend Osprey's series of books on the fighter. But the most useful research I conducted was to see what other people had done with the Airfix Hawks, and we start with a real beauty...

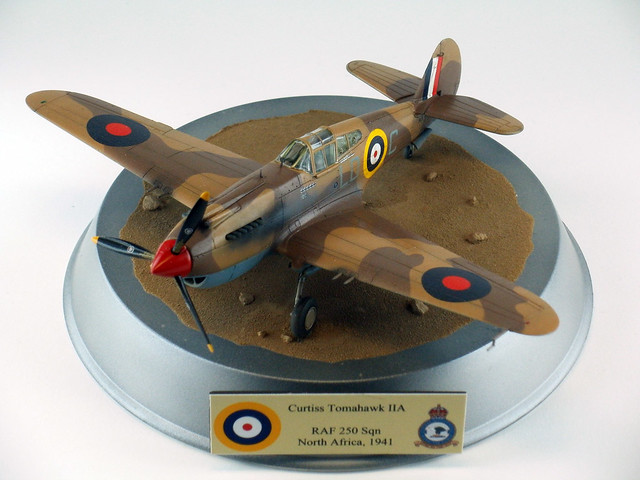
This immaculate example of a Tomahawk IIA illustrates, as it happens, the variant
quagmire I outline above! Although the modeller has chosen to do a Tomahawk IIA
he has used the Airfix Curtiss Hawk 81-A-2 (#A01003) to do it (which is technically
correct). Photo source: 'McCoy' from kiwimodeller.com
The above example - by 'McCoy' - is absolutely beautiful and something I could only aspire to in my wildest dreams. But it does give me a reference point to work towards and has some excellent touches that I may well wish to incorporate. See the full photo post here: Kiwimodeller - Curtiss P-40B Tomahawk IIA 1:72 (Airfix A01003 + Eduard #73427 PE).

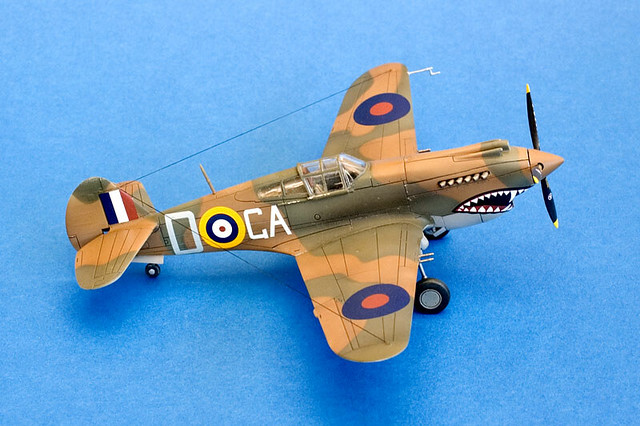
Lovely clean build of the Airfix Tomahawk IIA by Paul A H.
Source: Britmodeller.com
The next example of an Airfix Tomahawk build I came across was on Britmodeller.com by Paul A H. Again it was a build of the Airfix Curtiss Hawk 81-A-2 but it really shows Airfix's new tooling of this kit to the best advantage (a world away in quality from the old 1960s Airfix Kittyhawk). See the full photo post here: Britmodeller - Airfix Curtiss Hawk 81-A-2 build.

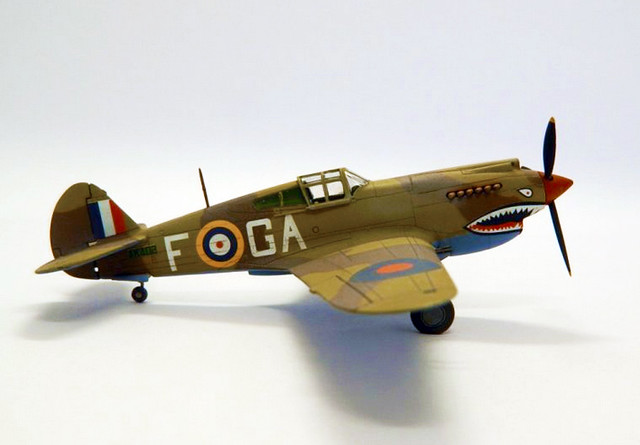
And finally, here's a lovely build by 'Yak Face' on Scale-Models.co.uk of the actual Airfix Tomahawk IIB. This is a nice illustration of an 'out the box' build of the Airfix kit...

Credit: 'Yak Face' over at Scale-Models.co.uk
She does look vert smart. But this all does fill me with a little apprehension as I have a lot to live up to as this subject has - as you can see - been done very comprehensively and by far better modellers than I. But, who dares and all that!

Out the Box or Accurised?
The last part of my preparation was to consider how much work to put into this kit. I don't mean how sloppy I intend to build this but rather to what extra lengths I might go to 'super accurise' the model by adding additional third-party accessories. As well done as this Airfix kit is said to be there are certain aspects that aren't - apparently - quite up to snuff as far as the purists are concerned.

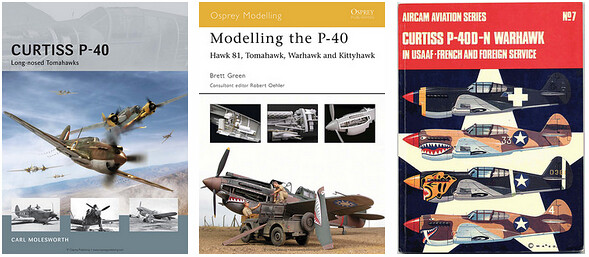
Left: Osprey's 'Modelling the P-40' gives many examples of how basic models can be refined with third-party accessories in order to make more accurate variations of the Hawk series.

To be honest, this shouldn't bother the beginner or intermediate modeller - the Airfix Tomahawk looks great to me (bearing in mind what I remember of the old Airfix Kittyhawk), but display modellers and competition modellers might want to take the basic kit to the next level.

It didn't take me long to track down a plethora of add-ons and up-grade kits specifically for the Airfix Tomahawk, and this says to me that it is a kit worth accurising. A quick search over at Hannants.co.uk for 'P-40' at 1/72 scale will reward you with several pages of Warhawk and Tomahawk bits and bobs of all types - resin and photo-etched parts, decals, internal and external up-grades and even vacu-form canopies.

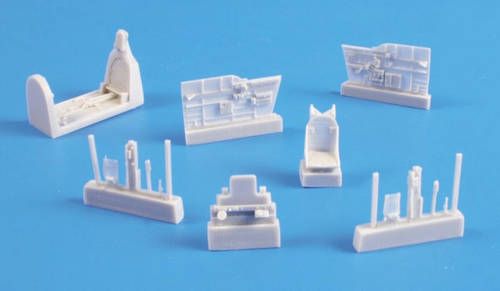
If you really want to push the boat out how about this Czech Master
kits P-40B/C resin interior upgrade kit. It's specifically made for the
Airfix kit but costs more than the Tomahawk kit itself!
Just the sort of kit 'bling' that advanced modellers like! This
replacement P-40B propeller kit is by QuickBoost and improves
the accuracy of this component - which is perhaps important to
the display and competition modeller.
In the end, as tempting as these parts would have been I decided that there was a greater appeal to simply making an Airfix kit as it was intended. It's been many, many years since I made an Airfix aircraft kit and the idea of recapturing my boyhood pass-time out-weighed any desire to make a 'better' Tomahawk. So this will be an 'out the box' build.

PS... I meant to add that for a laugh I popped all the relevant possible third-party upgrades that you could add to the Airfix P-40B into the Hannants shopping cart - the total came to forty-four Pounds! Ten times the price of the original Airfix kit itself.

What next?
Well, that's all my preparation thoughts laid out so it's on to the box review. And at this point I will get a chance to compare both of Airfix's Hawks side by side...Are they really identical?

Friday, 26 December 2014

Merry Day After Christmas!

...Just recovering from the Christmas Day so it's a late MERRY CHRISTMAS from me!

I would just like to add how pleased I am with my one model related Christmas present - it's something totally different from what I have done so far, but also something I have always been interested in. (I can blame Mr. Tim Gow for this, as he spotted these Airfix kits going cheap in Aldi of all places!)


This really is a blast from the past! I was in love with the original Airfix P-40 E A1 kit (in the old style plastic bag) when I was a kid so this was a lovely bit of nostalgia. Of course, the new Airfix Curtiss Tomahawk IIB is a completely new tooling and is pretty nice.

This is my Festive holiday project and will be a lovely change of pace. I've gathered together some interesting reference books, including a specialist Osprey modelling volume on the P-40 series...


I'm looking forward to relaxing with this project this festive holiday and I really hope you all have something similarly enjoyable from Santa this year...

Best wishes, and have a Happy New Year.

Steve

Tuesday, 23 December 2014

Mud, glorious mud

Fun with weathering powers
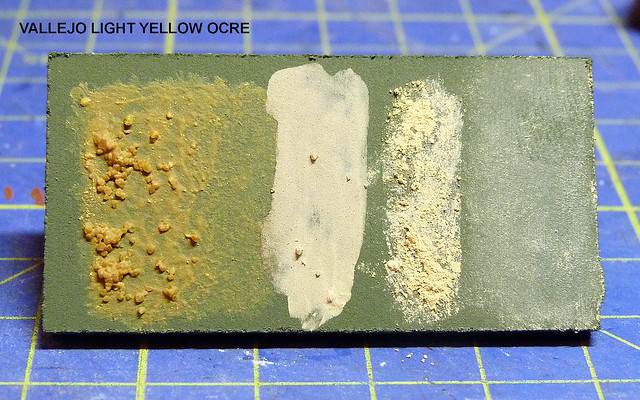
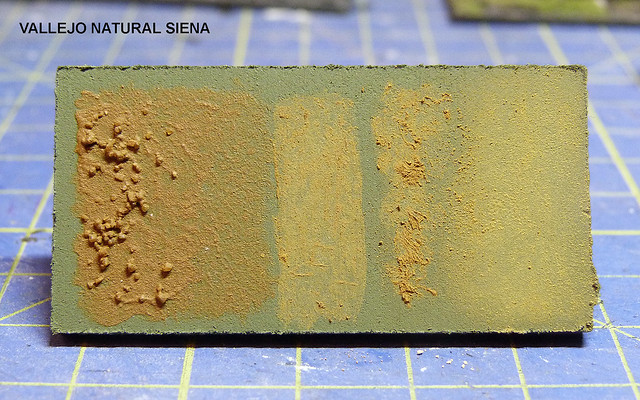
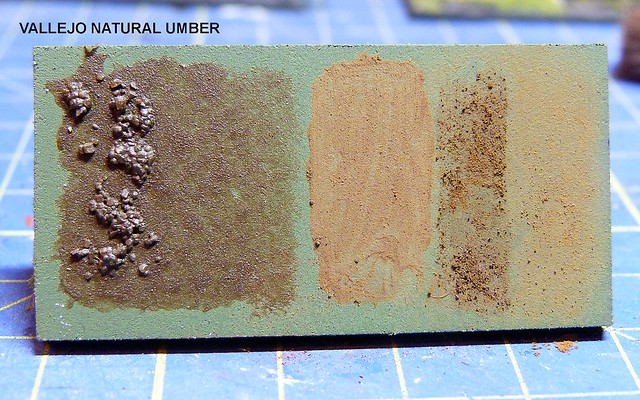
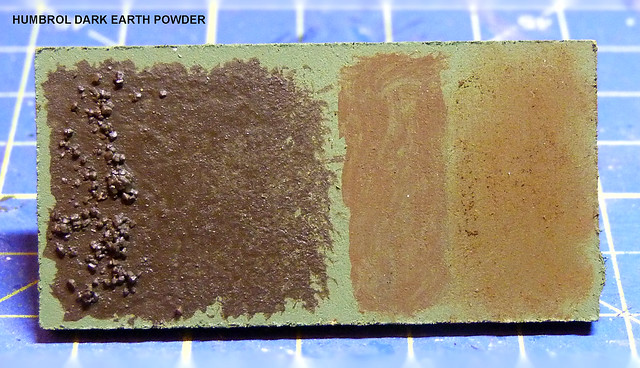
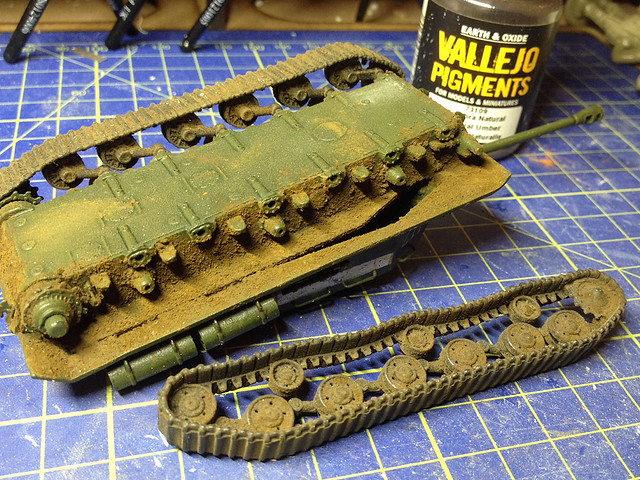
Something I've been meaning to do for a while now is make a set of 'mud' swatches to help me identify which weathering powders to uses for different jobs.

I bought a selection of Vallejo's powder pigments when they were offered on sale and added a couple of additional darker powders from the Humbrol range. But since buying them I have only scratched the surface of the variety of uses that they can be put to.

So while enjoying my relaxed Christmas break I though it was a good opportunity to experiment with the powders and examine their properties and possible uses.

Swatches
I wanted a record of the results of my experiments and so thought I would make some swatches out of some spare MDF bases. These could then be sealed (with Johnson's Clear or varnish) mounted on a card and put in a book so I can refer back to the effects created.

There are several ways, off the top of my head, I could think of using these pigments so divided up the swatch into different sections showing these varying techniques. These effects included:

• Pigment applied with PVA glue for thick gloopy mud

• Pigment applied with PVA with fine sand added for gritty mud

• Pigment applied as a 'dust' with no glue

• Pigment applied onto a wet surface (water or thinners)

• Pigment mixed with water/thinners and applied as a wash

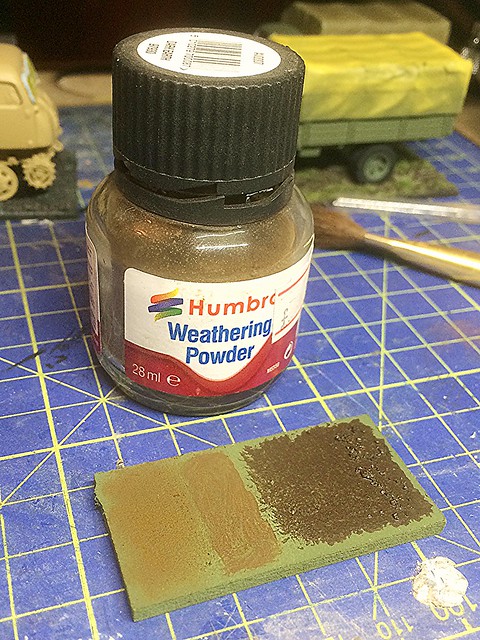
Order on swatch: PVA/sand | PVA | Wash | On water | Dust

Results - A few surprises
I was taken by surprise at just how much the various pigments changed colour when mixing with different mediums. PVA glue had a profound effect on the hue, mixing the pigment with water or thinners a similar - if not quite as drastic - effect.

I chose to paint my swatch a light olive green as I imagine this is the sort of colour that you would see these pigments used upon.

Vallejo's 'Green Earth

Vallejo's 'Light Yellow Ocre


Vallejo's 'Natuarl Siena'


Vallejo's 'Burnt Siena'

Vallejo's 'Natural Umber'

Vallejo's 'Burnt Umber'

Humbrol's 'Dark Earth'

Humbrol's 'Smoke'


So, there you go. Interesting to see them side by side. I concluded that to achieve a realistic mud effect on a vehicle I would have to 'mix and match' various pigments if I wanted a 'gloopy' effect next to a 'dusty' effect because of the hue change due to the medium I mix the pigments with.

Also, you can see which pigments might work nicely together to get a 'dry' mud and a 'wet' version of the same mud. It's not always the 'wet' version of the same pigment that's the best muddy companion!


Hope you find this helpful.

Sunday, 14 December 2014

1/72 Steyr RSO - Part 5

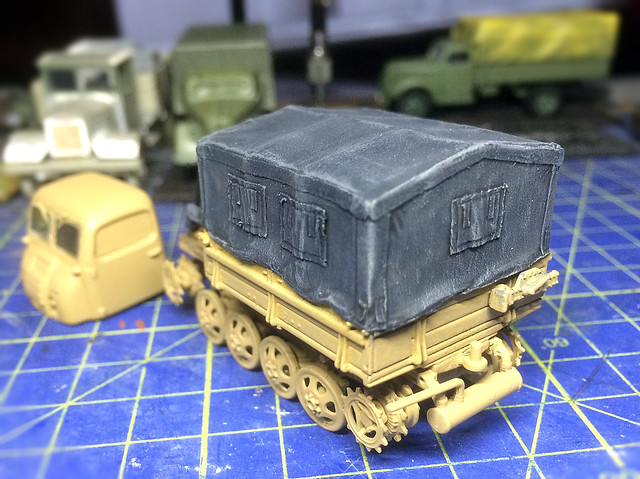
OK, a real post this time! I've been fooling around with some dry-brushing of the canvas tilt.

Now, I'm not a huge fan of dry-brushing - probably because I haven't mastered the technique - but it seemed such a logical effect to apply the my RSO's dark grey tilt cover.


I'm using this LIFE cover photo as reference, I really like the tatty nature of the canvas tilt on this RSO. It's also nice and muddy, which I will use as the contrast in colours will lift the plain grey canvas and add some character...


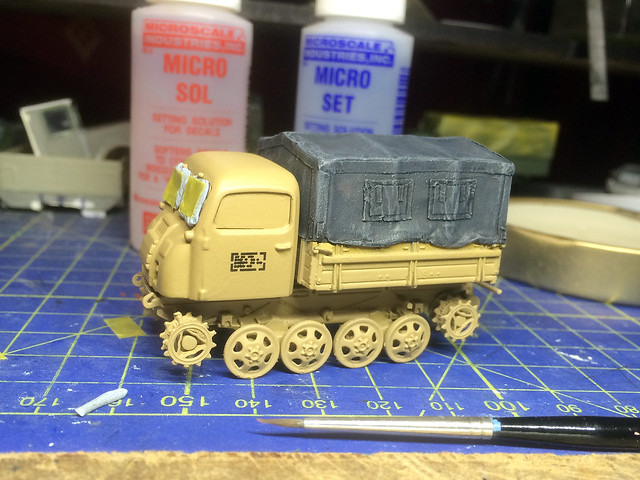
In the meantime, onto the cab interior. Now, I'm not spending a lot of time on this, just the bear minimum as it will only be partially visible through the cab windscreen. I gave the interior a mid-brown wash and did a passable job of the figure - just a bit of dry-brushing for highlights and then some black wash for shadows...


The Finnish vehicle didn't have unit or divisional emblems, the Finn's didn't seem to use them. All it seems to have had were Finnish military ('SA') number-plates and the factory applied vehicle ID patches on the driver's door. The ID patches contained weight data [shipping] for the vehicle and seem to have been applied to both doors, or sometimes just to the drivers side...


As usual I gave the base paint coat on the cab a light spray of Humbrol's acrylic Satin Varnish before applying the decal. I used Microscale's Micro Set as a preparation and placed the water-slide decal (from a Academy Opel Blitz kit) onto that then dabbed it dry. Once satisfied with the positioning I then gently moistened the edges of the decal with Micro Sol, just to ensure an seamless look between decal and the model surface.

And that's it for tonight. Next it will be back into the spray booth for another light dusting of satin varnish to seal the decal and prepare the model for a dusting of dust and pin-washing.