Friday, 13 November 2015

Minairons 1937 Chevrolet 1.5ton truck - part 3

This is the first time I have been blogging about two projects simultaneously, haven't decided whether alternating the posts like this is a wee bit confusing or not?

Anyway, progress on the '37 Chevy truck...

I've gone for the civilian type red leather bench seat colour. I can still remember this colour so well from cars when I was a lad in the 1960s (and I remember the beautiful smell too). They knew how to make car seats in those days, my father's Rover P5 had seating that would have done a gentleman's club justice! Sorry, I digress...

A tip for painting drivers - I glue them to cocktail sticks for easier handling.
A bit 'Gothy' perhaps? :)
The small unpainted splodge you can see is a bare patch of plastic I have left so that I can glue the driver onto the seat properly. As a matter of fact, I have also left the driver with an unpainted bum.

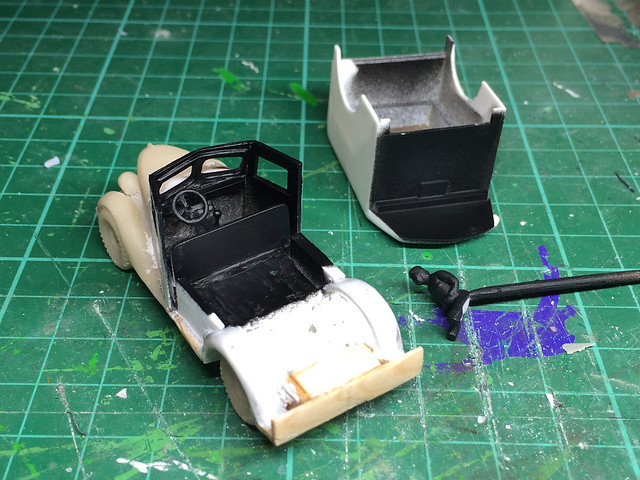
I've really simplified the painting and gone a bit minimalistic with the painting. Just a plain black painted interior for this one. (Which I guess it's in keeping with this war game format of model.)

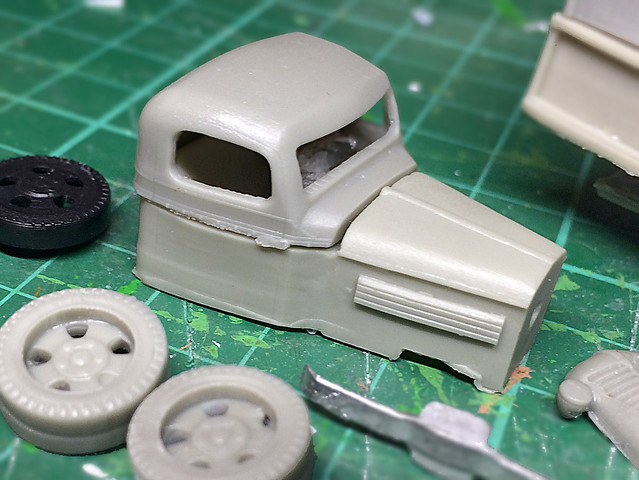
Before I close the cab by glueing the two halves together, I have the windscreens to make and fit. It's an easier job if I have access to the windows from inside and out. This actually brings my two current models to the same state of construction and I will be concentrating on a little windscreen production line when I have some time to myself today!

Tuesday, 10 November 2015

Chevrolet Radio Van conversion - Part 4

Apologies for the creeping progress reports on this one, but I'm just doing half an hour or so on this at a time (get the feeling I could have probably got this one knocked off in a long day session - if only I could get a whole day to myself)!

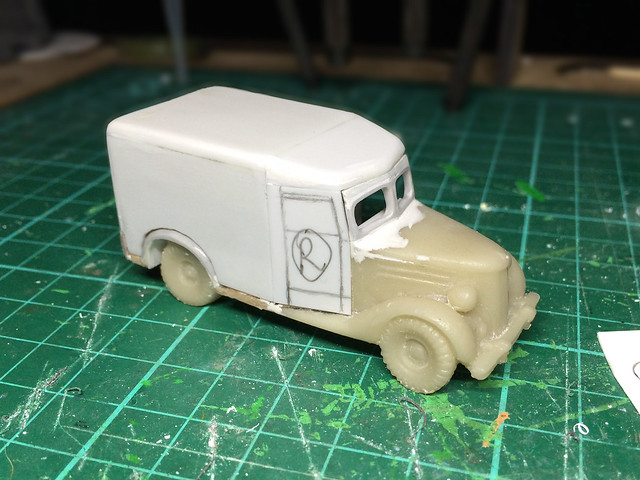
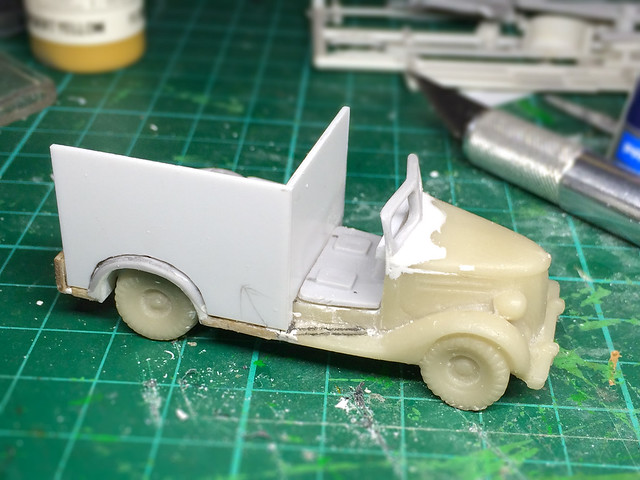
Still, nice bit of progress on the van bodywork...

At this point, I could turn this van into a variety of auxiliary vehicles. It could be
an ambulance, or a light cargo vehicle or how about an ice-cream van? ;)
Now, onto the slightly tricky part - making the cab roof. This joins the van 'box' to the top of the windshield in a curving wedge. I won't fix any of the cab parts permanently though as I will need to finish off and paint the cab interior before I do that.


Yay! Finally starting to look like a van. I've started marking the doors ready for cutting out the windows. Once this is done I can get on with finishing the cab interior.

Being able to see through the windows means I have to give my model a basic interior. It's not very accurate or detailed, but it will do...


One thing I have realised after doing about a dozen truck now is that when it comes to adding a driver figure a 1/72 scale vehicle rarely has interior space enough to add a 1/72 scale figure. I'm not sure if this is something to do with the thickness of the plastic used to create the cabs but I inevitably have to use a 1/76 scale driver figure to fit into the space provided. (The better quality kits seem to get this right, the cheaper model seem to use thicker plastic.)

In any case, this 'cheat' isn't too noticeable through the windscreen.

Right, I can actually paint the interior now, before I close the cab up. Again I won't spend too much time on this as it will not be altogether distinct through the plastic windscreens. All I need is a rudimentary impression (obviously were I doing a display quality model I would be absolutely conscientious about all aspects of the painting, whether fully visible or otherwise)...


First note on Colour scheme: The basic scheme for most Finnish transport vehicles was a plain 'moss green' or faded version of said (which I have been interpreting by the use of Humrol's Light Olive Green). Finnish armour did use a three-colour camo pattern, but all other of their military vehicles seemed to use either an easy to apply green or in some cases an ad-hoc and hastily applied two-tone camo pattern.

There was apparently no guidelines for unit level application of camo on transport vehicles. Units (and even individuals in some cases) seemed to add their own 'camo' as they saw fit...
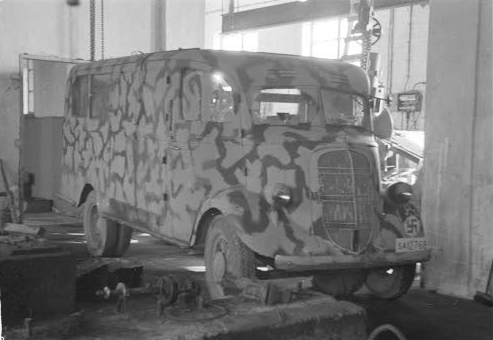
Source: SA-Kuva [Picture 167155]
This (above) anti-aircraft artillery repair van - it has a small workshop in the back - was photographed in 1944, which indicates that the practice of ad-hoc camo application persisted throughout the war.

I'd like to add this aspect of Finnish army transport into my collection so I'm going to have a go with my radio van. The only question is - what colours do I use?

Black civilian and commercial vehicles *seem* (this is my guess) to have gotten a quick pattern of moss green paint* over the top to create a two-tone scheme. This may be the case in the above photo. Those with more colourful liveries seem to have been given an all-over moss green coat (or were whitewashed in winter).

 Finnish Ford V8-51 - the earlier in the war the more slap-dash was the 'camo'
application (green over black possibly). 
Source: SA-Kuva 42567
Sadly, I have not been able to find one decent colour photo to back this theory up. While 'interesting' vehicles like tanks survive in museums trucks were most likely scrapped or returned to private ownership at the end of the war so few examples still exist.

*Note: Some enquiries over at the Axis History Forum have resulted in a suggestion that the light colour may have actually been a field grey!

In short, I may have to 'guess'!

First paintwork - Cab interior
OK, I realise I meander on, but I am thinking out loud so I can reassure myself of how to proceed. I'm going for the black with green camo scheme though this infers that the cab interior was probably its original black. Black seems a good shade to start with for an interior whatever the eventual top colour anyway...


Next I painted my wee driver figures (I happened to be working on a driver for another vehicle as well). I'm really fudging these figures, they will be partially hidden inside the cab and only visible - eventually - through a dirty plastic 'windscreen', so I'm taking some liberties...

Well...They will be only barely visible!
I know, not brilliant! The figure on the right is the one I will be using - he is part of a batch of cheap seated figures my brother sent me (I believe they were intended for use with model railways as passengers for the inside of coaches). It's not a great figure by any means, but it is a good size for fitting inside 1/72 trucks I have found.

(I wish someone would bring out a cheap set of generic 1/72 driver figures. The sets I have found are quite expensive and tend to be specifically for particular nations, with the appropriate hats/helmets.)

With the driver painted it was time to paint the cab interior. Again, I've kept it simple with just a basic coat followed by a wash for shading. I also painted the cab's rear wall which is a part of box body of the van...


Neary there. But there's one final element of making the cab that's a bit of a tricky so-and-so - making the windscreens.

This is not my favourite job as so much can go wrong. Each window has to be custom made to fit its equivalent window space and during the fitting it's easy to scratch the plastic if you aren't careful. Therefore, I will allot this process it's very own post.

(Note: I won't glue the driver figure in place until I have installed the windows.)

Sunday, 8 November 2015

Minairons 1937 Chevrolet 1.5ton truck - part 2

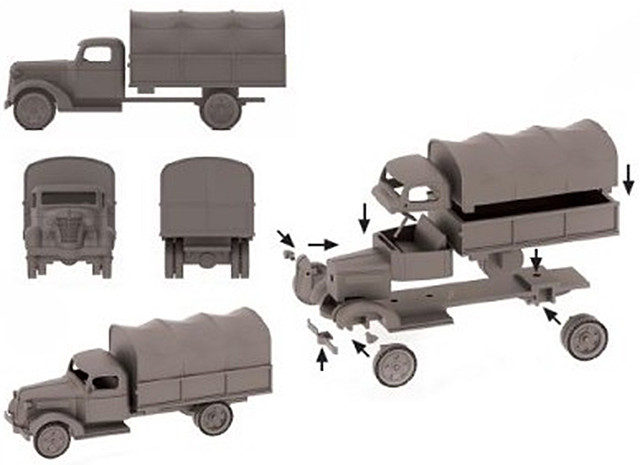
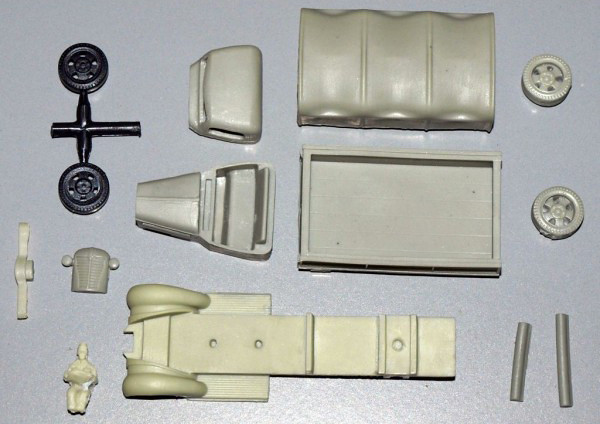
Actually I am right in the middle of another model build at the moment but could not resist peeking into the Minairons Chevy kit box. A glance at the number of parts plus mulling over the exceedingly simple instructions led me to wonder just how long it would take to put this kit together?

Source: Minairons
It may look simple but looks can be deceptive. On closer inspection - and a test fitting of all the parts - I quickly realised that this job might be a tiny bit more involved than it first appeared...


The fit is somewhat 'vague' - not that I could be too critical as Minairons specialise in niche models in resin and puter, they are not a large-scale plastic-injection manufacturer. You have to be aware that what you are getting is meant for a select community of enthusasts who are willing to overlook certain deficiencies in the model construction. So it's a case of caveat emptor! ('Let the buyer beware!')

Source: Minairons
The kit will go together quickly but in order to get the most ot of your purchase you have to be ready to put the extra time in...


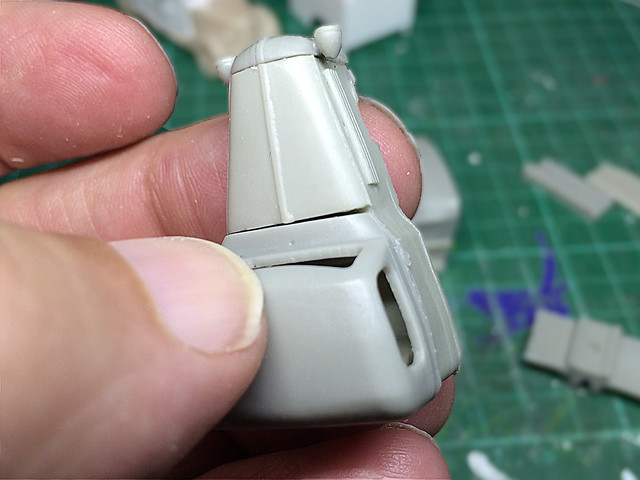
Some components  will need a little more than a quick sanding to get them to fit properly. Take the above photo of the profile of the model's chassis - I had to immerse this in hot water to get it straight.

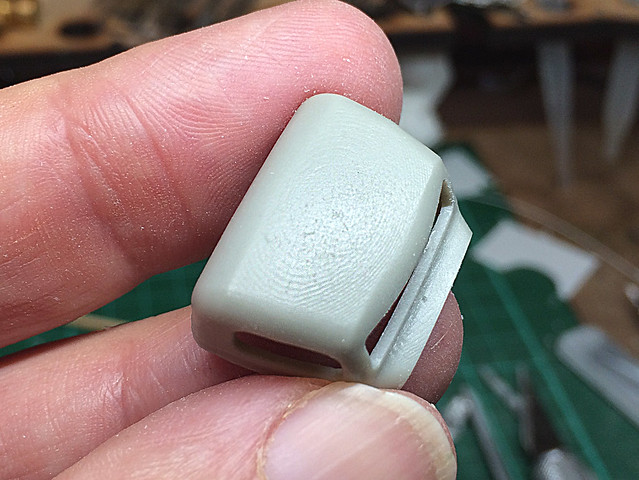
Another more trivial characteristic of the Minairons models are the surface textures that appear on some of the components. I believe this may be because they use 3D printing to generate some of the master parts (which is how they can resize their model designs for vaious different scales)...

No, not a finger print! This pattern - I believe - is the tell tale sight of 3D printing.
There's noting a bit of sanding or filling can't repair but it kinda negates the whole 'quick build' aspect of the kits!


But hey! I'm not dispondent. This is such a cool little vehicle that I'm still happy to have it...Now, where's my modelling putty? :)

Next: I begin at the beginning...The cab. Let's see how that goes together!

Saturday, 7 November 2015

November's stash additions - Part 2

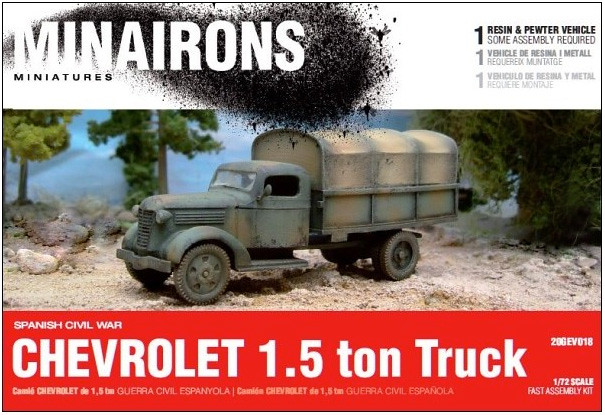
Well, that was quicker than I thought! All the way from Spain comes this wonderful 1/72 Minairons 1937 Chevrolet 1.5 ton truck...


I really quite like Minairons, they are producing a lot of interesting 'inter-war' models that no-one else is doing (in a variety of scales). The downside of this is they are a little pricey for what they are - they are simplified 'war game quality' kits, easy to put together and minimal parts yet this lovely '37 Chevy cost me £10.67 and then I took a big hit on postage as well.

Still, it gives me a unique little vehicle for my Finnish collection...

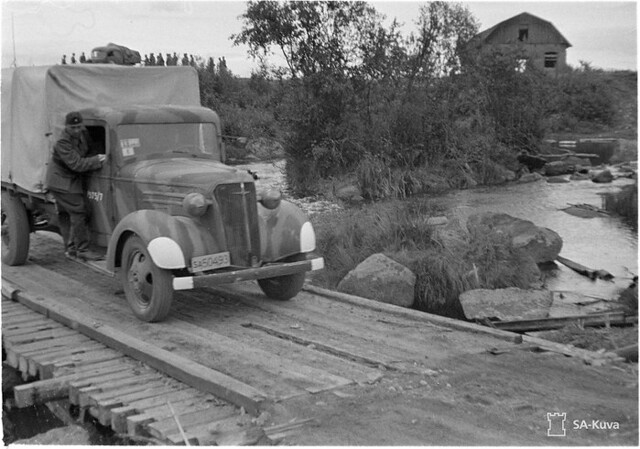
Source: SA-Kuva
In the above photo (take in 1941) a Finnish Army '37 Chevy makes it way over a temporary bridge. What's particularly interesting about this photo is that the vehicle has been given a camouflage paint job and it has night driving indicators (the white panels on the fenders and bumper). This is a bit more organised than earlier examples of Finnish commandeered vehicles, as earlier in the war they generally kept their civilian/commercial liveries.

I hate trying to work out what colours were from black and white photos. I'd love to do this camo on my truck but have no idea what colours it might be. (And as these patterns seem to have been an ad hoc unit embellishment there is no record of what they might have been.)

And that's it for this month.

Thursday, 5 November 2015

November's stash additions - Part 1

A couple of additions to the stash this month, the first of which has just been delivered. The other is still in transit from sunny Spain!

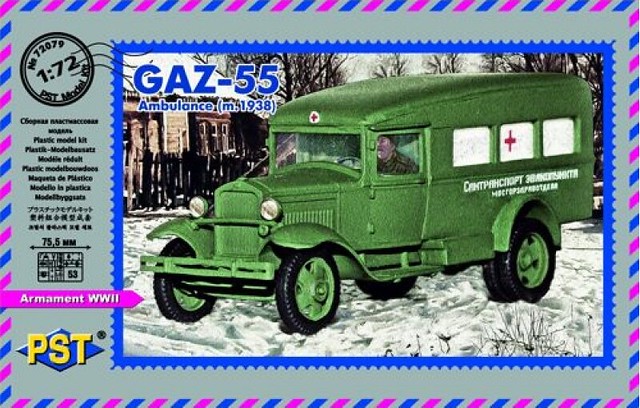
This morning I am rather pleased to be the recipient of one of PST's more recent models - a lovely GAZ-55 Ambulance (m.1938). Though, there are some mixed feelings attached to this model as I had already bought a similar one from Minirions a couple of months ago. Let me explain...

It all started when I spotted this photo while trawling through the indispensable SA-Kuva photo archive.  The picture shows a captured Soviet GAZ ambulance being used by the Finnish Army.

Source: SA-Kuva [44306 - Gaz 55 Ambulance]
Quite by chance the model maker Minirions had just released their 1/72 Spanish Civil War Ford AA 'Bookmobile' model, a wonderfully charming little kit...


It so happens that the Soviet GAZ-AA truck series - of which the GAZ-55 is a member - is a licensed copy of the Ford-AA Model1929 (hence the similarities). So, I immediately ordered the Minarion's kit with the intention of converting the Ford AA kit into its Soviet relative.

All fine and dandy - in fact, I was going start this project next - but then, a few weeks ago, I saw this on the eModels (UK) web site...


A bit of a quandary. What to do - proceed with my conversion plan or buy the proper kit?

What clinched my decision was that - by sheer coincidence - I happened to come up with yet another 'cunning plan' for the Minairion's kit (based on yet another piece of photographic reference I happened to come across). This meant I could go ahead and buy the PST GAZ-55 after all.

This is quite a nice outcome as I remember having fun making my PST ZIS-6 truck, it was a nice kit and went together very nicely. Therefore, I am looking forward to making this GAZ.

Wednesday, 4 November 2015

Chevrolet Radio Van conversion - Part 3

Having stripped the Valiant model (a LRDG Ford 15cwt truck) down to just the bonnet and chassis, I am now ready to build the bodywork back up again...


Rebuilding the windscreen worried me the most as I thought this might be tricky. Luckily I found a spare windscreen in my scraps box (one of the good things about getting time under your belt modelling is that the longer you do it the larger and more useful your scraps box becomes). I also found a nice set of wheel arches for the rear wheels.

The cab interior
Why go to the bother of making an interior? Well, I had the spare parts on hand and it didn't take five minutes to cobble together a simple bit of detail...


Now, because this interior will need painting (and a driver figure installed) I will leave off boxing it in and instead get on with the van framework instead (everything to the rear of the cab).

Van bodywork - forget the curves, let's have angles!
You might remember that it was my original intention to built a model of the 1937/39 Chevrolet
'Panel Van' - a lovely looking delivery van. This would have required a lot of delicate modelling to achieve the elegantly designed streamlined van bodywork inherent of this type, and I have to admit I don't think I'm up to doing the design the justice it deserves.

How can you not love this van?
However, I found a lovely photo of a 1939 Chevrolet with what looked like 'tacked on' and rather boxy van bodywork. Even though I cannot be sure of it's historic authenticity regarding Finnish use I just knew I had to have something like this in my collection. The ad hoc nature of its construction seemed perfectly in the spirit of the Finn's make do and mend philosophy.

(And being 'boxy' makes it so much more easy for me to make!)


Well, you get the idea. It's a pretty simple conversion - stripping down the resin parts aside (thank you Dremmel) - and although the initial phase seems a lot of work I find this sort of project very enjoyable as the end product is somewhat unique. Or rather I should say the product is very satisfying as I would never say that it's as good quality as an equivalent plastic kit.

(I mention this - the satisfaction derived - as a couple of people have pointed out on forums that this seemed a lot of work and that there wasn't much left of the donor vehicle. Yes, I guess I could have searched around to find a donor model closer to my finished idea thus negating all the tedious and messy Dremmeling, but I don't think the project would have been so interesting and enjoyable for me. That's just me!)

Next: The finished van bodywork and the cab fitting.

Sunday, 1 November 2015

Chevrolet Radio Van conversion - Part 2

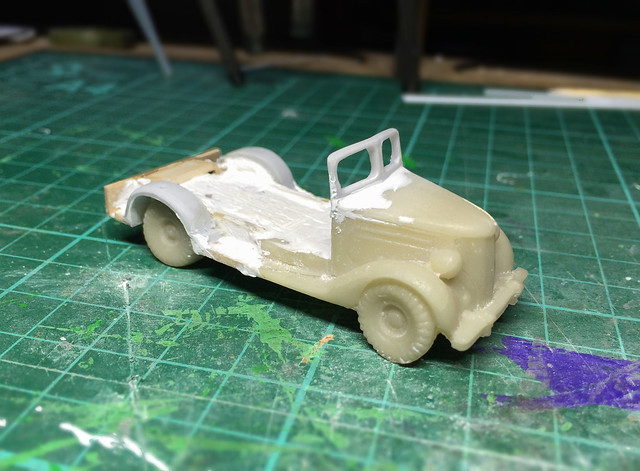
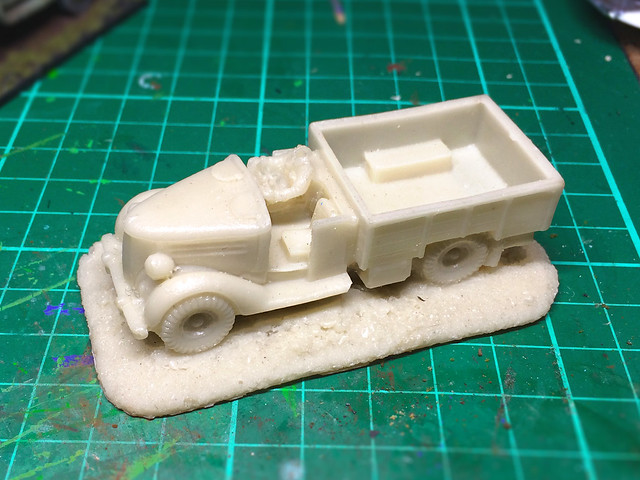
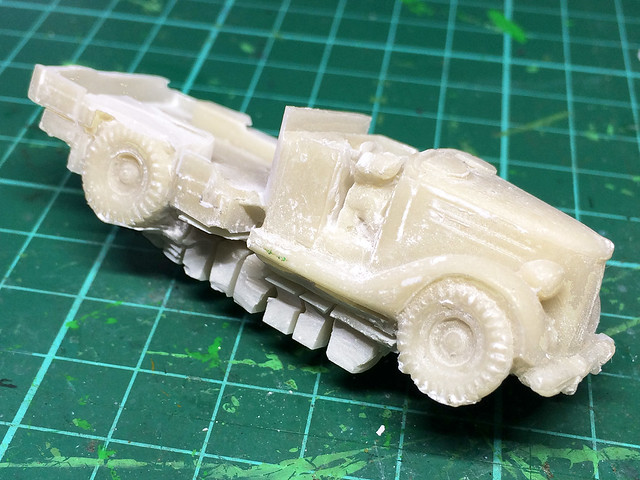
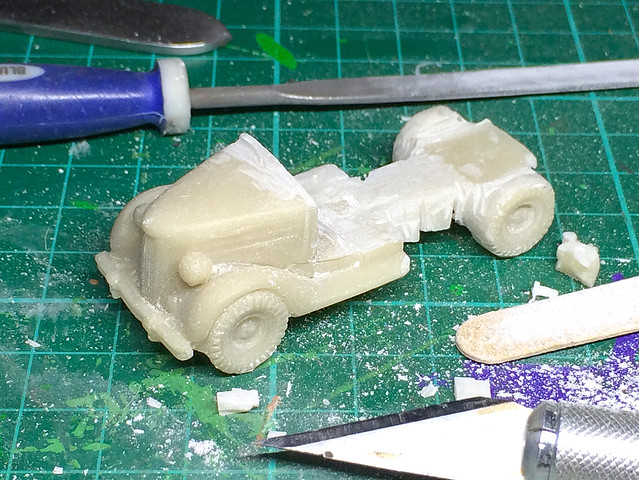
Now the messy work begins - drilling and sawing away at the Valiant resin model to strip in down to a state where I can build the panel van frame onto the basic chassis.


Warning! I have to mention that drilling, cutting or sanding resin models like this one creates a lot of dust. I strongly recommend you use some sort of dust mask as I am certain that the resin dust is not at all good for you if it is inhaled.

I carefully trimmed off the parts of the Valiant model I didn't want - including the base using my Dremmel and a cutting disc. Some of the hard to get to bits will have to be pared off using a thin chisel, sharp craft knife and file...


Unfortunately, I will also have to remove the driver figure. This is a bit annoying as I need a driver, of course, but this being a British version of the Chevy truck the driver (and steering wheel) are on the wrong side (right) and I am making a model of the American van.

The main part I have to trim down is the rear flatbed as this will be replaced by the van's box frame.


I know...Yet another project where I seem to have made a lot of work for myself! But I actually enjoy these projects as I end up with something unique in that I have put a lot of time into it. I get a lot of satisfaction out of it. But I understand if you think I'm a bit mad. :)

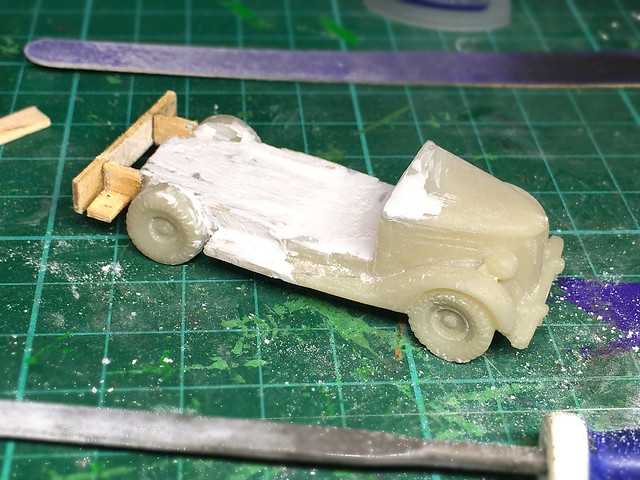
Having stripped down the Chevy's frame I now have to build it back up again. I shall start by smoothing everything off and tidying up any ragged edges, ready to install the new van frame.


I'm trying out a quick and dirty build using what we used to call lolly sticks when I was a kid. I'm reconstructing the van bodywork using the sticks as the framework. Once the skeleton of the body is built I'll 'skin' the frame with plasticard (styrene sheet).

I have a feeling that the trickiest part to make will be the windshield and cab. And I have to include a new set of seats and a driver as well. But the van body seems pretty straight forward...

Next: The van bodywork frame installed.