Anyway, gripe aside, all the track sets (4 sets, so 8 parts) went fairly well...
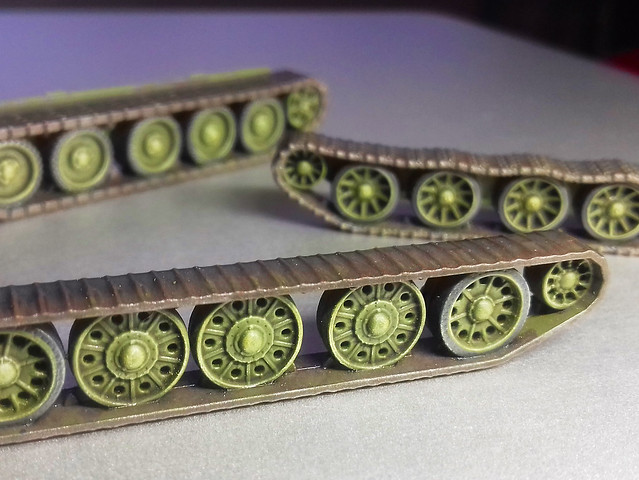
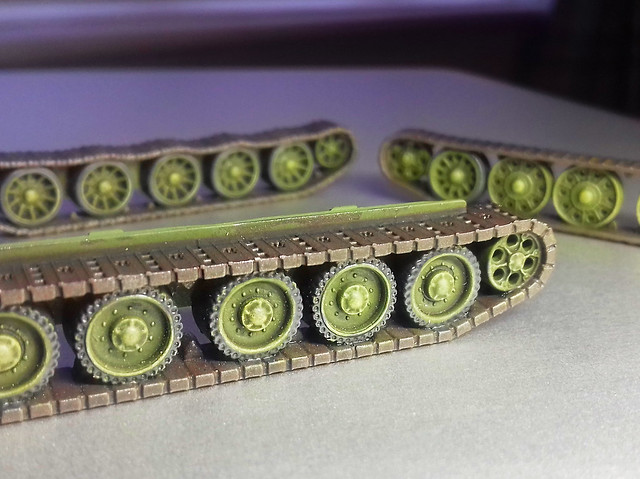
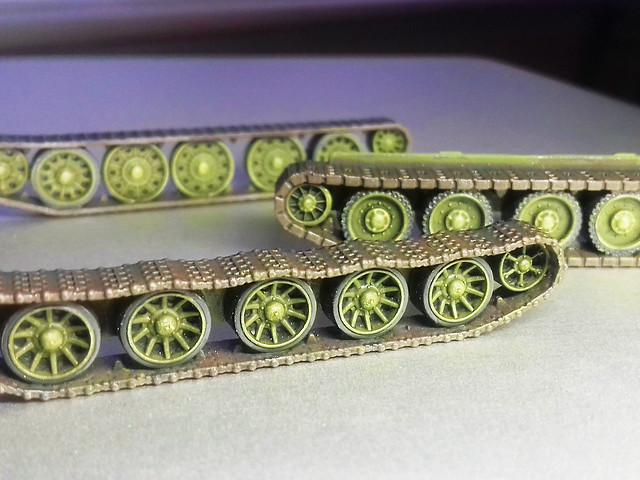
The dry-brushed highlighting is somewhat exaggerated for effect (nearly yellow, in fact). But, I'm beginning to get into this whole war-gaming style of painting, though I guess it might be very easy to get carried away.
In this case, however, I shall be toning the high contrast down a bit when I add an additional shading wash. Once that is done and I have pin-washed the shadow areas in the wheels I'll start to think about how much - if any - mud and weathering to apply to the tracks.
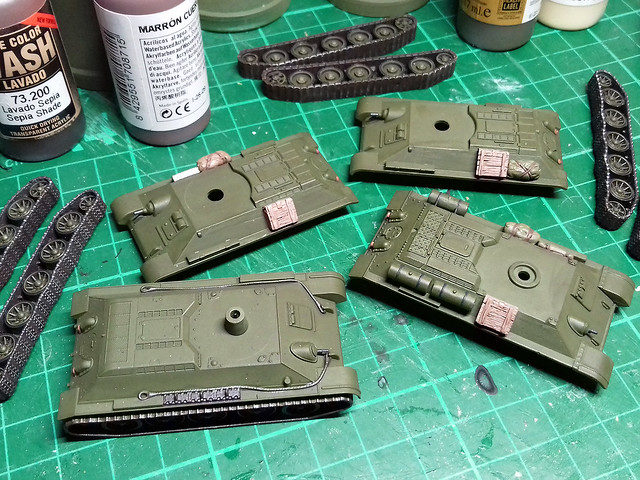
Now, onto the hull(s)...
First job is to paint the base colours of all the stowage and gear. I tried out Vallejo's Model Color Cork Brown for the wooden storage crates, it gives a nice light wood tone. The tarpaulins are various shades of khaki-green and metal equipment is metallic-grey (silver mixed with panzer grey)...
I won't bore you by repeating photos that I've shown before as my 1/100 process is starting to become pretty well 'set', so I'll just bullet-point the stages after priming and detail base painting:
• MODULATION WASH: A quick wash of Vallejo Model Air Russian Green (once I get my airbrush up and going again I will simply prime any Soviet vehicles with Vallejo's Russian Green Primer, thus eliminating a stage).
• HIGHLIGHTING: I've begun to highlight in two stages. First a general light dry brushing of a Russian Green/Ochre-Yellow mix to give some high-contrast highlights to raised detail and to give some lightening shade to the upper surfaces angels (tops of surfaces). This is followed by a more focused highlighting (near white) on the very most prominent edges and detail (I used a mix of Vallejo White and German Yellow [806] for this extreme highlighting).
• SHADOW SHADING/ PIN-WASHING: Application of Citadel's Agrax Earthshade (over-all wash) and Nuln Oil (focused pin-wash) shading tints to panel lines and any areas I want to deepen in tone.
• FINISHING WASH: This is something new I'm trying out. To *unify* all the previous wash effects I finish off with a wash of Citadel's Athenian Camoshade. Let me explain; using multiple layers of washes one onto of another - particularly dark washes - can get a little messy. You can end up with patches and streaks, and so - to smooth out and counter these unwanted blemishes - I apply an overall wash of Citadels darker green shade. It pulls everything together and adds a rich sheen to the Russian Green.
Lastly, some of these processes are repeated for effect. For example, I gently highlighted again after the shadow wash/finishing wash or, if a shadow in a panel is not deep enough, I might add an additional shadow wash to that specific area.
I know...This all sounds like a lot of work. But going down the route of multi-layer washes to build up effects seems to create a complicated tonal end product that suits me more than trying to subtly airbrush shading effects at this small scale. If you are more comfortable with airbrushing instead...Go for it! It's all down to personal taste. :)
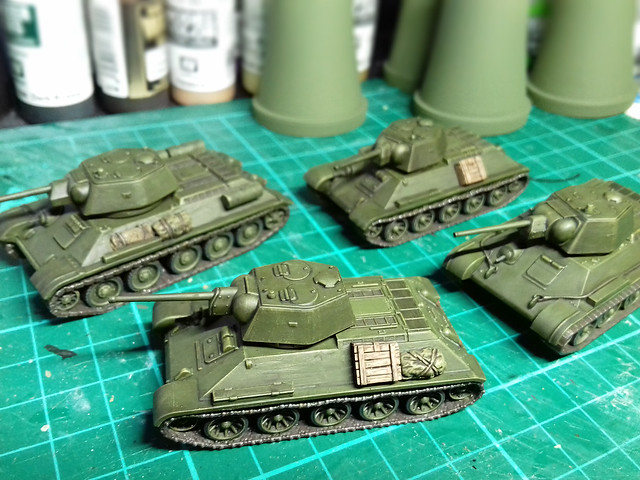
Ready for Weathering
And here we are, all ready to start the weathering and advanced detailing/effects stage of painting...
Next: Weathering & Completion
No comments:
Post a Comment