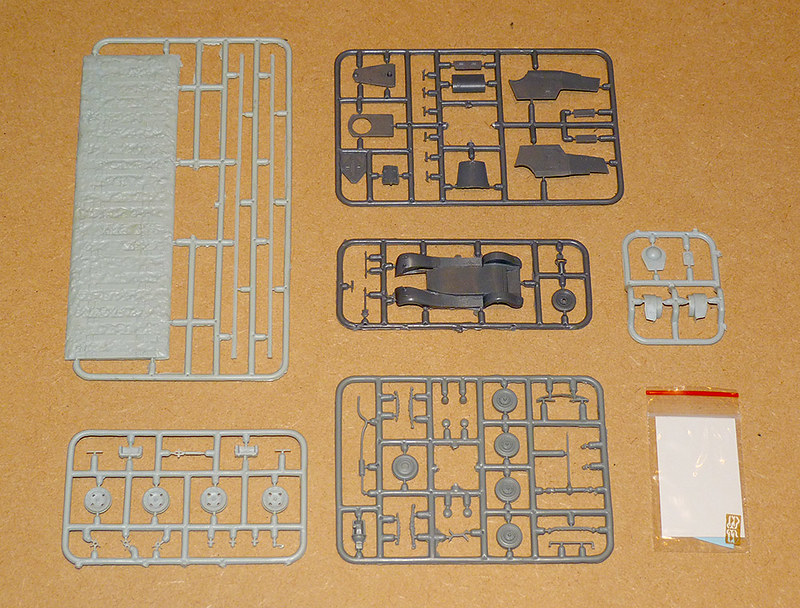
I was very excited as I cracked open the lid of this kit - I really like the look of this little armoured car. At first everything looked good, all sprues were encased in a sealed plastic bag (a good sign I thought) and inside this the tiny etched parts and decals were given their own separate plastic bag. On opening up the main bag this is what I got...
Notable among these are the two light grey sprues on the left - one is the small railway diorama (which I won't be needing, but thanks anyway) and the other is the railway wheels set. Obviously these will both be assigned to my spares box, but I am glad they are separates - it tells me that ACE added these to a basic BA-20 that they must've done. But more importantly...
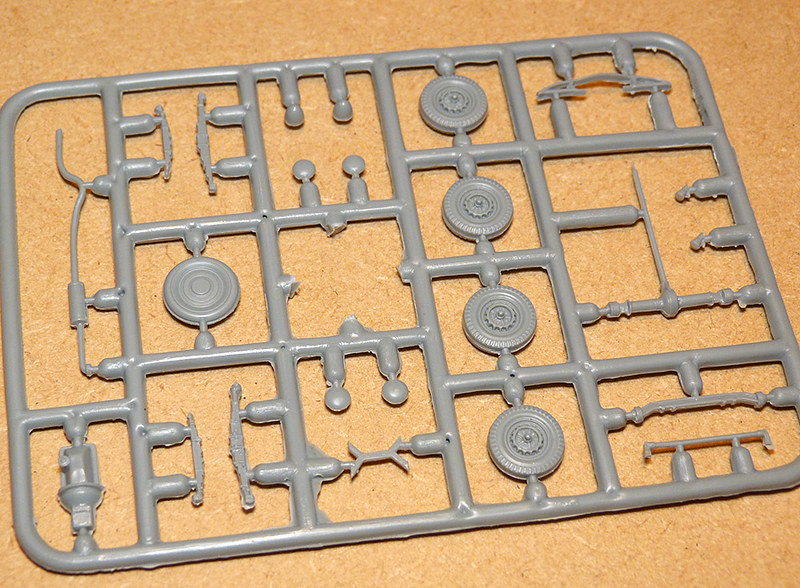
The normal road wheels come on their own sprue. These are solid plastic wheels and tyres, but I do like both the level of detail and the fact they come with optional domed hub caps.
Now, I won't go through every sprue individually, but I do want to show you this one - the chassis sprue - in some detail. Now do bear in mind that out of the two armoured car kits I bought - this one and the UM BA-10 - this kit was the more expensive (£10.70) so the quality of this main component is interesting to say the least...
Just in case you can't make out what I am trying to get at, here is the same sprue photographed from a more side-on angle...
The above photo shows the quality of some of the panel line detail - they aren't the sharpest lines in the world, just OK. But maybe I am being too picky, I am sure they will be serviceable enough and will be picked up nicely at the painting stage.
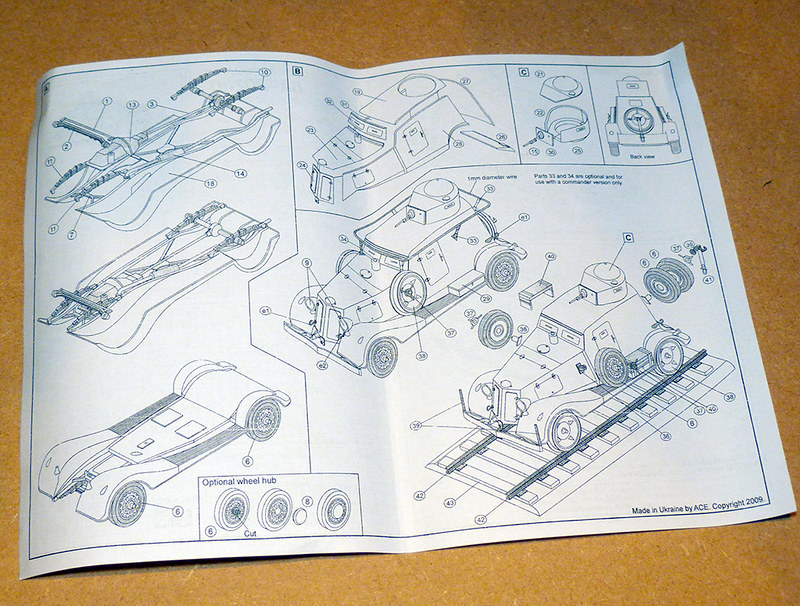
Instructions are clear enough, but while test fitting some of the parts I did find that ACE have left you to try and figure out the best place to glue some of the parts. The suspension in particular has a noticeable lack of pilot holes to guide your assembly.
Edit: Nearly forgot an important issue. While the instruction sheet clearly numbers each component ACE neglected to add these numbers to the sprues themselves! Common sense helps you identify parts, but in some cases - like the suspension springs - there can be some confusion.
One thing to note is that you have to make the 'clothes line' antenna yourself out of some spare thin wire, not a big problem but the war gamer may chose to skip this fiddly step (some BA-20s were not equipped with this option anyway). And the last parts are the etched ones, four tiny brass tow hooks, a indication, to my mind, that ACE is not up to moulding more delicate parts in plastic.
Finally, there are the decals - well, this particular version only comes with one set, some German crosses. I suppose my hope that they might have included some Soviet or Finnish decals to make the alternative road car was asking too much!
Above: A lovely built example of this kit by Neil Lyall. Photo
source: Henk of Holland's ACE WW2 models review section.
source: Henk of Holland's ACE WW2 models review section.
Overall I don't really think I am getting my ten quids worth here, but there again it is a relatively rare subject for 1/72 and I couldn't find any alternative, so beggars can't be choosers in my case. The quality of parts are mediocre, reminiscent of some of the older Airfix kits and I really did expect more.
It will be interesting to compare the quality of this to the UM BA-10 I have bought to accompany this BA-20. Both are Ukrainian made kits, I believe, but the UM armoured car was priced at a rather more palatable £7 (though do remember that you get TWO Pegasus BA-6 armoured cars for £9). It all depends wether, like me, you especially wanted this particular armoured car or not.


No comments:
Post a Comment