Saturday, 16 May 2020

1/100 Plastic T-34/76 Kits - Part 6

Preface: I'm back! Yes, after a two year hiatus I seem to have rekindles my modelling mojo! And luckily enough - when I checked - I conveniently had the following post still awaiting publication (written in 2018). This sets out exactly where I was with my models when I 'downed tools'. Enjoy...More to come. Milgeek.


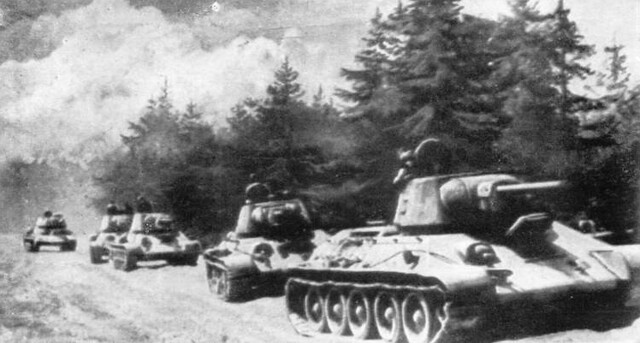
A column of T-34 Model 1943 Medium Tanks, with the hexagonal turret,
advancing through Poland. Source: Historyofwar.org

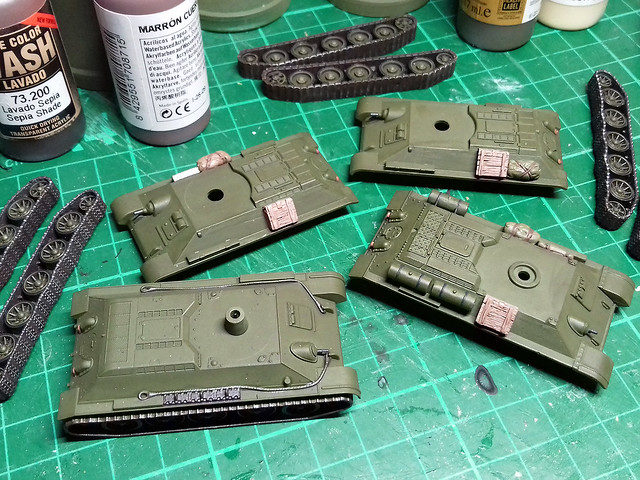
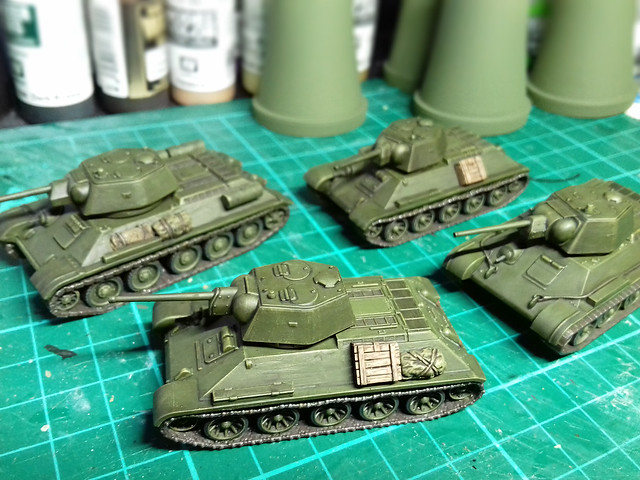
Phew! I'm probably making a real meal of doing what is - after all - a very simple kit. But, in my defence I am a slow modeller and I'm doing four vehicles at one time for the first time.

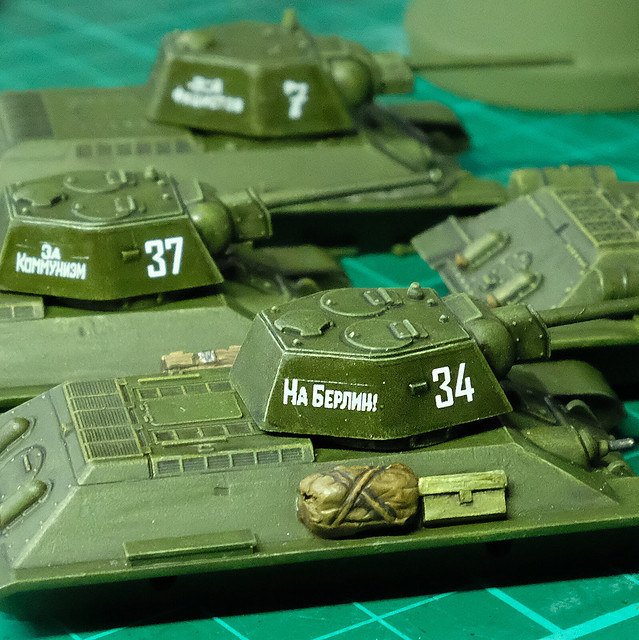
In any case, my little troop of T-34s trundles on (however ponderously) and I finally get around to adding the decals...
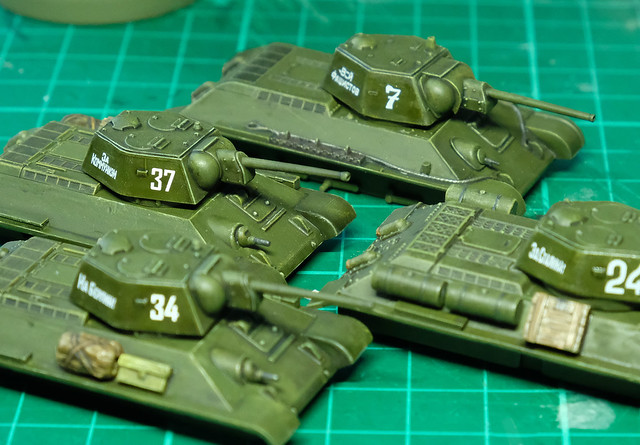

Now, to be fair, I had to order some of these especially for this project (which meant waiting for pay day, as I am now on a much reduced salary). It's one of the annoying aspects of modelling 1/100 war-game armour that - generally - the models do not come with decals, so you have to source your own if you want them.

Luckily there are a few companies out there that take advantage of this gap in the market. I make a lot of use of I-94 Enterprise's 1/100 decals (available from Minibits in the UK), but I also found a rather nice set of Soviet tank slogans on eBay by 1-144direct.com...
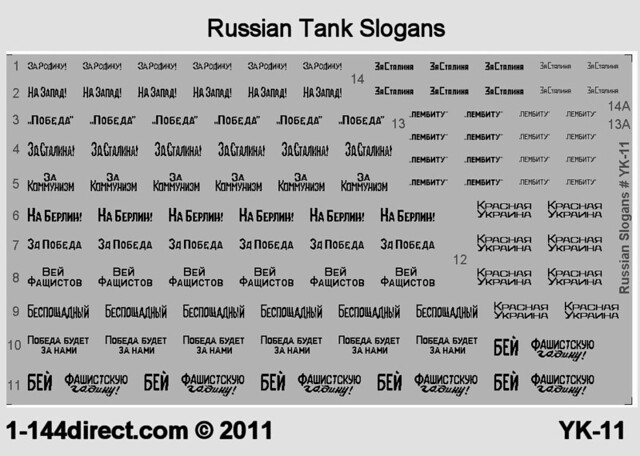
These decals are really 1/144 scale but can be used on 1/100 at a pinch. They
are available in red, black or white at £3.25.
The eBay seller's page for these - click here - comes with a key translation for the slogans so you are sure that they are not requests for soup! Although a little small (at 1/144) they do actually fit nicely onto my T-34 turret facets quite nicely...


Warning: These are APL printed decals and not the kit manufactures film transfers you may be used to. They need special care in using and the sellers webpage (provided above) gives full instructions in their use - THEY ARE QUITE DELICATE! (I ruined one set during application.)

I sealed these decals - and my tank numbers - using acrylic gloss varnish (you could also use Johnson's Klear, I guess, but test first). Don't use enamels, as spirit based stuff melts the APL decals, as I found out to my annoyance (read the instructions - du-oh)!

Anyway, I was very happy with these as they give my otherwise generic looking green machines a bit of individual character.

Wednesday, 7 March 2018

Skyrex 1/100 SU-122 - Part 3b

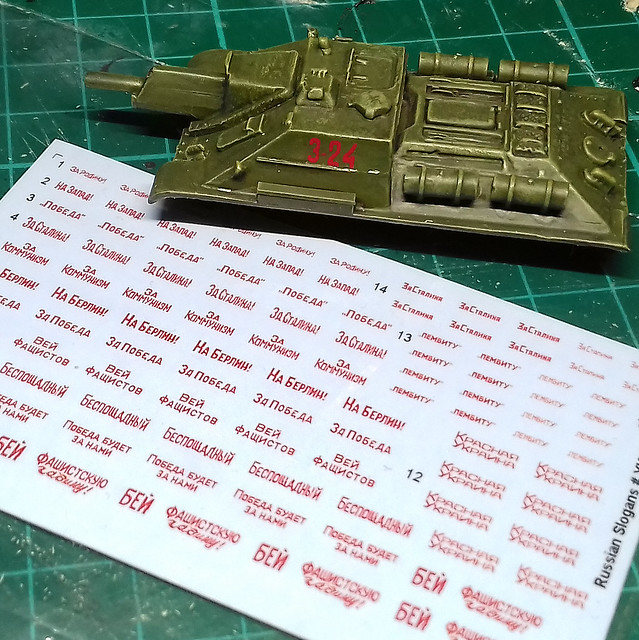
My 1/100 WW2 Soviet tank force has been on hold while I awaited the arrival of some additional decals that I ordered. I'm glad to say that they have now popped through my letterbox!


These 1/144 Red Army slogans are the same as the white versions that I used on my 1/100 T-34s...But red (in both senses of the word)!

I'm trying to get both my T-34s and SU-122s to the same point in their painting so that I can do the next couple of stages in their weathering together, hence the wait.

 I wasn't really satisfied with the red number decals that I had applied to this SU-122, I thought the tank looked a little mundane and needed a little something extra. So when I realised you could get the Red Army slogan decals in red I ordered them straight away (though, stupidly, I opted for second class postage which is why they took so long to come).

The decals are by 1/144 Direct in Glasgow. I just have to decide which slogan to add to my SU-122 (just below the numbers)...?

Next: Weathering my T-34s and SU-122s.

Tuesday, 27 February 2018

Skyrex 1/100 SU-122 - Part 3


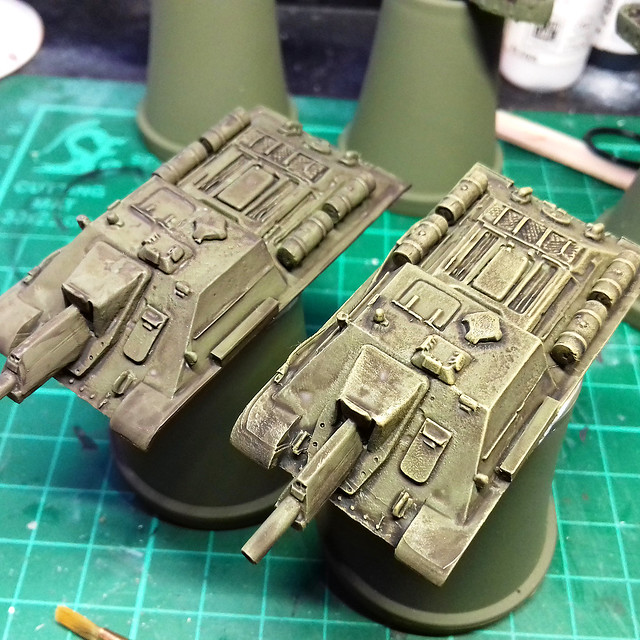
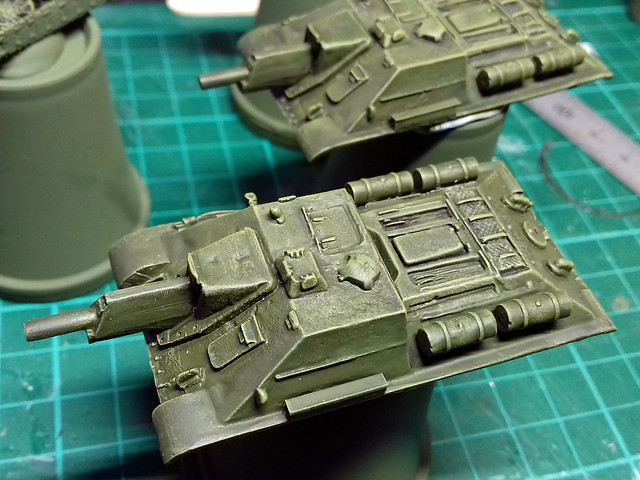
Moving on from the priming, I've applied my now standard wash procedure for WW2 Soviet armour. A dark staining wash of Citadel Agrax Earthshade, followed by a light dry brushed highlighting of Vallejo Model Color Yellow Ochre.

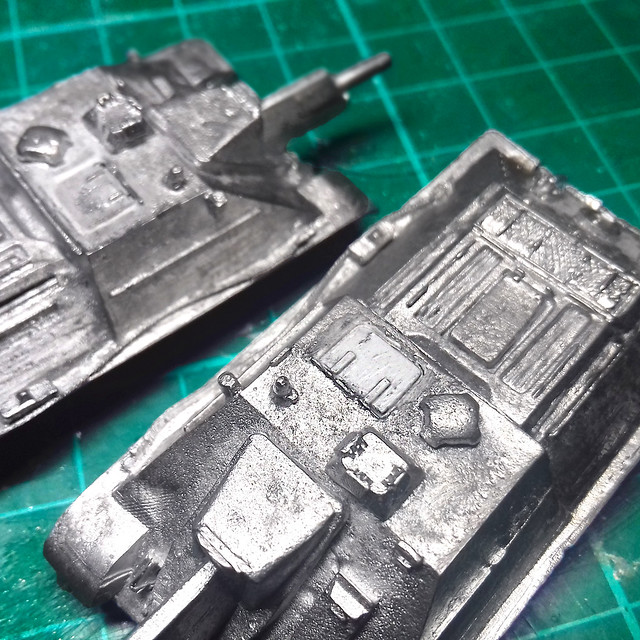
It's a subtle process, but you might just be able to tell the difference if you study this photo. The unhighlighted SU-122 is on the left and the one with the yellow ochre dry brushing applied in on the right...


It just picks out the raised edges and corners and gives some small amount of 3-D tonal contrast on raised detail. At this stage it does look a little in your face (though I have seen some war-game modellers who like 'high contrast' stop at this point), so I prefer to take a step backwards - of sorts - and smooth out this contrasty highlighting with a overall modulating wash of diluted Vallejo Model Air Russian Green.

This - to me - ties together the underlying high contrast coats and flattens them out again with a rich semi-glaze (no it isn't actually a glaze, but the Russian Green is a rich colour that gives seem transparent jewel-like coating that tones down the contrasty undercoat). It's kinda hard to explain and - again - is subtle...But I am kinda liking the effect...

The underlying contrast of the shadow wash and highlighting dry brushing
is modulated by the overall wash of Russian Green. But, you still get the
faint mottling of the darker shades showing through.

In a way I am sort of a fan of the opposite of the airbrushed 'panel shading' effect that you see on a lot of models these days, where the modeller highlights areas of panels with lighter tones to give a '3-D effect'. I prefer to work the other way, with a darkening underlying effect as I never feel comfortable with military vehicles being too bright.

Decals - We Don't Need No Sticking Badges!
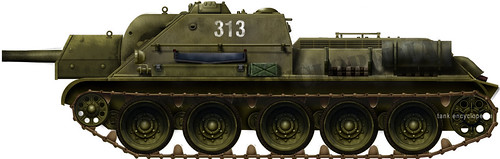
Being a Soviet tanks less is more regarding markings. As far as I can see, the SU-122s in particular - being something of a stop-gap - was one of those Red Army vehicles that only got the most    expedient of identifications...Principally a vehicle number.

Not exactly exciting markings but this seems to have been as complicated as it got for the
SU-122s around the time of the Battle of Kursk. Source: Tanks-Encyclopedia.com

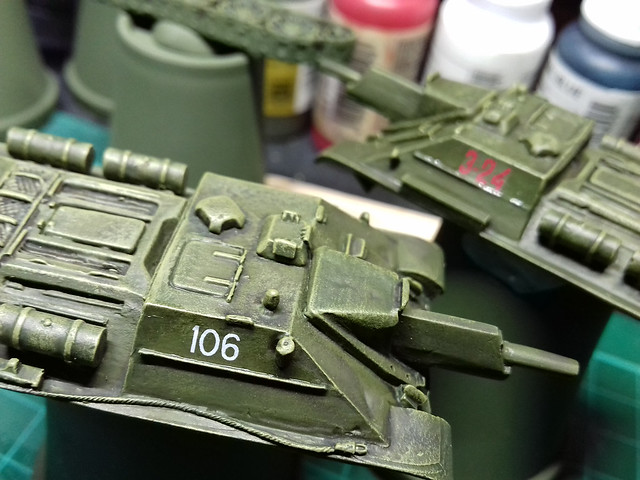
I searched through my decal stash and found a couple of numbers that looked the right size (though they are not historically correct and are really meant for other Soviet vehicle types)...

My chosen decals - '106' went on nicely, but 'Red 3-24' had a very heavy film
and silvered despite my use of MicroSet. This particular decal was made by
ACE (for one of their kits) and they are generally of poor quality, sadly.

Because these are just for wargaming and indicate examples of types I don't think we have to be too fastidious when it come to markings (they are not intended to be models of specific vehicles from specific units at a specific time). So long as they look the part I'm happy.

Next: Tracks and Mud

Monday, 19 February 2018

Skyrex 1/100 SU-122 - Part 2


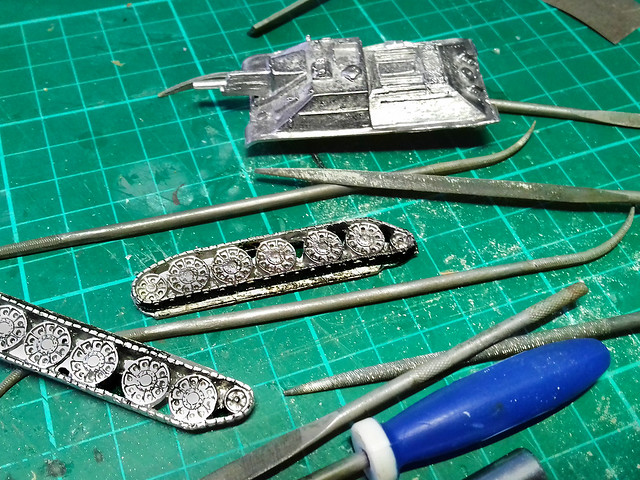
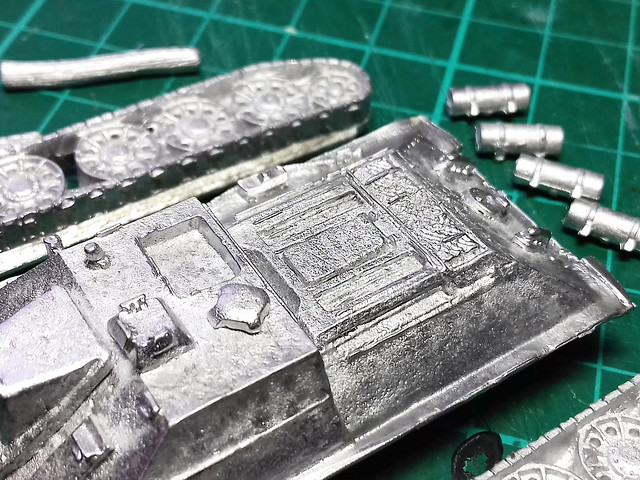
On with the prep work...This is the downside of white metal models and I find it a little tedious.

My main grumble about white-metal models is the inherent volatility of molten metal and it's propensity to distort and 'boil' (for want of a better word) during the moulding process. This effervescence of the molten metal during its transition into it's hardened state invariably results unpredictable flaws and blisters...And, sadly, such is the case with my SU-122.

I don't know why, but 'flash' always seems to form right at the most obvious point on a component, rather than at a point that is easily hidden or not seen...

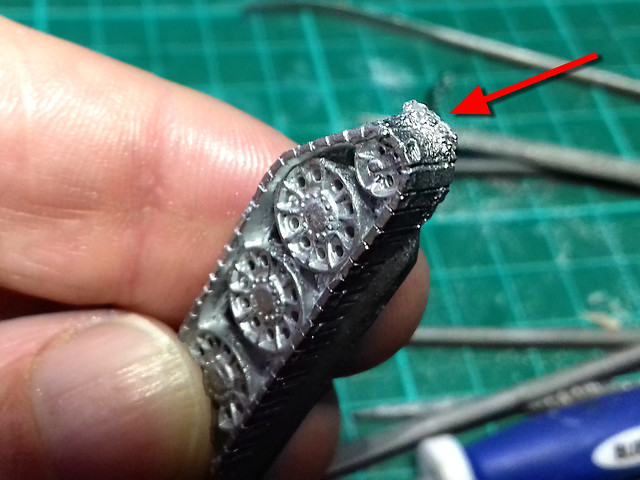
This carbuncle of metal 'flash' had to form *right* on the front of the track!
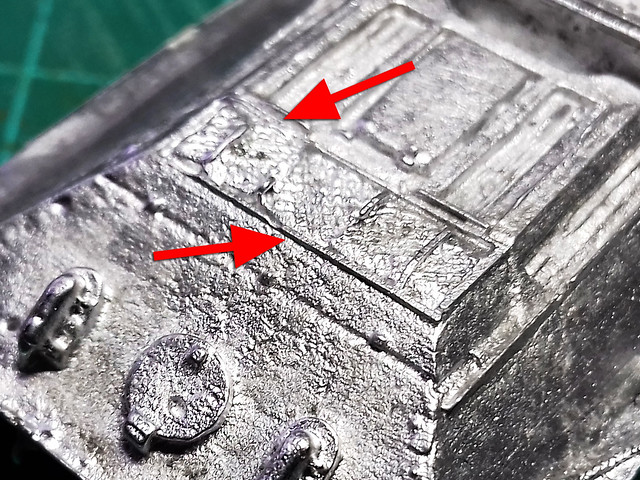
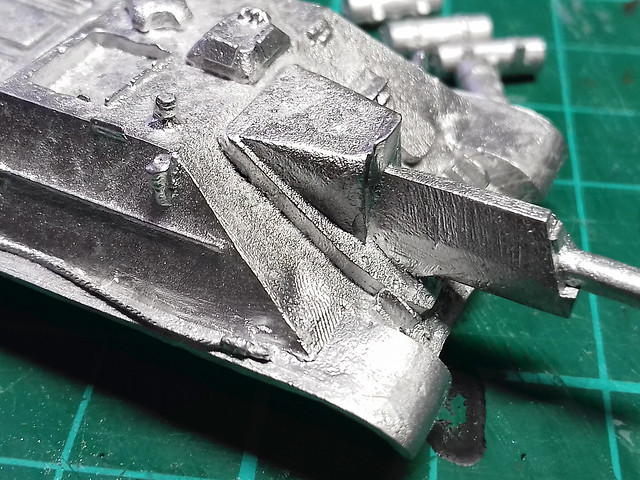
Other blemishes on the model - and there are a few - I can deal with but the imperfections on the tracks and the engine deck are very, very frustrating. All I can do is smooth the flaws down with a bit of filing and hope for the best (rebuilding the detail again with something like Milliput might be possible, but whether it is worth it when this isn't a display model is debatable).

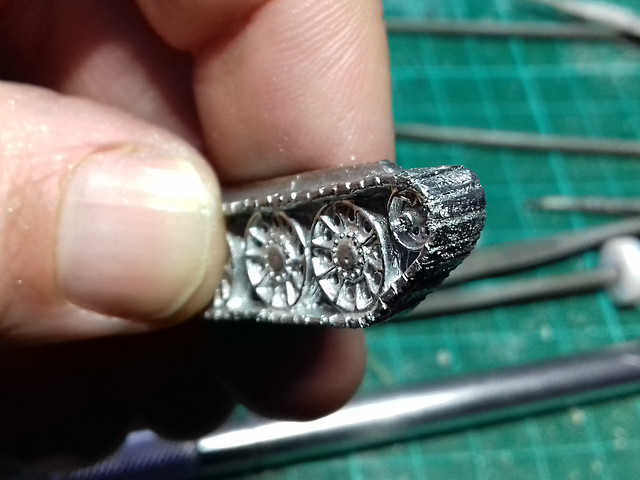
Simply removing the unsightly protuberances and neatening up may suffice for a war-game model...

Sadly, in filing down I have also lost some of the track pattern detail. :(
Though, the engine deck repair is a little more tricky and immediately noticeable (no hiding this)...


It's the same on both models and is very disappointing. As I said, I don't want to try and rebuild flaws like this using Milliput or styrene strips and filling down in preparation to rebuild might actually do more harm than good. Perhaps a bit of judicious painting might help camouflage the broken detail.

On piece of work I did have to do, though, was on of the commander's hatches which I lost to the infamous Carpet Monster! However, it was a very simple job to cut a new rectangular hatch from a piece of styrene sheet and then to glue a couple of thin hinges on...

My replacement commander's hatch.
All that's left now is to attach the external fuel tanks and any other stowage I fancy adding. I'd like to attach the unhitching logs to both tanks, but they look identical so I'll make a new 'log' myself...

Priming
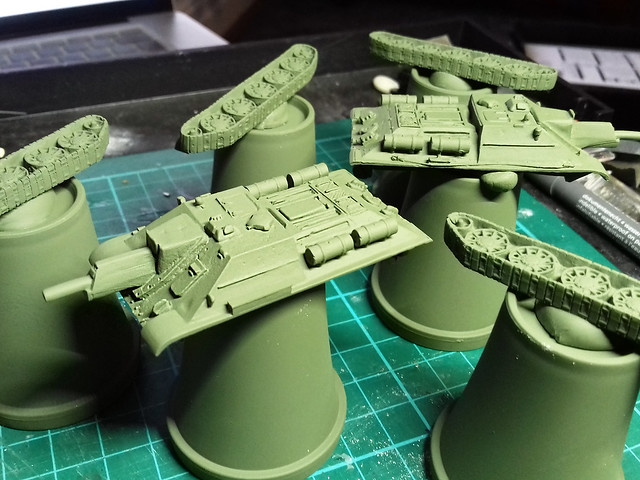
Having got everything prepared (there was LOTS of labourious filing) I started to add the extras to the hull using superglue. I was a bit disappointed that the external fuel tanks had to be just glued directly to the surface of the hull - without any guide pins or holes - and the side mounted tool boxes did not fit at all (I had to make my own out of plastic). Also, it turned out that the metal unhitching logs were a bit oversized and looked a little odd so I ended up leaving them off completey.

You do have the option to leave off the fuel tanks (reference photos show the SU-122 with and without them) and if you do that there is enough space for adding an unhitching log. But I would still recommend that you make your own log out of thinner diameter plastic rod.

All that done, I primed with Humbrol's Light Olive acrylic spray, just as I have with the rest of my Soviet armour for this project...


Well, they don't look quite as bad as I had imagined that they might when I looked at these model in the raw metal. Hopefully, as I apply more painting effects they will look even better!

I do have to keep reminding myself as these models are intended to be seen at tabletop distance (say, at least two feet away - don't ask me what that is in centimeters). So, we shall see.

Next: Operation 'Disguise the shoddy detail with paint' begins!

Sunday, 11 February 2018

Skyrex 1/100 SU-122 - Part 1

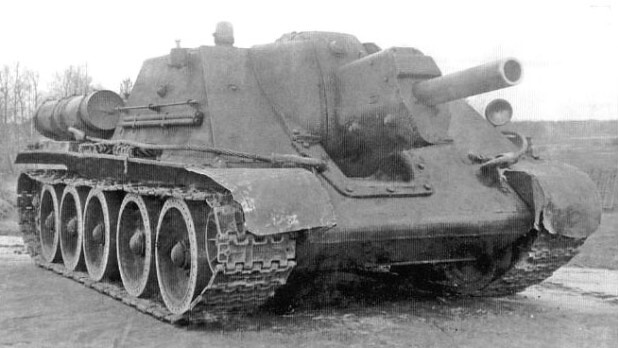
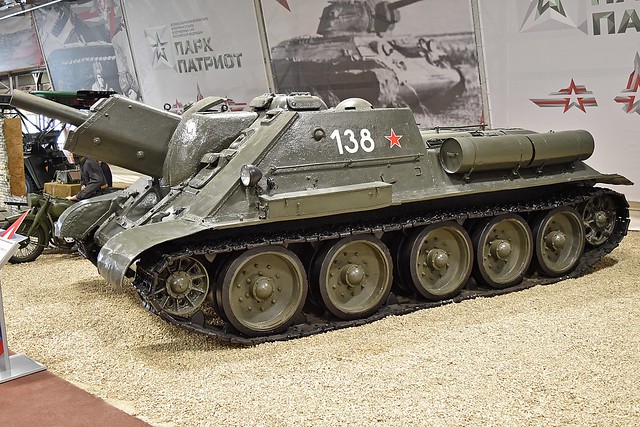
SU-122 in Kubinka Tank Museum. Source: Wikipedia.
While I wait for some decals I have ordered for my 1/100 T-34s to arrive, I thought that this would be a good opportunity to get started on the last of my mid-war Soviet tank force. While the Skyrex white-metal wargaming models don't require a lot of putting together, they do need some extra prep work to get them ready for painting.


The SU-122 was the Red Army's answer to the highly successful German Stug III assault gun/tank destroyer. This design of fixed gun housing on a medium tank chassis suited the Soviet's need for large numbers of quick to build and cheap fighting vehicles. The chief advantage of this design was that you could shoe-horn a larger gun into the housing than you could get in the equivalent vehicle with a rotating turret, thus - while normal T-34 designs were mounting a 76mm main gun - this gun carriage could mount a hefty 122mm howitzer!

The Skyrex Model Overview
While I would have preferred to have stuck with plastic models for my 'Battle of Kursk' project, sadly none of the main 1/100 plastic kit manufacturers make a SU-122 (and I didn't fancy taking on a T-34 conversion project). So, as I only required two of these models, I dug deep and splashed out on a pair of Skyrex metal models (£6.50 each plus postage).

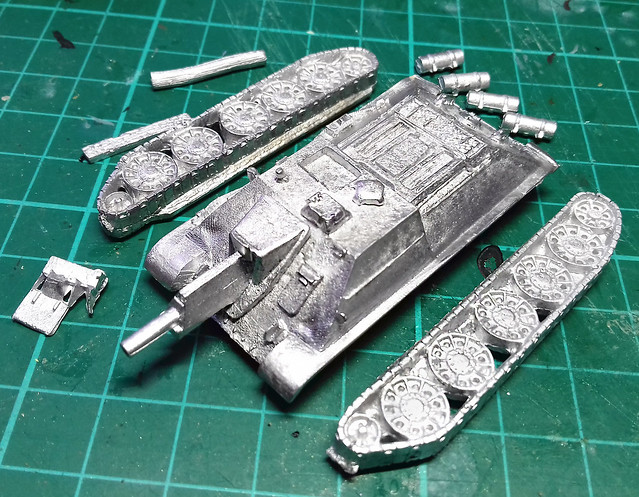
There are only four main parts (main hull, 2 x tracks and commander's hatch) plus four external fuel tanks, a tool box and a 'unditching log'. [Apologies for the lack of clarity of the photos, but bare metal is quite difficult to photograph.]


As usual, for a white-metal model, there is a little flash and a tiny bit of deformity so 'cleaning up' mainly involves smoothing out any pitting, bits of flash and scratches with some mild filing and shaving. Additionally, I've been told that it's good practise to give all surfaces a quick rub down with some 'wet and dry' paper to remove any of the moulding medium residue.

Detail wise, it's a mixed bag, but this is the compromise you make when having to resort to a low run metal moulding compared to a high volume plastic injection kit. The crispness of detail you get with plastic just isn't there, but - again - there isn't a plastic SU-122 model in this scale...So, be content! ;)


Because of the lack of definition with some of the detail (particularly the engine deck) I'm a bit worried about how the painting will pan out.

😬 <--- My worried face!

Well, I better get my file and 'wet and dry' out and get going...

Next: Priming, where I should get a better idea about how some of that detail might turn out.

Saturday, 10 February 2018

1/100 Plastic T-34/76 Kits - Part 5

It's taking some getting used to working on several similar models at one and the same time. I'm really not sure how people manage to do whole 'regiments' of vehicles for large scale games like Flames of War, I'm finding the repetition tiring with just a troop of four T-34s!

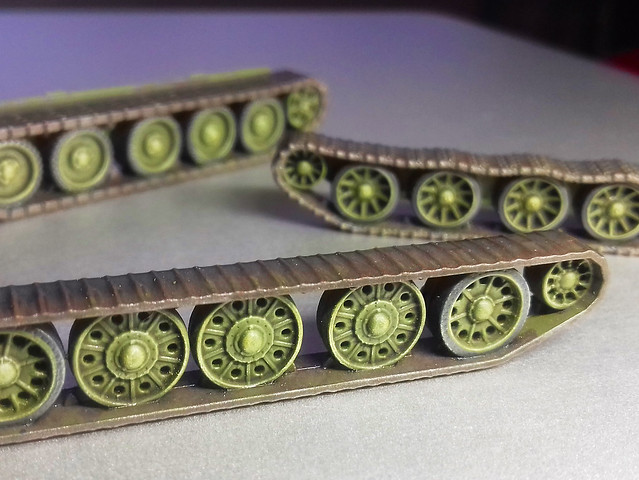
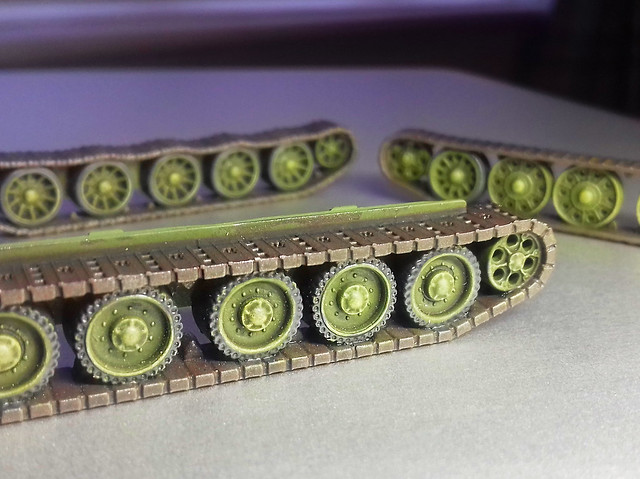
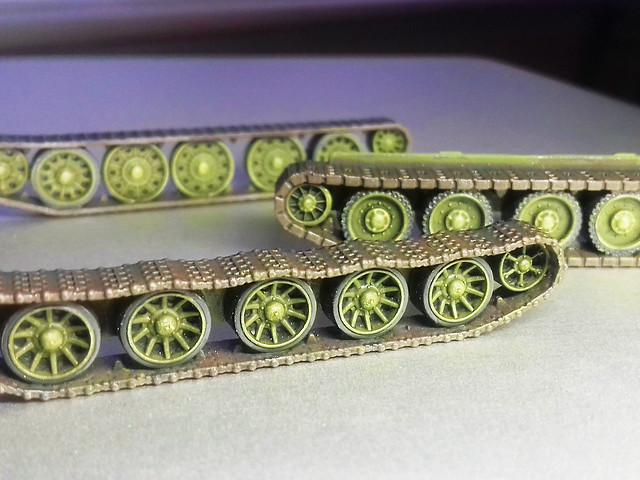
Anyway, gripe aside, all the track sets (4 sets, so 8 parts) went fairly well...


The dry-brushed highlighting is somewhat exaggerated for effect (nearly yellow, in fact). But, I'm beginning to get into this whole war-gaming style of painting, though I guess it might be very easy to get carried away.

In this case, however, I shall be toning the high contrast down a bit when I add an additional shading wash. Once that is done and I have pin-washed the shadow areas in the wheels I'll start to think about how much - if any - mud and weathering to apply to the tracks.

Now, onto the hull(s)...

First job is to paint the base colours of all the stowage and gear. I tried out Vallejo's Model Color Cork Brown for the wooden storage crates, it gives a nice light wood tone. The tarpaulins are various shades of khaki-green and metal equipment is metallic-grey (silver mixed with panzer grey)...


I won't bore you by repeating photos that I've shown before as my 1/100 process is starting to become   pretty well 'set', so I'll just bullet-point the stages after priming and detail base painting:

• MODULATION WASH: A quick wash of Vallejo Model Air Russian Green (once I get my airbrush up and going again I will simply prime any Soviet vehicles with Vallejo's Russian Green Primer, thus eliminating a stage).

• HIGHLIGHTING: I've begun to highlight in two stages. First a general light dry brushing of a Russian Green/Ochre-Yellow mix to give some high-contrast highlights to raised detail and to give some lightening shade to the upper surfaces angels (tops of surfaces). This is followed by a more focused highlighting (near white) on the very most prominent edges and detail (I used a mix of Vallejo White and German Yellow [806] for this extreme highlighting).

• SHADOW SHADING/ PIN-WASHING: Application of Citadel's Agrax Earthshade (over-all wash) and Nuln Oil (focused pin-wash) shading tints to panel lines and any areas I want to deepen in tone.

• FINISHING WASH: This is something new I'm trying out. To *unify* all the previous wash effects I finish off with a wash of Citadel's Athenian Camoshade. Let me explain; using multiple layers of washes one onto of another - particularly dark washes - can get a little messy. You can end up with patches and streaks, and so - to smooth out and counter these unwanted blemishes - I apply an overall wash of Citadels darker green shade. It pulls everything together and adds a rich sheen to the Russian Green.

Lastly, some of these processes are repeated for effect. For example, I gently highlighted again after the shadow wash/finishing wash or, if a shadow in a panel is not deep enough, I might add an additional shadow wash to that specific area.

I know...This all sounds like a lot of work. But going down the route of multi-layer washes to build up effects seems to create a complicated tonal end product that suits me more than trying to subtly airbrush shading effects at this small scale. If you are more comfortable with airbrushing instead...Go for it! It's all down to personal taste. :)

Ready for Weathering
And here we are, all ready to start the weathering and advanced detailing/effects stage of painting...


Next: Weathering & Completion

Thursday, 8 February 2018

Featured Work - Carsten's 'Object 704'

It's been a while since I posted a 'featured work' and I think that's possibly because I've been working in 1/100 scale recently. There are some terrific examples of beautifully painted 1/100 scale armour around if you Google them, but not so many tutorial examples (at least, not as many as - say - 1/72 scale tutorials anyway).

So, it was great to come across this wonderful example of what can be done at this diminutive scale. Particularly so as the modeller - Carsten - uses a lot of techniques and medium that are more usually associated with larger scales...


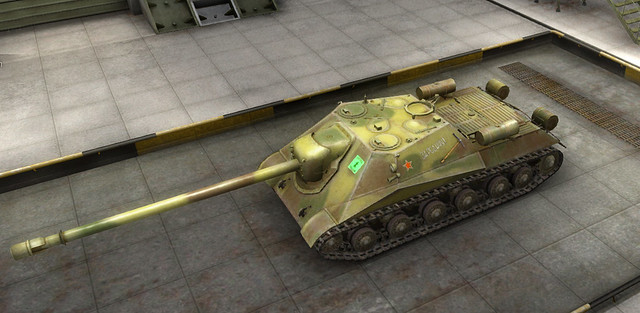
Another delightful aspect of this video is that Carsten's subject if the 'Object 704', which is a late WW2 prototype Soviet tank destroyer. I'm quite familiar with this monster as it's a tank which is available in the PC game 'World of Tanks'. Indeed, it's one of my favourite tanks to play in this game...


Computer games aside, though, this is a very useful tutorial on with some very interesting pointers about advanced painting techniques for 1/100 armour. I'll undoubtedly be trying out some of these tips in the various tanks I'm just producing.