Oh, bugger!
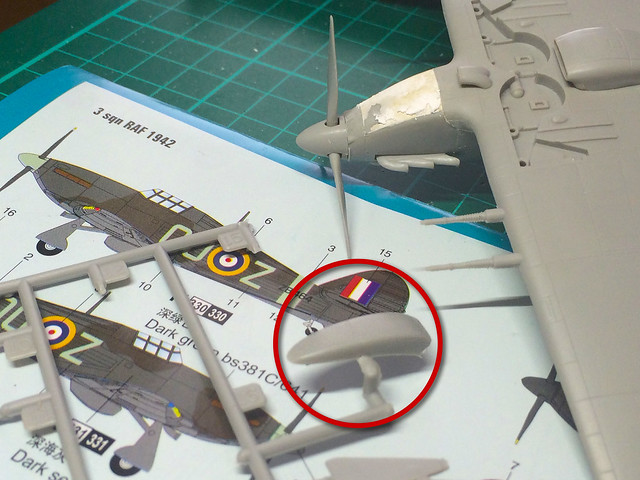
When I bought this Hobby Boss Hurricane Mk. IIC (European Theatre) I did think 'wish it had been the desert version' to match my Hobby Boss desert Spitfire. The desert Hurricane - Mk. IIC 'Trop' - has a distinctive enlarged air-intake 'chin', which the European Hurricane didn't have...
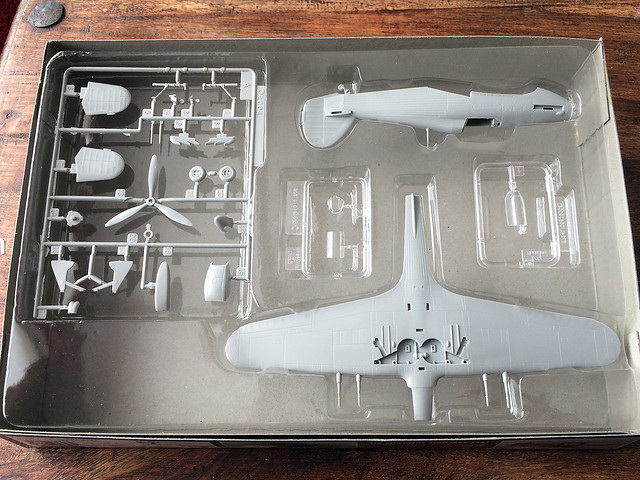
The Hobby Boss Hurricane kit only comes with two paint schemes, both European aircraft, so I thought - naturally - that they had missed a trick by not including the desert version option. Well, that was until I started building the kit, and then I found this...
Du-oh! If only I had checked the sprue before I begun I could have made the desert version after all. I did wonder why the I had to fill the model's 'chin' with putty to fill out the shape. Grrrr.
Still, to make the desert version I would have had to had bought a third-party set of decals.
Missed opportunity.
Diary of a novice scale model maker and his adventures in the wacky world of Braille Scale.
Tuesday, 26 July 2016
Monday, 25 July 2016
Hobby Boss 1/72 Hawker Hurricane Mk. IIC - Part 2
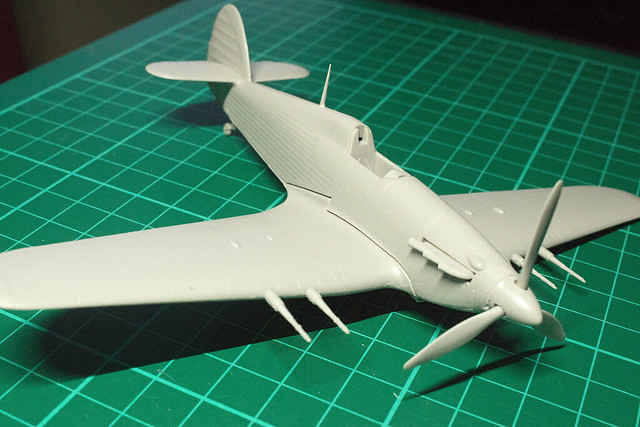
In common with the other 'easy build' Hobby Boss models I've made, this isn't going to take long to put together. In fact, all I've done is the first of the instruction's panels and I've most of the way there already!
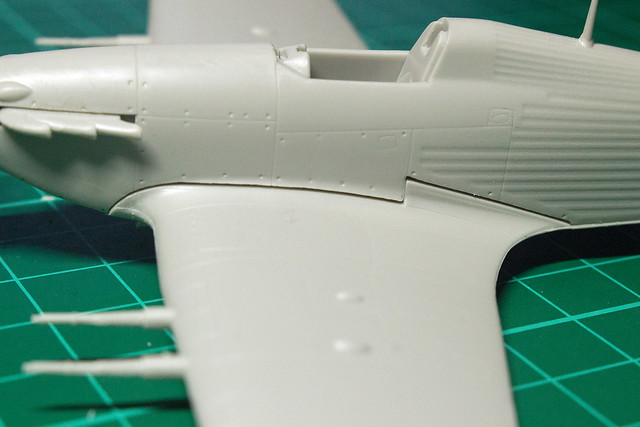
It's a nice clean model, not much flash and the detail is quite sharp and well moulded. However, Hobby Boss's joins let them down again...Where's my modelling putty?
That was a real shame really, as - otherwise - this model is quite a nice rendition of a Hawker Hurricane. Someone has told me that the fuselage is a little too skinny, but I'm afraid I just don't know that much about the Hurricane to say.
And with that, I will have to find my putty and get cracking...
Sunday, 24 July 2016
Hobby Boss 1/72 Spitfire Mk. Vb - Part 5
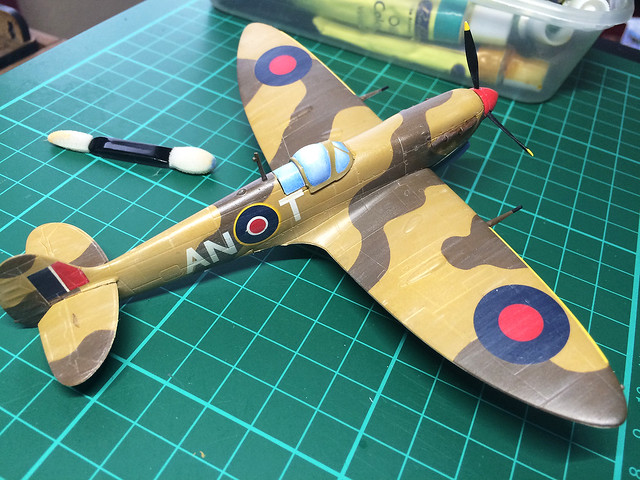
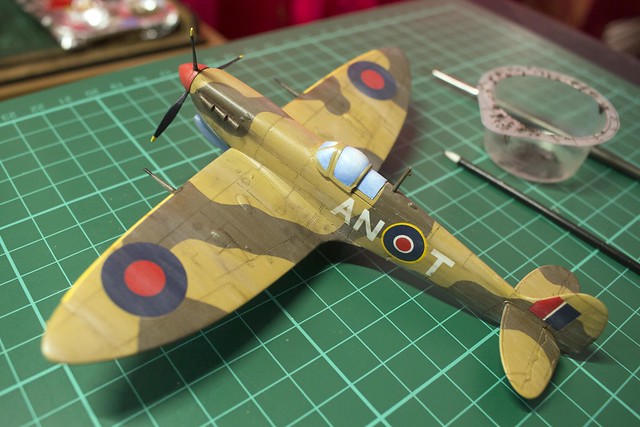
Continuing on with the first stages of the weathering of my desert Spitfire, I've applied the 'bleaching' on the top-side of the model using oil paints...
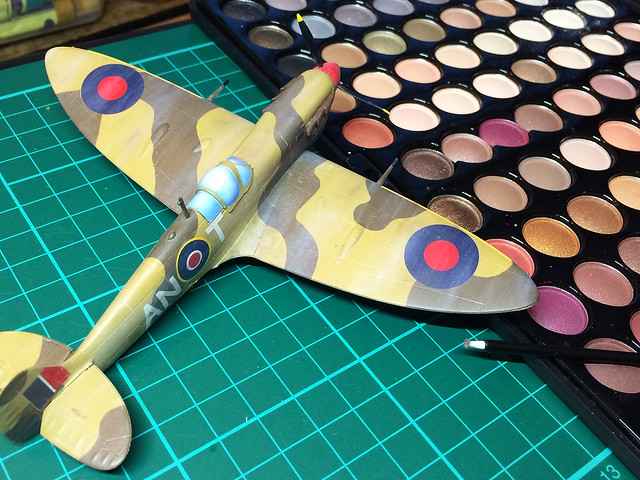
Once this was done, I decided I wanted to apply a little more bleaching - best to do a little at a time so that it's easier to gauge when 'enough is enough'. But, this time, I decided to turn to the eyeshadow makeup medium that I started using recently...
That's better - I'll stop there. I have to bear in mind that there are proceeding stages of weathering (shading, pin-washing, chipping and highlighting), so the overall effect will be cumulative so easy does it).
Pin washing...How much?
I'm not quite sure how much or how aggressive my pin-washing should be on an aircraft. Looking around at what other aircraft modellers are doing the intensity of pin-washing seems to vary enormously - from modellers who deem it completely unnecessary, to others who pin-wash heavily - to the point that they nearly outline ever panel in near-black!
I'm going to try out the middle ground, with some mild pin-washing in a subtle complementary colour...
I'll stop there, I've tried to be subtle, not aggressively outlining every panel. I used AK Interactive's Enamel Wash Dark Brown as this is my tried and tested 'go to' product for pin-washing. I like it's greasy brown colour whatever the base colour as it's about adding grime into recesses.
You'll notice I also used the AK wash to add darker streaks and some light 'shading' to accentuate panel shapes. It's not such a delineating a technique as pre-shading, which precisely marks out the division between each panel with subtle shading, but the translucent 'grid' effect pre-shading creates is not to everyone's taste.
Highlighting - accentuating panel contrast
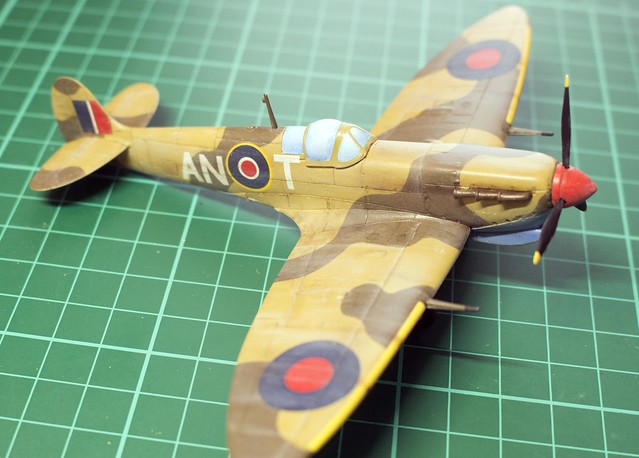
As it stands, the effect is a little 'flat' so the final stage of this shading stage is adding the highlights. By adding some very light, contrasting colours, I hope to give the surface an enhanced 3-dinesional aspect or depth. Well, that's the theory anyway.
I'll be using coloured pencils for this, with the ability to sharpen pencils to a very sharp, precise point I should be able to add very delicate highlight lines around small areas...
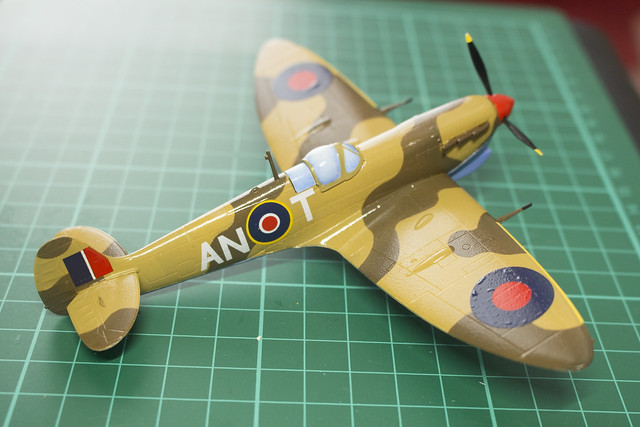
Well, that's about it I think. I could add some chipping, but I don't think it really needs it. All I really need to do now is seal my weathering by giving it a very light coat of matt or satin varnish and I think I'll call it quits on this one.
Next: Completion photos.
Once this was done, I decided I wanted to apply a little more bleaching - best to do a little at a time so that it's easier to gauge when 'enough is enough'. But, this time, I decided to turn to the eyeshadow makeup medium that I started using recently...
That's better - I'll stop there. I have to bear in mind that there are proceeding stages of weathering (shading, pin-washing, chipping and highlighting), so the overall effect will be cumulative so easy does it).
![]() |
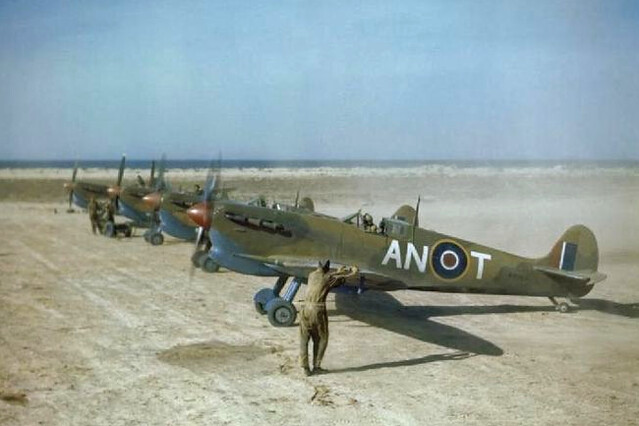
| Oh, look who it is! AN-T - RCAF Spits in Tunisia, 1943. |
Pin washing...How much?
I'm not quite sure how much or how aggressive my pin-washing should be on an aircraft. Looking around at what other aircraft modellers are doing the intensity of pin-washing seems to vary enormously - from modellers who deem it completely unnecessary, to others who pin-wash heavily - to the point that they nearly outline ever panel in near-black!
I'm going to try out the middle ground, with some mild pin-washing in a subtle complementary colour...
I'll stop there, I've tried to be subtle, not aggressively outlining every panel. I used AK Interactive's Enamel Wash Dark Brown as this is my tried and tested 'go to' product for pin-washing. I like it's greasy brown colour whatever the base colour as it's about adding grime into recesses.
You'll notice I also used the AK wash to add darker streaks and some light 'shading' to accentuate panel shapes. It's not such a delineating a technique as pre-shading, which precisely marks out the division between each panel with subtle shading, but the translucent 'grid' effect pre-shading creates is not to everyone's taste.
Highlighting - accentuating panel contrast
As it stands, the effect is a little 'flat' so the final stage of this shading stage is adding the highlights. By adding some very light, contrasting colours, I hope to give the surface an enhanced 3-dinesional aspect or depth. Well, that's the theory anyway.
I'll be using coloured pencils for this, with the ability to sharpen pencils to a very sharp, precise point I should be able to add very delicate highlight lines around small areas...
Well, that's about it I think. I could add some chipping, but I don't think it really needs it. All I really need to do now is seal my weathering by giving it a very light coat of matt or satin varnish and I think I'll call it quits on this one.
Next: Completion photos.
Friday, 22 July 2016
Hobby Boss 1/72 Spitfire Mk. Vb - Part 4 (ish)
Losing track of installments now, what with all the little niggling hic-cups. But, back on course now...
Weathering - bleaching and staining with oils
My post-shading attempt having failed I will have to do all my shading 'post' and I'm simply going to follow the same steps as I have with my vehicles. Not being all that experienced with aircraft models I'm playing things by ear.
So, as usual, I'm starting by 'bleaching and staining' using oil paints. As this is a desert aircraft I'm assuming there was certain amount of sand and sun damage to any paintwork.
While I don't know that much about the RAF's Desert Airforce I do remember what Derek Robinson wrote in his story of WW2 North African air warfare - 'A Good Clean Fight'. He described the effect that the desert had on aircraft, he said that they looked like they had been 'sanded'.
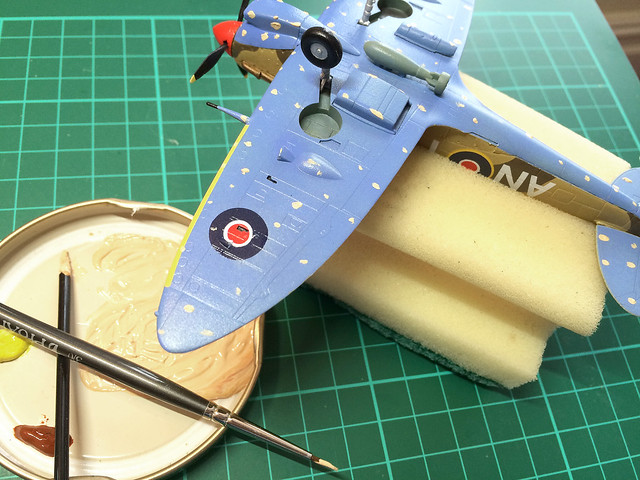
I mixed some of my oils into a cream colour - I was hoping that this would give a sandy tone to the weathered underside...
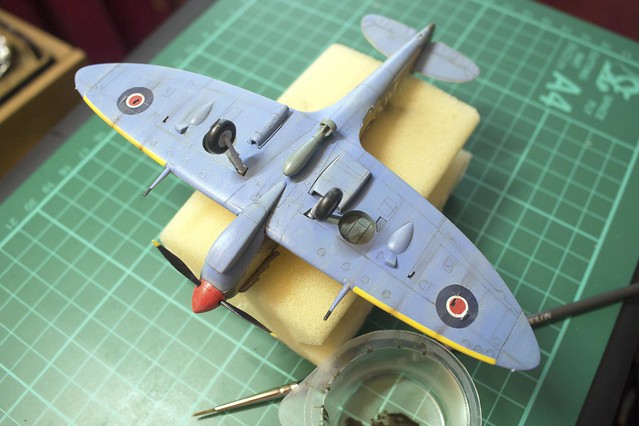
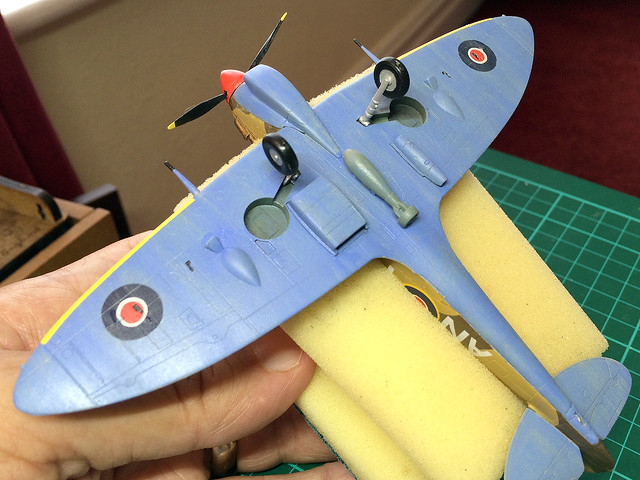
Then using a brush wetted with thinners I smeared the paint across the model, giving the surface blue a faded and blemished look (hopefully)...
The effect is subtle, but the original Vallejo Azure Blue has been toned down quite a bit. Of course, depending on how beat up you want your model you could add more spots of poil paint and more streaks. If I want darker stains I'll add some small darker brown spots and smear them.
A quick, light coat of Humbrol Matt acrylic varnish should seal the oil paints (which would smear if not sealed) and then I can move on - add additional weathering or apply shading or highlighting.
Next: The top side - same treatment, but with slightly darker coloured oils.
Weathering - bleaching and staining with oils
My post-shading attempt having failed I will have to do all my shading 'post' and I'm simply going to follow the same steps as I have with my vehicles. Not being all that experienced with aircraft models I'm playing things by ear.
![]() |
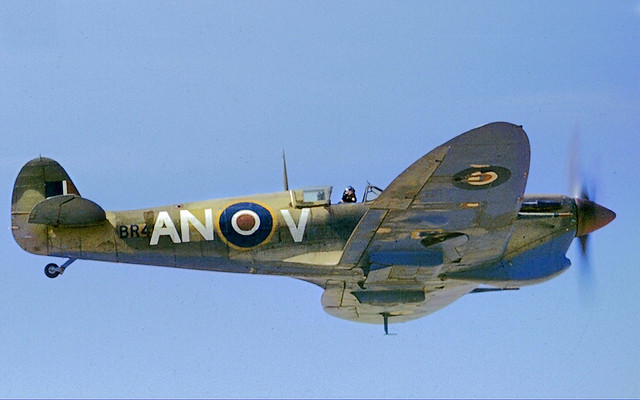
| RCAF Spitfire Mk V, 1943, No 417 Squadron, flying over the Tunisian desert. |
While I don't know that much about the RAF's Desert Airforce I do remember what Derek Robinson wrote in his story of WW2 North African air warfare - 'A Good Clean Fight'. He described the effect that the desert had on aircraft, he said that they looked like they had been 'sanded'.
I mixed some of my oils into a cream colour - I was hoping that this would give a sandy tone to the weathered underside...
Then using a brush wetted with thinners I smeared the paint across the model, giving the surface blue a faded and blemished look (hopefully)...
The effect is subtle, but the original Vallejo Azure Blue has been toned down quite a bit. Of course, depending on how beat up you want your model you could add more spots of poil paint and more streaks. If I want darker stains I'll add some small darker brown spots and smear them.
A quick, light coat of Humbrol Matt acrylic varnish should seal the oil paints (which would smear if not sealed) and then I can move on - add additional weathering or apply shading or highlighting.
Next: The top side - same treatment, but with slightly darker coloured oils.
Wednesday, 20 July 2016
British weather throws me a curved ball!
If there is one thing that you usually don't have to worry about - here in the UK - it's extremes of weather. But occasionally - very occasionally - the weather throws a wobbly and teases us with a sunny day, just to show us what we are missing!
Yesterday was just such a day. In fact, it wasn't just sunny - it was neigh-on Mediterranean, with temperatures that had us poor old Brits running for the nearest chip shop or for the kitchen to make an emergency boiling hot mug of tea!
The upshot of this was rather unfortunate as I had picked yesterday to gloss my freshly decaled Hobby Boss Spitfire Vb. I sprayed the model - to seal the decals - as usual, but when I returned to my attic workspace the room was like an OVEN, and this had happened...
The gloss on top of these decals looks like it had actually boiled! (I presume this is the result of spraying on acrylic gloss when the room temperature is far too high.)
This is a great shame as the model was coming along nicely...
I suppose it's lucky that this was just a paint test model and not the 'real thing' - I would have been really gutted then. Just Googling to see if there are any remedies...I'll update this post if I come across any.
Boo-hoo!
The Solution - was a solution!
Glad to say that I have somewhat rectified the 'bubbles' in my decals problem. It's not perfect but it's miles better than it was...
A great big thank you to the members of The Plastic Scale Model Making Group on Facebook who's members helped me out of my predicament.
To get rid of my bubbles it was recommended that I use a sharp pin or sewing needle and to prick each bubble. Then, having holed each little bump I applied a couple of coats of Microscale's Micro Sol. This shrunk the bumps down and smoothed out the wrinkled decals.
Phew!
Yesterday was just such a day. In fact, it wasn't just sunny - it was neigh-on Mediterranean, with temperatures that had us poor old Brits running for the nearest chip shop or for the kitchen to make an emergency boiling hot mug of tea!
The upshot of this was rather unfortunate as I had picked yesterday to gloss my freshly decaled Hobby Boss Spitfire Vb. I sprayed the model - to seal the decals - as usual, but when I returned to my attic workspace the room was like an OVEN, and this had happened...
The gloss on top of these decals looks like it had actually boiled! (I presume this is the result of spraying on acrylic gloss when the room temperature is far too high.)
This is a great shame as the model was coming along nicely...
I suppose it's lucky that this was just a paint test model and not the 'real thing' - I would have been really gutted then. Just Googling to see if there are any remedies...I'll update this post if I come across any.
Boo-hoo!
The Solution - was a solution!
Glad to say that I have somewhat rectified the 'bubbles' in my decals problem. It's not perfect but it's miles better than it was...
A great big thank you to the members of The Plastic Scale Model Making Group on Facebook who's members helped me out of my predicament.
To get rid of my bubbles it was recommended that I use a sharp pin or sewing needle and to prick each bubble. Then, having holed each little bump I applied a couple of coats of Microscale's Micro Sol. This shrunk the bumps down and smoothed out the wrinkled decals.
Phew!
Sunday, 17 July 2016
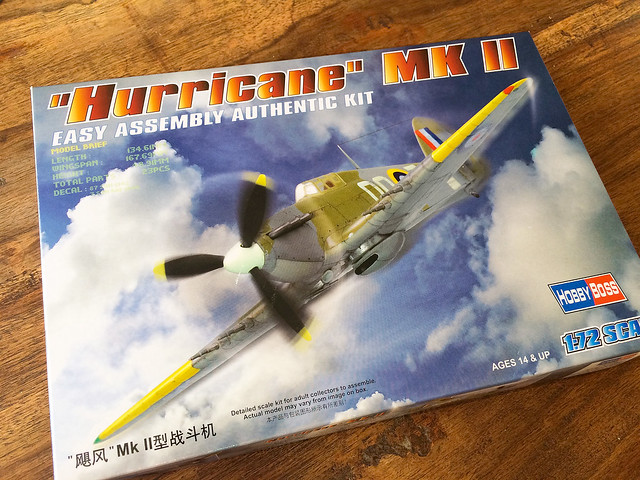
Hobby Boss 1/72 Hawker Hurricane Mk. IIC - in the box
Just a quick overview of the box contents of Hobby Boss's easy build Hurricane...
For my £4.75 I got 22 components, well protected inside a clear plastic inner case. To be honest, I think this is a bit of overkill and a waste of packaging. But it does keep all the parts pristine.
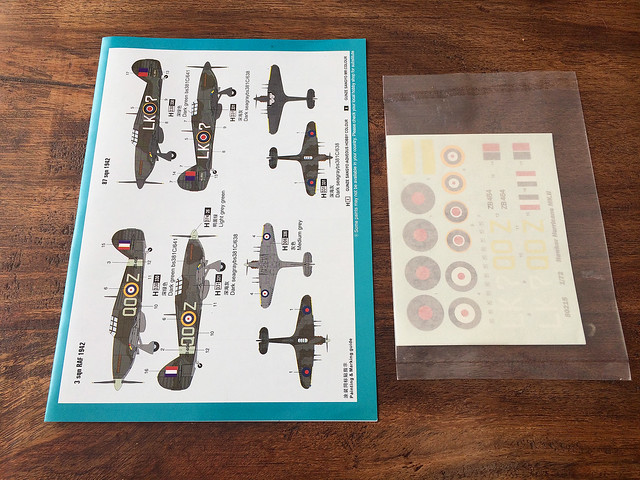
As usual, Hobby Boss does do a nice job with the instruction sheet, it's well printed - in colour - and the colour scheme directions are nicely illustrated. There is an option for two different RAF schemes, both European theatre...(Pity there isn't an overseas option.)
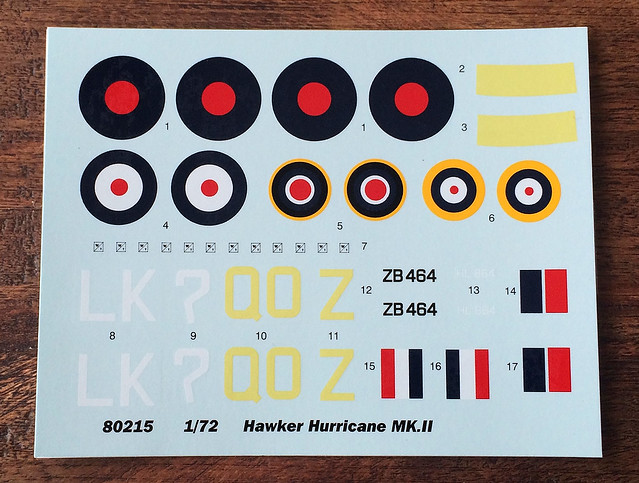
I'm a little unhappy with the colour reproduction of the included decals - some colours are just plain wrong (the registration numbers and fuselage ring of the first option are way off). But then, Hobby Boss decals are fast turning out to be my nemesis - they have a cheap and nasty glossy finish to them and don't like aggressive products like Microscale's MICRO SOL.
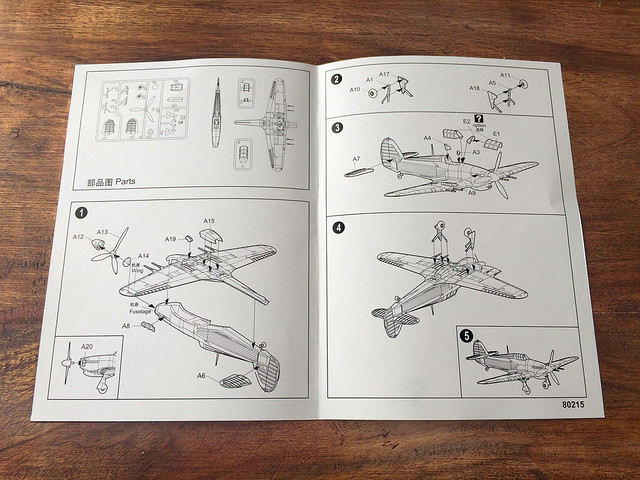
Finally, we have the instructions themselves. I do like the quality of the little colour printed leaflet that HB gives you - I wish other manufacturers would print their instructions to such quality. But, there again, in this instance the instructions are a little excessive as you could put this kit together without any diagrams at all!
My first impressions - prior to actual assembly - are that this kit looks quite nice. Again, Hobby Boss have made a nice job of the panel lines - neither too deep or too shallow. And there is nothing that immediately stands out as being particularly bad (unlike their Spitfire).
So, it's onto the construction, and I'm feeling quite positive.
For my £4.75 I got 22 components, well protected inside a clear plastic inner case. To be honest, I think this is a bit of overkill and a waste of packaging. But it does keep all the parts pristine.
As usual, Hobby Boss does do a nice job with the instruction sheet, it's well printed - in colour - and the colour scheme directions are nicely illustrated. There is an option for two different RAF schemes, both European theatre...(Pity there isn't an overseas option.)
I'm a little unhappy with the colour reproduction of the included decals - some colours are just plain wrong (the registration numbers and fuselage ring of the first option are way off). But then, Hobby Boss decals are fast turning out to be my nemesis - they have a cheap and nasty glossy finish to them and don't like aggressive products like Microscale's MICRO SOL.
Finally, we have the instructions themselves. I do like the quality of the little colour printed leaflet that HB gives you - I wish other manufacturers would print their instructions to such quality. But, there again, in this instance the instructions are a little excessive as you could put this kit together without any diagrams at all!
My first impressions - prior to actual assembly - are that this kit looks quite nice. Again, Hobby Boss have made a nice job of the panel lines - neither too deep or too shallow. And there is nothing that immediately stands out as being particularly bad (unlike their Spitfire).
So, it's onto the construction, and I'm feeling quite positive.
Saturday, 16 July 2016
Don't ask me why! Another Hobby Boss.
Really, I don't know why I bought this today...HB's Spitfire was bad enough, but having bought a Spit I found I was uncontrollably drawn to their Hurricane. You just can't seem to build a Spit without also building a Hurri'!
Let's just hope it ain't as bad as their Spitfire was. A big plus, though, is this is the wonderful Mk. IIC with the quad 20mm cannon!
Subscribe to:
Posts (Atom)