Showing posts with label X-Ref: PST/FinnZIS6/0514. Show all posts

Monday, 7 July 2014

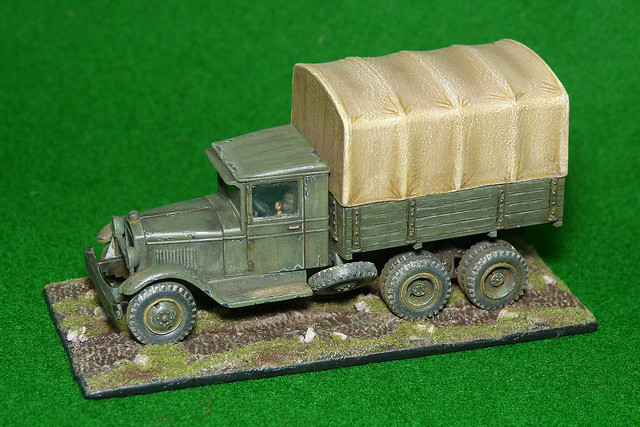
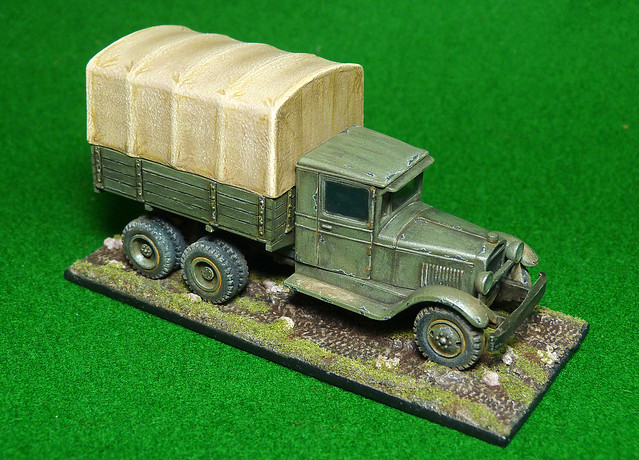
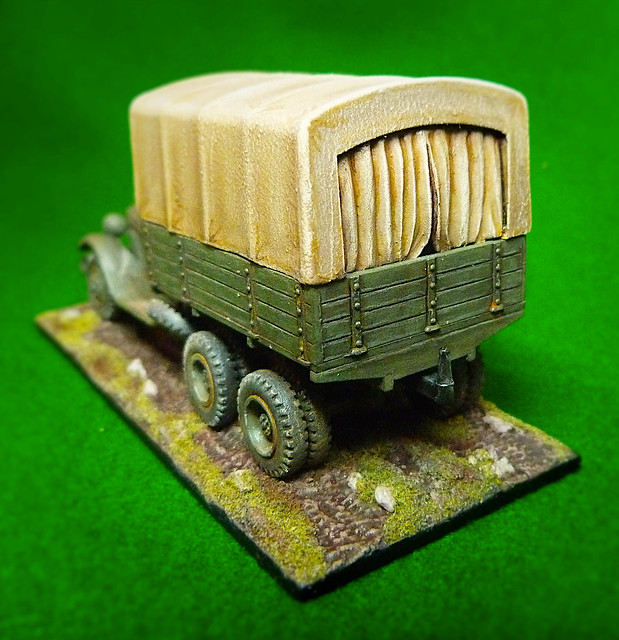
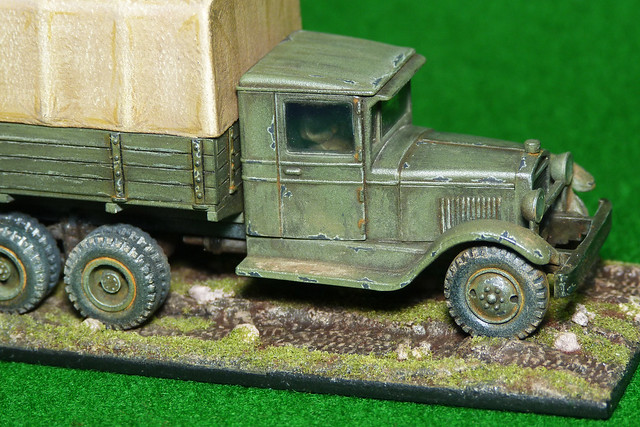
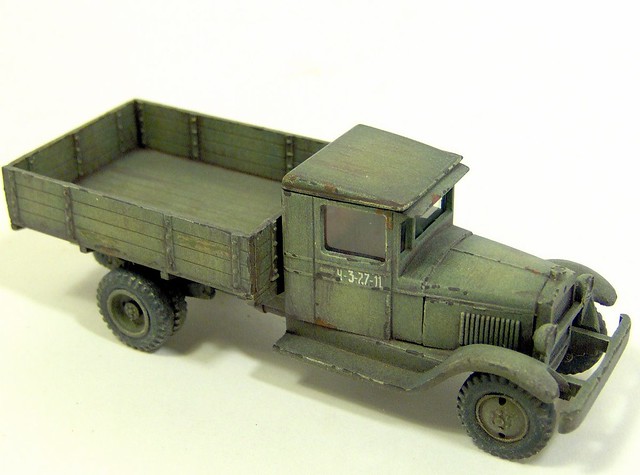
PST ZIS-6 Truck - Finished

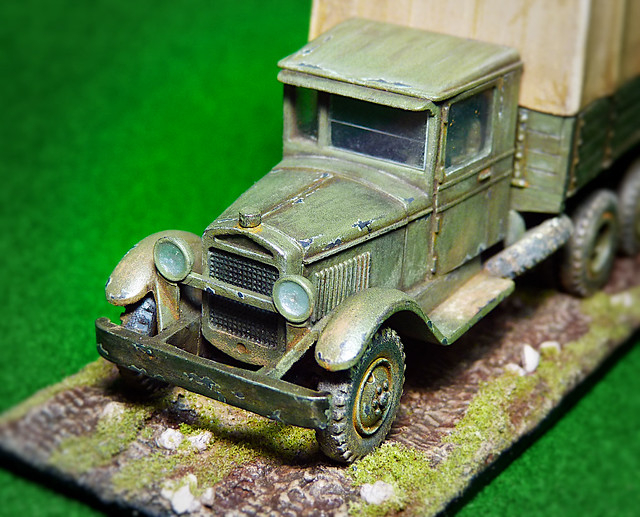
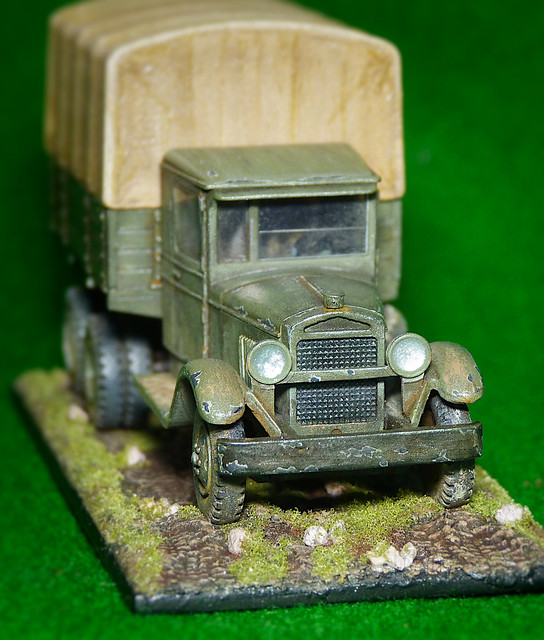
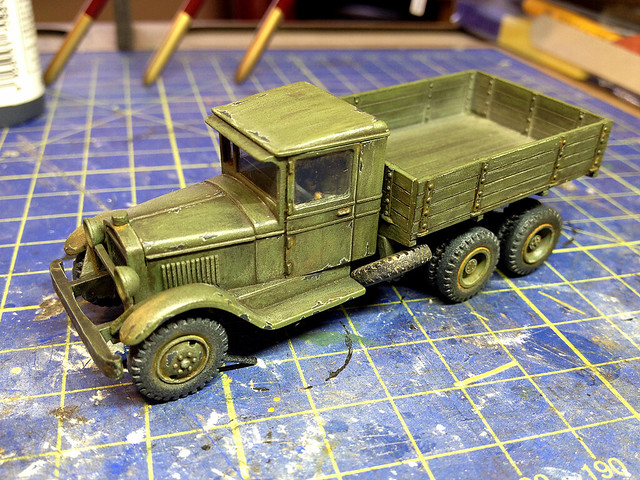
I'm quite sad to have finished this truck. I was really enjoying this project. Still, always nice to be taking those completion snaps, so without further ado here they are...


Sunday, 6 July 2014

PST ZIS-6 Truck - Tilt canvas mod

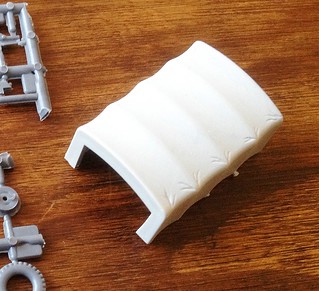
PST's very basic tilt canvas
One of the less satisfactory components in PST's ZIS-6 kit - in my opinion - was the tilt canvas cover. It was very basic and not much thought had gone into it's design, leaving the modeller to give it a realistic finish by way of painting.

There was no texture, few details simulating folds in the 'material' and the rear 'door' was just left a gaping hole with no option to place a closed cover on it. So, to finish off the model, I decided to make some improvements.

The main problem was the very smooth plastic PST had used to mould the canvas cover - it didn't look like canvas at all, just a big flat plastic box (with some half-hearted ridges and scores in it to suggest it was a fabric cover). So, problem number 1 - how to simulate a canvas texture?

Here's a nice photo showing a canvas tilt on the back of a ZIS-42M, a relation
of the ZIS-6. You can see a lot more wrinkles and folds in it's canvas
cover than my overly smooth kit version, as well as how it was
actually attached. Source: Wikipedia
There seems to be a couple of ways to add a 'fabric' texture to plastic tilt covers. One way is to use toilet tissue (!) - or similar tissue paper material - soaked in PVA glue to add a thin layer of texture on top of my 'plastic tent'! But this seems a bit messy, so I decided to have a crack at what I think is the easier method - the liquid glue trick.

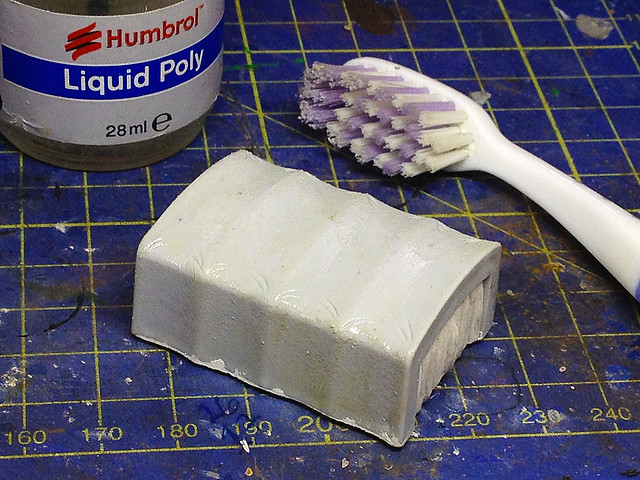
This technique involves coating a plastic part with a thin layer of liquid poly glue and leaving it for a few seconds - this should be enough to melt the surface just a bit - and then you scrub at the surface with an old toothbrush to scuff it up. The resultant roughened surface

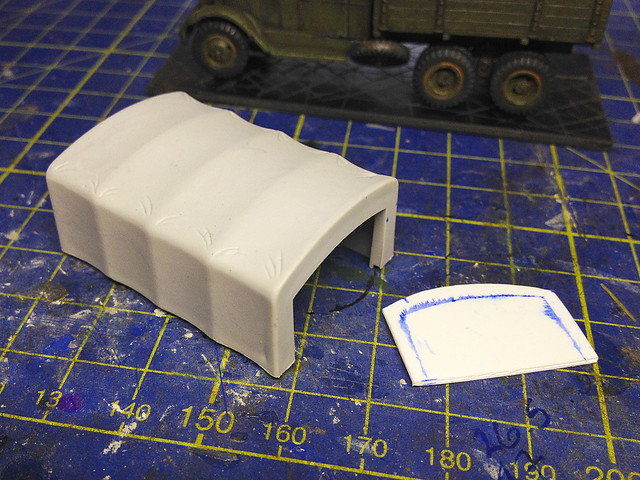
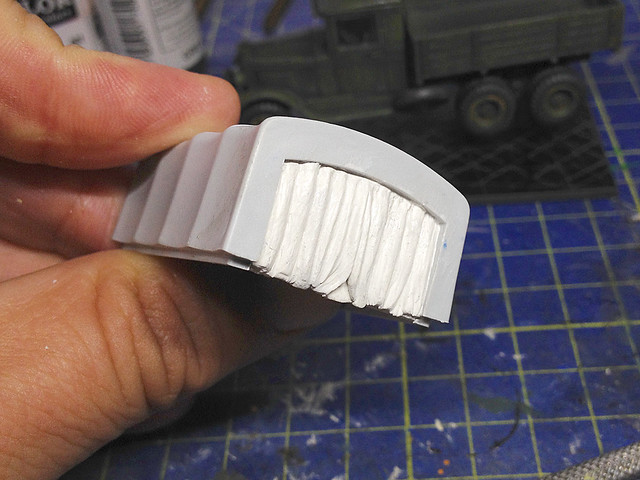
BUT FIRST...I wanted to close the gap at the back of the tilt cover. I did not like the big empty 'hole' this left at the back and so decided to cover this up with a scratch-made drop sheet. So, to begin I made a false partition out of plasticard onto which I could model a sheet with lots of folds in it...


I glued this blanking plate into the 'hole' in the cover. This would give me a firm base onto which I could sculpt my folded material out of good old Miliput putty.


Admittedly I went a bit over the top with lots of vertical folds and it does look more like the Muppet Theatre curtain than a drop cover, but I wanted a dramatic effect. I then test fitted the cover again to ensure the folds tucked nicely inside the wooden flatbed of the truck, which they did.


Next I painted on the poly glue and scrubbed the cover gently with an old toothbrush. The pattern you end up with can be determined by how hard you brush and also in which direction you brush. If you feel that you've gone over the top another light coat of poly glue should smooth the texture back down again. Just keep doing this until you are happy with the result.


The colour of canvas?
Here was another little problem. I couldn't find a reliable or accurate colour photo of a ZIS truck with the original tilt cover in place. Illustrations and other scale models showed a variety of colours, from light green to a canvas brown. Annoying.

The PST box art suggests a buff or light khaki canvas cover colour.

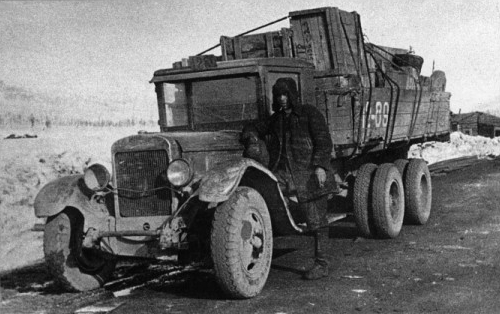
So, I (and you) will have to make some kind of guesstimate at what the correct colour for the cover might be. Looking at the B&W reference photo I included at the top of the page I will hazard a guess that the colour is lighter than the Russian Green of the vehicle itself. The PST box art has an illustration of the truck with a light-khaki canvas cover so I suppose failing any better reference I'll just go with that.


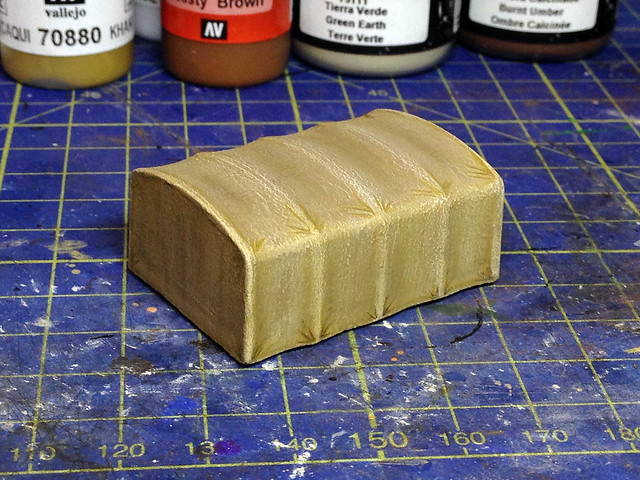
I started with a quick spray of what Humbrol described as 'brown'...OK. And then airbrushed on some highlights to the ridges of the tilt. Then it was back to the workbench and the brushwork begins...


Not the best thing I've done, dry-brushing isn't my favourite technique. But it does look a bit better at a distance! Also, it will be interesting to see how a coat of matt varnish affects the drybrushing effect.

Not much to do now, just some touching up details on the truck itself.

Tuesday, 1 July 2014

PST ZIS-6 Truck - Weathering Pt. 3

Pin-washing...
I think I am pretty comfortable with this technique now and have definitely settled on using AK Interactives Dark Brown Enamel Wash for Green Vehicles (bit of a mouth full). I know I've said it before, but I like the greasy effect you get with this wash, it does make it look like grim has built up in panel lines and recesses.


At this point - while the truck is starting to look shabby enough for me - it's all a bit flat and lacking in something. So, next I will be adding some chipping effects and light coloured bleached stains and rain and dust streaks for some variety...


NEXT: The base, and then once I have that put together I will add some mud, matching the mud of the base to the mud on the truck.

Sunday, 29 June 2014

PST ZIS-6 Truck - Weathering Pt. 2

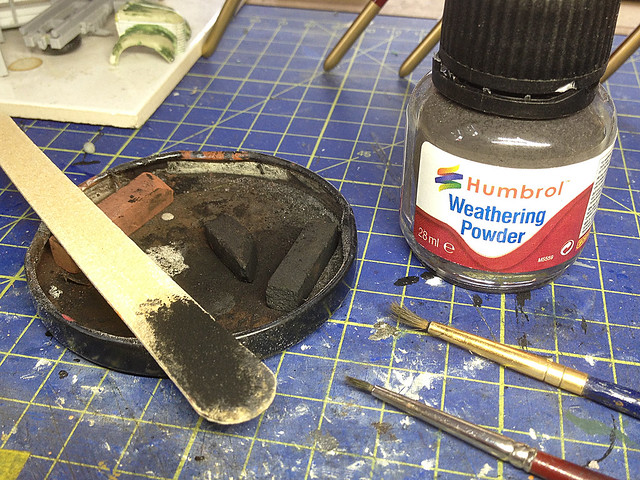
Now, the potentially messy bit! The application of 'weathering powder' (that's chalk dust to you and me). There's so much that can go wrong here - this stuff is apt to go exactly where you don't want it...But despite that I like working with powders.

There two ways you could go with powders, you can buy a proprietary modelling
brand - like Humbrol's - or a stick of artist's conte crayon. To be honest there's not
much between them in either quality or price, but the pre-ground powder is a little
less messy. The conte crayon is maybe a little more 'sticky' and greasy.
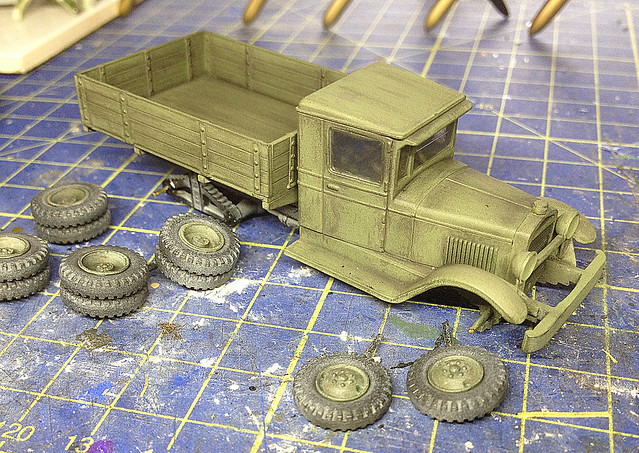
The object here is, simply, to 'grubby up' the paintwork and this is sort of a subjective process. I like 'grubby' stuff (oh er, matron) but it can look over the top and artificial, in short it's a matter of taste.


Having done this it can be a bit of a 'yikes' moment but you mustn't panic and remember that this is only a stage in a process, it won't look like this when you're finished!

Even if you find that you've gone a bit over the top the good thing about the powder technique is that it can be modified and even removed using an artist's putty eraser or even Blu-Tack (especially if you have coated the model with layer of gloss or satin acrylic varnish before starting...I probably should have mentioned that first).

Once the model is as grubby as I want it I'll give it a light spray with varnish just to seal the powder layer. When varnished I can then move onto the next stage which is the pin-washing stage.

And finally...The chassis...
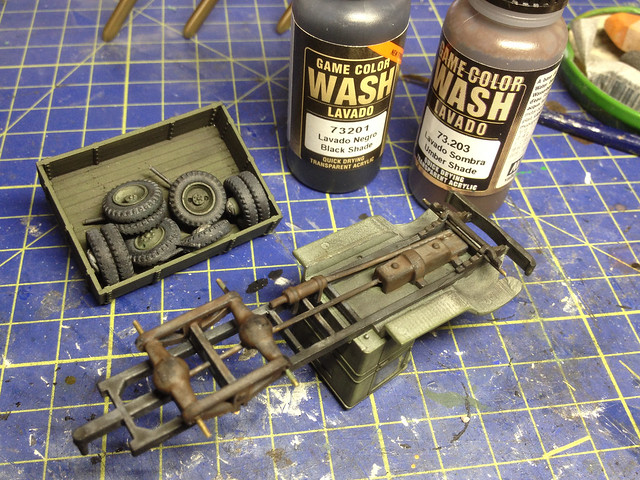
While preparing the bodywork let's not forget about the underside of the model. I started with a base of flat black for the chassis, engine and running gear and, again, I wanted to end up with a well worn mucky, greasy finish.

In contrast to the powder effects used topside this time I am reaching for my relatively new Vallejo 'Game Color Wash' bottles - Black Shade and Umber Shade...


The umber shade over a black base give a nice oily colour with a hint of surface rust. The black adds some depth and additional shading and staining. I am really enjoying these Vallejo washes, I am rubbish at making a nice wash of the right consistency and these take the hard work out of this job.

NEXT: Another light coat of varnish and then the pin-washing.

Saturday, 28 June 2014

PST ZIS-6 Truck - Weathering experiment

Right from the start I knew I wanted my ZIS-6 to be a heavily weathered example. My thinking is that as this truck would have been a vehicle that was captured from the Soviets by the Finns it probably had already seen it's fair share of use and abuse from both it's owners!

So I am going to experiment a bit here - this could be bad news - what I am thinking is building up several layers of discolouration, chipping, flaking, dirt and grim and finally dust (and in amongst this somewhere I will be pin-washing and highlighting as well)!

Let's begin...First stage - 'discolouration'.


What I have done here is to apply some dabbs and and streaks of a slightly darker green - Vallejo's German Field Grey (830) - to stain the base coat (Humbrol's Light Olive). This is intended as a pre-chipping base BUT...

I will also be dulling and discolouring the overall tone (modulating?) by dusting the bodywork from the edges in with some black conte crayon dust! That's next...Finger's crossed.

--------------------

Just a little addendum...
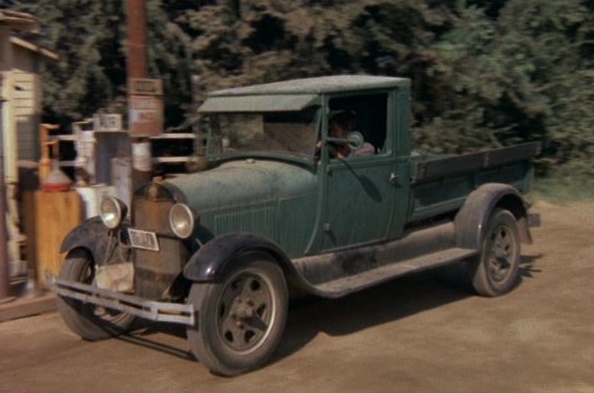
In thinking about how I would like to weather this truck I did have something in the back of my mind - does anyone else Pa Walton's truck?

Picture source: www.imcdb.org
Funnily enough I had the impression that this 1929 Ford Model AA from the old TV series - 'The Waltons' (1972-1981) - a lot more battered up than this, but still you get the idea. Incidentally, this model of Ford was the basis for the Soviet GAZ AA truck (made under licence), so even when World War 2 started this was already quite an old design.

Monday, 26 May 2014

PST ZIS-6 Truck - Base coat

As much as I intend to do this weekend - the basic paint coat. I really like Humbrol's Light Olive, it's a smashing base for a variety of olive drab vehicles for a variety of nations as it can be modulated into a multitude of hues. Plus it's great for doing a slightly faded or sun-bleached green...


I can now start to plan how I want to weather this model. As this was a captured vehicle and saw a lot of hard use from 1941 to 1944 I am thinking a heavily worn and weathered look will be suitable. As usual I do look around the web to see what other people have done and while there aren't many ZIS-6s there are plenty of ZIS-5s, including this very nice example by Gulumik Miltary Models...

Source: Gulumik Miltary Models
As you can see with the above example Humbrol's Light Olive is a good light base to start with before you begin to modulate and shade with darker tones. Gulumik have made a lot better job of gluing in their windows though, I made a bit of a mess of mine but may be able to disguise this with some dust sprayed onto the glass.

Finally, I have - as I intended when I started this project - built this model 'out the box', I haven't made any improvements or modifications. There are a few easy improvements you can make - like the headlamps and their fitting - but I really just wanted to relax and make a vanilla kit for a change.

Sunday, 25 May 2014

PST ZIS-6 Truck - Flatbed & windscreen

This progresses nicely. I am quite pleased with the general quality of this PST kit - especially when I compare it to my previous experiences of the other Eastern European kits I have made from MW and ACE - and I will certainly buy more from the PST range.

Onto the flatbed, there isn't a lot to it but it fits together well enough. While making this I also added a driver figure and painted the inside of the cab, the driver was just a random figure I had laying around and isn't the best but I guess you won't see that much of him...


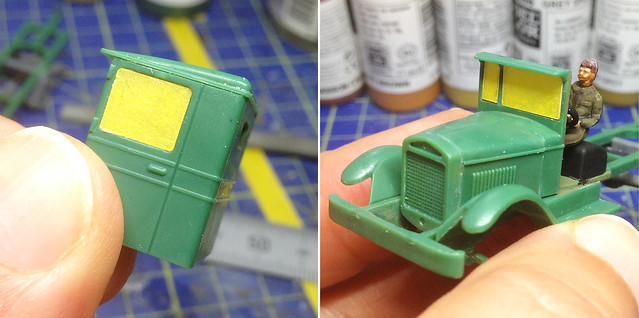
I have decided - after much consideration - to make and fit the transparent plastic windscreens before I glue the cab together - just to make it easier to install the 'glass'. This does mean that I will have to mask the windscreens before I spray the truck body with it's primer coat, but that isn't a big deal.

As I said earlier, luckily all the windows in the ZIS are rectangular so there is no complicated cutting out to do and as usual I will be using Formula '560' canopy glue to stick the transparent plastic in place (although I am still unsure what advantage this has over cheap PVA glue).

I've used masking tape to protect the transparent plastic during fitting and
during the base coats spraying phase (which is next).
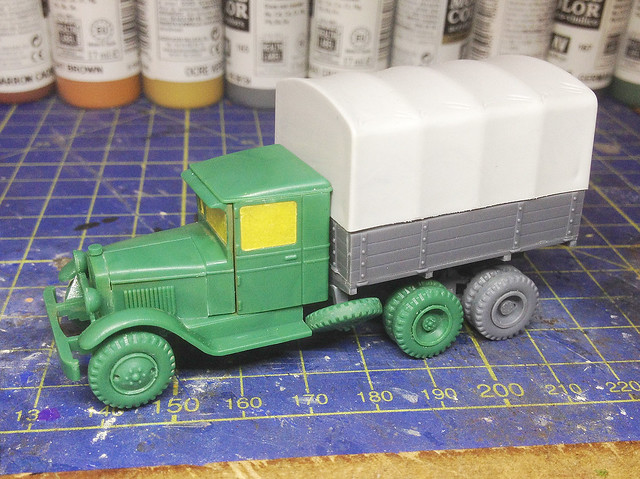
Time to put all the components together for the first time and have a look at what the truck looks like. It really does look a bit of a mongrel with all the various colours of plastic PST uses for this kit  BUT it all works in the end and that's all that matters...

All the major components are just dry fitted, I will be disassembling the
truck again in order to spray on the base coat of Humbrol Light Olive.
It really is a handsome little truck and I am sorely tempted to get some more of these (especially as they come in so many variants), but I will have to leave that until my Finnish project is done as I now more or less have filled my truck inventory for that now. Still, I have the PST ZIS-5V still to make for this project and that's almost exactly the same kit but with a single rear axle!

Next: Base coat.

Wednesday, 21 May 2014

PST ZIS-6 Truck - cab & bonnet

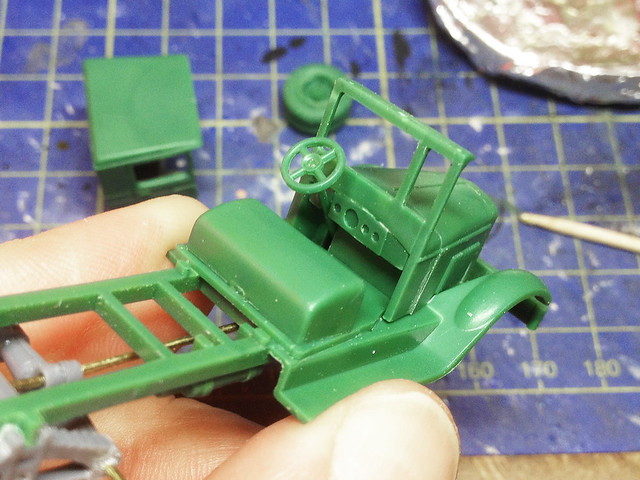
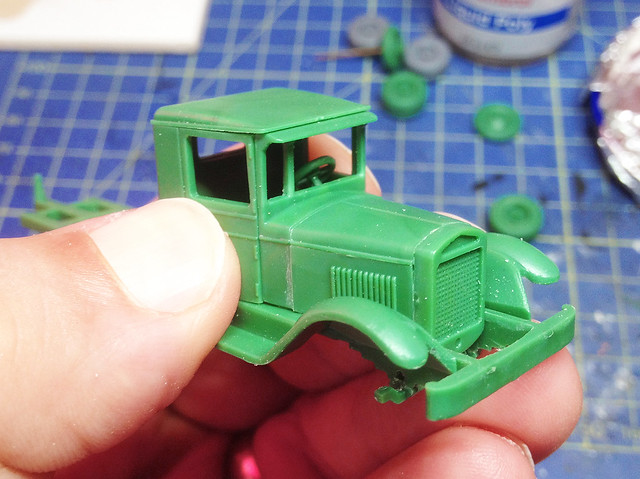
For once there isn't much to say! Things went fairly much as the instructions described. Fit was the main niggle - a little sloppy but not horrendous...


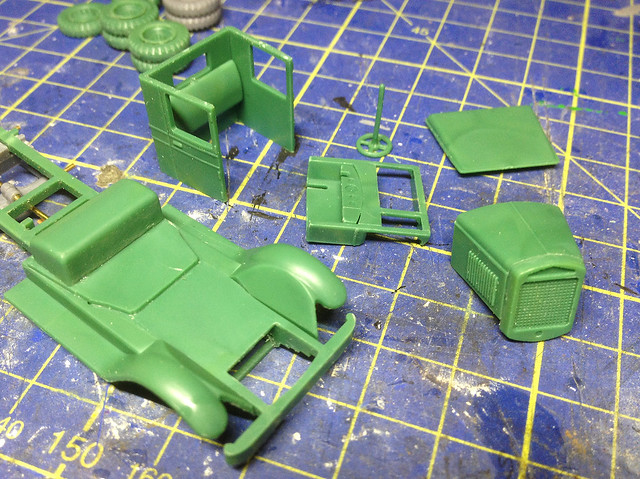
The main cab and bonnet components - above - are quite chunky and the detail is basic but the radiator grill is nice. But as you can see with the interior detail PST have just done the bear minimum...


Nothing didn't fit, but there were a few gaps...But hey, it's a Soviet wartime vehicle so what do you want! By the way, I'm not glueing the cab together yet as I will need to paint the interior (and add a driver) before I close it up...


Not bad though eh? It's a fun little vehicle to make as it has plenty of character. Reminds me of The Waltons! Grandpa Walton could have shifted a lot of wood with one of these...


Well, as least he could once I have fitted the flat bed, which is what I'm doing next.

Monday, 19 May 2014

PST ZIS-6 Truck - wheels & axles


What looked like nice clean and crisp component parts turned out to be a little sloppy when it came to construction. Everything that came off the sprues seemed to need a little filing to clean them up and make them fit -- not big job you understand and everything did fit, but just niggling little preparation.

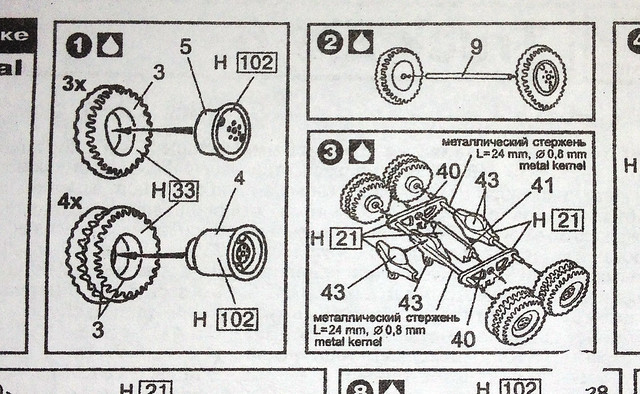
As mentioned in the in-box review f this kit there are a number of additional parts and this did indeed cause some little confusion in the construction. No sooner had I started sorting out the various parts for the wheels and axles that I ran into two little problems, the bigger of which was that I could not locate the axles!


You see the instructions are largely pictorial, but do have - frustratingly - the odd important notation in Russian! So I hunted for parts that looked like they were axles - basically plastic rods (I thought) - only to realise after some time that the little Russian notations in panel (2) of the instructions were - in fact - telling me that I had to cut my own axles out of some metal rods (of my own)! Grrrrrrrr!

...And then, as if things weren't confused enough there was the little matter of the part numbers - like those shown in the instructions above - or should I say the lack of them...


No, I haven't got the sprue the wrong way around - the part numbers just aren't there!

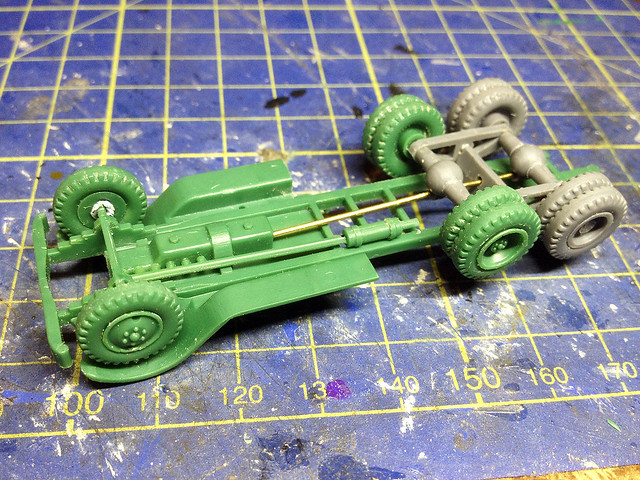
Still, these were only minor - if somewhat annoying - hiccups and I soon muddled my way through the construction of the wheels, axles and rear suspension...


Note the mixed colours of the parts, the green wheels come from the basic ZIS-5/V sprue (see in box review) and the gray parts are from the ZIS-6 sprue.  The DIY 'axles' are some lengths of scrap brass rods I happened to have (luckily).

The wheels themselves are - as you can see - one-piece plastic components which is good and bad. Bearing in mind the horrendous experience I had with my ACE BA-10 kit's vinyl tyres I was somewhat relieved to have plastic wheels, but there again there is not so much detail on these plastic 'tyres' and no tread pattern whatsoever. :(

Now on to the chassis, but - again - there is a little niggle which seeks to frustrate the modeller.

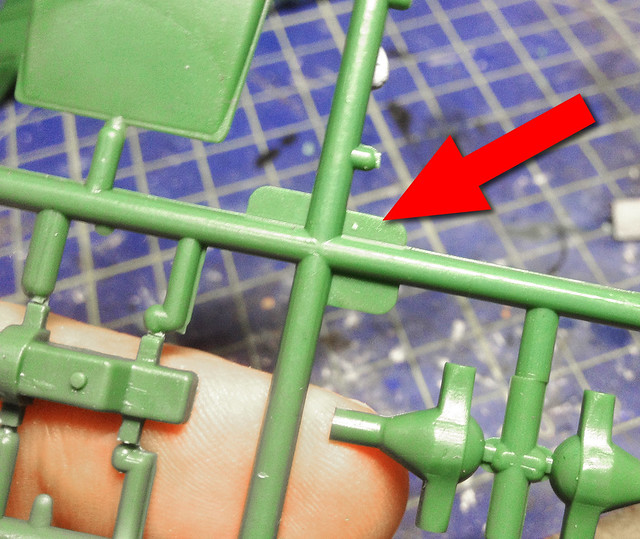
The main fenders (mud-guards to we Brits) are attached to the main (green) sprue in the most annoying fashion with a sprue attachment right on the apex of the front of the rounded mud-guard! OK, this - again - isn't a biggie but is worth mentioning as you have to be careful detaching it and then do some filing to get the rounded end into shape.

Are PST trying to upset me? This was - after all - supposed to be a simple and straight forward build!

Well, the chassis turned out to be a bit more straightforward with no real surprises, which was nice. Though there were some more brass rods required, but at least I now knew what the Russian notation meant in the instructions so wasn't confused by the absence of suitable parts on the sprues.


I decided not to glue the wheels onto the axles permanently yet as I want to be able to spray these parts individually before final assembly. Similarly I haven't glued on teh mud-guards either, as I want to spray the chassis black and the fenders green and having them separate will make this easier.


Well, that's that. Aside from the slight confusion regarding the addition of your own axles by means of some brass rod it was all pretty simple. Though there will still need to be some tidying up when I glue together everything permanently - and balance the rear wheels on their axles too so they are perfectly level.

Next: The cab and the bonnet.

Saturday, 17 May 2014

PST ZIS-6 Truck - in-box review

It seems that if you are modelling WW2's Eastern Front sooner or later you will build a ZIS or GAZ truck. It's inevitable! And so the time has come for me to try my hand at one of these charming little vehicles in the form of PST's ZIS-6 medium truck...


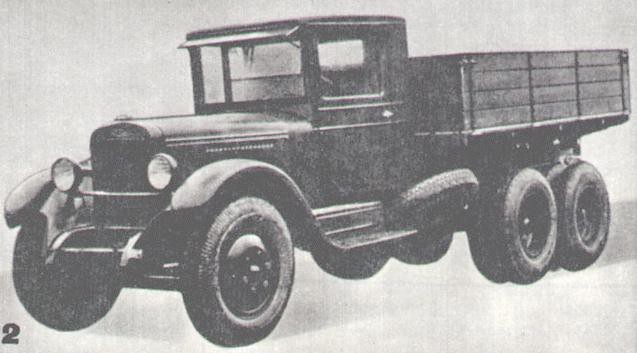
The Soviet ZIS-6 was the 3-axle version of the ZIS-5 light truck (which I will be making at a later date) and was a 2.5 ton 6x4 transport which could haul up to 4 tons on a highway. Because of this heavier load capacity I have chosen this model as one of the trucks for my Finnish medium artillery formation.

Source: Wikipedia
In terms of war game modelling this heavier truck is not as familiar a build as it's smaller sibling - the ZIS-5 - or it's GAZ compatriot. But it is available in kit form in wide number of variants - mainly by PST - which range from this cargo version to an ambulance version, to self-propelled anti-aircraft truck, to mobile workshop to the famous (or infamous) "Katyusha" rocket launcher.

What's in the box?
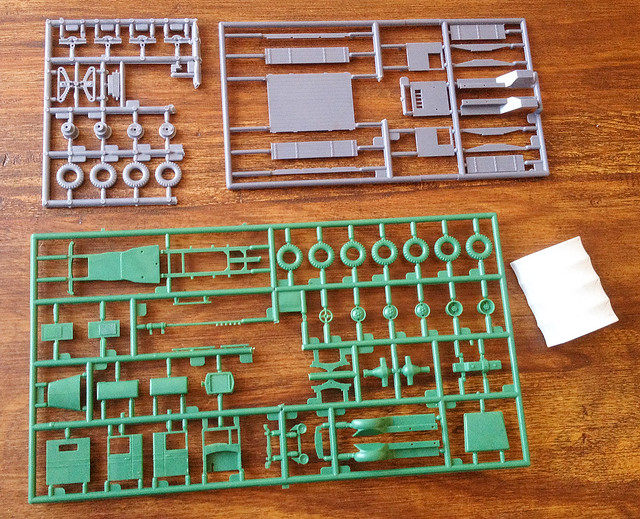
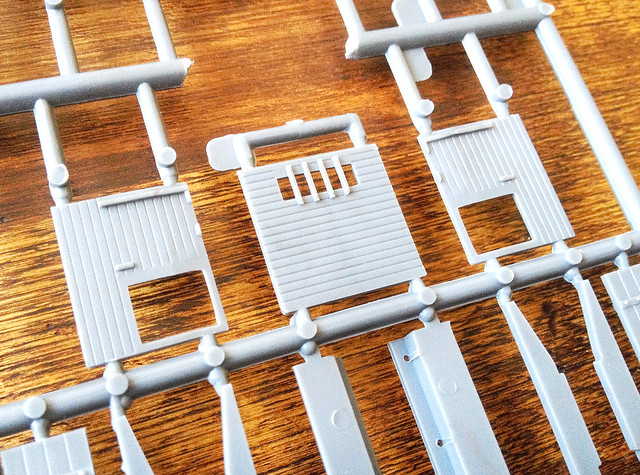
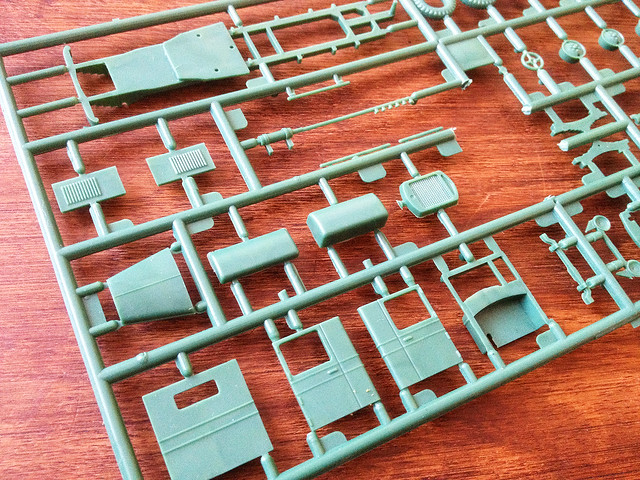
As with my last PST model - thier 1943 Ford 6 Truck - there are a hotch-potch of coloured sprues in the box (which is a little bemusing at first). As usual PST seem to 'mix and match' a basic set of sprues with additional ones to make variants of the basic model - hence the different colours.


The amusing up-shot of this is that you tend to end up with additional parts that aren't meant for the model you have actually bought! With my PST Ford I ended up with several (useless) Studabaker parts, and with the ZIS-6 I have ended up with a superfluous wooden cab which I *think* is intended for the ZIS-5V light truck! :)


However, the reason you end up with these extra parts is because there are parts on this particular sprue that you do need...Bizzarre! Obviously PST are saving money and realised that the flat bed parts which come with the ZIS-5 kit also happen to be the the same size as the flat bed parts required for the ZIS-6.

Anyway, you can't really complain about extra parts, even if it makes things a little confusing at first.

The quality of the moulding is lovely, it's nice and sharp and detail is well defined and there is a complete absence of any flash (at least on my model). Nice!


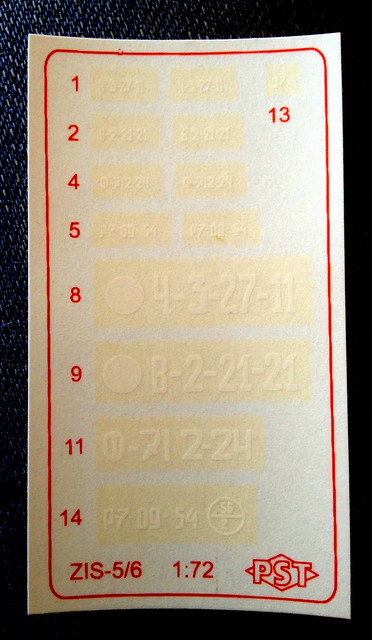
The two other parts I do not mention here are the decal sheet and the windows. Well, I didn't mention the windscreen because the kid doesn't come with one! You will have to make your own glass out of some clear plastic...Luckily the shape of the windscreen is pretty much rectangular, so it's not a difficult job.

Then there are the instructions, which is one A4 double sided photocopied sheet. Now this isn't such a big deal, but with relation to the decals in particular the lack of a colour-scheme guide is a bit of a annoyance.

Now, sorry about my terrible photography but there isn't that much to see really. I *think* there are enough decals to make a choice of four different vehicles, but as there is no information about these decal choices I have no idea what machines these were, what regiments or where they served! (Just as well I am making a captured Finnish version of the truck isn't it!)

And that's about it really. It looks all pretty straight forward - even with the extra parts thrown in - and I have to say that it will be nice to make a simple model for a change (with none of my usual dodgy conversions or 'improvements'! :)
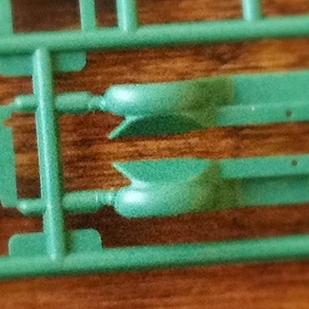
Looking at it now - before construction - it all looks very nice. So...Let's get ready to rumble!

Link: The ZIS-6 at Engines of the Red Army

------------------------------------------------------------------------------
Postscript: Curious about the extra parts - and what they were - I checked back to the 'in box' review I did when I bought my PST ZS-5V, and guess what? Exactly the same basic sprues appear in this kit!

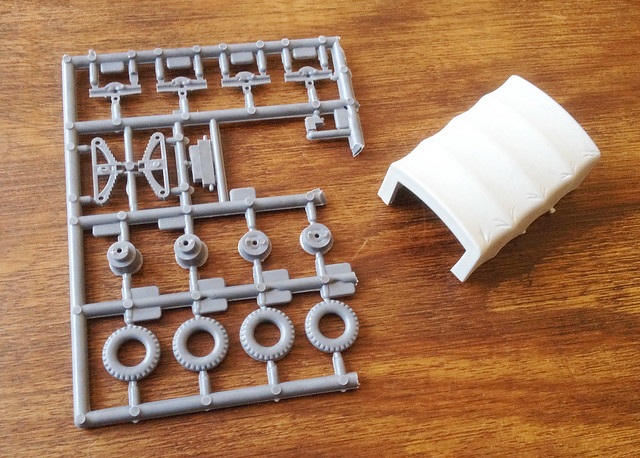
In fact the only difference between the PST ZIS-5V and the ZIS-6 kit is - naturally - the smaller sprue which provides the rear axles and extra wheels that the ZIS-6 has and a tilt cover.


This makes me very tempted to make both related truck kits at the same time, or do the ZIS-5/V after I do the ZIS-6. Incidentally, you also get two kits in one in the PST ZIS-5/5V kit. It comes with all the parts to make the basic (earlier) metal cabbed ZIS-5 and then an extra sprue to make the (later) wooden cabbed ZIS-5V.
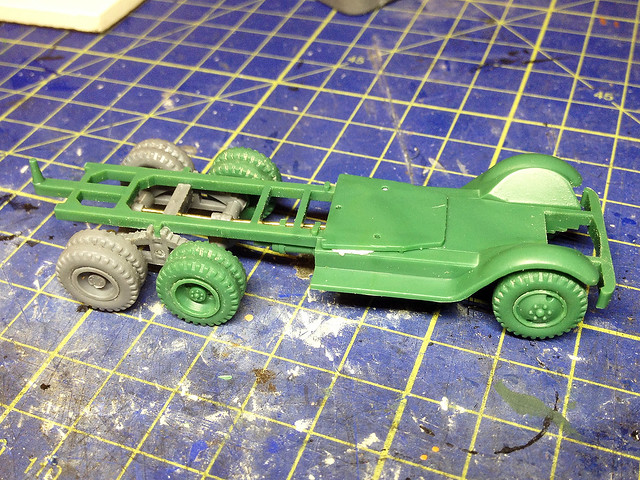
All this means that if you do buy a PST kit expect some bits and pieces that you can put in your spare parts box! :)