Diary of a novice scale model maker and his adventures in the wacky world of Braille Scale.
Showing posts with label X-Ref: PH/KVQB/0212. Show all posts
Tuesday, 22 May 2012
Pegasus Hobbies KV-2 - Experiment 4 complete
Another experiment complete, this time I've been trying out 'chipping'. This is where corroded and chipped paintwork is added to the surfaces of a model (I'm sure you knew that), a form of weathering that is in principle the opposite of the hairspray technique.
Friday, 6 April 2012
New arrivals - Aleran decals for Soviet & Axis AFVs
As my collection of unfinished models piles up I thought it best if I make a concerted effort to clear the backlog of partially complete projects. It's not that I get bored half way through making them, it's just that sometimes they hit a speed bump where I need a particular item to finish them. So I was pleased that a couple of sheets of Aleran decals arrived while I was on holiday.
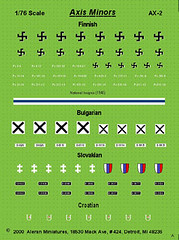
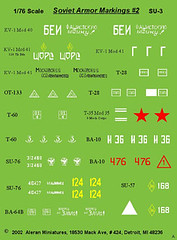
There are two sheets which will allow me to put the finishing touches to my Pegasus KV-1 & KV-2 project. One is Aleran's Axis AFV Markings for Finland, Bulgaria, Slovakia & Croatia (AX02-D) and the other is their Soviet Markings for T28, T35, KV1, T60, SU76, BA10, BA64 & SU57 (SU03-D), both acquired from Millicast at a cost of £6.95 each.
As usual the service from Millicast was exemplary and very personal (with the usual friendly hand written note on the complimentary slip). I really can't recommend this online retailer highly enough.
The decals provide me the hakenkreuz for my Finnish KV-1 1940 'Ekranami' - or Model 'E' - and a nice bold hand painted Soviet slogan for the turret of my KV-2 behemoth. I have used Aleran decals before and they are superb quality and there are enough on each sheet to make several models of varying types.
Link: The Millicast Moodel Company (fine resin 1/76 WW2 AFVs and accessories)
There are two sheets which will allow me to put the finishing touches to my Pegasus KV-1 & KV-2 project. One is Aleran's Axis AFV Markings for Finland, Bulgaria, Slovakia & Croatia (AX02-D) and the other is their Soviet Markings for T28, T35, KV1, T60, SU76, BA10, BA64 & SU57 (SU03-D), both acquired from Millicast at a cost of £6.95 each.
The decals provide me the hakenkreuz for my Finnish KV-1 1940 'Ekranami' - or Model 'E' - and a nice bold hand painted Soviet slogan for the turret of my KV-2 behemoth. I have used Aleran decals before and they are superb quality and there are enough on each sheet to make several models of varying types.
Link: The Millicast Moodel Company (fine resin 1/76 WW2 AFVs and accessories)
Sunday, 25 March 2012
Track Day - painting one-piece tank tracks
Moving on with my 'basic training', I have started work on a few of my one-piece tracks for my quick build models. I haven't really nailed doing tracks yet and this is an opportunity to experiment with a few new techniques.
I'm not flying solo though, I'm using a few useful tutorials for painting tracks. My main source of reference is Alex Clark's 'Small-Scale Armour Modelling', and excellent book which has gotten me through my first few models. Then there is this online tutorial...
> ScaleModelGuide.com - Painting tank tracks
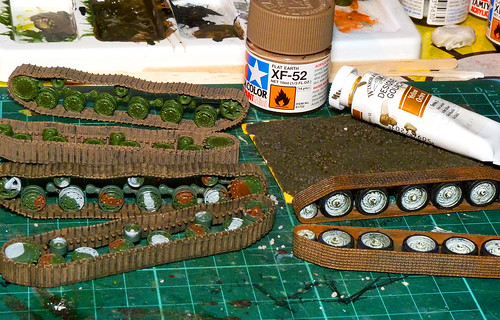
I started with a base coat of black, then applied a wash of Tamiya's Flat Earth XF-52. I didn't want to go too rusty, a pit-fall that some war gamer modellers are apt to fall into. I think I did this with the T-34 tracks pictured above, so I am toning down the redness of my wash and going more earthy instead.
Once I laid down the lighter earth and it dried completely I ran a quick thin darker wash over it to accentuate the shadow areas and provide some depth to the earth colour. Hopefully the end result will look like there is a mixture of mud and dry earth on the tracks.
Finally I might do some gentle pin-washing - to deepen the detail - and then some very light dry brushing with some silver to give the metal highlights to the tracks. I may also add some graphite pencil to the prominent areas. We shall see...
Above: Three pairs of one-piece tank tracks, on the left are the tracks fro my Pegasus KVs and
on the right is my modified Armourfast T-34 tracks.
I'm not flying solo though, I'm using a few useful tutorials for painting tracks. My main source of reference is Alex Clark's 'Small-Scale Armour Modelling', and excellent book which has gotten me through my first few models. Then there is this online tutorial...
> ScaleModelGuide.com - Painting tank tracks
I started with a base coat of black, then applied a wash of Tamiya's Flat Earth XF-52. I didn't want to go too rusty, a pit-fall that some war gamer modellers are apt to fall into. I think I did this with the T-34 tracks pictured above, so I am toning down the redness of my wash and going more earthy instead.
Once I laid down the lighter earth and it dried completely I ran a quick thin darker wash over it to accentuate the shadow areas and provide some depth to the earth colour. Hopefully the end result will look like there is a mixture of mud and dry earth on the tracks.
Finally I might do some gentle pin-washing - to deepen the detail - and then some very light dry brushing with some silver to give the metal highlights to the tracks. I may also add some graphite pencil to the prominent areas. We shall see...
Thursday, 15 March 2012
A Comedy of errors - when kits go bad!
I'm not sure whether modellers make more errors during a build than they admit to - certainly those lovely tutorial builds you see in the glossy magazines always seem to go without a hitch - but my experience so far is that every model hits snags or I mess up somewhere along the line. Last night's modelling is a prime example of my 'bodge it' style of model making.
I was working on two different models and maybe this has something to do with my lack of perfect concentration as I had problems with both of them. With my Finnish KV I made an elementary boob with the painting and I also had some minor construction problems with my Soviet rocket launcher build.
My Finnish KV went a bit pear shaped when I was touching up my shoddy camouflage job. I tripped up and selected completely the wrong green to over-paint the ragged areas of my dark green camo pattern! Oooops!
Because of the light - or my eye sight - I didn't notice the mistake until I took a snapshot, the harsh flash bringing out the differences in the greens!
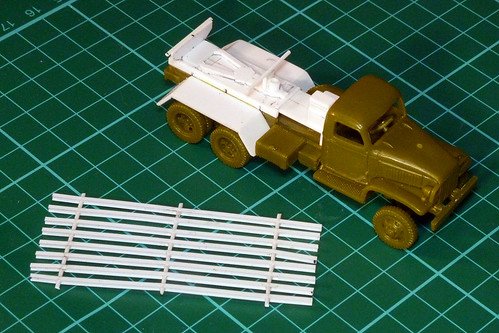
Next, I had a problem with the material I chose to make the rocket launcher with. I selected a delicate styrene 'I' frame rod which was roughly the right shape. But the thin sections of plastic proved a little too flimsy and bent slightly, despite my careful efforts. Not badly but enough to annoy me.
As you can see from the photo the bending isn't huge but it is apparent, especially at the ends. I now have to decide whether to live with it or re-make the frame in a more ridged material (believe it or not I am looking at wooden coffee stirrers at the moment).
With the green paint job I may have to over-paint the rest of the dark green areas to match. I'm already unhappy with this first stab at camouflage painting and further tinkering will only make it more messy. But them's the breaks!
I was working on two different models and maybe this has something to do with my lack of perfect concentration as I had problems with both of them. With my Finnish KV I made an elementary boob with the painting and I also had some minor construction problems with my Soviet rocket launcher build.
My Finnish KV went a bit pear shaped when I was touching up my shoddy camouflage job. I tripped up and selected completely the wrong green to over-paint the ragged areas of my dark green camo pattern! Oooops!
Because of the light - or my eye sight - I didn't notice the mistake until I took a snapshot, the harsh flash bringing out the differences in the greens!
Next, I had a problem with the material I chose to make the rocket launcher with. I selected a delicate styrene 'I' frame rod which was roughly the right shape. But the thin sections of plastic proved a little too flimsy and bent slightly, despite my careful efforts. Not badly but enough to annoy me.
As you can see from the photo the bending isn't huge but it is apparent, especially at the ends. I now have to decide whether to live with it or re-make the frame in a more ridged material (believe it or not I am looking at wooden coffee stirrers at the moment).
With the green paint job I may have to over-paint the rest of the dark green areas to match. I'm already unhappy with this first stab at camouflage painting and further tinkering will only make it more messy. But them's the breaks!
Thursday, 8 March 2012
Experiment No. 3 - Camouflage Part 3
Having gone through the various stage of masking with Blu-Tack and spraying a separate colour for the camo I have finally finished the basic pattern...
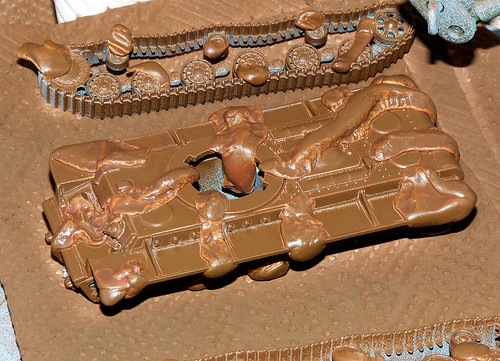
I have to say it didn't seem to be entirely successful, as you can tell from the photo there are clearly visible marks around the edges of the pattern where one paint layer joins the other. This hard edged effect isn't as clean as I was hoping it would be and now I will have to do a fair amount of remedial touching up.
Of course this can be partially explained by the fact that I am using spray aerosol cans instead of an airbrush as I am guessing that an airbrush can put down a finer layer of pain, thus negating any noticeable borders between paint patterns.
I can't help but be a little disappointed and have to wonder if I might have done a better job by just brush painting the camo?
Certainly these more subtle paint effects do seem to be best done with an airbrush, but I don't want to buy one of these until I can afford a very good quality one. I shall try a couple more experiments with this Blu-Tack masking technique on some spare plastic packaging to see if altering the hard mask to a softer one can alleviate the noticeable lines between colours.
I have to say it didn't seem to be entirely successful, as you can tell from the photo there are clearly visible marks around the edges of the pattern where one paint layer joins the other. This hard edged effect isn't as clean as I was hoping it would be and now I will have to do a fair amount of remedial touching up.
Of course this can be partially explained by the fact that I am using spray aerosol cans instead of an airbrush as I am guessing that an airbrush can put down a finer layer of pain, thus negating any noticeable borders between paint patterns.
I can't help but be a little disappointed and have to wonder if I might have done a better job by just brush painting the camo?
Certainly these more subtle paint effects do seem to be best done with an airbrush, but I don't want to buy one of these until I can afford a very good quality one. I shall try a couple more experiments with this Blu-Tack masking technique on some spare plastic packaging to see if altering the hard mask to a softer one can alleviate the noticeable lines between colours.
Wednesday, 7 March 2012
Experiment No. 3 - Camouflage Part 2
Camo colour 2 - Hazel Brown
Having laid down the base camo colour - mid-grey - I was ready for the next paint layer in the three-colour pattern. The second part of this experiment is to try out the BluTack method for masking out camouflage schemes, so here we go...
Applying the BluTack is - it has to be said - a little pain-staking, but it is quicker than the masking tape method AND it is better for making organic and rounded shapes. I do worry a little about how easy it will be to lift off, but we shall see.
The spray paint I used was Tamiya's TS-1 acrylic Red Brown and it's exactly the colour shade I wanted, though it is slightly glossy...
My main concerns are as follows:
1. WIll the various layers, sprayed one over another, leave a noticeable hard edge between the colours?
2. How easy will the BluTack be to remove?
3. Will the additional over-spraying cover up fine detail on the model?
Number one is the critical one. Not being very experienced in masking the couple i have done have produced noticeable ridges where one colour meets another, this seems partly due to my dependance on spray can paint which puts down a thicker coat of paint than airbrushing.
Having laid down the base camo colour - mid-grey - I was ready for the next paint layer in the three-colour pattern. The second part of this experiment is to try out the BluTack method for masking out camouflage schemes, so here we go...
Applying the BluTack is - it has to be said - a little pain-staking, but it is quicker than the masking tape method AND it is better for making organic and rounded shapes. I do worry a little about how easy it will be to lift off, but we shall see.
The spray paint I used was Tamiya's TS-1 acrylic Red Brown and it's exactly the colour shade I wanted, though it is slightly glossy...
My main concerns are as follows:
1. WIll the various layers, sprayed one over another, leave a noticeable hard edge between the colours?
2. How easy will the BluTack be to remove?
3. Will the additional over-spraying cover up fine detail on the model?
Number one is the critical one. Not being very experienced in masking the couple i have done have produced noticeable ridges where one colour meets another, this seems partly due to my dependance on spray can paint which puts down a thicker coat of paint than airbrushing.
Tuesday, 6 March 2012
Pegasus KV box set - Part 4
On the other hand, I am very pleased with the Pegasus KV models. They are quick and easy to make - though there are quite a few parts in the tracks - and a passably accurate (certainly excellent for war gaming if not for display). I especially appreciate the fact that you get all the extra build options.
Next I am applying the base coats and camo patterns.
Thursday, 1 March 2012
Experiment No. 3 - Camouflage Part 1
The primer coat
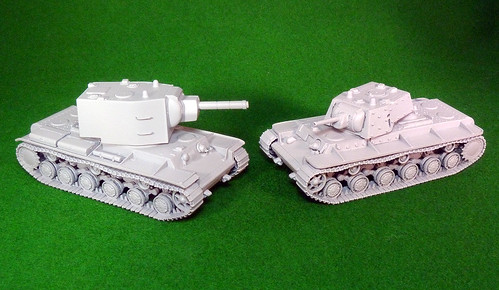
Working my way through the modelling basics it's time to look at camouflage paint schemes. So far the practise models I have done have all been olive drab (or variations of). The Pegasus KV box set is the subject for this experiment and I think I have picked an interesting colours scheme for one of the models.
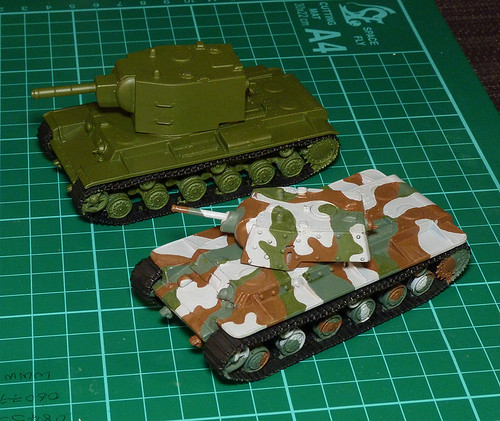
I have chosen a 3 colour pattern based on KV-1s captured by the Finnish army, a scheme made up of mid-grey and chestnut brown over a dark green base. However, using a painting technique which entails masking the various patterns using Blue-Tac means that I shall be laying down a base coat of the lightest colour first.
Coincidently, a friend of mine who is also a modeller suggested that I try priming my vehicles with a grey base coat before applying further coats of paint. So this is a good opportunity to kill two birds with one stone - try out a new paint procedure as well as a new more advanced technique.
Next: Masking out the camoflague with Blue-Tac
Working my way through the modelling basics it's time to look at camouflage paint schemes. So far the practise models I have done have all been olive drab (or variations of). The Pegasus KV box set is the subject for this experiment and I think I have picked an interesting colours scheme for one of the models.
I have chosen a 3 colour pattern based on KV-1s captured by the Finnish army, a scheme made up of mid-grey and chestnut brown over a dark green base. However, using a painting technique which entails masking the various patterns using Blue-Tac means that I shall be laying down a base coat of the lightest colour first.
Coincidently, a friend of mine who is also a modeller suggested that I try priming my vehicles with a grey base coat before applying further coats of paint. So this is a good opportunity to kill two birds with one stone - try out a new paint procedure as well as a new more advanced technique.
Next: Masking out the camoflague with Blue-Tac
Monday, 27 February 2012
Pegasus KV box set - Part 2
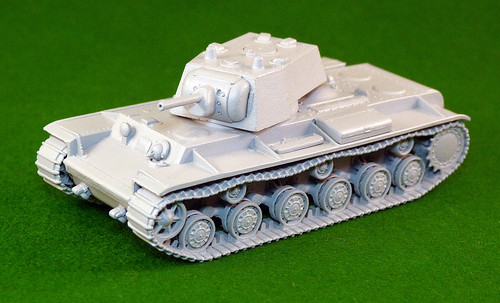
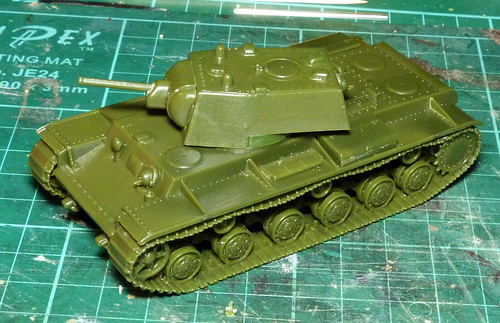
Popped the KV-1 together. Decided to go with the earlier version without the applique armour. Nice looking tank, although the track running gear was maybe a little complicated for a quick build.
I have chosen this model for my next painting experiment - camouflage.
Tuesday, 14 February 2012
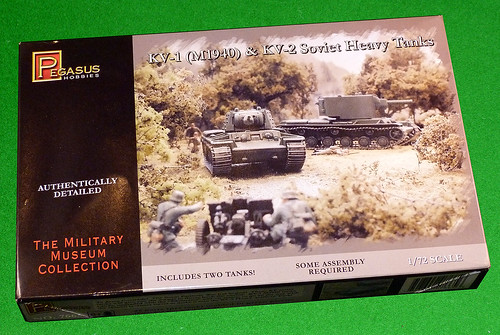
Pegasus 1/72 KV-1 & 2 quick build set review - Part 1
Fans of German WW2 AFV modeling enjoy a huge variety of vehicles to choose from, and even the Western Allied inventory is quite diverse. But modelers who want to immerse themselves in Red Army fighting vehicles might be forgiven for thinking that the only real choice you have is which variant of T-34 to build.
Luckily Pegasus Hobbies have come to the rescue of the quick build modeler with a selection of Soviet armored vehicles that represent both the early war years and the latter. In this case the KV series of heavy tanks were a nasty surprise for the Nazis during Operation Barbarossa that eventually provoked a German response in the form of the Tiger and the Panther tanks...
Subscribe to:
Posts (Atom)