Showing posts with label X-Ref: PH/GMCUS6/0312. Show all posts

Thursday, 15 March 2012

A Comedy of errors - when kits go bad!

I'm not sure whether modellers make more errors during a build than they admit to - certainly those lovely tutorial builds you see in the glossy magazines always seem to go without a hitch - but my experience so far is that every model hits snags or I mess up somewhere along the line. Last night's modelling is a prime example of my 'bodge it' style of model making.

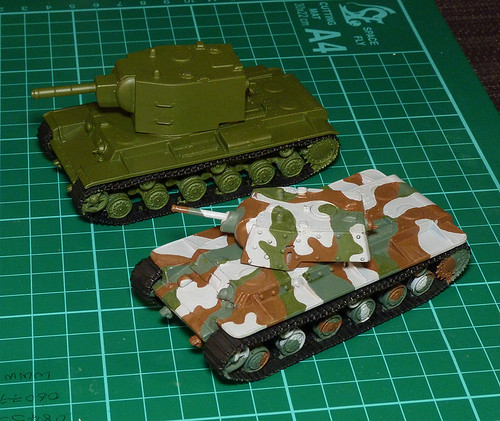
I was working on two different models and maybe this has something to do with my lack of perfect concentration as I had problems with both of them. With my Finnish KV I made an elementary boob with the painting and I also had some minor construction problems with my Soviet rocket launcher build.

My Finnish KV went a bit pear shaped when I was touching up my shoddy camouflage job. I tripped up and selected completely the wrong green to over-paint the ragged areas of my dark green camo pattern! Oooops!


Because of the light - or my eye sight - I didn't notice the mistake until I took a snapshot, the harsh flash bringing out the differences in the greens!

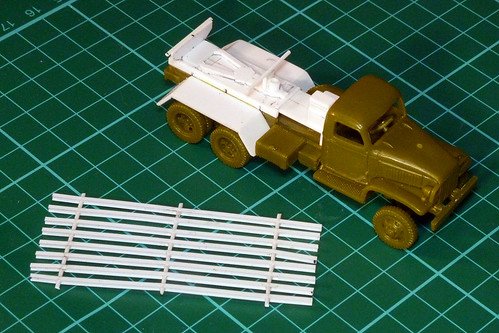
Next, I had a problem with the material I chose to make the rocket launcher with. I selected a delicate styrene 'I' frame rod which was roughly the right shape. But the thin sections of plastic proved a little too flimsy and bent slightly, despite my careful efforts. Not badly but enough to annoy me.


As you can see from the photo the bending isn't huge but it is apparent, especially at the ends. I now have to decide whether to live with it or re-make the frame in a more ridged material (believe it or not I am looking at wooden coffee stirrers at the moment).

With the green paint job I may have to over-paint the rest of the dark green areas to match. I'm already unhappy with this first stab at camouflage painting and further tinkering will only make it more messy. But them's the breaks!

Monday, 12 March 2012

Pegasus US Army truck to BM-13-16N conversion - Part 3

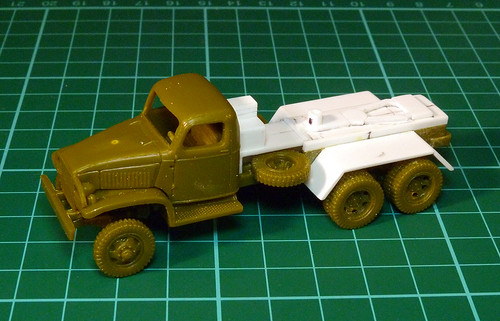
I was hoping to get the launcher frame completed tonight but got side-tracked. Instead I finished off the chassis and flat-bed of the GMC-come-US6 truck.


I think I have just included enough simplified detail to produce a passable impression of the truck. I've kept it all very quick and easy to make, with no small or fiddley components. I can't wait to get the launcher frame on!

Pegasus US Army truck to BM-13-16N conversion - Part 2

The first half of this conversion job is to make the platform on which the rocket launcher will sit. And this is where the first problem cropped up.

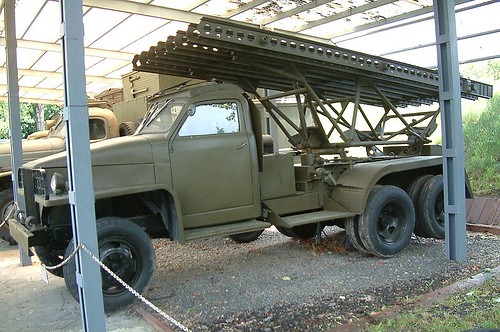
The Pegasus US Army truck is based on the GMC CCKW, in turn the Soviet US6 is a version of this American lend lease vehicle, BUT the BM-13-16N vehicle is a modified version of the US6. Short story - they ain't all exactly the same vehicle!

Above: The real BM-13-16N differs in configuration from the GMC CCKW truck on which the Pegasus Hobbies model is based. I have to work around these differences if I want to produce a 'quick build' model. Source: Wikipedia

There are small differences in the layout of the BM-13-16N truck in order for it to accommodate the large rocket launcher system. Most noticeably, the fuel tank and spare wheel are reversed, and the wheel is mounted vertically (on the right side) instead of horizontally on the left side as it is on the Pegasus model. Now I could spend some time chopping and sawing and remounting these components to be completely accurate, but bearing in mind my goal of producing a 'quick and dirty' Katyusha rocket launcher - that's easy to make for war gaming - I don't really want to muck about too much.

Were this a display model naturally I would take the time and effort to make this model as accurate a possible, but will the placement of the spare tyre really have an impact on the models intended use as a war gaming piece? Better that the conversion is easy to do with the minimum of structural changes (though this up to you - the modeller).

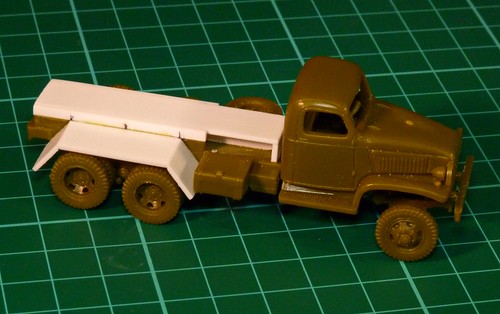
So, first of all I made a raised flat bed platform designed to incorporate the horizontally positioned spare wheel into it's framework...

Above: Here you see - in white plasticard - the simple box structure I built on the chassis so
that the spare wheel could be easily incorporated.

This method does means a inaccurately high platform, but it's a fudge I am willing to accept in order to make the construction something you can do with the 'out of the box' Pegasus model.

Next there is the rear wheel mud guards, and again we have to make a design decision based on ease versus accuracy. This decision is necessary as the real truck's mud guards had nicely curved fenders matching the shape of the wheels, not a very complicated piece of modelling I guess but thinking in 'quick build' mode it does seem logical that this element could be simplified to just a straight edged structure...

Above: I went for the easy option and simplified the rear mud guards with this angular shape. Three rectangles of plasticard glued together in no time at all.

Now, you will have to look at these two design simplifications yourself and decide just what level of accuracy (or rather inaccuracy) YOU can live with. My model is obviously the most simplified option based wholly on ease of construction over authenticity - just because I want to see how quickly I can do this - but you can adjust the level of detail to match your particular tastes based on just how much time you have to spare.

Next: The rocket launcher framework
Sunday, 11 March 2012

Pegasus US Army truck to BM-13-16N conversion

While I do have several projects on the go at the moment they are all in the painting stages, which - to be honest - isn't my favourite part. I like to build! So I though a quick conversion job would keep me entertained.

I wanted some Soviet artillery to go with my WW2 Red Army tanks, and naturally the infamous 'Stalin's Organ' must be included in my war gaming fleet.

Above: The Soviet BM-13N was based on the American lend-lease Studebaker truck, which was given the designation US6 by the Soviets. Source: Wikipedia

While there are plenty of display kits for the mid-war model BM-13-16M - which was the standardized version build on lend lease and licence built Studerbaker trucks - there aren't any quick build alternatives for the war gamer. I want to see if I can make a quick and dirty conversion designed with the war gamer in mind.

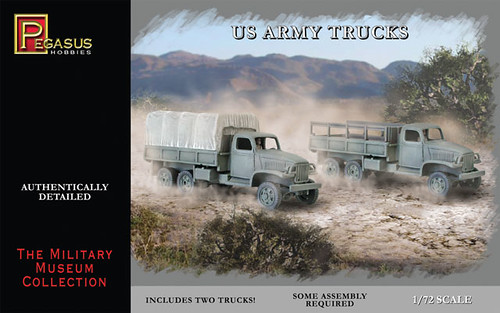
Luckily Pegasus Hobbies produce a quick build set called - rather vaguely - 'US Army Trucks'. You get two trucks in the set for about £8 and they are quite nice - if simplified - representations of the GMC CCKW, otherwise known as the Studebaker 'Deuce and a Half'. This hugely successful truck was the basis for the Soviet US6, which in turn was the platform for the Katyshua rocket launcher system.


The conversion process
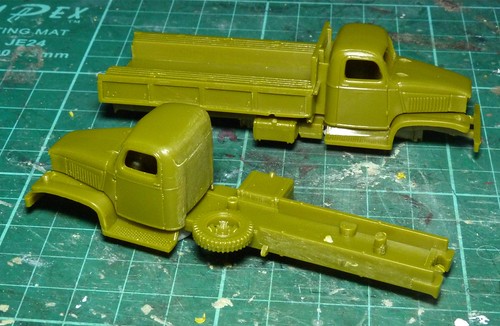
Pegasus's version of the truck is the cargo carrying variant with a flat bed built onto the rear. We need to get rid of this before we can start building the launcher framework onto the chassis. Unfortunately the flat bed and cab are a single component of the model, so it's time to get your saw out!


The two major truck components of the model are the lower one-piece chassis and the upper cab/flat bed, these clip together once you add the cab interior details (seat, dashboard, steering wheel, etc). So I used my Dremmel multi-tool and it's cutting wheel accessory to separate the cab from the flat bed. It's quite solidly attached and will need some shaving and sanding once detached to smooth out the join.

I should mention something about the general quality of the Pegasus Studebaker. When I started modelling again, not so long ago, the first model I made was the Airfix GMC CCKW and I have to say that although the Pegasus kit is obviously simplified some of the detail is quite nice. Areas that are obviously dumbed down are the front grill and there is no 'glass' wind-shields included. It is perfectly adequate for war gaming and in fact quite an attractive model.

Next: Making the new launcher flat-bed.