Showing posts with label X-Ref: Gerinf/0414. Show all posts

Tuesday, 24 June 2014

German Squad B - Batch 1 Finals


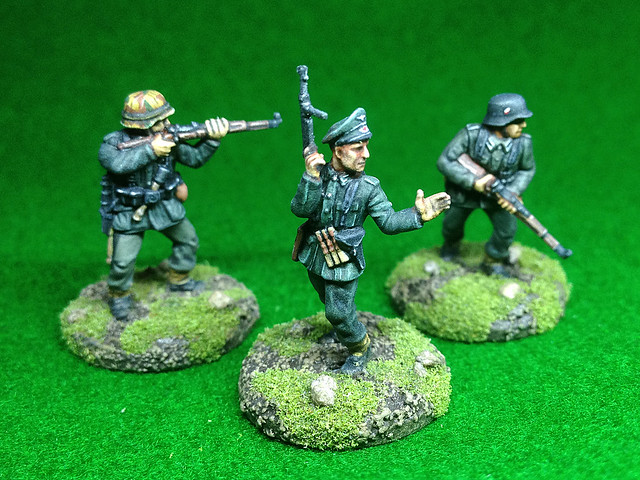
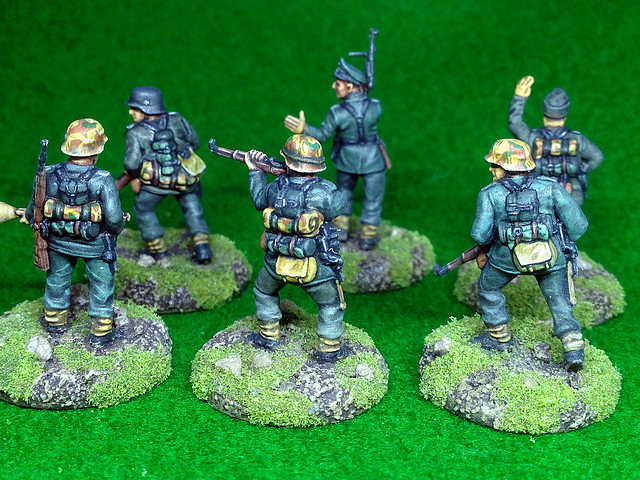
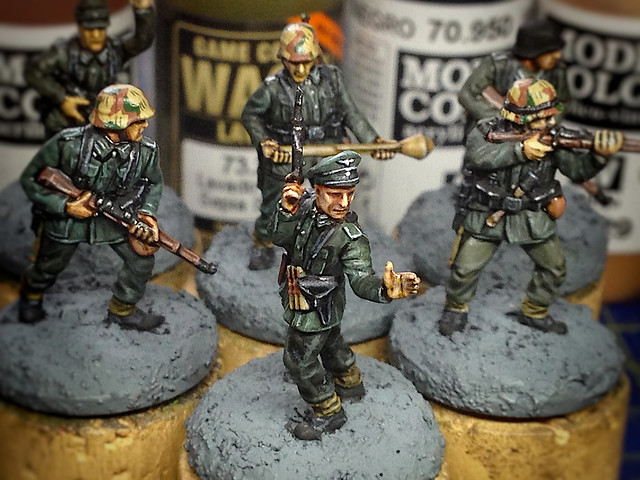
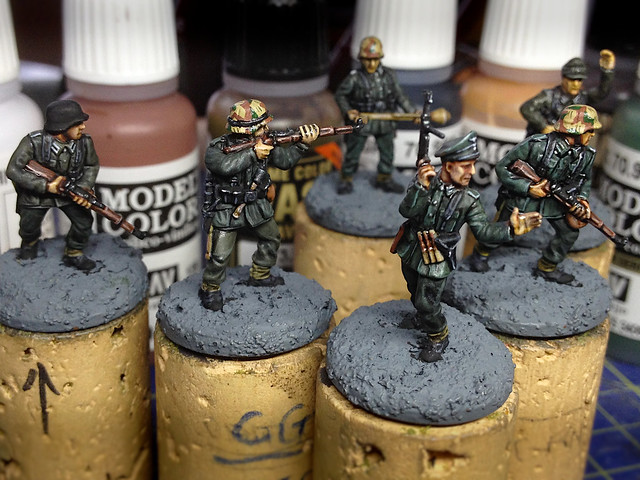
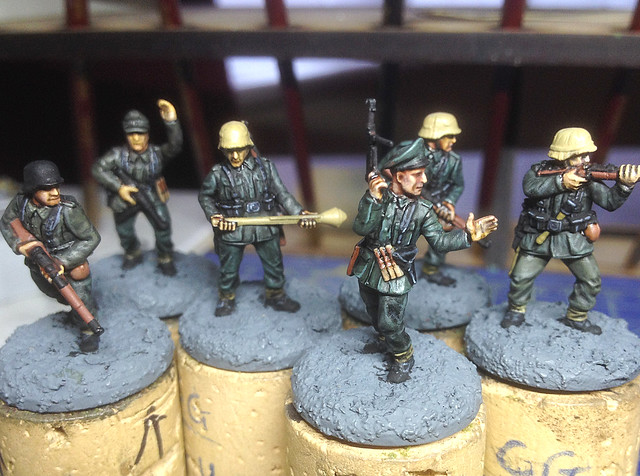
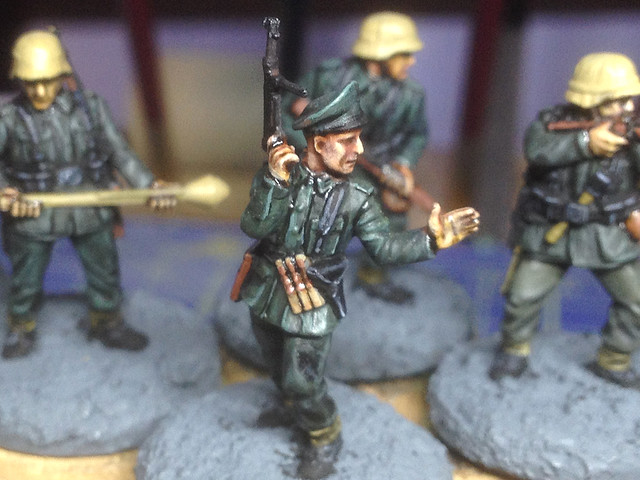
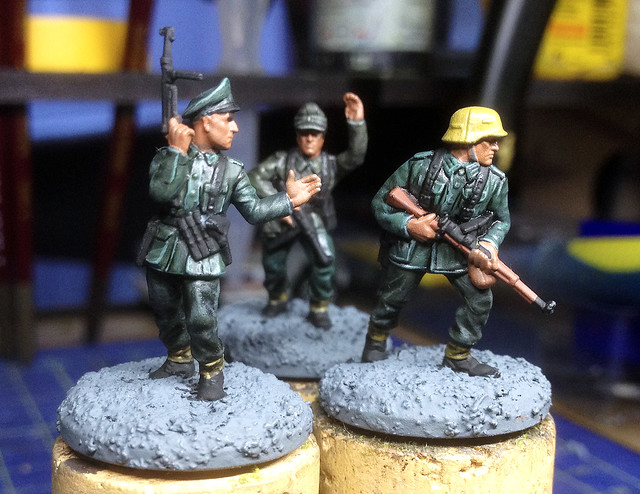
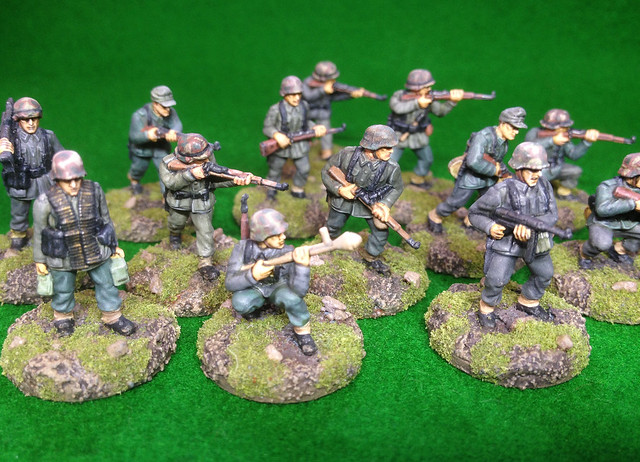
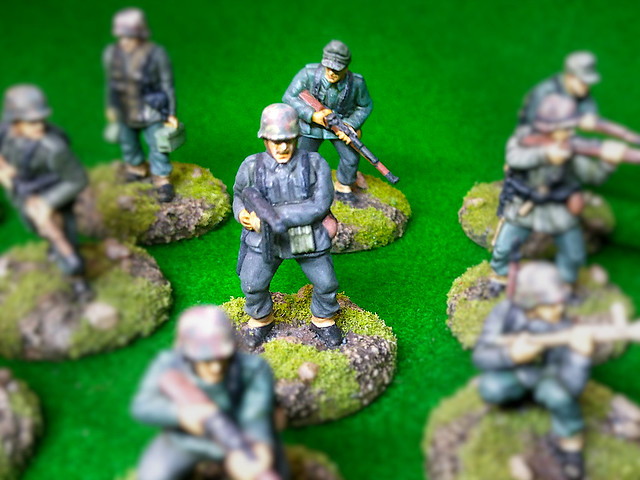
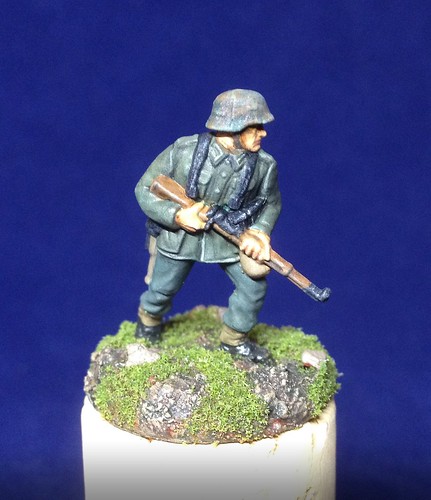
I got the first batch of my Command and Squad B Bolt Action Germans varnished last night. As hoped a final light spray of matt varnish just took the glossy shine off the figures that was caused by the use of inks.

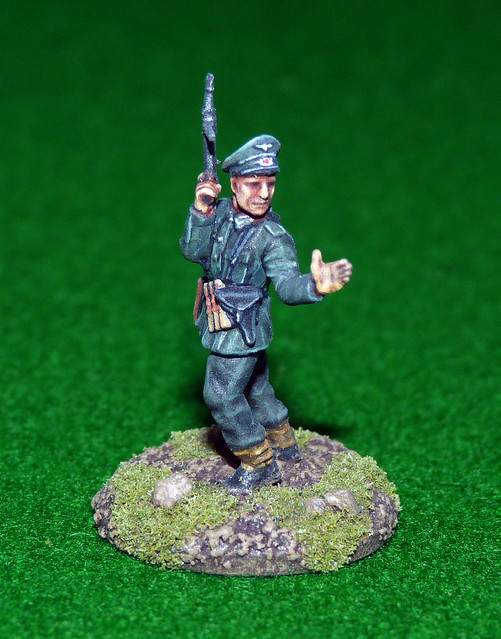
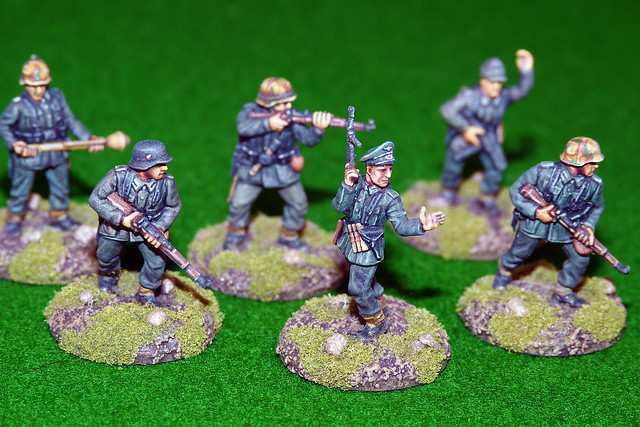
The Command Group consists of the First (or 2nd) Lieutenant and two 'body guard' riflemen. The first batch of Squad B (my second infantry squad) has an NCO (with SMG), a rifleman and a rifleman with Panzerfaust. The final number of infantry in Squad B will total nine men.

My Bolt Action German Command Group.
Initial batch of Squad B of my Bolt Action German infantry.
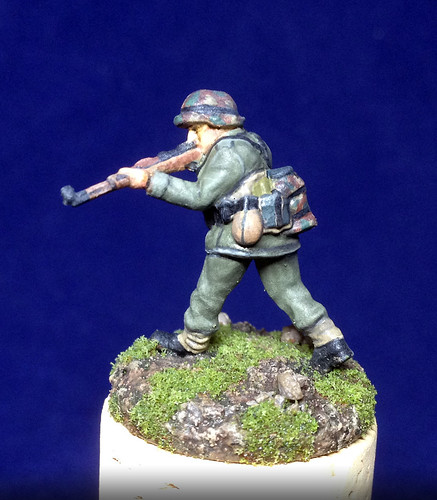
I am generally pleased with this batch of soldiers as I think I have taken my painting up a level, both in the improved brushwork and the new techniques I have employed. As I mentioned in my prior posts not everything that I tried from the 'Painting War' magazine worked, but a lot did - or at least I was able to come up with solutions based on the tutorials that worked for me.

Ironically, because I have used all my German infantry as guinea pigs, the overall quality of my first Bolt action infantry force will be something of a mixed bag. But that's why I started with the Germans first - I didn't mind them looking a bit shabby in places. (I would have hated to have made a bad job of a British unit!)

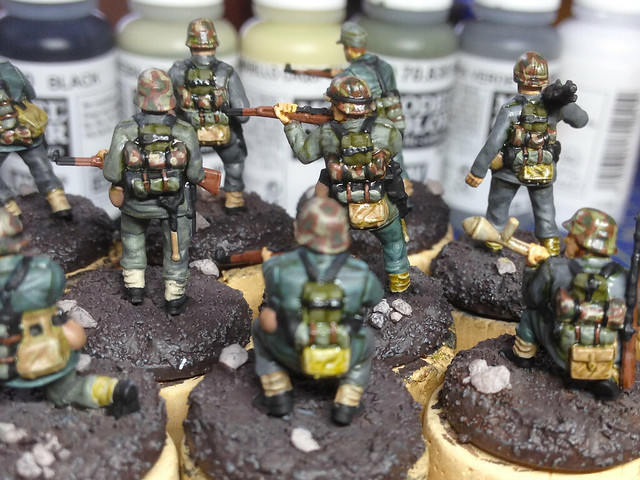
My detailing is improving - I'm rather pleased with the job I made of the
infantry kit and accessories.
Well, I just have the remaining members of Squad B to paint - using the techniques I liked so far - and then that will be my very first ever wargaming force completed. I can then go on to do one of two things next - start the opposing American infantry force OR continue on with the German theme and complete the supporting fire teams for this 'army'.

But, for the moment, I'll have a rest from the figures and get back on with my Finnish Army transport project for some variety.

Friday, 20 June 2014

German Squad B - Detailing Part 2

When do you stop detailing? I suppose you can go on and on, luckily I did have a plan and I stuck to it. My main concern was the completion of the insignias - I stopped short of rank badges - and the toning down of the helmet camo.


I'll admit - and I wouldn't normally say this - that I'm quite pleased with what I've done here, small jobs that they were. I kind of feel that I'm starting to get somewhere. Though I'm really glad I didn't have to do lot more helmet insignia, I wouldn't like to have to do a full army of these!

I've said this before and I will say it again, however, you have to give Zvesda a lot of the credit here by producing such a beautifully crafted German officer figure - it made my job easier.


Next: Basing.

Wednesday, 18 June 2014

German Squad B - Detailing

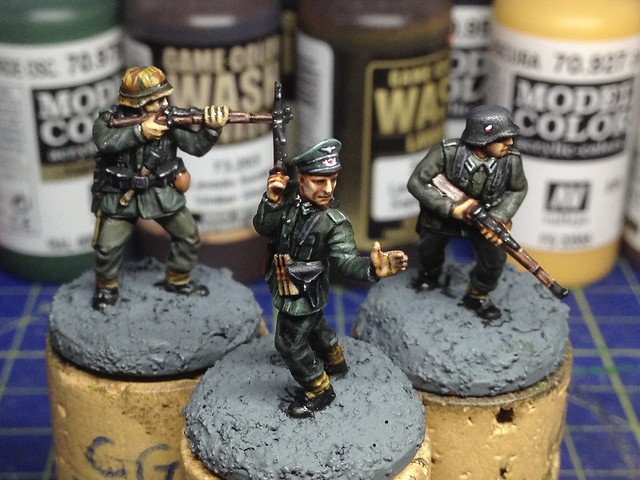
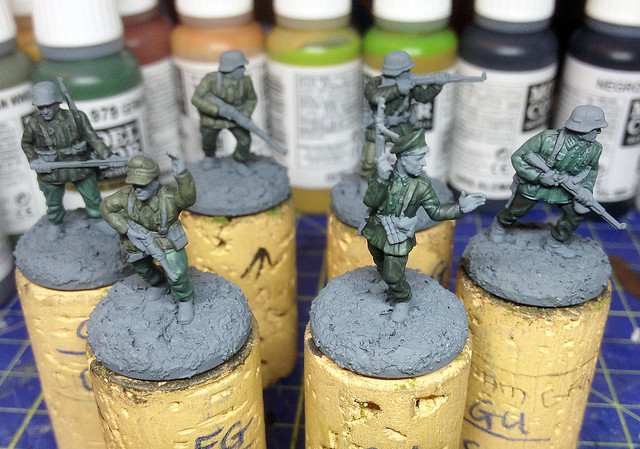
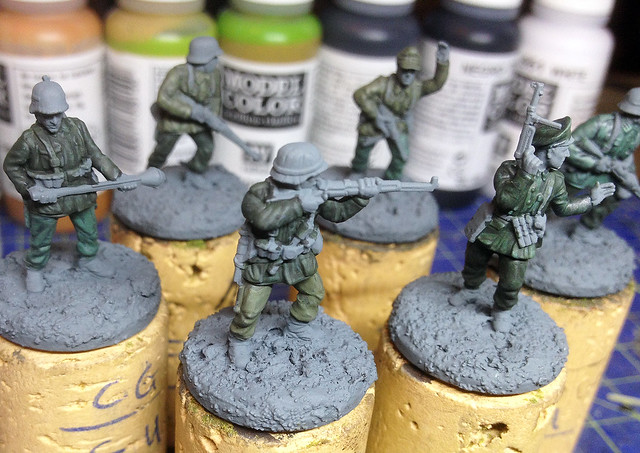
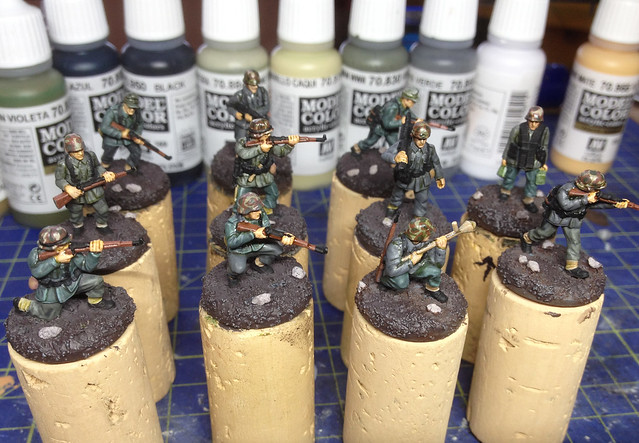
I did a bit more to my little Germans last night, this involved picking out the details and finishing off the rifles. We're very nearly there though...


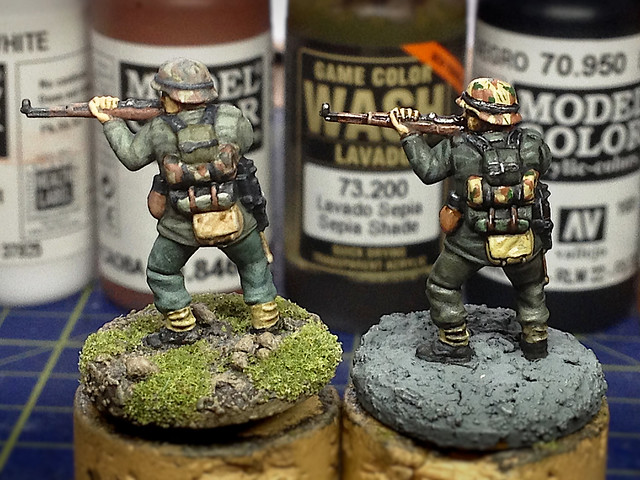
At this point it's perhaps interesting to compare one of my early attempts at one of my 'Squad A' Germans with one of these latest examples...

Early attempt at these figures on the left, latest figure on right.
I think my technique has visibly improved somewhat, certainly the level of detail has gone up a notch. But I still feel that this current technique - based on tutorials in the 'Painting War' magazine - is a little long winded and could be streamlined to suit my requirements better. I really don't want to spend this much time on painting figures when I suspect that skipping one or two of the tutorial's convoluted intermediate stages will still get me a happy medium between the two results shown above.


Next: Weathering the camo helmet covers and then basing.

Wednesday, 11 June 2014

German Squad B - Skin tones

A bit happier today, the painting of the soldiers' flesh tones using the Painting War guide went better than the uniforms. But generally everything seems to be sorting itself out, it's just taking so much time with this method...


The good news is I think I have finally found a formula for painting skin tones that I'm comfortable with. The trick for me was using inks rather than acrylics, they seem to blend in a softer way and the rich semi-translucent colours seem to suit the painting of flesh.


I've already started working on the equipment but still have to do the camouflage items and also the rifles. Finally there's the basing, of course, then that'll be that.

Wednesday, 4 June 2014

German Squad B - uniforms complete (not happy)

In short the new technique for painting miniature I was trying out with this squad was far too complex and convoluted for me. In the end it's sheer fussiness - when compared to my simplified method - simply took far longer for not much of a noticeable improvement...Maybe I was doing it wrong, or I'm just not a very good painter!


To be honest, I think I could have achieved a similar effect by adding a more aggressive highlighting stage to my 'quick' method.

Don't get me wrong, I don't think the effect is bad (for me) - I just think it took me three times as long to do it as 'my way'. It has taught me a few new tricks, but otherwise I'm a bit disappointed.

Next: The fleshtones - maybe the 'Painting War' technique can improve my skin painting, we'll see.

Wednesday, 28 May 2014

German Squad B - test figures

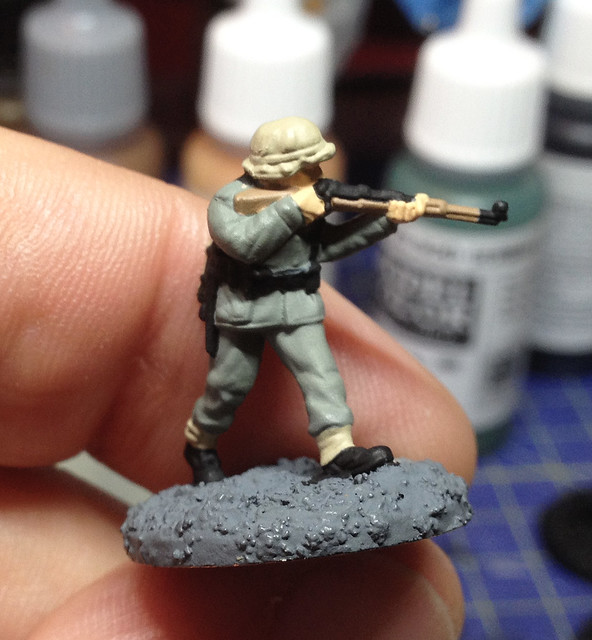
For my second squad of Germans I am trying out the painting techniques featured in Issue 1 of  the 'Painting War' magazine. It's a bit more convoluted than the method I used with my initial squad, in fact it's almost the reverse procedure working, as it does, from a dark base coat to light - whereas I worked from a light base coat to dark!


At this point I am about halfway through the process (yes, just halfway) of painting the uniforms! There are more intermediate paint layers in this method than my simplified one - 6 shades as opposed to my triad of shadow/target/highlight. I am already a bit skeptical - but I guess this is the length to which top-class figure painters go to at this scale...Is it worth it for wargaming I have to ask?


As before I have gone for a rather 'shabby' look with my Germans, using a hotch-potch of mis-matched jackets and trousers colours. I really want a war-weary look rather than pristine parade ground uniform ensemble.

And also just as before, my variations on 'Field Grey' center around Vallejo's 920 German Uniform, 830 Field Grey and I am trying out 979 German Camo Green. All green tone themes, but going darker and lighter. While drab and subdued it still should make these figures suitably distinct from the colour scheme I am using for the Americans I am putting up against them.

At this point I am thinking my way was certainly easier and I think this method is a bit of overkill for 20mm figures and was really intended for the larger 28mm figures that are used for Bolt Action.

Thursday, 22 May 2014

Bolt Action - First German unit!


Completed 'Squad A', my very first full Bolt Action unit (I need to get at least another like it to make a viable playable force - and, of course, make a similar opposing force to get a game going). So still a bit of work to do before I can start really learning Bolt Action with a couple of basic forces.

More importantly, perhaps, is that this is my very first completed 1/72 set of figures! Hooray!


Overall I'm relatively satisfied with the results of my amateurish painting experimentation. Everything has been done on a 'suck it and see' basis, I haven't developed a method for painting figures as yet (but I'm working on that and we shall see if there are noticeable improvements when I get around to painting Squad B). In particular I am having a hard time with faces.

Obviously I have a lot to learn about painting figures and I'm a bit annoyed that when I varnished my guys the matt varnish - naturally - dulled down some of the vibrant colours and left them looking a bit 'flat'. Next time I may try a satin finish, just to perk the colours up a little bit.

However, on a more positive and less self-critical note, I am quite pleased with the job I made of the battle-weary dulled down camo and the equipment...


I noticed - when looking at other Bolt Action painted figures done by others - that there seems to be a trend to making colours a little more vivid. I kinda get this as - in my opinion - Bolt Action is kind of a 'comic strip' sort of game - it's like a game version of those Commando or Battle comics that I used to read as a kid. Everything is larger than life and a little - frankly - silly (I mean that in a nice fun way).

I hope Bolt Action fans who read this will not be offended!

Having vivid and brightly painted army uniforms makes sense from a tabletop game point of view simply so players can quickly recognise which infantry is which on the table. Dulled down and drab uniforms might seem more historically accurate but then it becomes a little harder to tell infantry apart then. But it's all a matter of taste (they are your soldiers) - mine are a little duller and battle-worn.

Monday, 5 May 2014

Painting PSC's Late War German Infantry - Pt. 4

Shady Germans
The shading stage of doing figures is the hardest for a beginner like myself. What is the best way to mimic the shading of material and the folds in clothing? A quick look around the web showed me that there are many different techniques and methods, using washes and/or subtle blending.

As usual I decided to muddle my way through picking some techniques I feel are achievable at my level of skill (I will attempt some of the more complex blending techniques when I feel I have improved my brush skills). One of the things I am experimenting with at the moment is inks...


Sometimes the inks can can appear a little glossy, but after the final matt varnish coat this isn't a problem.


The amount and variety of equipment was a bit of a task to paint, but the good thing about using the ink to shade the borders between items is that it hides my wobbly painting! At least the camo turned out OK.

I finished by adding a little highlighting. Just some streaks of lightened colours on the raised folds of material and that's about it really. The one thing I am really unhappy with is my painting of the rifles - I haven't fathomed nicely blended wood shades yet. :(

The faces need some touching up now and there's a bit of neatening up to do, but it's on to the flocking of the bases next.

Tuesday, 29 April 2014

Painting PSC's Late War German Infantry - Pt. 3

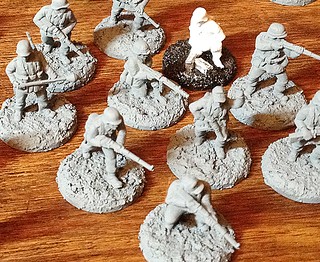
Having completed my two guinea pig German figures and experimented with some of the painting techniques and colours I wish to use it's now time to start my first full squad of 'Late War' Germans!

It's pretty much a production line job, applying one colour at a time across the figures, working 'inside out'. I start with the flesh - Vallejo's 955 Flat Flesh - and then move on to the tunics, then equipment and so on...


On the matter of what constitutes 'Field Grey' I have decided to be flexible and create what I feel was probably a late war scenario in the Wehrmacht Heer (army) where uniform quality was 'variable'. I wish to give the impression of a decline in supplies with a somewhat rag-tag look to my soldiers.

Obviously, while uniform quality probably did vary at this point in the war uniforms were most likely issued from supplies in batches, so units probably had uniforms of similar colour and quality - but this would no doubt vary from unit to unit as they received different batches from different manufacturing factories. So my intention to vary colours quite radically within one unit is a bit of exaggeration for effect.

The base coats applied, pre-shading.
So, to make a squad wearing uniforms of mixed colours and shades I set up a triad of colours and mixed and matched them randomly...


I began with laying down a tunic or trouser colour of the lightest shade of my target colour, then when that was dry I gave it a good going over with a wash of the 'out the bottle' target colour itself (to create some subtle shading and modulate the overall colour back toward a 'medium' shade). Then I worked on the shadows and deep creases with a darkened shade of the target colour. And finally, I added some highlight details using a near white version of the target colour.

One thing I found when doing my test figures was that it was best to slightly over-exaggerated effects. Subtle highlighting, for example, was lost somewhat when I vanish coated the figures. Slightly exaggerated highlights remained visible, though a little subdued, after the varnish coat.

You sort of get a feel for how much to over-exaggerate colours so that - hopefully - they turn out the correct target colour at the end of the process. But that's the beauty about doing test figures first.

It's all very interesting and I'm really enjoying the learning experience - but you really get to appreciate it when you see a very well painted figure...Boy! Those experienced guys really put a lot of practise in!

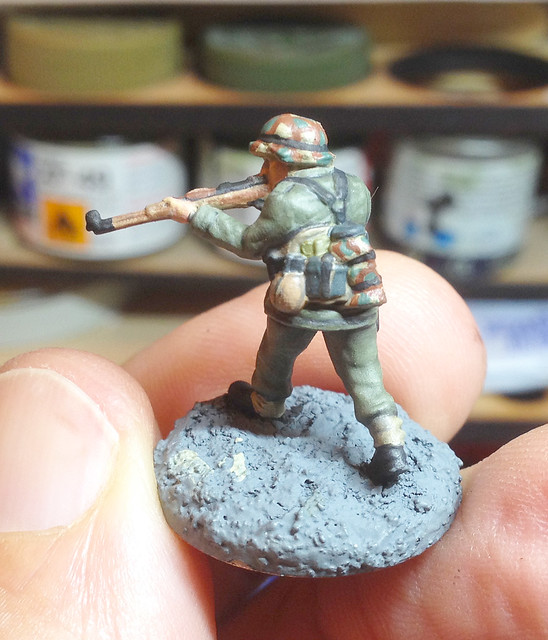
Helmet camo painting...For beginners (like me)!
As these are very early days as far as figure painting is concerned I am trying to keep everything pretty simple. Painting realistic camouflage patterns on Braille Scale soldiers is probably one of the more complicated techniques to learn (along with realistic skin tones) and I would have been happier to have avoided doing camo at this point - unfortunately my PSC Germans nearly all have camo helmet covers. Still, could have been worse and I guess it's a nice introduction to this subject.


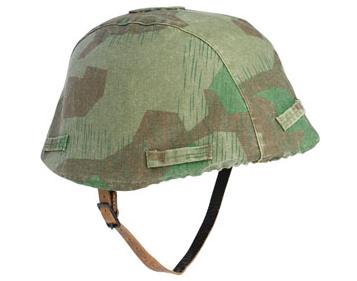
I was surprised to discover that the lovely 'Splinter' pattern camo that was used by the Germans was not a late war innovation and actually stemmed from the 1930s!

Buntfarbenaufdruck 31 or, more commonly, Splittertarn (splinter-pattern) was first printed on the newly designed and issued triangular tent/poncho called the dreieckszeltbahn ("3-corner tent"). On the PSC Germans this 'ponch'-come-tent is visible as part of the equipment carried on their backs, and of course the camo is also displayed on their helmet covers.


For more precise information regarding the nature, position and colour of German
army equipment and how it was carried refer to this excellent site: www.mp44.nl/

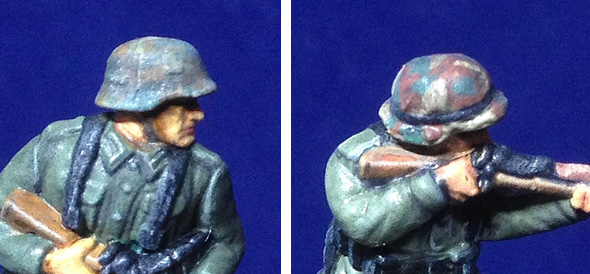
As an experiment I painted my helmet covers in two ways, one battle-worn and faded (or dirty) and the other cleaner and with more vivid colours (see above picture).

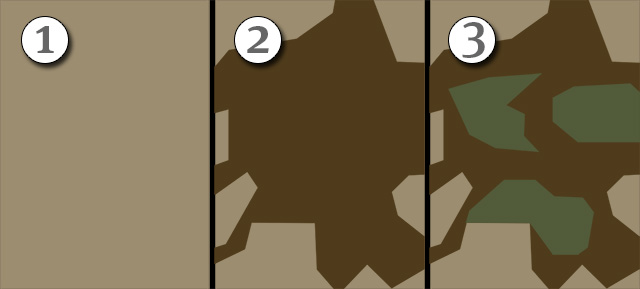
Weathering and shading aside the actual paint process here - and on the rolled up poncho - was pretty simple thanks to Splittertarn's hard-edged, solid coloured geometric design. I simplified the pattern somewhat (for scale) and followed this procedure...


Now a couple of points regarding authenticity. First of all, from all the various reference photos I have looked at of the actual helmet cover there is some variation in the scale (coverage) of the pattern and also some colour drift - sometimes the base colour is khaki-buff and at other times (as with the example above) it has a slight green hue to it. But, secondly, I also didn't try to replicate the very small and fine green 'dash' pattern which was overprinted onto the basic geometric design of the camo simply because at this scale I doubt it would be seen.

(Kamoflague.net in fact described the 'khaki' base colour as '...light field grey or tan background'.)

As with the basic uniform I do intend to create some colour variations within my squad to reflect wear and the position of the camo on the cover (it was not always the same depending where the original cloth was cut from the roll).

NEXT:  Fine details, then the shading washes.
Sunday, 27 April 2014

Painting PSC's Late War German Infantry - Pt. 2

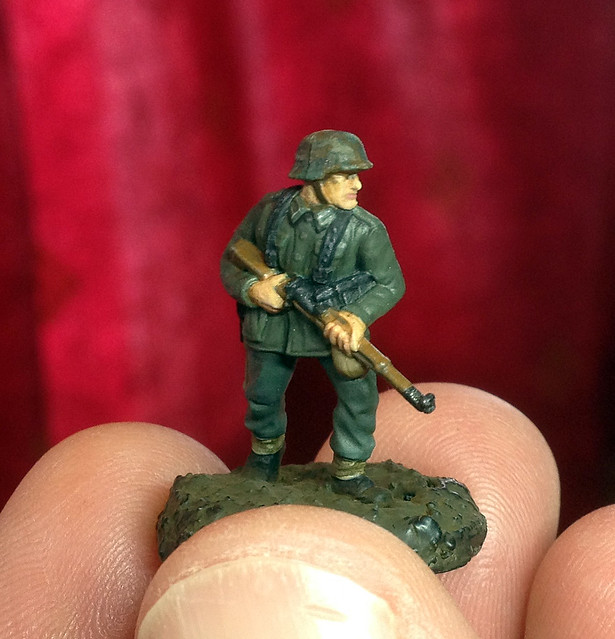
It's been a bit of a figure-fest (that sounds wrong) this weekend and I got my 1/72 PSC Late War German test figures finished...


I got a lot out of doing these two models, it was very good practise and will make things a little easier when I undertake the job of painting the two full squads I have sitting on my workbench!

These Germans will be the first of my two Bolt Action practise armies - I intend to build a little American force to oppose them. Just a couple of infantry squads, some fire teams and a couple of vehicles.
So, why not 28mm you ask? ...Simple - cost!

I don't want to fork out large sums on a 28mm Bolt Action army until I know what I am doing. These 1/72 fellows were a minimum outlay as I already had them in my stash. Yes, the Yanks will add some cost but nowhere near the same cost as the equivalent 28mm force.


At this stage it's simply more important to have a couple of armies with which I can learn the Bolt Action rules and try out a few test games. At length I will decide on which army I fancy making in 28mm (I am toying with a British 8th Army force - in honour of my Dad).
Of course, all this figure painting is very good practise for my Finnish Army project...Which is what I will be turning my attention to next.

Thursday, 24 April 2014

Painting PSC's Late War German Infantry - Pt. 1

While painting my 'test Finns' I started experimenting with one of the PSC Germans I made for last week's Bolt Action game. I hadn't intended to do two figure painting projects at the same time but I wanted to see if a nicely made figure would make any difference to how a painted model would turn out. The results were interesting.

To begin with I started my German figure in exactly the same way as I had my Strelet's Finns, but I had already primed the German with a mid-grey colour.

I haven't really decided what makes a good colour for a primer base as yet - some people say white and some prefer black (for speed painting), so I thought grey was a good compromise!

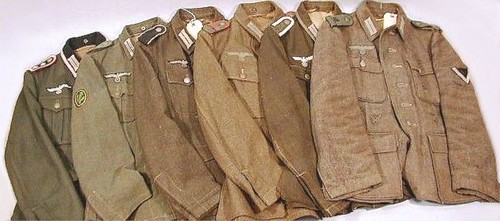
Anyhoo - first problem. Like most people I know that German infantry wore uniforms of Field Grey...That would be a sort of mid-grey them wouldn't it? Er, after checking out a couple of Osprey reference books I discovered that Field Grey wasn't as grey as I imagined!

Mid-grey, greeny-grey, browny-grey, buffy-grey, more grey, grey...What the
flip? Afraid I don't know the original source of this photo but it regularly
appears on forum threads about German Field Grey.
Osprey reference: Men-At-Arms 'The German Army 1939-45 (5) - Western Front 1943-45'

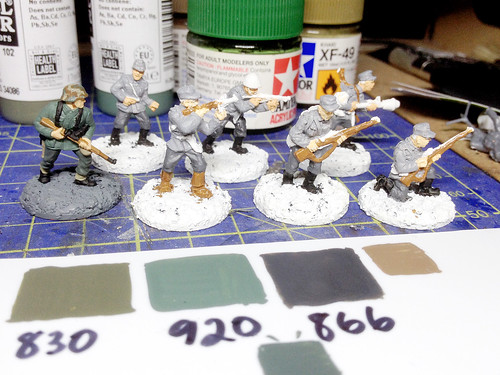
Plastic Soldier Company recommend Vellejo's 920 German Uniform and 886 Green Grey for their figures, but I found 920 too green and 886 too dark...

Painting my German (far left) along side my Finns, below are my Vallejo
paint swatches, I tried 920 for the jacket first but thought it too green.

I tried 920 German Uniform at first but had to repaint it with a grey wash as it was far too green for my liking.

Left: My first base coating attempt, the jacket is too green but I like the grey of the trousers, so I later gave the jacket a light wash of the 866 Grey Green to darken it a bit.

I realise that a lot of reference does mention that German Field Grey did have a green tinge to it, but at this small scale I imagined that would be quite difficult to see unless one exaggerated this for effect (which some modellers actually seem to have done). My preference was based on all the old war films I used to watch, Field Grey was mid-grey as far as I was concerned!

So it was back to the drawing board as I began to shade my first attempt at a Late War German. I began by toning down everything so it looked a bit 'war weary', but I did find that the problem was that I had already painted him a medium colour, so in darkening it I was risking the finished model turning out too dark...


Not too bad, but as I suspected probably a bit too dark - dark enough that the colours are muddy and indistinguishable - so I figured that really you do want to exaggerate and over-lighten the main colors so you can get the sense of a distinctive German uniform (and be able to distinguish it on a war game table from other armies). To his end I decided to have a second go - but this time I would start with lighter base colours...


This time I started with - perhaps obviously - Vallejo's German Field Grey WWII (830) but added a couple of spots of white to lighten it one or two shades. I did the same with the Khaki I put down as the base for the equipment, helmet cover and gaiters.

The theory here is when I start to add the shading wash the overall effect will be to darken the lightened base colour back to the medium target colour. So, my lightened 830 Field Grey when shaded should approximate 830 out of the bottle (if I got the mix right)...


It seemed to work! On the left - above - you have my first attempt with the 'out the bottle' Vallejo 830 Field Grey tunic, and on the right my shaded second attempt which started too light but then was 'modulated' back to near 830 again, but with shading!


I'm happier with the second attempt for wargaming purposes. Historically, I *think* my first attempt was closer (though maybe a tad too dark) to the look of WWII German soldiers, but was too muddy and indistinct to act as an easily recognisable marker on the tabletop for a game. My second attempt is perhaps a little exaggerated and too light but is a distinctive colour that would mark it out as German compared to other soldiers on the tabletop.

It's a matter of preference and I won't stop experimenting with shades as I go on the paint the remainder of my Bolt ACtion German force. Bearing in mind the reference photo of the real German tunics I included above I have some latitude for a variation in shades. I think the ideal Field Grey for gaming is probably exactly halfway between the two test samples I have painted.