The diffuser
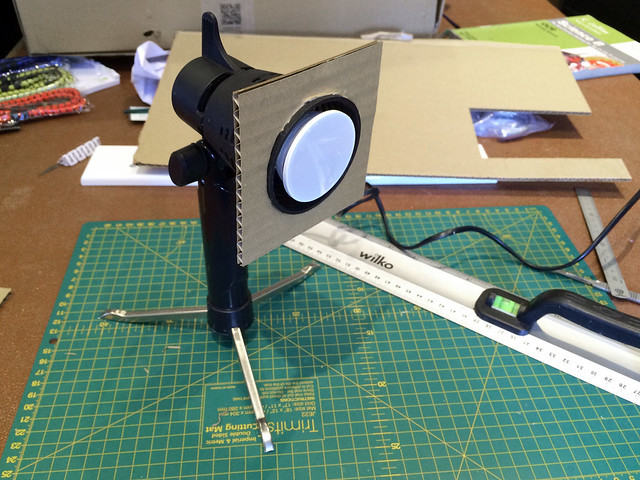
Having sorted out the shape and how to construct my mini soft-box, it's time to try the contraption out and see whether it actually works! As a diffuser, I took the advice of some of the feedback I have had (than you) and am trying out grease-proof baking paper (£1 a roll from Wilkos)...
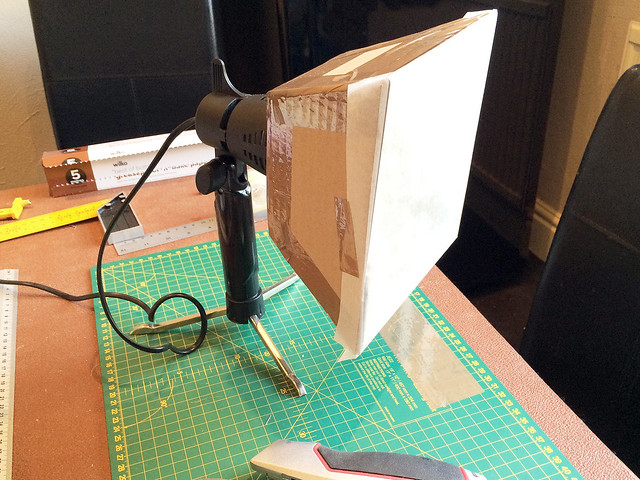
I was worried whether this material would be a bit too flimsy, but in the end, I figured that even if I have an accident and pierce the paper-like diffuser I have a whole roll of spare material with which I can replace the damaged piece.
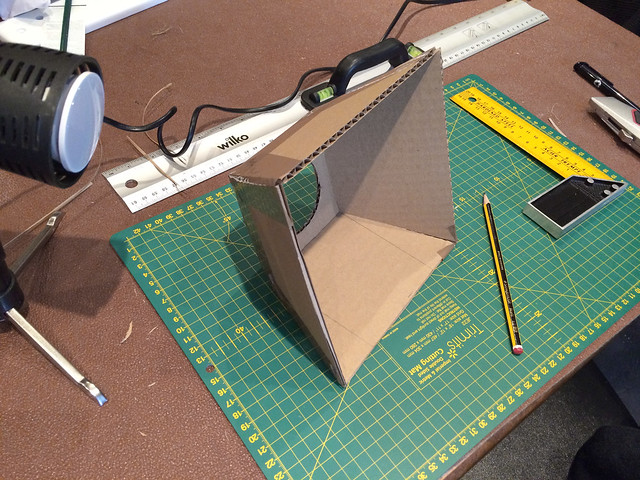
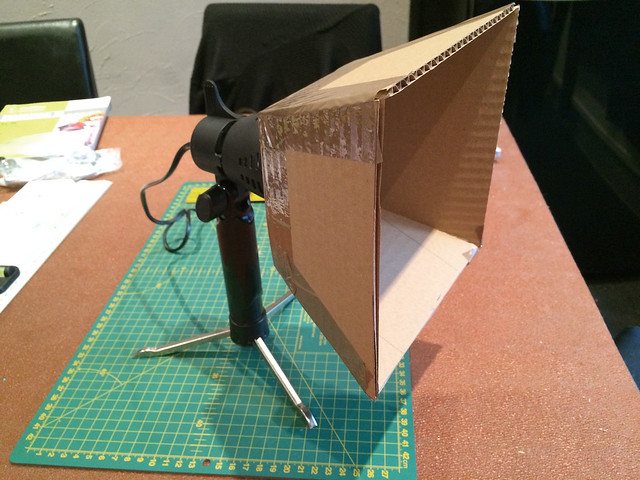
At the moment, you'll notice, the soft-box is held together with tape. This is just so I can quickly put together the prototype and - importantly - take it apart again to use it as a template for a second one. I also need to deconstruct the box so I can add a reflector surface inside the box.
Time to try it out...
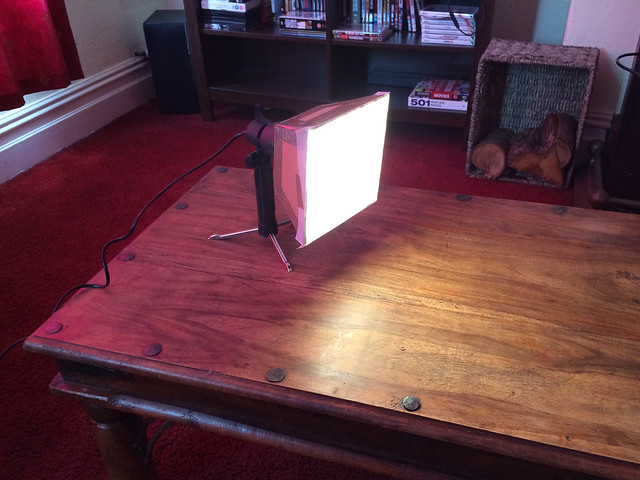
Well, that seems to be OK! It has, as I hoped, produced a less focused and softer light which has a wider 'spill'. Although, what you can't see is that there is a bit of a hot spot in the middle, but I how to alleviate that a bit by adding a reflective surface on the inside of the box.
The reflector
The reflective interior of the box will be made of a foil material, probably kitchen foil which would be in keeping with the 'bargain basement' nature of this project. However, I have had suggestions that I crumple the foil first and then flatten it out again so that it's an uneven reflective surface.
I'm sure there is a logical scientific reason for breaking up the surface like this, but I don't know what that is. All I do know is that my professional video soft-box lighting has this sort of crinkly reflective surface on its interior. So, let's see what I can do with cheap (Wilkos) kitchen foil...
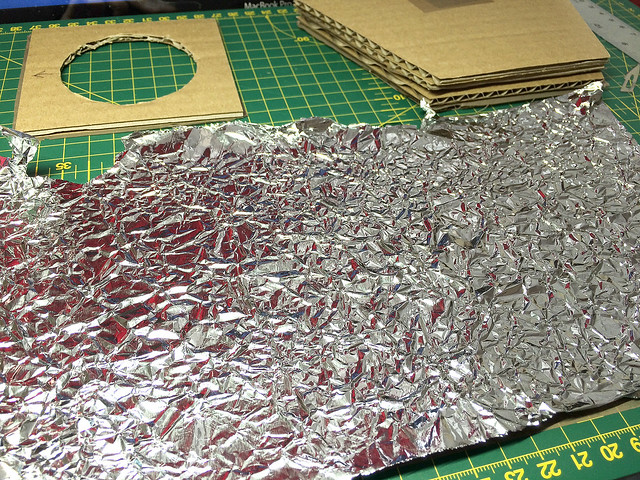
The next question is - how do I stick the foil to the cardboard? I wonder if good old PVA would do the job? Only one way to find out...
...Yep. That worked fine. I was a bit surprised! Now to cover the rest of the parts.
Next: I reconstruct the box and test the completed 'mini-studio'.
Diary of a novice scale model maker and his adventures in the wacky world of Braille Scale.
Sunday, 8 May 2016
Thursday, 5 May 2016
Photographing models - improved lighting Part 1
I've been having a bit of a trouble with my model photography recently. Up until now I've been fairly content with my snapshots - taken with my iPhone and some cheap mini lights - but have wanted to improve the quality.
Well, I hoped I had taken some steps to better pictures of my finished models when I received a terrific new camera for Christmas - a superb Canon 700D DSLR - but try as I might my model pictures actually got worse (I think). The camera isn't at fault, it's the learning curve as I step up from fully automatic iPhone photography to the fully manual world of a complex digital single lens reflex camera.
Though, as well as the increase in technical complexity I have also been having a lot of problems getting the right light for close-up photography.
Improving my 'mini studio'
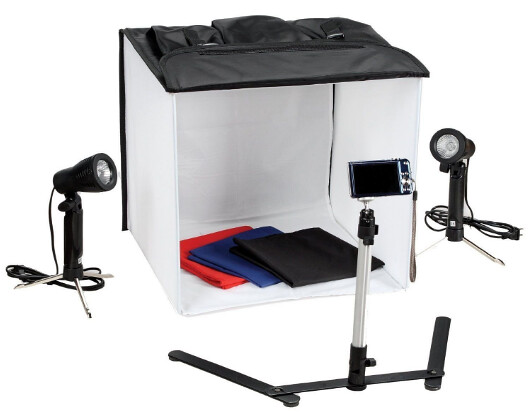
To begin with, I bought myself a relatively cheap 'mini studio' - a small backdrop tent and a couple of continuous lamps. I hoped this would give me the consistent light I needed, and to some extent, it was adequate with the very forgiving focus and exposure of the iPhone camera.
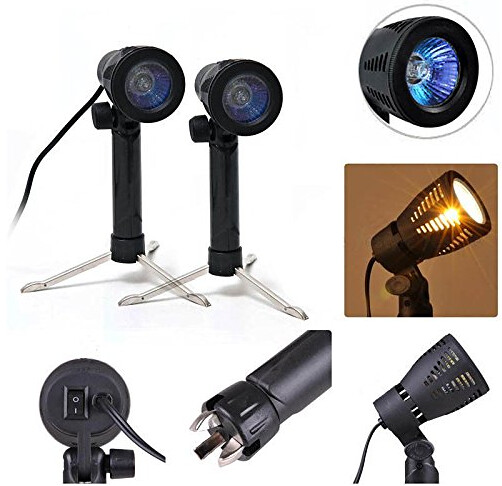
The issue is the lamps. They are cheap little contraptions which run halogen bulbs and this set-up has two major disadvantages - the light levels are not adjustable and the bulbs get very (very) hot!
These lamps also produce a very bright and intense light which is a little too harsh and uncompromising for my little models and their delicate detail. So I had been considering upgrading the lamps to a nice set of dimmable LED panel lights (of a type I use in my video work), but this seems a little over-kill as the one good thing about my cheap halogen lamps are the are so compact and easy to store.
Well, I hit upon a compromise when I discovered that you could buy an LED bulb that fitted the bayonet mounts that my little lamps use. This would solve the heat problem - allowing me to leave the lights on longer - but they still would not be dimmable.
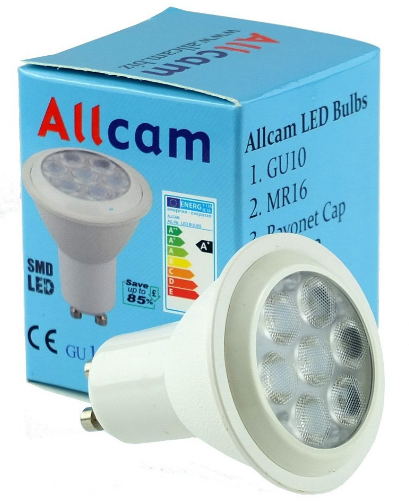
Left: 7W Ultra Bright GU10 LED bulbs of the type that will fit my little mini studio lamps. There are various makes and power outputs. the ones I bought were by Philips and cost £3.50 each.
What I needed was some sort of diffuser or 'soft box' for my LED lamps, to control the intensity of the light given out. I reckoned I could make a little light shade or some sort, with some semi-opaque material over the front to soften the light. (I could not even consider using any form of diffuser material with the mini lamps while they used halogens, not unless I wanted a nice little house fire!)
Making a 'soft box' for my lamps
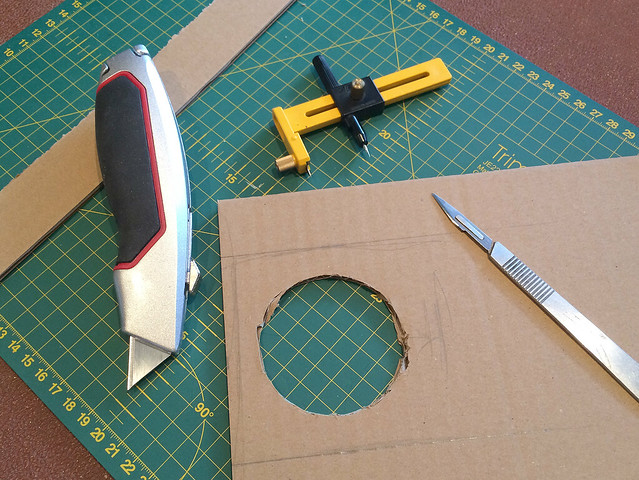
I decided to have a go and make a simple prototype to try out the idea. The simplest material I could think of to knock up a test design for my mini 'soft box' was box cardboard, if that worked I could always look for a better material later - but, for now, I just wanted to see if the idea was feasible.
So, off we go...
Good start - it fitted snuggly enough - but now the tricky bit, the 'cone'...
Well, it looks the right shape. But how will it look when I fit it to the lamp?
Not bad! Maybe a little big, but I can always modify the size in my next version - presuming this prototype works.
Next: I'll pause here as I now need to find a suitable material to act as the diffuser. Some sort of thin white nylon or maybe even a square of baking paper, maybe? I'll see what I can find in town...
![]() |
| My little 'mini studio', OK to begin with but now I've outgrown it. |
Though, as well as the increase in technical complexity I have also been having a lot of problems getting the right light for close-up photography.
Improving my 'mini studio'
To begin with, I bought myself a relatively cheap 'mini studio' - a small backdrop tent and a couple of continuous lamps. I hoped this would give me the consistent light I needed, and to some extent, it was adequate with the very forgiving focus and exposure of the iPhone camera.
The issue is the lamps. They are cheap little contraptions which run halogen bulbs and this set-up has two major disadvantages - the light levels are not adjustable and the bulbs get very (very) hot!
These lamps also produce a very bright and intense light which is a little too harsh and uncompromising for my little models and their delicate detail. So I had been considering upgrading the lamps to a nice set of dimmable LED panel lights (of a type I use in my video work), but this seems a little over-kill as the one good thing about my cheap halogen lamps are the are so compact and easy to store.
Well, I hit upon a compromise when I discovered that you could buy an LED bulb that fitted the bayonet mounts that my little lamps use. This would solve the heat problem - allowing me to leave the lights on longer - but they still would not be dimmable.
Left: 7W Ultra Bright GU10 LED bulbs of the type that will fit my little mini studio lamps. There are various makes and power outputs. the ones I bought were by Philips and cost £3.50 each.
What I needed was some sort of diffuser or 'soft box' for my LED lamps, to control the intensity of the light given out. I reckoned I could make a little light shade or some sort, with some semi-opaque material over the front to soften the light. (I could not even consider using any form of diffuser material with the mini lamps while they used halogens, not unless I wanted a nice little house fire!)
Making a 'soft box' for my lamps
I decided to have a go and make a simple prototype to try out the idea. The simplest material I could think of to knock up a test design for my mini 'soft box' was box cardboard, if that worked I could always look for a better material later - but, for now, I just wanted to see if the idea was feasible.
So, off we go...
Good start - it fitted snuggly enough - but now the tricky bit, the 'cone'...
Well, it looks the right shape. But how will it look when I fit it to the lamp?
Not bad! Maybe a little big, but I can always modify the size in my next version - presuming this prototype works.
Next: I'll pause here as I now need to find a suitable material to act as the diffuser. Some sort of thin white nylon or maybe even a square of baking paper, maybe? I'll see what I can find in town...
Thursday, 28 April 2016
A better portable workbench
While my attic 'man cave' continues to be unavailable to me - due to it having been relegated to the house junk store - I have been instead using my portable modeling tray for kit building and painting. However, it looks like this ‘temporary’ solution has developed into the norm and will be for the foreseeable future, so I decided some modifications to the tray were in order.
So, the problem was - how to add a reasonable amount of extra storage space to my Paintstation while still keeping it manageable as a tray I could move about? (I work, mainly, in our lounge and so, every so often, the wife insists I remove all clues of my ‘toys’ when we have guests.)
After a few rough sketch ideas, I settled on an under-tray draw storage solution. A simple 'bolt on' box that I could attach to the bottom of my tray...
The benefit of this was that I could have it made while still using my current tray and then quickly screw it on without having to take apart or put my Paintstation out of action.
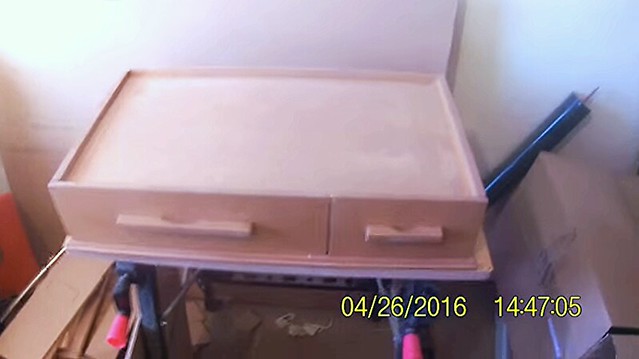
Being a complete DIY clutz, I sent my designs up to my very talented big brother and he quickly worked out how my design could be made using MDF and wood. Well, the task is near complete and Ian has sent me the first preview of my under-tray storage draw...
(Note: the actual bit about the workbench starts about a minute in - Ian starts with a look at his new action camera that we have been talking about!) :)
Nifty eh? There's more than enough storage there to keep my tray uncluttered, yet it will still keep the whole unit portable.
While my brother puts the finishing touches to the draws I have to figure out how to get the thing down to my home in Yorkshire from darkest Scotland!
Can’t wait for it to arrive. Big thanks to my brovver.
So, the problem was - how to add a reasonable amount of extra storage space to my Paintstation while still keeping it manageable as a tray I could move about? (I work, mainly, in our lounge and so, every so often, the wife insists I remove all clues of my ‘toys’ when we have guests.)
After a few rough sketch ideas, I settled on an under-tray draw storage solution. A simple 'bolt on' box that I could attach to the bottom of my tray...
![]() |
| My sketch of how I would like the bolt-on draw section to attach to my workstation top. This also shows how I would like the draws to be. |
Being a complete DIY clutz, I sent my designs up to my very talented big brother and he quickly worked out how my design could be made using MDF and wood. Well, the task is near complete and Ian has sent me the first preview of my under-tray storage draw...
(Note: the actual bit about the workbench starts about a minute in - Ian starts with a look at his new action camera that we have been talking about!) :)
Nifty eh? There's more than enough storage there to keep my tray uncluttered, yet it will still keep the whole unit portable.
![]() |
| The complete add-on draw unit ready to slip onto the bottom of my Paintstation. |
Can’t wait for it to arrive. Big thanks to my brovver.
Sunday, 24 April 2016
Minairons 1937 Chevrolet 1.5ton truck - part 8
I'll start this episode by taking a step back. In Part 7 of this project, I was left feeling quite unhappy with the colours I painted my Chevy. They just weren't right - so I had to do some tinkering!
Now, this can be a gamble, as over-painting unsatisfactory paint coats (rather than stripping them back and starting again) has all sorts of pit-falls. But, primarily, slapping on an additional coat is bad in that - obviously - it thickens the amount of paint you have on your model...
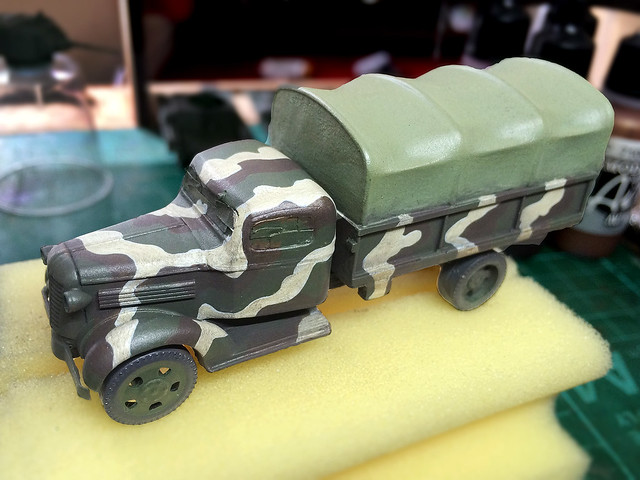
Well, it doesn't look too bad (from a distance) but you can make out a bit of streakiness. This is because I attempted to off-set the paint thickness issue but using a thinned (near wash) consistency of the paint I used to rectify my colours. Close-up, it is a little 'bumpy' in places, but hopefully the varnish coat - which I will apply next - will smooth this effect out a little.
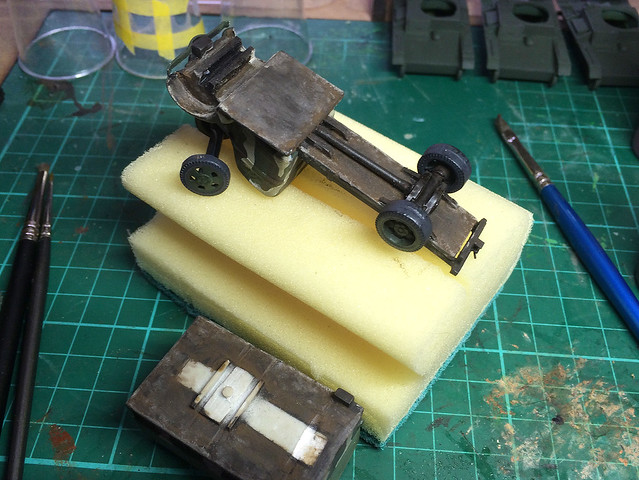
There's very little to see on the underside of the model - Minairons keeping this very simple - and so I didn't bother too much with painting and weathering. I just applied a couple of dark and muddy looking layers, after all, it's underneath and will be hidden once mounted on its base...
Weathering the Chevy
Before weathering, you have to decide what look you are going for. This entails you - the modeller - giving your model a back story. Is your truck old or new, what were the conditions in which it served, what was the weather like, etc, etc. This will dictate just what kind of state the truck would be in.
I decided that - by 1944 - my 1937 Chevy would have been a little beaten up. But I wanted it to be more dirty than neglected, so less rust and chips and more grime and dust!
The first part of this process was to apply the base dirt layer, and for this started with a dusting of Humbrol's 'Smoke' pigment (I could have used charcoal powder as an alternative)...
This gives a nice 'grubby' effect, and tones down the pristine camo scheme a bit.
The next phase in the weathering is my oil paint 'staining and bleaching' work. The usual process where I dab the model in a variety of 'dots' of oil colours, then I smear them into streaks using a wide brush which has been wetted with some thinners.
The above picture gives you and idea how I begin my oil streaking and staining - by applying a multitude of colored dabs of oil paint. I've probably gone a bit over the top here (I normally just do a few dots at a time) but I wanted to experiment with a multi-tonal effect.
The great thing about staining with oils is that you can more or less scrap the whole thing and start again if you are unhappy. So long as you have a good underlying varnish layer to protect the work that has gone before, you can wipe off your oils with a tissue which is damp with thinners.
You then just streak your dots in the pattern you want with a broad brush which is damp with thinners...
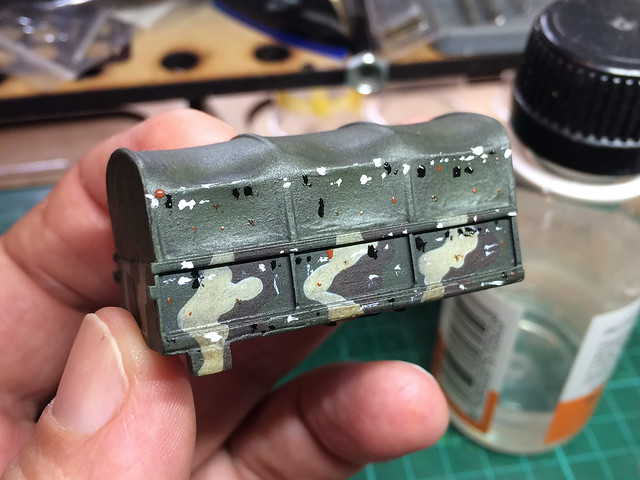
Oils give a nice greasy and oily stain (naturally enough) which looks particularly nice on tarpaulins. Overall, this truck is as dismal and filthy as I imagined I would like it now. The Finns actually took very good car of their vehicles (as getting new ones was nigh on impossible for them), but as a frontline vehicle I guess there wasn't a lot of time for a wash and scrub up!
Next: Chipping and pin-washing stage (plus, I make a start on the base).
Now, this can be a gamble, as over-painting unsatisfactory paint coats (rather than stripping them back and starting again) has all sorts of pit-falls. But, primarily, slapping on an additional coat is bad in that - obviously - it thickens the amount of paint you have on your model...
Well, it doesn't look too bad (from a distance) but you can make out a bit of streakiness. This is because I attempted to off-set the paint thickness issue but using a thinned (near wash) consistency of the paint I used to rectify my colours. Close-up, it is a little 'bumpy' in places, but hopefully the varnish coat - which I will apply next - will smooth this effect out a little.
There's very little to see on the underside of the model - Minairons keeping this very simple - and so I didn't bother too much with painting and weathering. I just applied a couple of dark and muddy looking layers, after all, it's underneath and will be hidden once mounted on its base...
Weathering the Chevy
Before weathering, you have to decide what look you are going for. This entails you - the modeller - giving your model a back story. Is your truck old or new, what were the conditions in which it served, what was the weather like, etc, etc. This will dictate just what kind of state the truck would be in.
I decided that - by 1944 - my 1937 Chevy would have been a little beaten up. But I wanted it to be more dirty than neglected, so less rust and chips and more grime and dust!
The first part of this process was to apply the base dirt layer, and for this started with a dusting of Humbrol's 'Smoke' pigment (I could have used charcoal powder as an alternative)...
The next phase in the weathering is my oil paint 'staining and bleaching' work. The usual process where I dab the model in a variety of 'dots' of oil colours, then I smear them into streaks using a wide brush which has been wetted with some thinners.
![]() |
| Going dotty! Yeah, a bit over the top here. |
The great thing about staining with oils is that you can more or less scrap the whole thing and start again if you are unhappy. So long as you have a good underlying varnish layer to protect the work that has gone before, you can wipe off your oils with a tissue which is damp with thinners.
You then just streak your dots in the pattern you want with a broad brush which is damp with thinners...
![]() |
| You dirty, dirty truck! |
Next: Chipping and pin-washing stage (plus, I make a start on the base).
Monday, 11 April 2016
Minairons 1937 Chevrolet 1.5ton truck - part 7
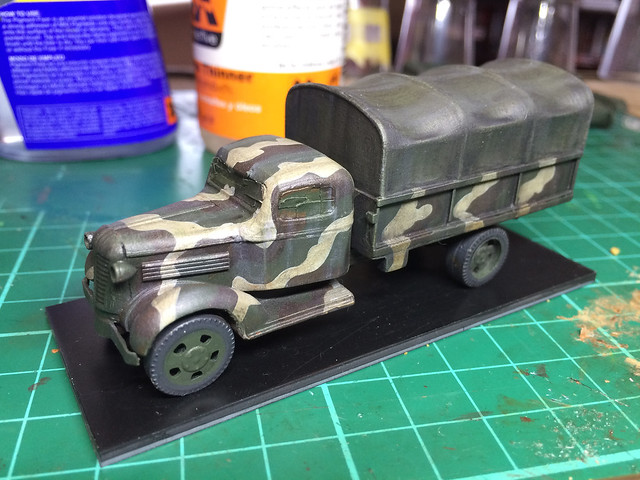
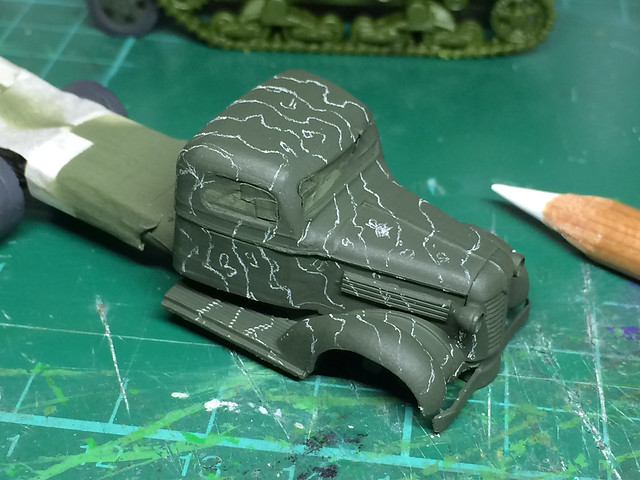
After the usual primer coat of Hycote Black Matt aerosol, I brush painted on a coat of my 'Finnish Green' (50/50 mix of Vallejo 'German Cam. Dark Green' and 'Yellow Olive'). I'm beginning to like brush painting, it's not only a lot less fuss than airbrushing, but it has a texture and variability of coverage that I think looks a little less clinical as airbrushing does. But, that's a matter of opinion.
Next, I prepared for the application of my Finnish 'Beige-Grey' by marking out these patches using a white pencil...
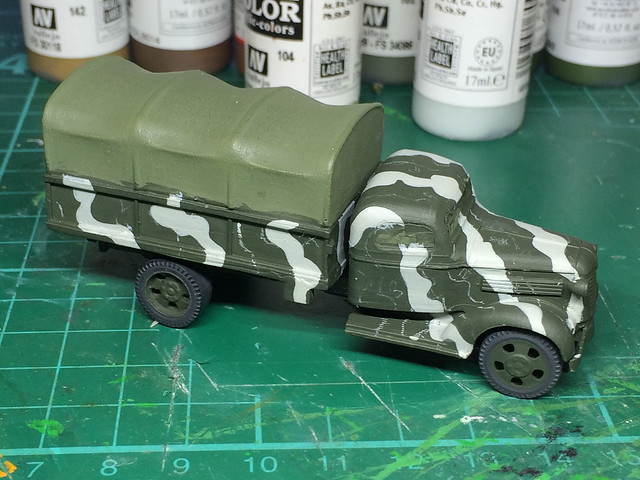
As it turned out, my beige-grey mix was far too grey (and not enough beige). In fact, my camera's flash even made the grey look snow-white!
It looks a rather attractive winter camouflage scheme (must remember that)! But, for my purposes, the beige is a bit of a fail and will have to be rectified (replace Vallejo's 'Blue Grey' with their 'Stone Grey' paint).
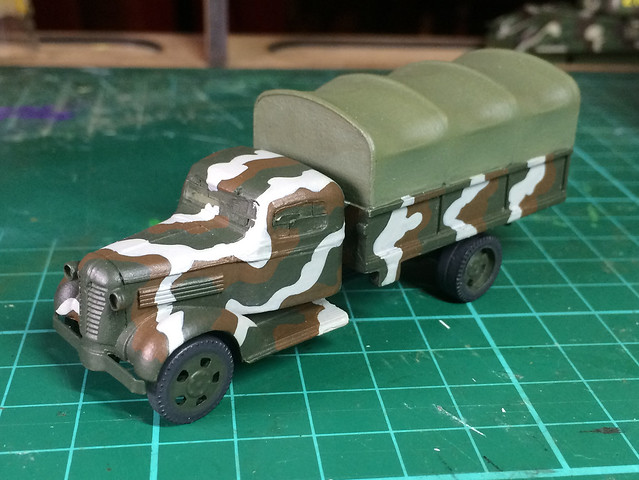
Still, let's get the third colour of the Finnish camo scheme on first before I tinker with the 'beige'...
It's obviously not my day, as the dark brown came out a bit too light and red! Again, that is easily rectified with a light wash of darker brown. However, in a way, using lighter paints is a bit of a tactic I have been thinking of employing as I am finding that once I introduce weathering this darkens the base paint scheme anyway.
Well, that's the progress on the '37 Chevy. Even at this stage, it's quite a handsome looking kit, despite its simplicity.
Next: Rectifying my dodgy camo scheme, and painting the tilt canvas!
Friday, 8 April 2016
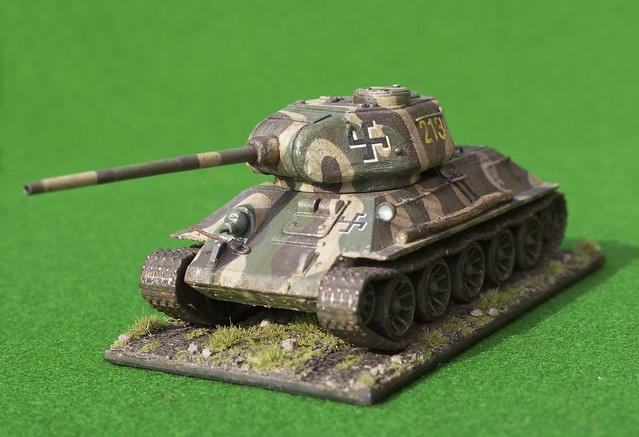
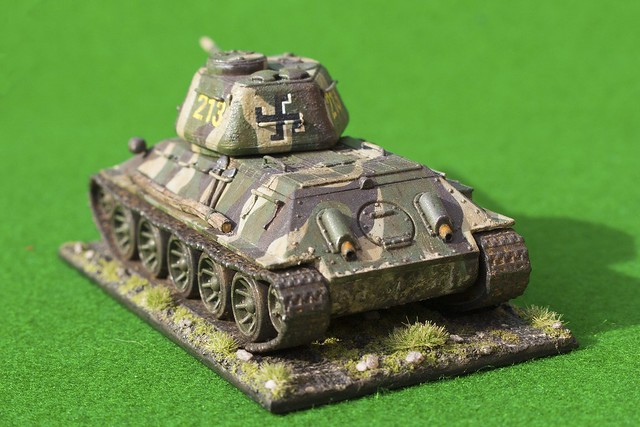
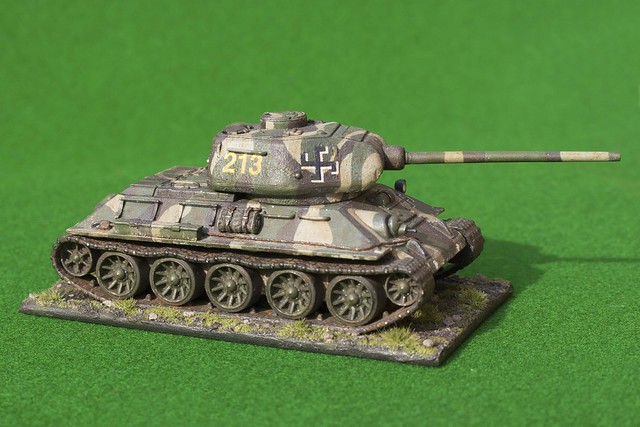
PSC 1/72 T-34/85, Finnish Armoured Brigade 1944.
Hoorah! Finished - and about time too (my enthusiasm was beginning to wane).
The Plastic Soldier Company kit is - in my opinion - one of the best 'easy build' plastic T-34/85 kits made for wargamers in 1/72 scale. I think it just pips the Pegasus model to the winning post, purely because it has the better tracks.
Although I did tinker around with this kit and made some 'improvements' I didn't go completely mad and did not add any PE refinements. The engine deck is just as PSC designed it and although the 'mesh grills' look a bit derpy I decided to settle for them as they were.
You can tell, from the chunky road wheels, that the track sections are simplified (3-piece components), but I did my best with them.
The one let down with this completion is the photography, as I struggle to get to grips with my new camera (and lighting). Hence, I have not as many finished photos as I normally have. But, on a positive note, I think I have progressed enough to start thinking about taking on a 'premium kit' (like Dragon). I'll just finish off the other two 'wargame quality' T-34/85 kits I have and I have a really nice model waiting!
The Plastic Soldier Company kit is - in my opinion - one of the best 'easy build' plastic T-34/85 kits made for wargamers in 1/72 scale. I think it just pips the Pegasus model to the winning post, purely because it has the better tracks.
You can tell, from the chunky road wheels, that the track sections are simplified (3-piece components), but I did my best with them.
The one let down with this completion is the photography, as I struggle to get to grips with my new camera (and lighting). Hence, I have not as many finished photos as I normally have. But, on a positive note, I think I have progressed enough to start thinking about taking on a 'premium kit' (like Dragon). I'll just finish off the other two 'wargame quality' T-34/85 kits I have and I have a really nice model waiting!
Sunday, 20 March 2016
Wargame vehicle base making
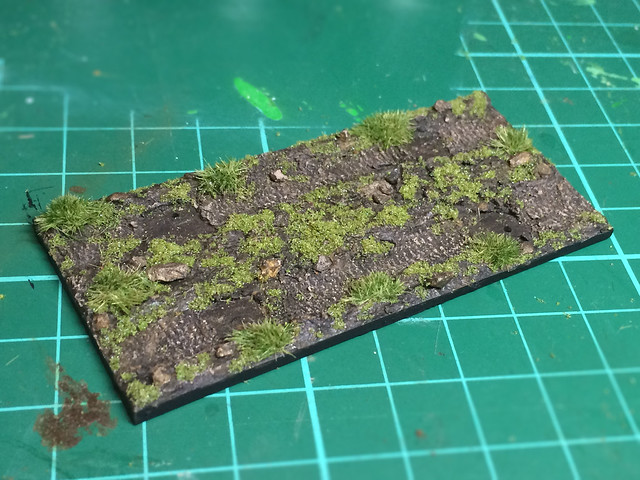
Despite the fact that I have developed a particular technique for making my wargame model vehicle bases, I decided to try something a little different. There was one small area of the base manufacture I wasn't happy with, that was the tracks on the ground.
I make two furrows in my base surface to show a countryside 'roadway' and on this, I try to imprint a pattern of tyres and tank-tracks to give it a used look. Now, up until now, I have created the basic 'ground' using PollyFilla, which was then painted and this worked OK. But, it was a bit difficult to imprint the vehicle tracks into this quick-drying plaster.
The problem with plaster is that it remains a little too 'squishy' right up to the moment it sets hard. You have to try and catch the plaster just at the moment where it is turning and is semi-hard to press a good pattern into it - too soft and it's like trying to press a pattern into butter!
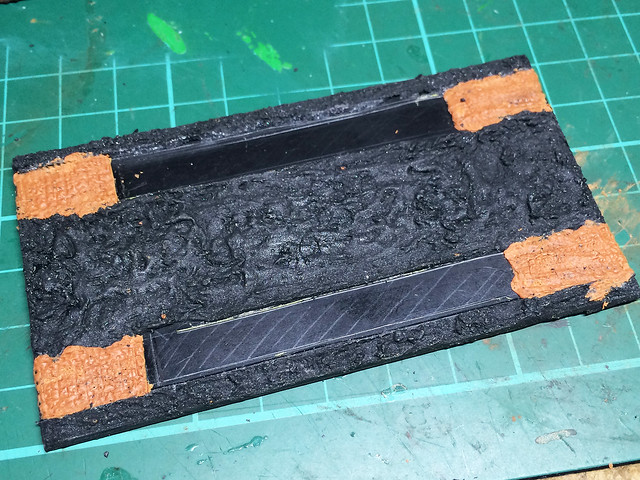
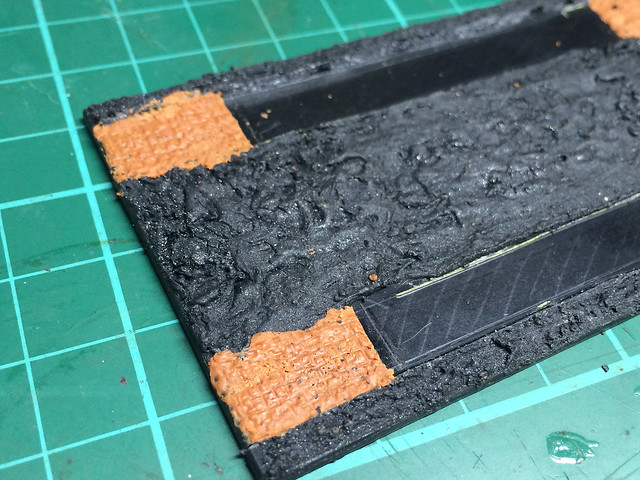
So, I'm trying out a different approach where I make the majority of the ground as normal - with PollyFilla - but then leave the strips where I want to make a track pattern bare and then I used Milliput (Terracota) to make small areas where I could press my patterns into...
Milliput has the consistency of plasticine when it's mixed and so is far more conducive to having patterns pressed into it...
Prints are far more defined and easier to make and if you make a mistake or aren't happy you just smooth the putty over again and have another go!
Now, there is a downside, Milliput can take hours to dry properly. My PollyFilla technique was dry in 20 minutes and you could have the whole base-making process done in a couple of hours (working at my speed). This new technique demands a little more patience but does pay off with a clearer and more satisfying track imprint.
The rest of the process is the same as normal, I apply a base coat, then an earth coat, weather and then apply my grass (and maybe some grass tufts and rocks). So I won't bore you with this.
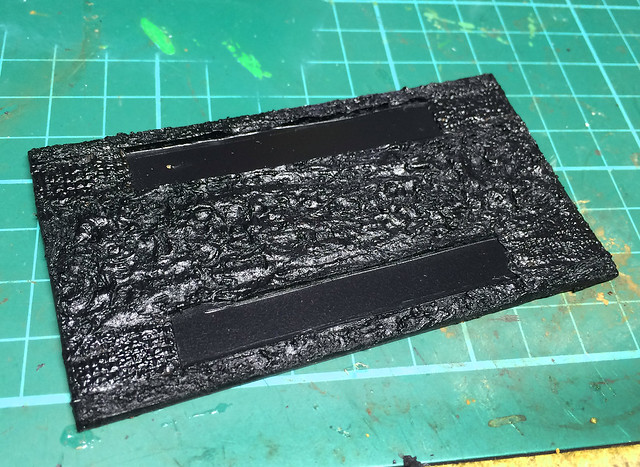
I'll see how this (below) turns out and if I decide I like the effect then I will just have to remember to produce the track as a job I do last-thing before going to bed, so it's dry in the morning.
![]() |
| One of my earlier bases. Primarily created with PollyFilla. |
The problem with plaster is that it remains a little too 'squishy' right up to the moment it sets hard. You have to try and catch the plaster just at the moment where it is turning and is semi-hard to press a good pattern into it - too soft and it's like trying to press a pattern into butter!
So, I'm trying out a different approach where I make the majority of the ground as normal - with PollyFilla - but then leave the strips where I want to make a track pattern bare and then I used Milliput (Terracota) to make small areas where I could press my patterns into...
Milliput has the consistency of plasticine when it's mixed and so is far more conducive to having patterns pressed into it...
Prints are far more defined and easier to make and if you make a mistake or aren't happy you just smooth the putty over again and have another go!
Now, there is a downside, Milliput can take hours to dry properly. My PollyFilla technique was dry in 20 minutes and you could have the whole base-making process done in a couple of hours (working at my speed). This new technique demands a little more patience but does pay off with a clearer and more satisfying track imprint.
The rest of the process is the same as normal, I apply a base coat, then an earth coat, weather and then apply my grass (and maybe some grass tufts and rocks). So I won't bore you with this.
I'll see how this (below) turns out and if I decide I like the effect then I will just have to remember to produce the track as a job I do last-thing before going to bed, so it's dry in the morning.
Subscribe to:
Posts (Atom)