Now, this can be a gamble, as over-painting unsatisfactory paint coats (rather than stripping them back and starting again) has all sorts of pit-falls. But, primarily, slapping on an additional coat is bad in that - obviously - it thickens the amount of paint you have on your model...

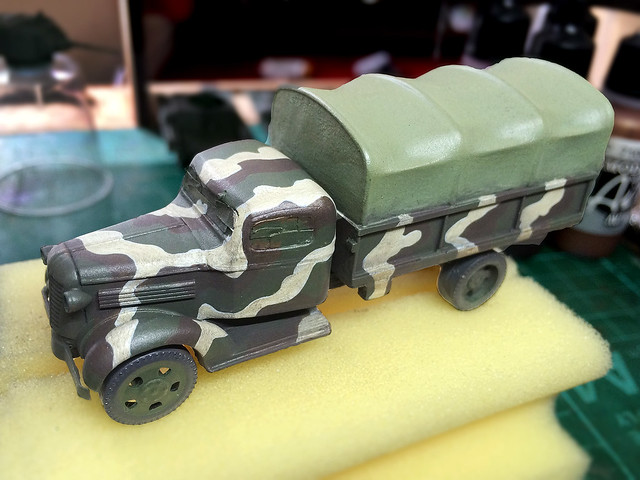
Well, it doesn't look too bad (from a distance) but you can make out a bit of streakiness. This is because I attempted to off-set the paint thickness issue but using a thinned (near wash) consistency of the paint I used to rectify my colours. Close-up, it is a little 'bumpy' in places, but hopefully the varnish coat - which I will apply next - will smooth this effect out a little.
There's very little to see on the underside of the model - Minairons keeping this very simple - and so I didn't bother too much with painting and weathering. I just applied a couple of dark and muddy looking layers, after all, it's underneath and will be hidden once mounted on its base...
Weathering the Chevy
Before weathering, you have to decide what look you are going for. This entails you - the modeller - giving your model a back story. Is your truck old or new, what were the conditions in which it served, what was the weather like, etc, etc. This will dictate just what kind of state the truck would be in.
I decided that - by 1944 - my 1937 Chevy would have been a little beaten up. But I wanted it to be more dirty than neglected, so less rust and chips and more grime and dust!
The first part of this process was to apply the base dirt layer, and for this started with a dusting of Humbrol's 'Smoke' pigment (I could have used charcoal powder as an alternative)...
The next phase in the weathering is my oil paint 'staining and bleaching' work. The usual process where I dab the model in a variety of 'dots' of oil colours, then I smear them into streaks using a wide brush which has been wetted with some thinners.
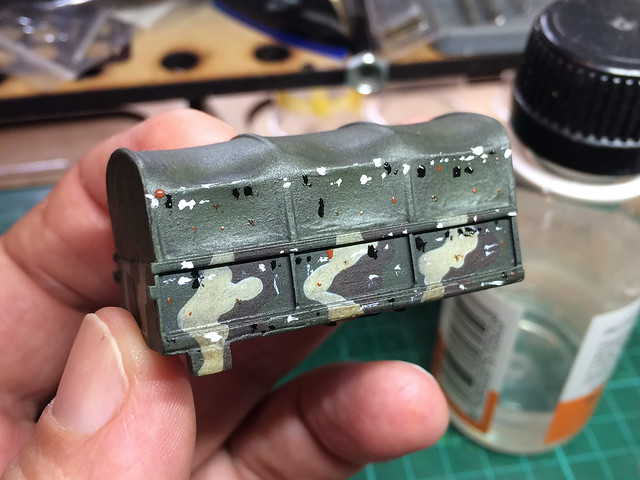 |
| Going dotty! Yeah, a bit over the top here. |
The great thing about staining with oils is that you can more or less scrap the whole thing and start again if you are unhappy. So long as you have a good underlying varnish layer to protect the work that has gone before, you can wipe off your oils with a tissue which is damp with thinners.
You then just streak your dots in the pattern you want with a broad brush which is damp with thinners...
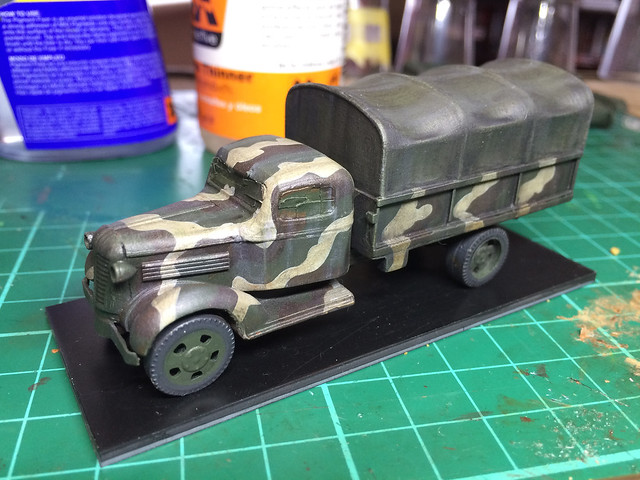 |
| You dirty, dirty truck! |
Next: Chipping and pin-washing stage (plus, I make a start on the base).
No comments:
Post a Comment