All of a sudden there is a lot going on with my Airfix Tomahawk IIA as the slow start of my previous post gives way to work on some of the major components. To begin with, though, I put the finishing touches to the cockpit.
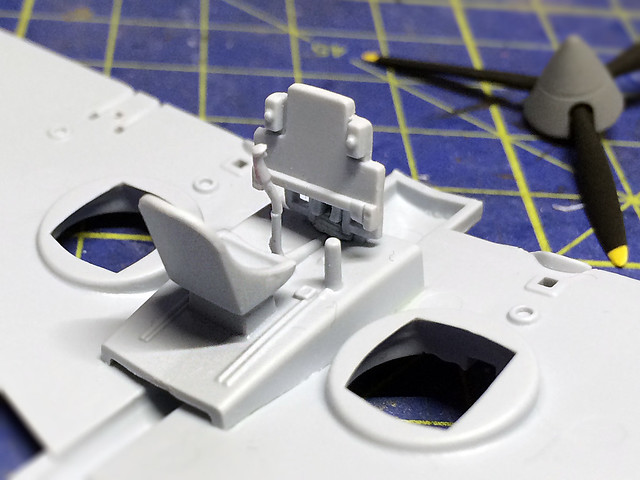 |
| No dials? Nope - there is a very nice decal to add to the control panel. Some of the other elements are a little 'chunky' - check out that thick post to the right of the pilot's seat. That's the auxiliary hydraulic pump handle, which allows the pilot to jack up/down the undercarriage in an emergency. It should be a quarter of this thickness. I will probably replace this. |
But this leads on to the big job of attaching the wings to the fuselage.
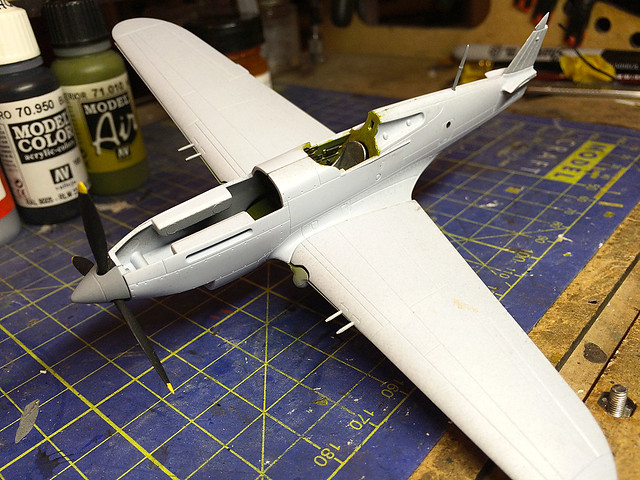
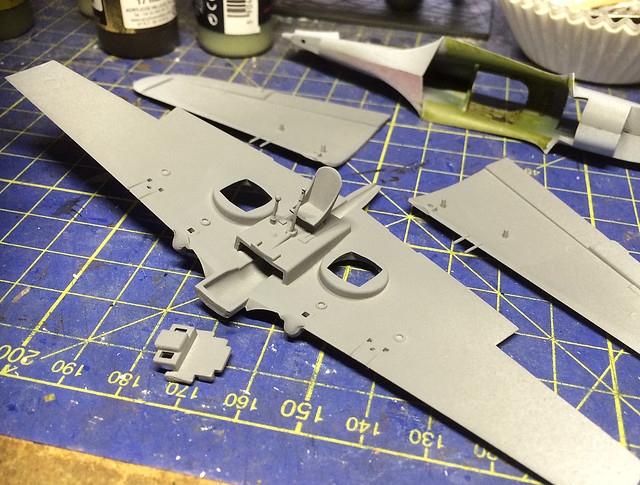 |
| Wing components and cockpit interior primed and ready to paint. |
Test fitting the fuselage to the under-wing did seem to indicate that there would be the inevitable filling to do at the root joints. But it wasn't horrendous, but considering this is a kit aimed at 'beginners' any filling is a bit of an annoyance...
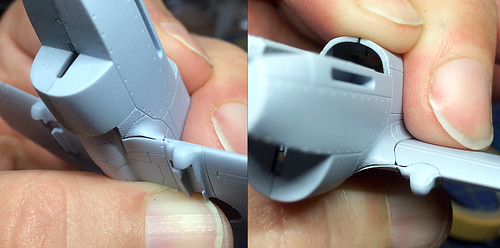 |
| Not major gaps by any means but they do definitely need filling with modeller's putty and then sanding smooth. A real beginner might not be ready to undertake such a job, even if 'we' think it's minor. |
Before putting all these pieces together, however, the inner surfaces must be painted. The lower cockpit, pilot's set and control panel and the inside of the wings - which will be seen through the landing gear wells - all need a coat of the 'interior green'. I didn't care for the Hakata RAF Interior Grey-Green colour so I'm now having a go with Vallejo's Model Air [71.010] Interior Green.
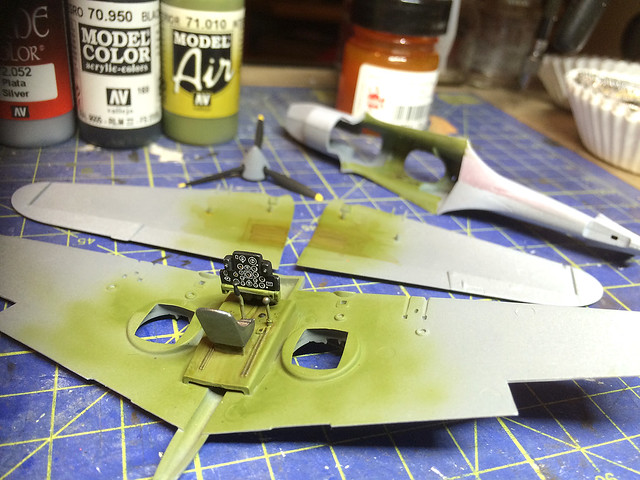
I then shaded the green (using Vallejo's Game Colour Sepia Wash and some yellow artists ink) to give it the distinctive yellowish green that Curtiss used on the P-40's interiors...Or at least I tried. To be honest I'm still unclear whether or not the RAF repainted the Tomahawk's interior or whether they retained the original factory interior colour.

The hardest thing was resisting the temptation to dress up the standard Airfix cockpit by scratch-building this or that part or adding some of the excellent third-party upgrade parts. But I stuck to my guns and built the cockpit 'out the box'. And I don't think it looks too bad, the panel decal is a very nice touch.
Looking a very clean build
ReplyDeleteLike your cock-pit work :)
Nice work on an old Airfix kit