 |
| The panel detail on the Airfix P-40 is rather deep, but it's crisp and consistent so I can live with it (advanced modellers might not appreciate it so much though). |
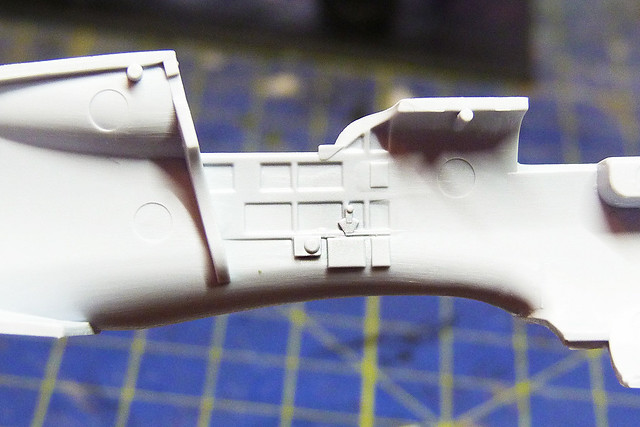 |
| There is some cockpit wall detail, I'm happy enough with it but if it's a little too basic you can buy third-party upgrade kits which add extra detail. |
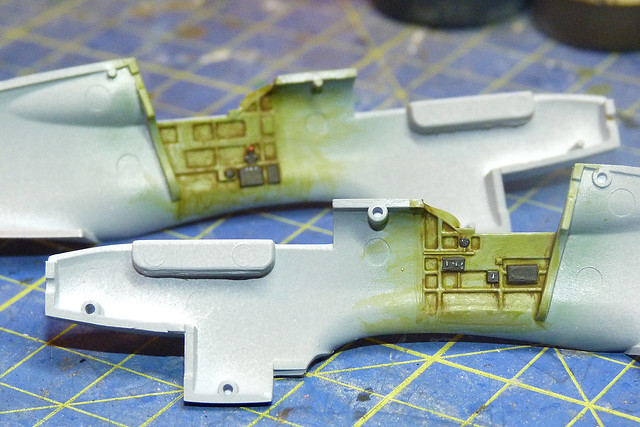
Now, as usual with anything to do with scale modelling, there may be a bit of disagreement about exactly what colour to paint the cockpit interior. I have gone with Hataka's interior green because - simply put - I wanted to try out that paint. In actuality I *think* the Tomahawk's cockpit colour was probably the Curtiss factory default interior colour, RAF 'Interior Grey-Green' being for WW2 British manufactured aircraft.
"Unlike some other manufacturers (like Boeing), Curtiss painted their aircraft directly at the factory. The cockpit of the P-40 was Curtiss Cockpit Green, which was the Berry Brothers' (a local paint vendor) approximation of Interior Green. Reportedly it was a little browner than Interior Green." [Source: "Camouflage & Markings: Interior Colours of US Aircraft, 1941-45 (Part II)"
© Copyright 1997-2006 by IPMS Stockholm]
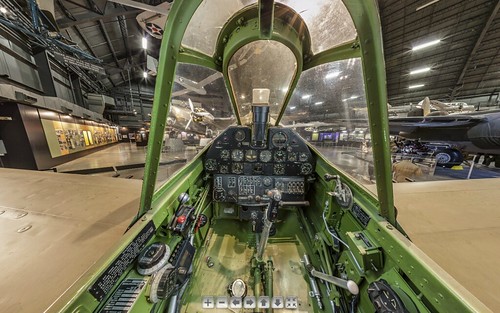
See a wonderful 3-D Curtiss P-40 cockpit at the following link:
The original Curtiss cockpit green is a lot more green than the RAF colour - my opinion is that the RAF would have simply painted the exteriors to RAF spec and not bothered with interiors (feel free to correct me). But, as I say, I really want to give the Hataka colour a go, to see how well it goes through my airbrush and see how much it needs to be thinned.
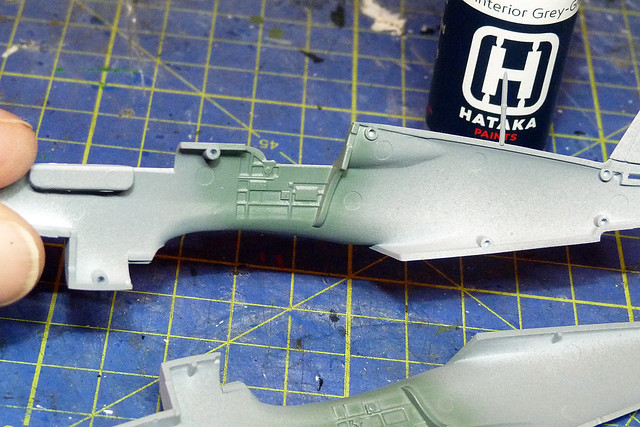 |
| Hataka's RAF Cockpit Grey-Green, a more subdued green than the American equivalent. But this test of this new make of paints went well, as they went through my airbrush very nicely, coverage was good and smooth and it mixed well with Vallejo's airbrush thinners. |
I was lucky enough to find a nice YouTube cockpit tour of an RAAF P-40N. Now P-40 cockpits change through the variants, of course, but this does give you a general indication of the colours of the different types of equipment.
At this point the Airfix instructions direct you to glue the two halves of the fuselage together. However, the version of the Tomahawk I am making will be the RAF IIA version of No. 26 Squadron in 1941. These aircraft had photo-reconnaissance cameras fitted just behind the cockpit on the left side of the fuselage...
 |
| Tomahawk IIA AH791, RAF 26 Sqdn., Gatwick, 1941. Source: Wings Palette |
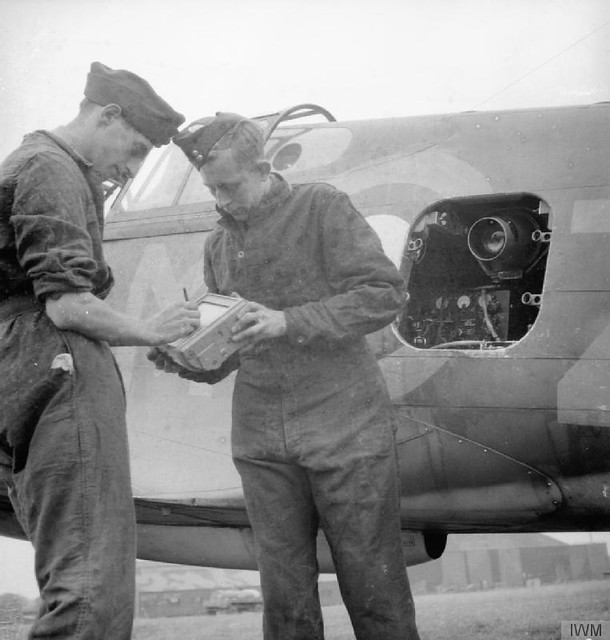 |
| Royal Air Force Army Cooperation Command. © IWM (CH 17187) |

I drilled through the panel then glued a piece of plastic to the inside of the fuselage, then the recess was painted with black Humbrol enamel. To make a lens-like effect I think I will handle this like I would one of the fake headlamps I have made for my truck models and fill the recess with some Pacer Forumula '560' Canopy Glue. If all goes well this should produce a clear 'lens'- but I will do this part after I have painted the model and added the decals (so we will have to wait and see how that works out).
And finally...
This post deals with the first two panels of the Airfix P-40 instructions. Obviously the main construction is the fuselage but the other little job is the assembly of the lovely propeller.
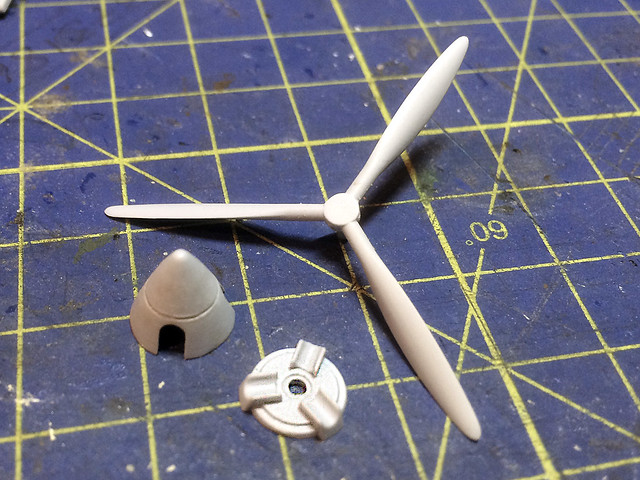 |
| The Airfix P-40 prop assembly - three parts; prop blades, spinner boss and end cap. All nicely moulded and a decent fit. |
I put this line back in by running a craft knife around the spinner. Otherwise it's a nicely formed prop with no flash...
 |
| Prop assembled, but only for this photo as I will be painting the parts separately. Here you can clearly see the line I drew around the spinner with my craft knife. |
No comments:
Post a Comment