 |
| Photo credit: Matthias Dorst - The Warbird Information Exchange. And no, I do not think they used Plasti-kote on this beautiful P-51! |
 I'm a great believer that you don't really know about modelling techniques until you try them yourself. While there are a great many comments on model forums about this and that technique and a great many example photos you never really quite know the full process that these modellers undertook to get that final shot or opinion. Plus - importantly - a lot of modellers are a bit shy about showing off their failures, which of course teach you as much about a technique as do the successes.
Thus, I am undertaking a test of a fairly well documented medium because I need to see - close up - exactly what Plasti-Kote 'Brilliant Metallic' spray paint does (or doesn't) do.
I am interested in this paint as it's very readily available and - unlike many proprietary specialist modelling chrome solutions - is comparatively cheap. I don't profess this would be an expert modellers choice but rather a possible 'quick effect' for war-gamers. But before we talk about using Plasti-kote on models lets get an idea what the product is actually intended for...
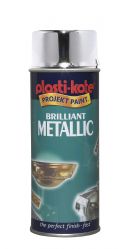
Platsti-kote 'Brilliant Metallic' spray is not - apparently - just another metallic-effect paint but, to quote Plasti-kote themselves: "This specially formulated paint is made from tiny metallic particles which are highly reflective."
What this means in practical terms is the paint produces a highly polished and near mirror effect, rather like chrome. For modelling this would - in theory - be really useful for models like aircraft with bare metal or polished aluminium surfaces (like some WW2 fighters and post-war jets). Obviously this is NOT what Plasti-kote was intended for - so bear that in mind.
I did some research about it's use for modelling but information was sparse, it seemed, and what there was was not very encouraging. The consensus being that this product was not a suitable medium for the serious modeller. Well, never let it be said that I am a serious modeller!
Undercoating for metallic sprays
There was a general view that if you are going to use these sort of 'general craft' or DIY metallic spray paint for modelling then you should lay down a good quality black enamel coat first.
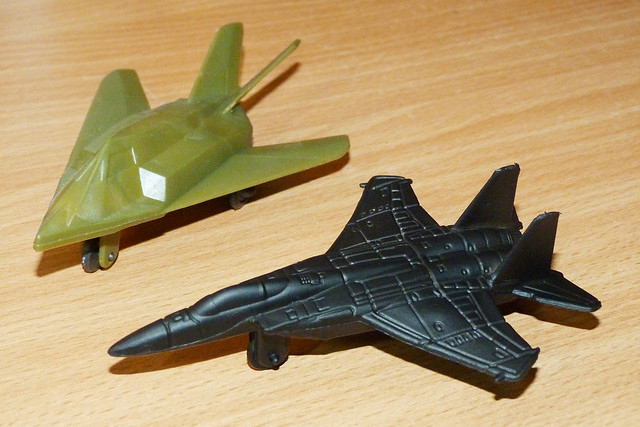
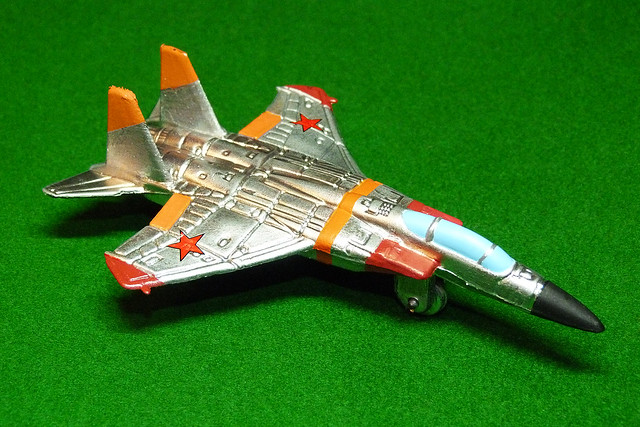
I decided I needed a low-cost expendable guinea pig to try the Plasti-kote on and so delved into my 'scrap toy box' and came out with a horrible plastic aeroplane which I got in a bag'o'soldiers from the local Pound store!
My undercoat was a layer of good old Hallford's black car touch up spray paint. I went for matt though there are some who suggest gloss - I think it is a matter of personal preference. As usual this went on very nicely and did not noticeably eliminate any of the detail - such as it was - on the toy plane.
Working with Plasti-kote 'Brilliant Metallic'
I didn't have high hopes for the quality of spray from a can - by that I mean that I suspected that the paint molecules would be big and spat out in a dense cloud that could easily lead to over-spray. So I tried to off-set this danger by doing very quick light passes with the spray can, and this seems to have worked...
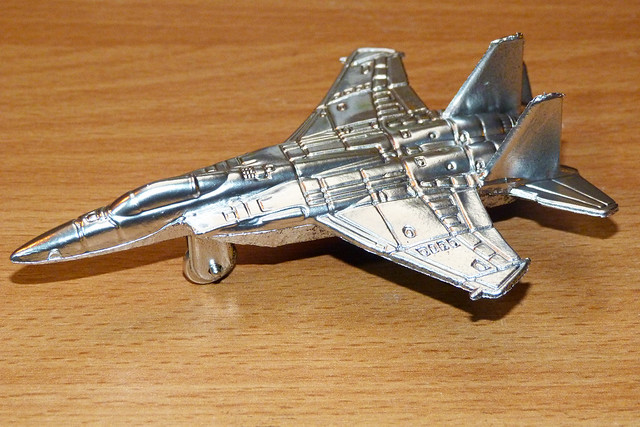 |
| No...Before you say anything, I didn't bother to tidy up seams or clean off flash! |

There is an element of luck in this as the idea is to get one light coat with perfect coverage in one go! I am told that over-spraying is not a good idea as the thicker the coat or the more coats you add the duller the paint effect becomes. Although Platsi-Kote says: "Allow to dry for 10 minutes between coats. Touch dry in 10 minutes. Thoroughly dry in 2 hours."
In my opinion, less is definitely more in this case. Although I did have to re-spray two isolated areas where my coverage had been poor and it didn't seem to have all that much of a detrimental effect.
Working on-top of Plasti-kote
Now, all very well and good...Much to my surprise, I now have an attractive 'mirror finish' coat. Coverage was quite good - as it was a new can there was no splatter - and smoothness of coat was OK (though to be fair the quality of the toy plane's surface was less than perfect).
In effect the Brilliant Metallic is a gloss paint, which has some implications if you intend to work over this surface.
Trying to brush paint matt acrylics onto this glossy surface is a bit of a bugger, enamels would fair better I suspect but the best way to cope with it is to spray any further colour areas on. I tried out some patches of colour using Humbrol acrylic spray can paints and a couple of thin coats worked well.
 |
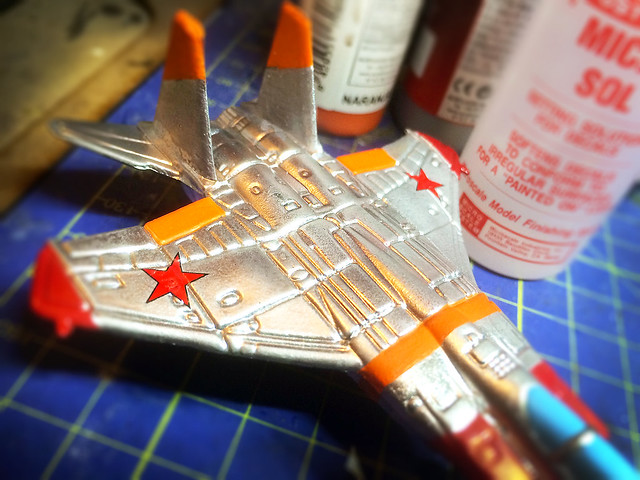
| I did the orange stripe around the fuselage with Vallejo acrylic using the airbrush and despite the Plasti-kote being high-shine gloss it actually went on very nicely. |
Again I consulted what internet references I could find and the general view seems to be that decals can be applied directly onto the Plasti-kote and similar bright metallics as they are already - effectively - gloss coats. The decals took to the surface quite well and with no silvering, and I used some micro sol just to aid the decal settle into the panel lines. BUT...
Unless you paint some sort of varnish directly onto the decal - carefully avoiding the Plasti-kote - you should avoid sealing the decal for the following reasons...
Sealing Plasti-kote painted modelsThere is always a 'but' somewhere in anything you do, and sure enough here comes the 'but'!
Finishing off the model you have painted using Plasti-kote Brilliant Metallic poses something of a quandary. Usually I would finalise my model by sealing the whole thing with a thin coat of satin or matt varnish...YOU CANNOT VARNISH PLASTI-KOTE BRILLIANT METALLIC!
Plasti-kote warn: "If a sealer is applied over the top it will stop the particles from reflecting in the light and the paint will appear duller."
I did an experiment and sure enough...
 |
| Vanished area on the left wing...Which is on the right! |
So I did some more intensive web research on the issue and found a couple of articles where the authors suggest that if you do use a mirror effect paint like this then you should leave your model unsealed. This means you will have to decide what to do about any additional painted surfaces you apply over the Plasti-kote and consider how to deal with decals.
Incidentally, I tried out hand-brushing a small area with Pledge Klear - which happens to be a very nice crystal clear varnish - instead of spraying on a specialist acrylic varnish. The result was little better that the Humbrol lacquer and the Klear tended to pool more resulting in unsightly dull blotches all over.
Conclusion - the pros and cons
OK, well this did go a bit better than I expected. The bottom line is that IF you do want a mirror finish on a model BUT don't want to spend a lot of cash and time on advanced modelling mediums OR have a lot of models to do quickly then MAYBE Plasti-kote Brilliant Metallic spray paint is an option.
That said, there is no doubt that - for display modellers - that there will be too many down sides for this to be considered an ideal solution. The quality of the coating from a mere 'rattle can' could never be as good as a proprietary effects paint delivered from a fine airbrush. The thickness of the coating and the unpredictability of the coverage makes the whole thing unviable.
In the end the product is what it is and trying to make it do something it was never intended to do was alway likely to end in one way. It's a no-brainer really. BUT for the war-game modeller there is some use to be derived from this paint, particularly if you are doing a number of the same type of model and time is an issue. As long as you are aware of the issues connected with working with this sort of product then you will not be surprised by any of it's accompanying quirks.
And finally, how to do 'chrome' properly?
You will, of course, make your own mind up on how successful or appropriate Plasti-Kote is as a bright metallic medium, but here are a couple of links to show you how expert modellers tackle this tricky finish...
You will, of course, make your own mind up on how successful or appropriate Plasti-Kote is as a bright metallic medium, but here are a couple of links to show you how expert modellers tackle this tricky finish...
Great work Stephen. A well detailed review. Top notch in fact.
ReplyDeleteMy dream about making a Century series selection of USAF fighters may have just came closer.
Hi Paul glad you found the post useful.
DeleteIf you are contemplating using this paint look out for the 'live project' post I'm doing soon. The problem with this experiment was the very poor quality of the plastic of the toy plane, but I wanted to see the basic properties of Plasti-kote.
Having satisfied myself that it's worth having a go on a proper plastic kit I'll move on to a budget model. I want to see just how smooth a coat I can get with Plasti-kote and also how it copes with very fine panel line detail.
ReplyDeleteI am glad you take pride in what you write. This makes you stand way out from many other writers that push poorly written content.