Carrying on with my 1/100 Beagle, things didn't bode well during the dry fitting. This is one of Tamiya's older kits (apparently) and the quality of fit isn't what I had expected from the company. Still, what would it be like if everything were perfect eh?
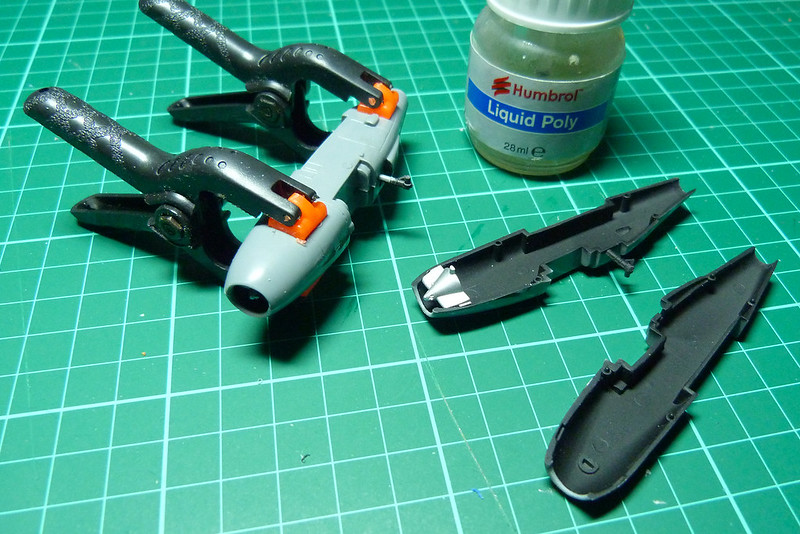
I painted the inside of the engine nacelles and then put the haves together...Not the best match. I would dry fit these if you try this model and work on filing the shape of the circular intake and exhaust ports before committing to glue.
The clamping is necessary if you want to close up the seam tightly. But I foresee plenty of sanding to merge the seams and match the halves precisely.
While the nacelles dry I began work on the fuselage, again I painted the inside (cockpit green instead of the recommended flat grey). There isn't a lot of detail in the cockpit - no dials and what not - and there is no pilot, so you are sort of nudged gently towards making this a grounded aircraft (further encouraged by the landing gear set in the down position by default).
In order to accomodate a landed plane some ballast is provided in the form of two steal balls. These sit in the forward compartment and should balance the model out when sitting on its undercarriage (hopefully).
You are provided with a moderately detailed bomb bay, should you wish to model your aircraft with bomb doors open. But as my aircraft is the Finnish target towing variant I shall have the bomb doors closed (so no painting of the bombs).
Glued and clamped the two fuselage halves go together OK, but there is - once again - a bit of mis-matching which will require some sanding to smooth out some of the joins.
Next will be the mounting of the engines onto the wings and then fixing the wings to the fuselage. But I will be smoothing out the engine seams before I do that! Quite work intensive really, but for £3 I guess there has to be some sort of catch.
Diary of a novice scale model maker and his adventures in the wacky world of Braille Scale.
Thursday, 30 May 2013
Monday, 27 May 2013
1/100 Tamiya IL-28 Beagle - Part 1
Bit of a tangent here, but this was one of those spur of the moment purchases as it was just £3 at my local model shop. I enjoyed making this 1/144 aircraft I have done so much I thought I might like to have a go at some more, and I do like twin engined attack aircraft. This Beagle is a lovely looking plane, I suppose it was the Soviet answer to the Canberra (?), and even at 1/100 it is quite a big kit.
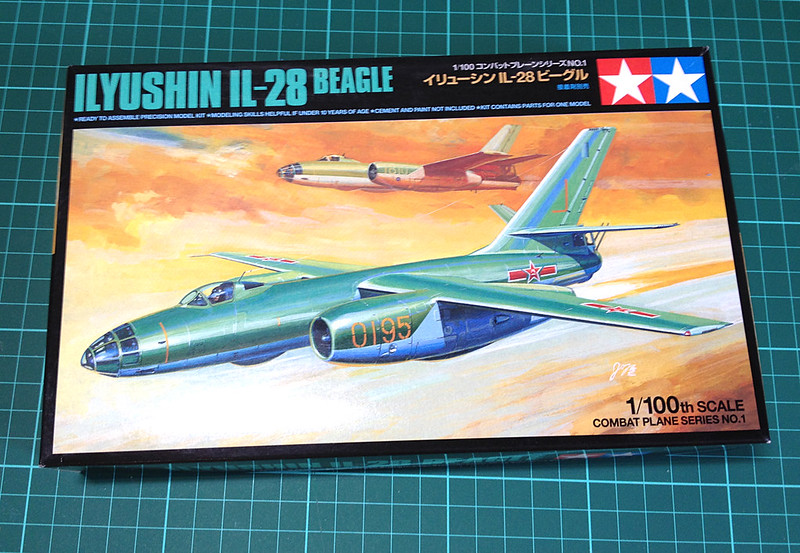
It comes with a choice of about four different national schemes including, a pleasant surprise, a Finnish one! Aircraft finishes are mainly polished metal, but the Chinese air force example does give you the choice of a nice green and blue scheme (as on the box).
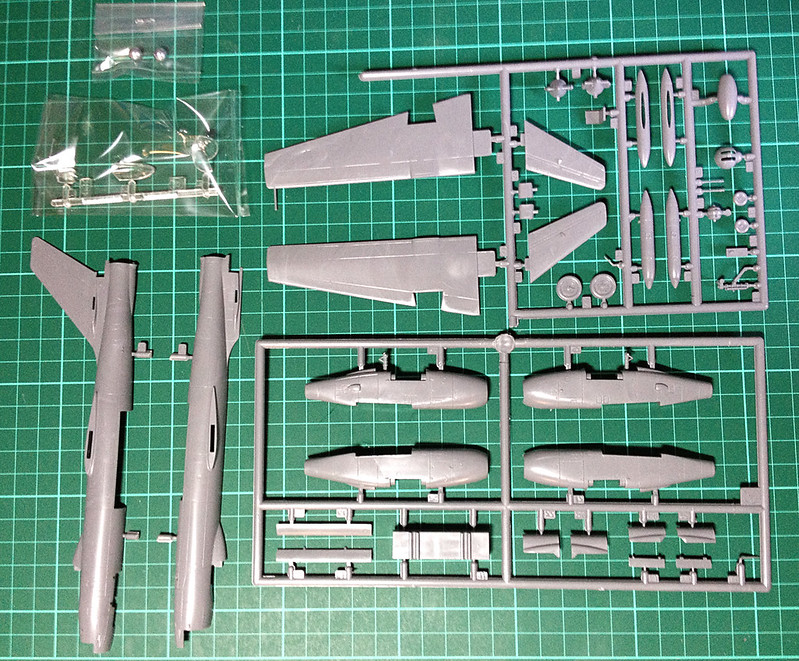
I unboxed the model today and you can see from my rather shoddy photo above that there aren't that many parts (and certainly no variant options). But still that's all good as I don't feel like doing anything complicated at the moment.
Next: Construction
Edit: Managed to find a illustration of the Finnish example that is included in this kit. It's a target-towing aircraft from the Finnish Transport Squadron based at Utti in 1967. Not very glamorous I suppose, but a necessary job...
Source: Wings Palette web site, "Finnish Air Force 1918-1968", Aircam Aviation
Series No.2, (c) Osprey Publishing Limited, England. SBN 85045-012-8.
Thursday, 16 May 2013
Featured work - Mr Dyzio's Polish Stug
This 1/72 Revell build by Dyzio is a topper! I like the Stug for some reason (I've been playing it a lot in 'World of Tanks' recently) and it has a bearing on my current project as the Finns made very good use of them during the Continuation War (25 June 1941 – 19 September 1944).
Anyway, this is a very fine build...
This is kind of funny really as this is the second example of the Stug in Allied use that I've seen over the past few days - the first being an interesting example of an American Stug - and it does illustrate what a handy little thing this tank was, even by the later stages of the war.
You can see more wonderful photos of this lovely diorama here: Dyzio Scale Models - 1/72 StuG 40 Ausf.G - T-3 (75mm) Polish Army - Revell - Completed
Wednesday, 15 May 2013
ACE 1/72 BA-20 Armoured Car Pt. 5 - Decals
I haven't gone wild with the decals but instead just produced something fairly generic that will suffice for a war gaming model. Besides I'm afraid Finnish decals in 1/72 are a bit rare and my stock is nearly depleted.
Anyway, it looks smart enough but those Finnish swastikas were a real pain to get straight. These are later war cropped swastikas, I believe the Finns used full sized ones in the early war but then clipped the swastika 'arms' for armoured units mid-war. Of course, when Finland changed sides in the later part of the war they changed over to the Finnish roundel at the insistence of the Soviets (for obvious reasons).
I will give the decals a light coat of gloss varnish to seal them and then the model is ready to pin-wash and weather. But I will pause at this point while I await my new BA-10 wheels to arrive as I want to weather these models together (as they are part of the same company).
While this project is on hold I will move onto my next Finnish war game army model. I suppose there is some merit in getting a few models up to the same stage and then finish them together, especially when you are weathering.
Sunday, 12 May 2013
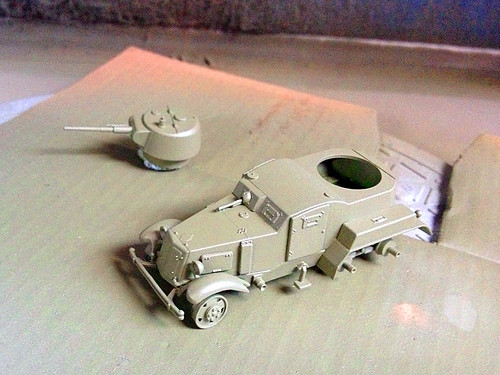
1/72 Unimodel BA-10 Armoured Car Pt. 6 - base coat
I do like Humbrol's Light Olive, especially when you add a thin gloss varnish layer...
This is my first chance to see the BA-10 and BA-20 together in their final base colour and they do look a really sweet couple! At the moment I am trying to ready the god awful UM acrylic tyres, the UM kit maybe better than the ACE BA-20 kit, but I wish I had the ACE's hard plastic wheels for my BA-20.
However...I have a cunning plan.
So while I tinker with this I will move on to the decals and also get the wheels on the BA20.
Friday, 10 May 2013
Man cave 'finished' - first live project
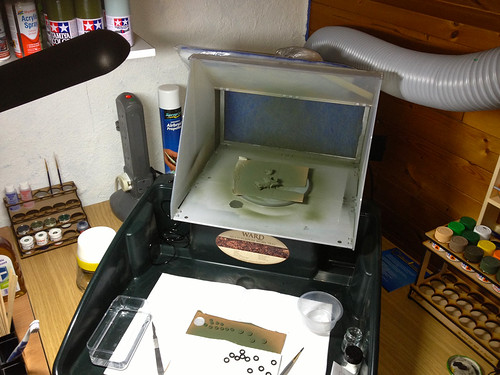
Well, not a new project, but it's nice to get back to some actual work. I say that the cave is 'finished' but obviously it will never really be finished, but it's set up enough that I can make use of my spray booth set-up...
A bit disappointed this isn't a job for my new airbrush, but I have decided how I will slowly integrate that into my workflow. But in any case Humbrol's Light Olive acrylic spray is one of the nicer of the rattle-can paints to work with. The finish is quite nice, obviously it's a flat coat and not the sort of fancy multi-tonal effects you can get with an airbrush using a overspray technique...
So - onwards and upwards, no excuse for things not rolling off the production line now! ;)
Thursday, 9 May 2013
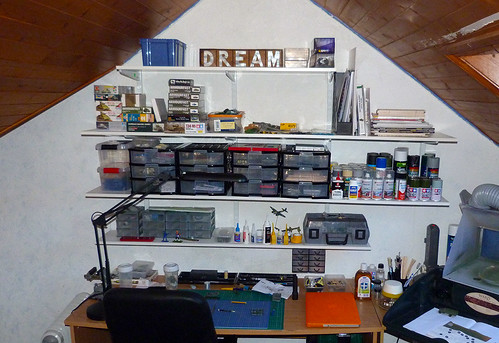
Man cave progress - modelling zone
OK, it's a bit messy while I sort out where everything goes but this is the model work bench...
Now...Back to work!
Now...Back to work!
Wednesday, 8 May 2013
1/72 Unimodel BA-10 Armoured Car Pt. 5 - Vinyl rot prevention
So imagine my shock when - while posting up the progress of my UM BA-10 armoured car on the Society of Gentleman Gamers forum - I discovered that the vinyl tyres of my model were exactly the type material that causes this sort of disintegration. Chris Steadman (of SoGG) commented on my project...
"On the UM kit, did you use a barrier between the vinyl wheels and the plastic? Are you aware that they are known to interact and that the plastic dissolves with time? PVA apparently acts as a good barrier. There are also reports that washing the vinyl parts well, helps to reduce the effect. Also, when you paint the model, any paint with a solvent base will attack the vinyl parts."Eeeek! This was enough to send any kitnoob like myself into a mild panic...But I calmed down!
And so, my solution was a bit belt and braces but I hope this works; I detached the tyres from the plastic wheels and coated the wheels with a gloss varnish to act as one barrier between the materials, then I sprayed the wheels their base colour (Humbrol acrylic Light Olive) to act as a second barrier. I also sprayed a light coat of varnish over any other area - notably the front fenders - where the tyres would come into contact with the main model.
Having done that I next turned my attention to the tyres themselves. As recommended I washed the tyres in soapy water and then, once dry, I painted on a thin solution of PVA just on the inside of the tyres where they would come into contact with the plastic wheels.
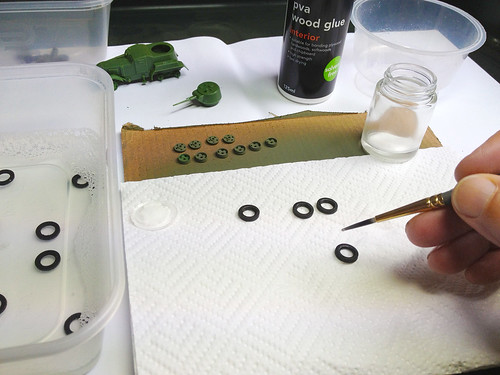 |
| Coating the vinyl tyres with a thin layer of PVA glue to act as a barrier. |
So, little hic-up. To be honest I was skeptical about the merit of the vinyl tyres right from the start, tyres are just as easily modeled using hard plastic and paint effects. In any case they are a pig to fit and deform - I will probably try to avoid them in the future (though I can't really avoid vinyl tracks unfortunately).
Monday, 6 May 2013
Cheap Ford-Werke V3000 (Pt.12) - Gloss coat
Tiny jobs while I sort out my man cave! This time I had just enough time to spray on a light gloss coat (Humbrol Acrylic Gloss) prior to pin washing and weathering...
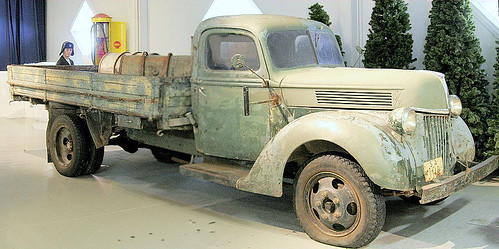
This is the most creative phase of the work, do I want a pristine truck fresh at the front or do I want a war weary veteran. It's rhetorical really as I want to create something that is worthy of the V3000's nickname in Finnish use - "Hävittäjä" ('fighter').
Luckily I have a nice reference photo to work from...
Next: The pin wash
Wednesday, 1 May 2013
Man cave update - painting zone complete
I've put the finishing touched to my painting workstation today...
I guess the main point of interest will be the green tray - this is actually a dirt cheap seed tray (pun for Tim!) from Aldi of all places, it was just £6.99. The idea is that it will keep all the paint exactly where I want it.
The spray booth has been raised to a more useful height and I bought another of those nice paint pot racks from Progressive Engineering for my Tamita 10ml pots (it also happens to hold my Vallejo weathering powders and enamels).
Next: The final phase, the modelling bench.
Subscribe to:
Comments (Atom)
