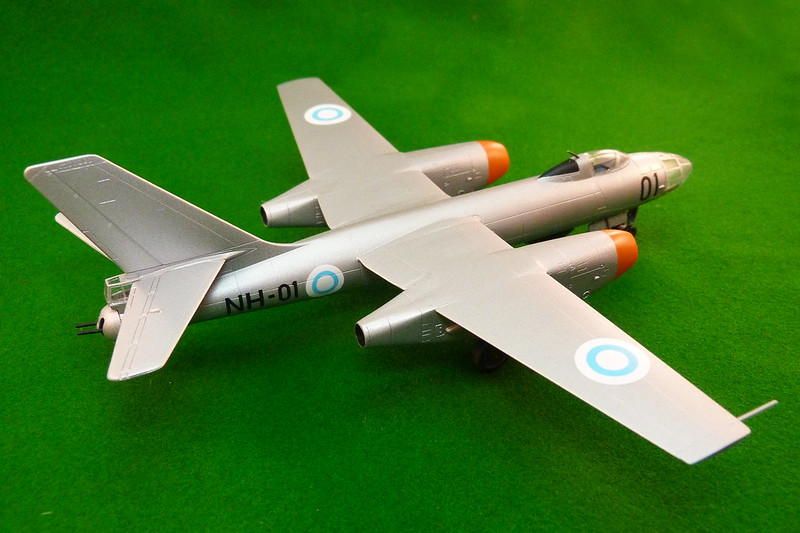
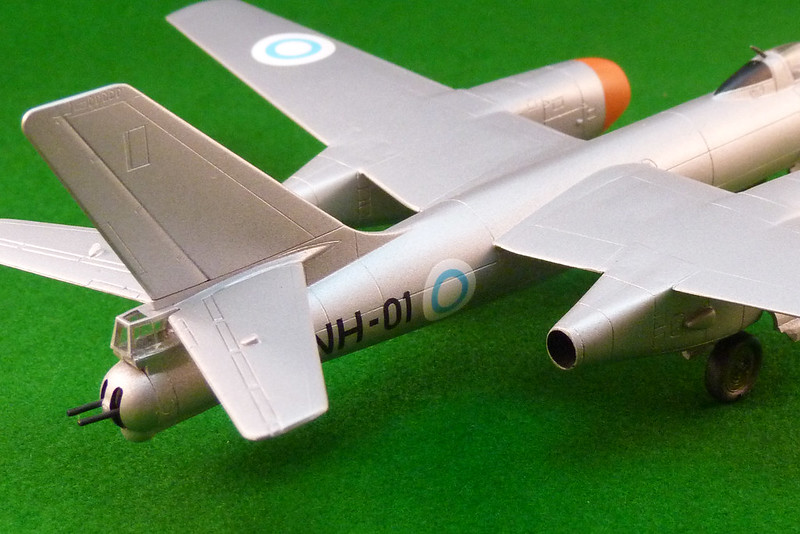
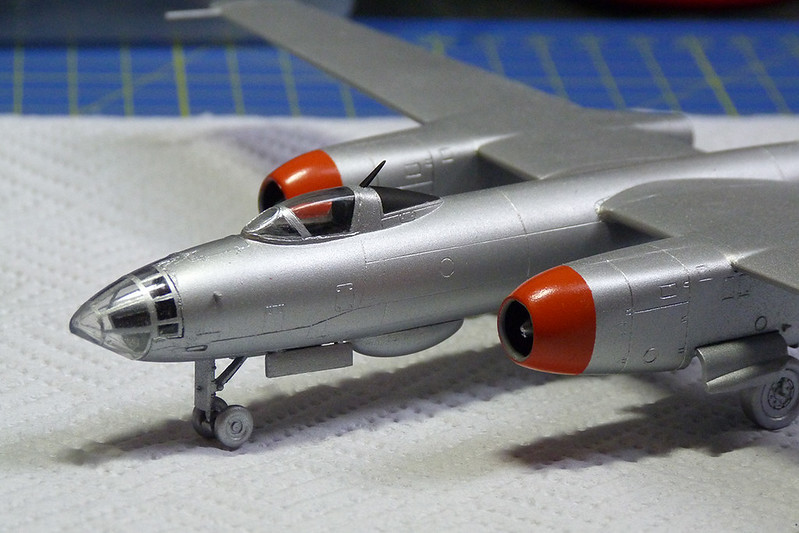
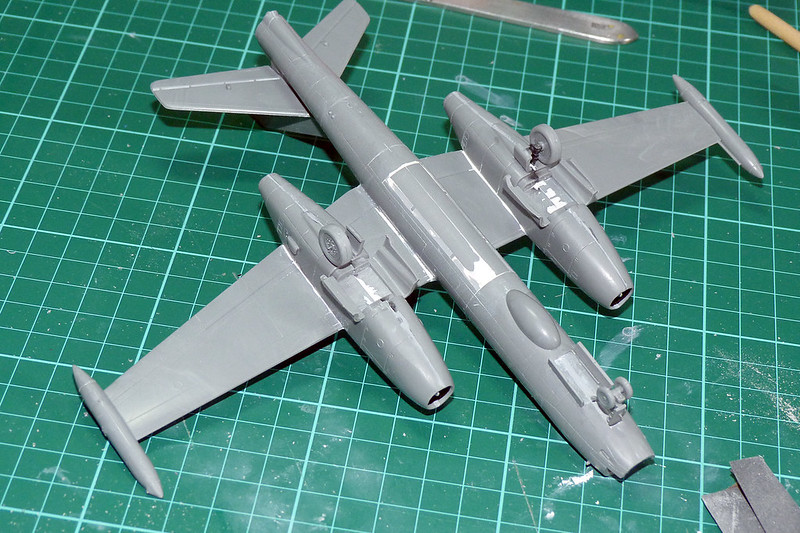
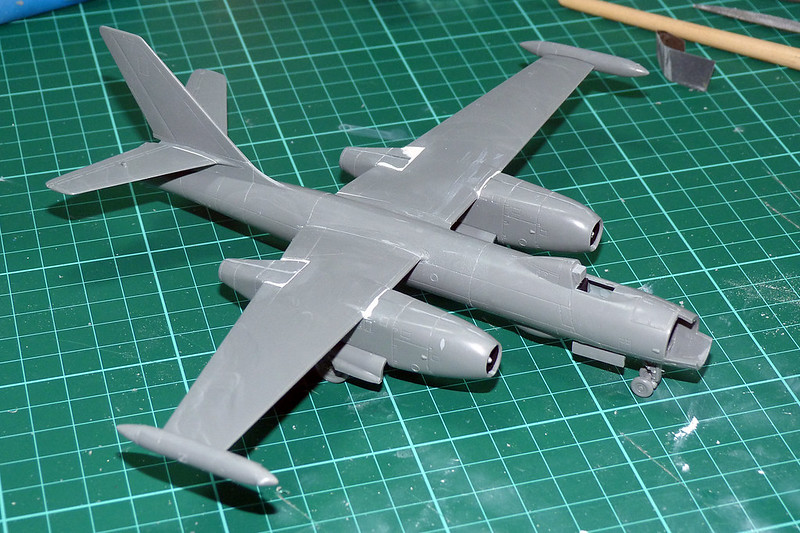
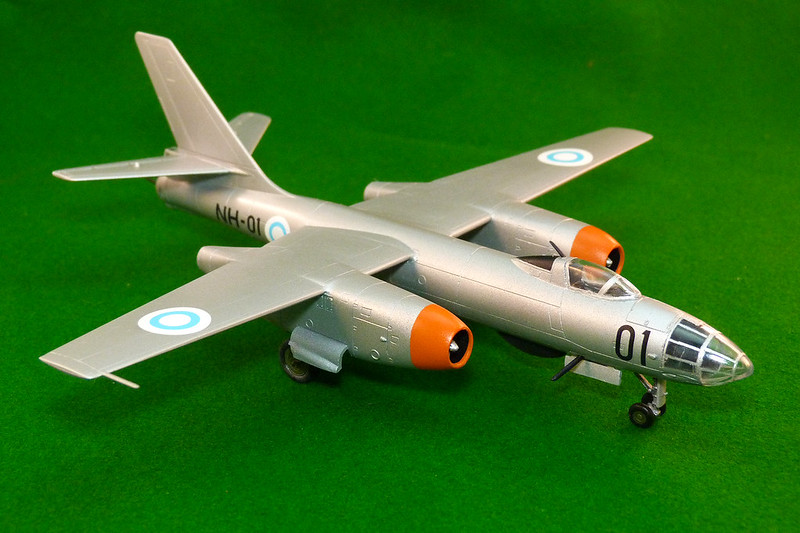
Well, it's as finished as I want it anyway. It's been enjoyable and I have learned quite a few new things...
There are quite a few mistakes, but they were very useful mistakes and I was glad to make them on this practise kit rather than on the model I have in mind after this.
I am still unsure about weathering aircraft though, the metal look on this seems to look nice pristine but I guess I could have at least put the panel lines in. Maybe on my next practise model!
Edit: And warning! One mistake I made was destroying one of the decals (hence no port or front on snaps). While the Tamiya decals go on beautifully - they seem extra thin - with no noticeable silvering they did NOT like MICRO SOL decal solution at all!
MICRO SET was OK, but it seems MICRO SOL is a tad too harsh for the Tamiya decals and it actually melted the large port side aircraft number. You live and learn.
Diary of a novice scale model maker and his adventures in the wacky world of Braille Scale.
Showing posts with label X-Ref: Tam/IL28/0513. Show all posts
Monday, 24 June 2013
Thursday, 20 June 2013
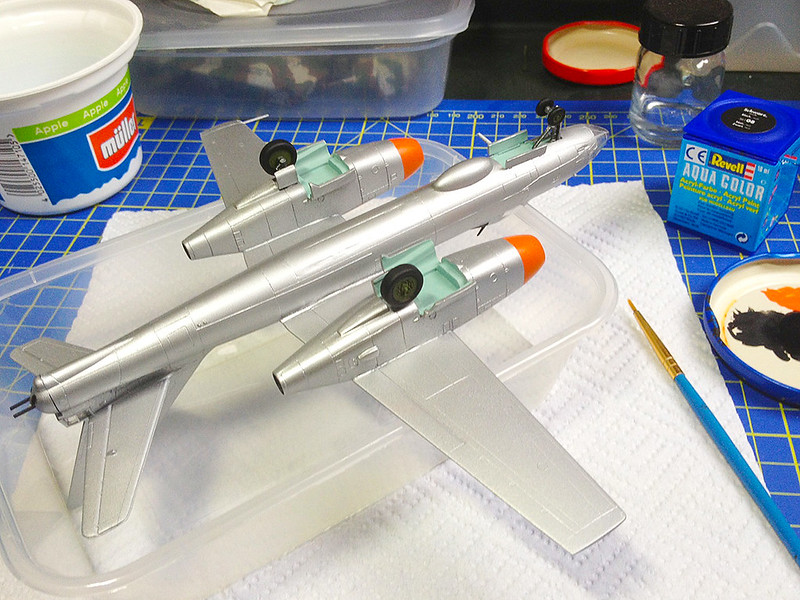
Beagle undercarriage painting
The last little details painted before I spray on the gloss coat...
...That was part 14 for anyone who is still keeping count! :)
Wednesday, 19 June 2013
1/100 Tamiya IL-28 Beagle - Part 11...Painting details
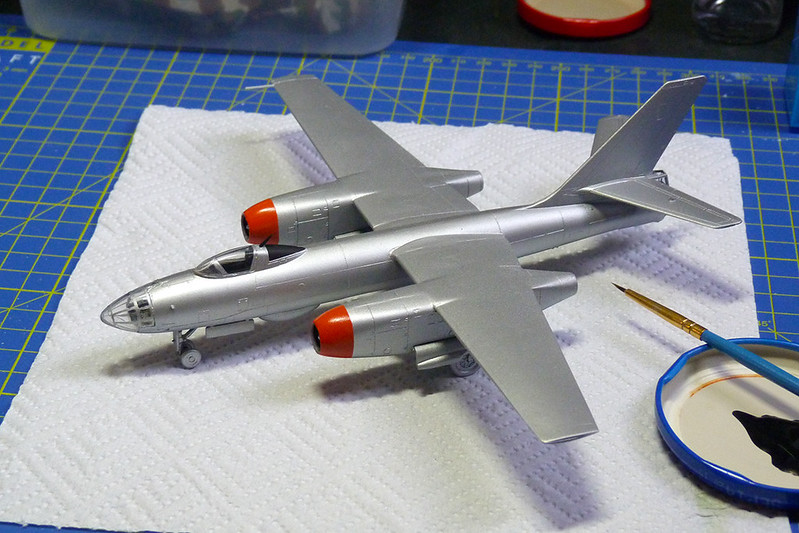
Started painting the details today...
Don't look too closely (please) as some of my boo-boos will become obvious. Doing an aircraft turns out to need a whole new set of modelling skills and applied in a different way than those I have gained modelling vehicles.
To be frank, there is a lot you can hide behind 'weathering'! But planes look better pristine (in my opinion), so no fudging by adding some convenient bumps and scratches or rust and mud.
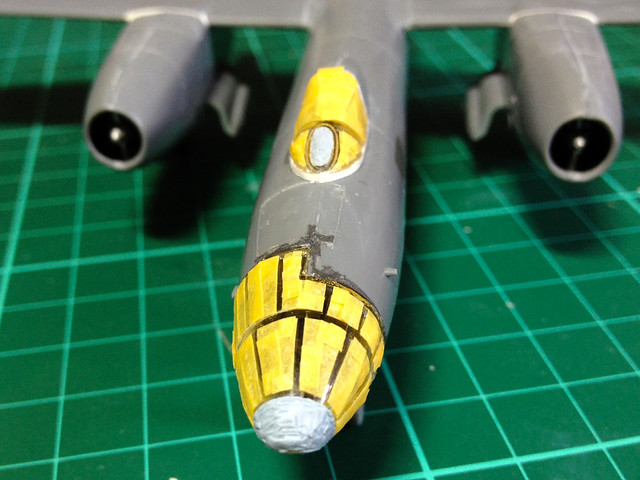
Anyhoo, there were some positives too - the masking of the nose canopy worked to a degree and some of the work I did with my sanding and filling worked out well. But I do think I need to explore finer specialist modelling abrasives for finishing off.
Next: Finishing off the details and re-masking the canopies before applying the gloss - pre-decal - coat.
Don't look too closely (please) as some of my boo-boos will become obvious. Doing an aircraft turns out to need a whole new set of modelling skills and applied in a different way than those I have gained modelling vehicles.
To be frank, there is a lot you can hide behind 'weathering'! But planes look better pristine (in my opinion), so no fudging by adding some convenient bumps and scratches or rust and mud.
Anyhoo, there were some positives too - the masking of the nose canopy worked to a degree and some of the work I did with my sanding and filling worked out well. But I do think I need to explore finer specialist modelling abrasives for finishing off.
Next: Finishing off the details and re-masking the canopies before applying the gloss - pre-decal - coat.
Monday, 17 June 2013
1/100 Tamiya IL-28 Beagle - Part 10...First coat.
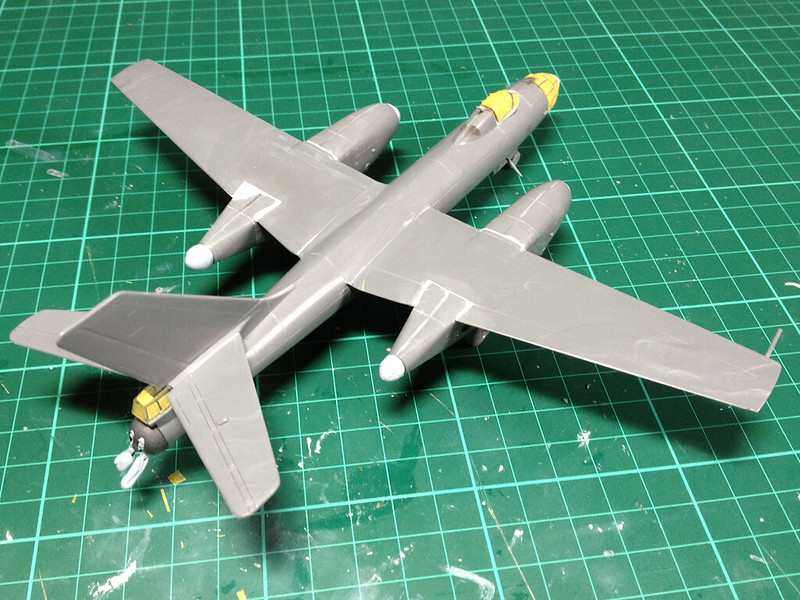
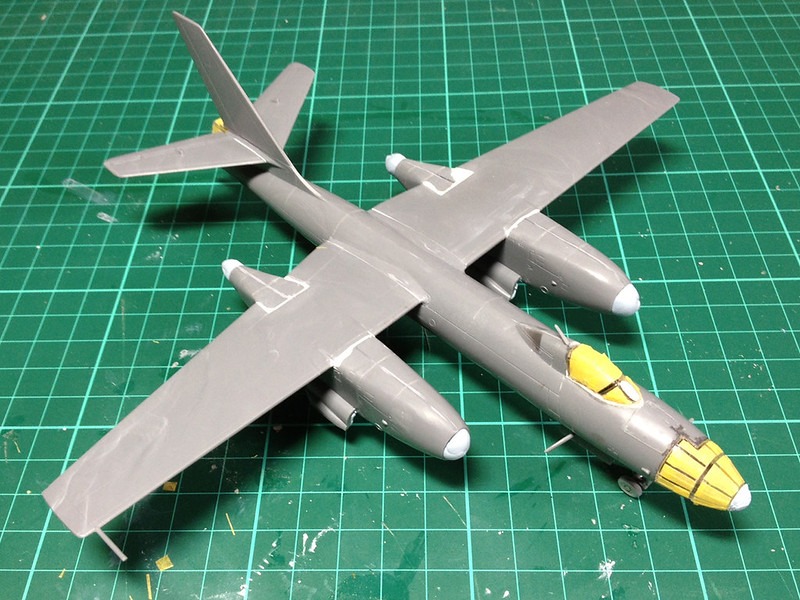
Having masked off everything I could think of...
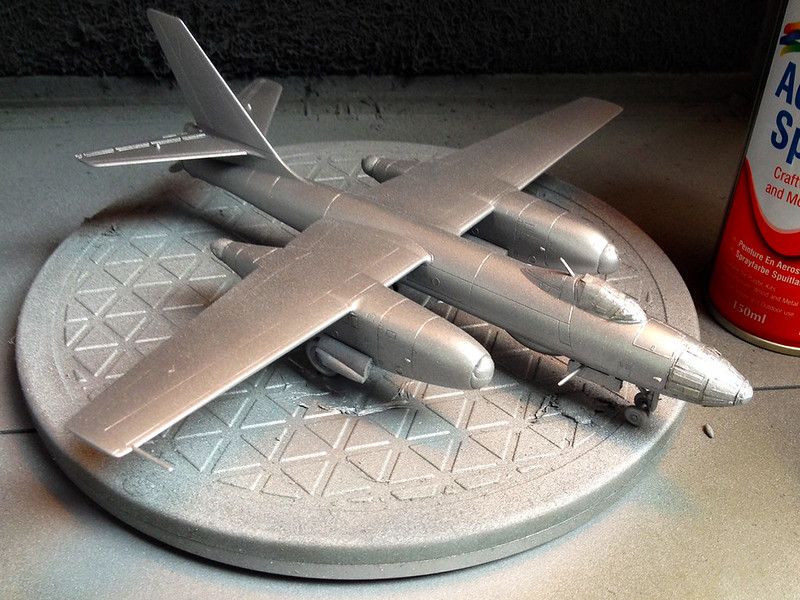
Then it was finally time to bite the bullet and spray the first few coats of the Humbrol silver. The moment of truth...
And the sad news that despite all the fuss I made over filling and sanding some of my seams are still visible Pah! That will teach me to think that I knew what I was doing, there's obviously a knack to this. :)
Next: Painting the details before glossing for decals.
Then it was finally time to bite the bullet and spray the first few coats of the Humbrol silver. The moment of truth...
And the sad news that despite all the fuss I made over filling and sanding some of my seams are still visible Pah! That will teach me to think that I knew what I was doing, there's obviously a knack to this. :)
Next: Painting the details before glossing for decals.
1/100 Tamiya IL-28 Beagle - Part 9...Yawn!
OK, I know you will be tiring of this as much as I am but hopefully once I get past this bit of the model making things will speed up again...
You will probably have guessed that this wasn't my favourite process - I kept finding excuses to do other stuff instead! :)
Saturday, 15 June 2013
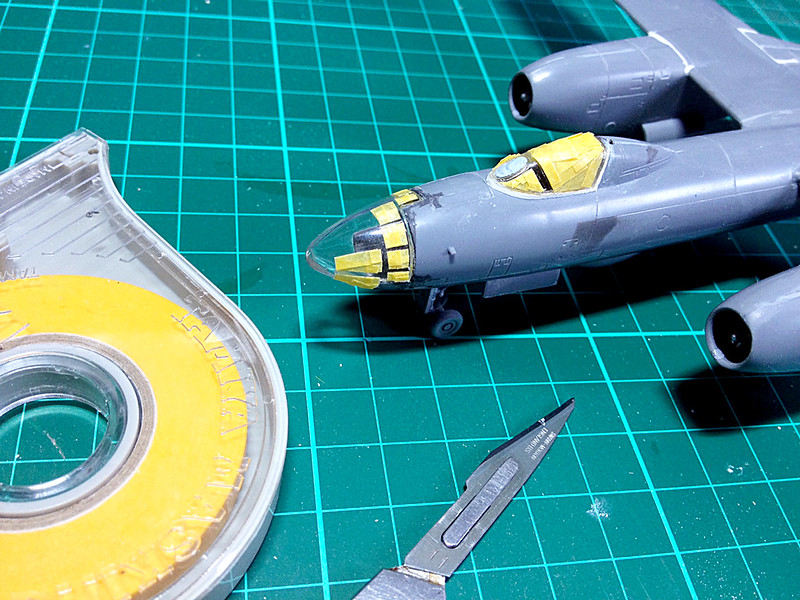
1/100 Tamiya IL-28 Beagle - Part 8, Canopy masking
Just a tiny update on this project as I haven't mentioned it in a short while. Basically I am at one of those very monotonous and time consuming stages, masking the canopy.
Now this very well might be my fault as I am playing this one by ear, I am not sure if I am doing this properly at all. Fingers crossed though. Once I have masked out the complicated nose canopy framework I will start giving the model it's first light coats of Humbrol's spray metallic acrylic.
Monday, 10 June 2013
1/100 Tamiya IL-28 Beagle - Part 7, Canopy
Arrrrrrggggg! After all the care I tried to take I checked my canopy yesterday only to find a big spec of dust or something on the INSIDE of the main canopy...How it got there I do not know, I checked when I did it but must have been tired or something. Anyway, I missed it and I had to take off the cockpit canopy again to remove the dust ...
Additionally, despite having checked, the fit of the main cockpit glass isn't as good as I thought, so after removing the spec I glued it back on and then had to use some Milliput around the bottom of the canopy to make a perfect seal.
Bah!
Additionally, despite having checked, the fit of the main cockpit glass isn't as good as I thought, so after removing the spec I glued it back on and then had to use some Milliput around the bottom of the canopy to make a perfect seal.
Bah!
Friday, 7 June 2013
Krystal Klear - fun with canopies
1/100 Tamiya IL-28 Beagle - Part 6
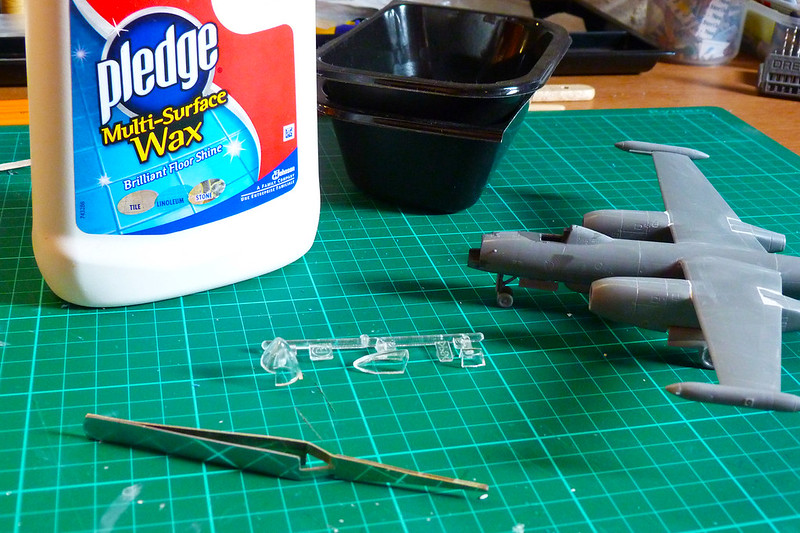
Any newcomer to model making who delves into the many and various modelling forum will soon read about Pledge Klear floor wax. It's one of those 'miracle' products that kit-making veterans swear by, but it took me a while to get my head around what it is and what it does...
Quick explaination: Plain old Johnson's Klear floor wax was a liquid acrylic varnish. In recent years it was re-branded as Pledge Klear, but is exactly the same stuff - except that it's now a cloudy liquid and is slightly scented (which has absolutely no bearing on it's effectiveness). Some bright spark found that it was a terrific and cheap substitute for specialist modelling acrylic gloss products. That's it.
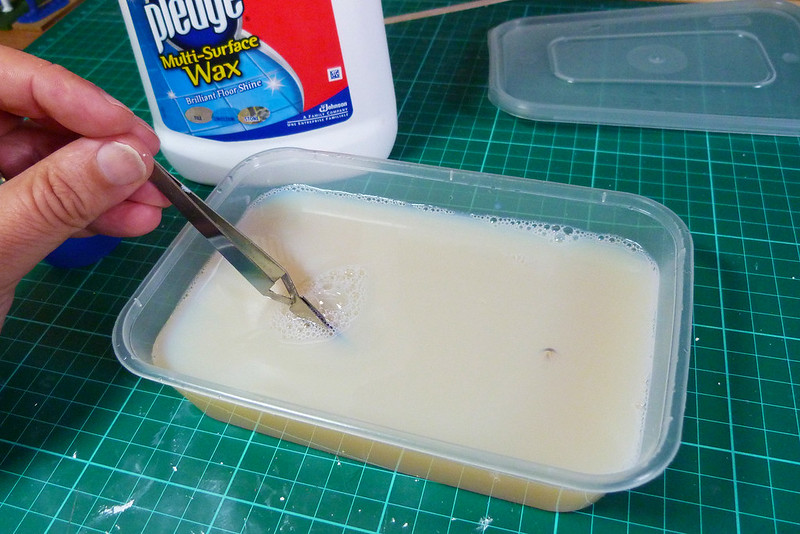
Anyway, in this context it does a very good job in protecting model canopies when you dip the model parts in a bath of the substance...It's a very easy process and will - I am assured - make the clear plastic parts shine and provide a barrier that prevents scratching prior to affixing or frame painting.
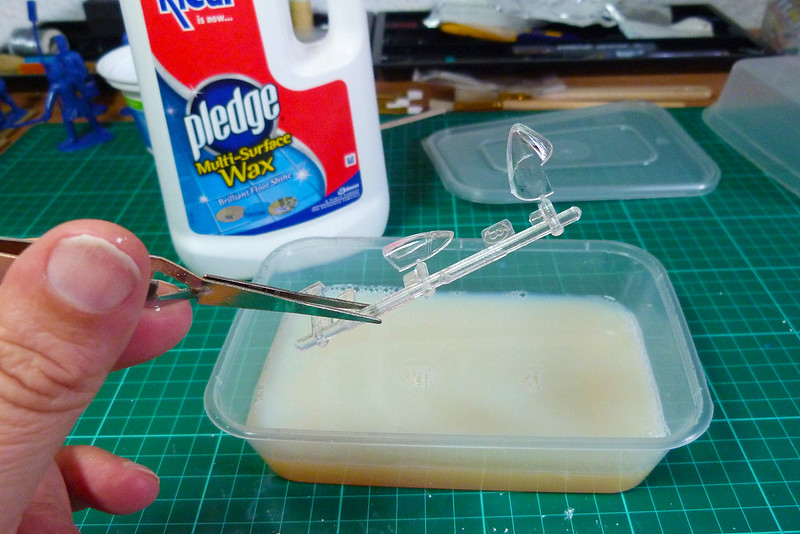
| A quick dip in a bath of Klear is all that is required. Immerse the parts completely for a minute or so, then remove and drip off any excess. |
The process for canopies is very simple indeed, just dunk your canopies in a little bath of the solution. Despite the liquid looking milky it does dry absolutely clear...
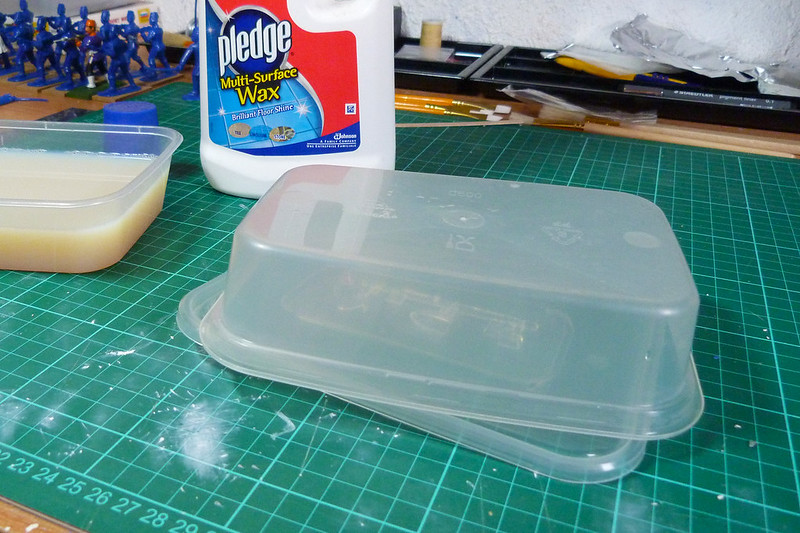
After a couple of minutes in the bath and dripping off the excess liquid you plonk the parts down on a clean base and leave to dry. A tip I picked up is to cover the parts with a lid or something like that to prevent dust particles or stray hairs settling on your still drying parts - just leave a gap at the bottom for the air to circulate...
Give the parts a good 3-5 hours to dry, or even better over-night if you can. Now they won't look that different - don't expect them to go 'ting!' with a TV advert type of sparkle - but the protective layer is there and it is, as it says on the bottle, perfectly Klear!
Personally I wanted this protection as I will be masking and over-spraying the canopy frames onto the parts, but the idea that my parts will retain this clear look despite moderate handling is appealing too (as I find clear parts pick up scratches and blemishes very easily).
Again, there are specialist products out there that do the same thing, but they are comparatively expensive. Klear is reasonably easy to pick up - I got mine for a fiver for a huge 750ml bottle from Amazon - and best of all you can reuse the liquid again and again by pouring it back in the bottle!
One last thing - Klear is also highly recommended as a model varnish, it can be diluted and sprayed on and works very well helping to seat decals. I have tried this and was very impressed...
So there you go. Pledge Klear, cheap and cheerful acrylic varnish.
Wednesday, 5 June 2013
1/100 Tamiya IL-28 Beagle - Part 5, Wheels down
Probably one of the easiest phases in this kit, the undercarriage went on without any problems. This is the first phase where I haven't found myself reaching for my modeler's putty!
At the same time I tried out a test fitting for the wing-tip tanks...
Well, just two minor pre-painting phases to go. The first is the construction of the rear turret and the second is the preparation of the canopies.
I already did a test fitting of the canopies and was pleased to find that they are quite a nice fit. So I can move on to the Pledge Klear dip (more on that later)...
There will also be a minor painting phase as I check all interior surfaces and give them a coat prior to the major overall silver coating. Things like undercarriage wells and nose interior and tail gunner interior surface will get a coat of mid-grey.
At the same time I tried out a test fitting for the wing-tip tanks...
Well, just two minor pre-painting phases to go. The first is the construction of the rear turret and the second is the preparation of the canopies.
I already did a test fitting of the canopies and was pleased to find that they are quite a nice fit. So I can move on to the Pledge Klear dip (more on that later)...
There will also be a minor painting phase as I check all interior surfaces and give them a coat prior to the major overall silver coating. Things like undercarriage wells and nose interior and tail gunner interior surface will get a coat of mid-grey.
Monday, 3 June 2013
1/100 Tamiya IL-28 Beagle - Part 4, Winging it
While I want to get to the putting the wings on stage of my Beagle, I'm afraid there is even more filling to do first. There are a few noticeable gaps around the engine roots - where they meet the wings - and it's a job for the Milliput this time...
Additionally there are a few small gaps in the undercarriage wells so I might as well do the job lot in one go...
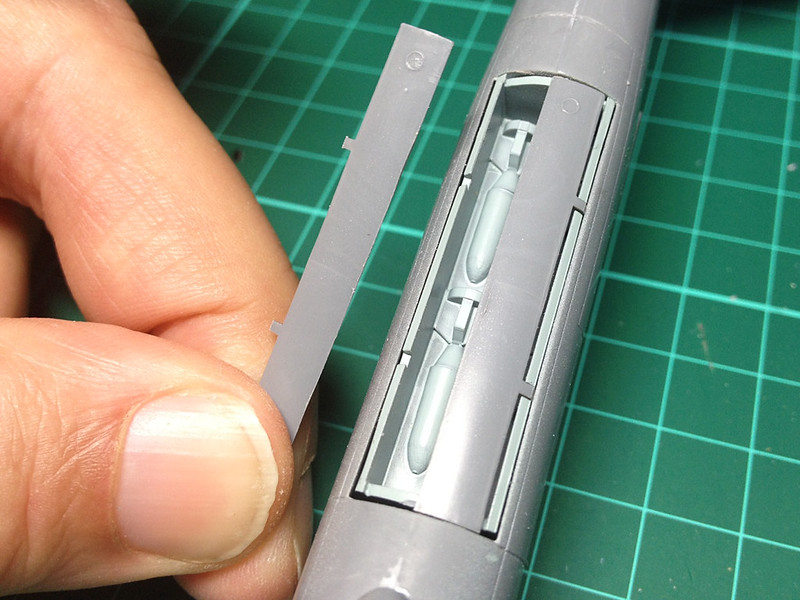
Putting these parts aside to set I had a look at the bomb door and it's much the same news, ill-fitting parts which need the attention of some filler...
That done it's on to the wings themselves. Again I expect to have to do some filling at the wing roots, early test installations showed a none too exact fit. I will also have to carefully level the wings as one of the wings seems to want to lean upwards while the other down!
Well, once the wing joins are filled that will be the main part of the construction complete. All that's left to do is the undercarriage and I do have the option to add the wing-tip fuel tanks. After this it is the scary bit...The main coat of metallic silver! (The canopies will wait until the main coat is done.)
Next: Undercarriage down!
Additionally there are a few small gaps in the undercarriage wells so I might as well do the job lot in one go...
Putting these parts aside to set I had a look at the bomb door and it's much the same news, ill-fitting parts which need the attention of some filler...
That done it's on to the wings themselves. Again I expect to have to do some filling at the wing roots, early test installations showed a none too exact fit. I will also have to carefully level the wings as one of the wings seems to want to lean upwards while the other down!
Well, once the wing joins are filled that will be the main part of the construction complete. All that's left to do is the undercarriage and I do have the option to add the wing-tip fuel tanks. After this it is the scary bit...The main coat of metallic silver! (The canopies will wait until the main coat is done.)
Next: Undercarriage down!
Saturday, 1 June 2013
1/100 Tamiya IL-28 Beagle - Part 3, Mr. Surfacer
Smoothing seams is a bit of a speed bump in my progress with my Beagle. I suppose this part of the construction can take as little or as much time as you decide to dedicate to it...
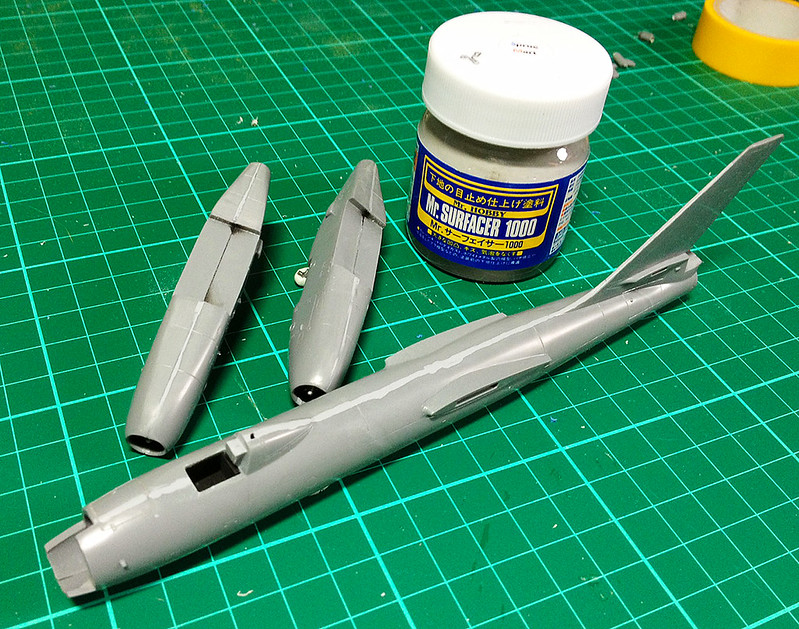
I decided to give a new product a go - Mr. Surfacer. I had heard a lot about this liquid filler and it's ability to fill in small blemishes and seams. It's a self levelling sludge (the only way I can describe it) which flows into bumps and cracks and settles there. Once dry you can sand it smooth.
First of all I filled down the worst of the overlapping seams with a needle file, then smoothed away the file marks with some very fine glass paper. And then I carefully painted on Mr. Surfacer in a smooth line up the seams (see photo of fuselage) before leaving it to settle and dry.
Once the filler had dried I checked to see if it had settled down into the blemish in which case I gave it a second coat of Mr. Surfacer and again waited for it to dry.
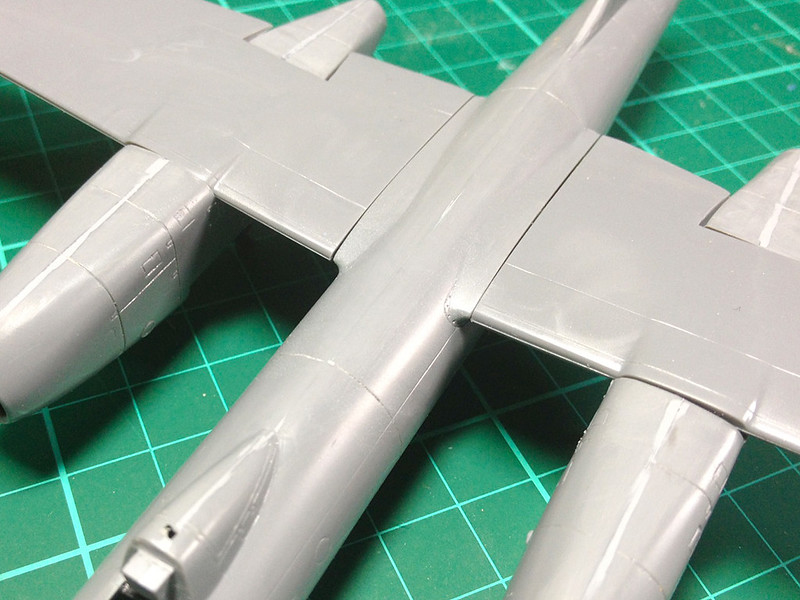
Finally I started to carefully file and then sand the new seam until I felt the join was smooth enough (see photo and the engine nacelles). I used the fingernail technique to tell me when the joins were 'seamless' by dragging my nail over the join - if it caught on an uneven seam then I continued to sand it.
Now, you may very well find that in smoothing away the areas around a join that you also sand off some of the detail - like the panel lines. There's nothing you can do about that, you will just have to try and use a scribe or sharp point to draw back on these details. Raised detail is another matter, for example there is a hatch on the nose which had a raised seam all the way around it which my sanding rubbed out a little...I'm still thinking about how I will correct this.
| Seams sanded I try out fitting the wings and discover that there will be more work ahead of me. But the central seam does look a bit better as does the joins on the engine nacelles. |
Anyway, you get the idea.
Mr. Surfacer - as opposed to my usual Milliput filling - is an interesting and useful material. Before I started using it I used to fill with Milliput and then use a wet brush to smooth down the filler, BUT Mr. Surfacer is self-levelling, more or less smoothing itself out. But, as usual with these specialist modelling materials, it is not the miracle stuff that some people make it out to be on some of the forums. It will not miraculously make defects in the model's surface disappear...That is all down to how much hard and careful work you do with elbow grease!
Thursday, 30 May 2013
1/100 Tamiya IL-28 Beagle - Part 2, construction
Carrying on with my 1/100 Beagle, things didn't bode well during the dry fitting. This is one of Tamiya's older kits (apparently) and the quality of fit isn't what I had expected from the company. Still, what would it be like if everything were perfect eh?
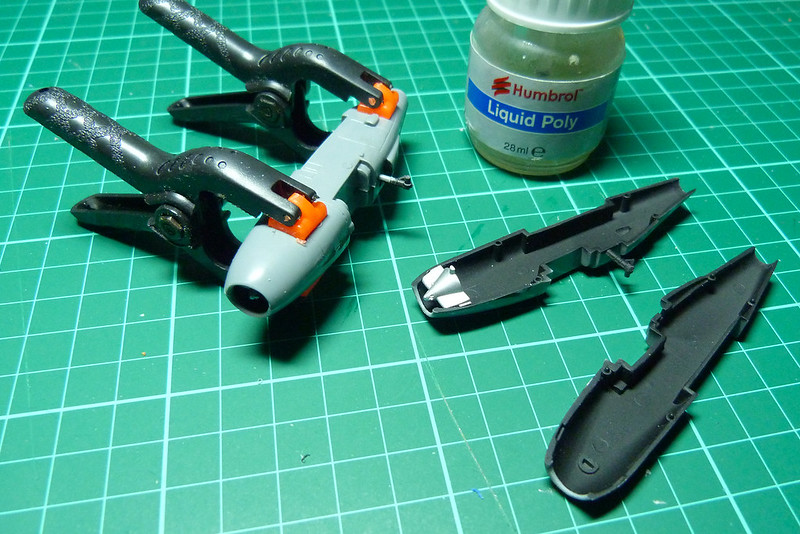
I painted the inside of the engine nacelles and then put the haves together...Not the best match. I would dry fit these if you try this model and work on filing the shape of the circular intake and exhaust ports before committing to glue.
The clamping is necessary if you want to close up the seam tightly. But I foresee plenty of sanding to merge the seams and match the halves precisely.
While the nacelles dry I began work on the fuselage, again I painted the inside (cockpit green instead of the recommended flat grey). There isn't a lot of detail in the cockpit - no dials and what not - and there is no pilot, so you are sort of nudged gently towards making this a grounded aircraft (further encouraged by the landing gear set in the down position by default).
In order to accomodate a landed plane some ballast is provided in the form of two steal balls. These sit in the forward compartment and should balance the model out when sitting on its undercarriage (hopefully).
You are provided with a moderately detailed bomb bay, should you wish to model your aircraft with bomb doors open. But as my aircraft is the Finnish target towing variant I shall have the bomb doors closed (so no painting of the bombs).
Glued and clamped the two fuselage halves go together OK, but there is - once again - a bit of mis-matching which will require some sanding to smooth out some of the joins.
Next will be the mounting of the engines onto the wings and then fixing the wings to the fuselage. But I will be smoothing out the engine seams before I do that! Quite work intensive really, but for £3 I guess there has to be some sort of catch.
I painted the inside of the engine nacelles and then put the haves together...Not the best match. I would dry fit these if you try this model and work on filing the shape of the circular intake and exhaust ports before committing to glue.
The clamping is necessary if you want to close up the seam tightly. But I foresee plenty of sanding to merge the seams and match the halves precisely.
While the nacelles dry I began work on the fuselage, again I painted the inside (cockpit green instead of the recommended flat grey). There isn't a lot of detail in the cockpit - no dials and what not - and there is no pilot, so you are sort of nudged gently towards making this a grounded aircraft (further encouraged by the landing gear set in the down position by default).
In order to accomodate a landed plane some ballast is provided in the form of two steal balls. These sit in the forward compartment and should balance the model out when sitting on its undercarriage (hopefully).
You are provided with a moderately detailed bomb bay, should you wish to model your aircraft with bomb doors open. But as my aircraft is the Finnish target towing variant I shall have the bomb doors closed (so no painting of the bombs).
Glued and clamped the two fuselage halves go together OK, but there is - once again - a bit of mis-matching which will require some sanding to smooth out some of the joins.
Next will be the mounting of the engines onto the wings and then fixing the wings to the fuselage. But I will be smoothing out the engine seams before I do that! Quite work intensive really, but for £3 I guess there has to be some sort of catch.
Monday, 27 May 2013
1/100 Tamiya IL-28 Beagle - Part 1
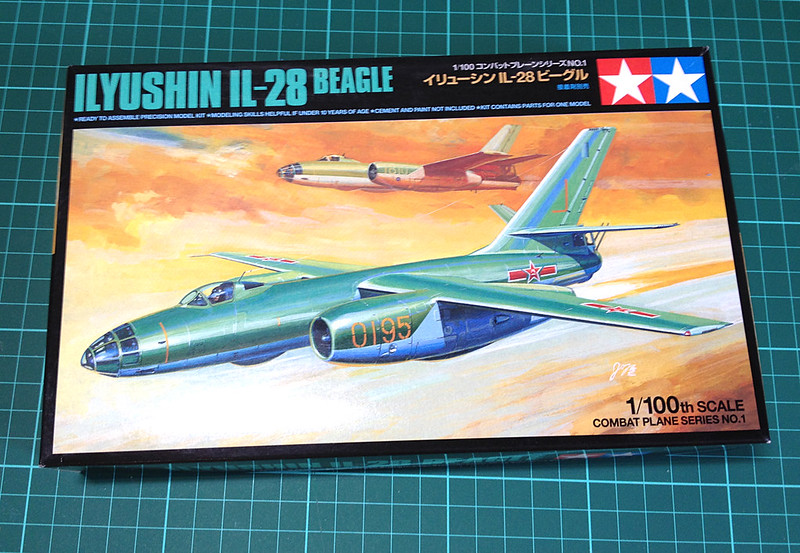
Bit of a tangent here, but this was one of those spur of the moment purchases as it was just £3 at my local model shop. I enjoyed making this 1/144 aircraft I have done so much I thought I might like to have a go at some more, and I do like twin engined attack aircraft. This Beagle is a lovely looking plane, I suppose it was the Soviet answer to the Canberra (?), and even at 1/100 it is quite a big kit.
It comes with a choice of about four different national schemes including, a pleasant surprise, a Finnish one! Aircraft finishes are mainly polished metal, but the Chinese air force example does give you the choice of a nice green and blue scheme (as on the box).
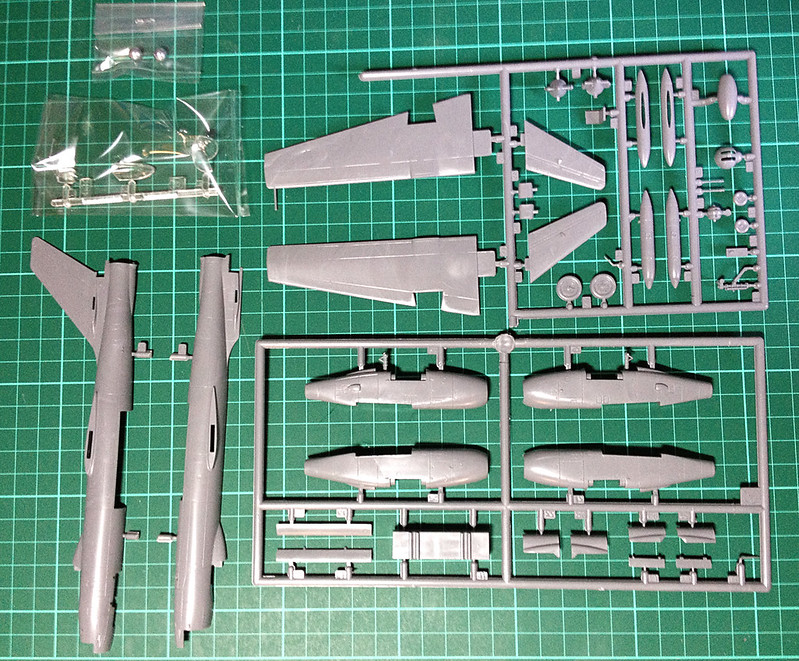
I unboxed the model today and you can see from my rather shoddy photo above that there aren't that many parts (and certainly no variant options). But still that's all good as I don't feel like doing anything complicated at the moment.
Next: Construction
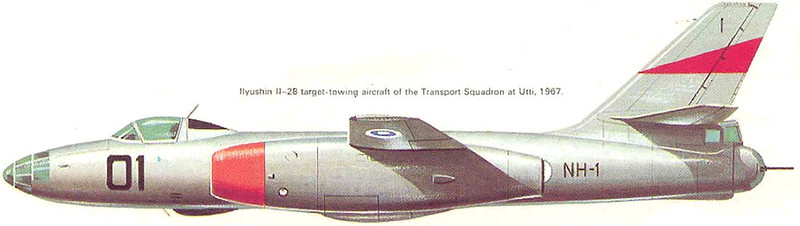
Edit: Managed to find a illustration of the Finnish example that is included in this kit. It's a target-towing aircraft from the Finnish Transport Squadron based at Utti in 1967. Not very glamorous I suppose, but a necessary job...
Source: Wings Palette web site, "Finnish Air Force 1918-1968", Aircam Aviation
Series No.2, (c) Osprey Publishing Limited, England. SBN 85045-012-8.
Subscribe to:
Posts (Atom)