Friday, 6 January 2017

Thar be Monsters!

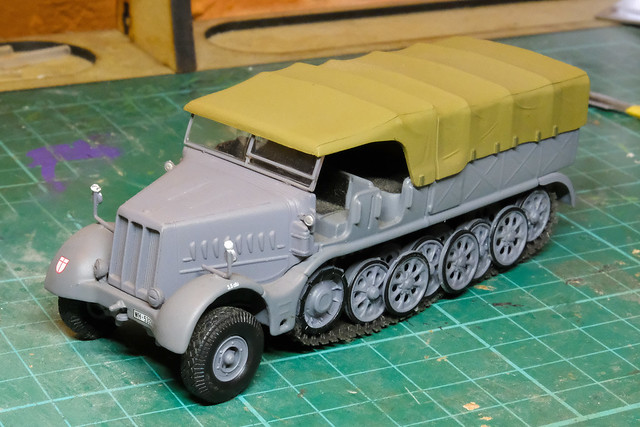
I had nice surprise this morning, one of my belated Christmas presents arrived, a Deagostini 1/72 Combat Tank Collection Schwerer Zugkraftwagen 18 t Sd.Kfz. 9 'FAMO'!


This amazing vehicle was the heaviest half-track produced by the Germans during WW2. It was a prime mover, principally dragging around their larger artillery but it later found a new role as a recovery vehicle for another monster - the Tiger I.

It is as a recovery vehicle that this model interests me, as the Finns purchased a couple of examples from the Germans late in the war as they were desperately short of this sort of extreme pulling power. The Finns relied heavily on captured heavy tanks, as they had no tank manufacture of their own, so being able to recover damaged or abandoned tanks off the field was of major importance to them.

But the sheer size of these astonishing vehicles isn't obvious until you see them compared to a 'normal' sized truck...
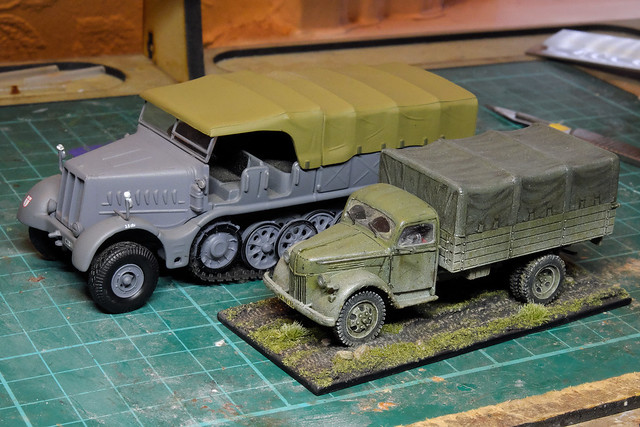
The giant FAMO compared to a Ford V3000 medium truck of the same period!
The size difference between the Famo and conventional medium trucks of the time is astounding. When you look at the above picture you do find yourself wondering if both vehicles are of the same scale. They are, 1/72.

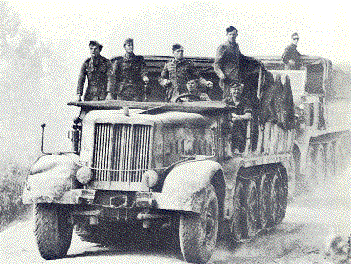
Sadly, one of the only photos of the Famo in Finnish service during the Continuation War (1941-44) is this half-caught 'photo bomb'...


It does show an interesting 'tiger stripe' camo pattern, though. But does leave me wondering what the two colours are. It's very likely that one of the colours is the colour that the Famo was painted when it left it's German factory (either Field Gray or 'Dunkelgelb'), but what the second colour might be is anyone's' guess (possibly Finnish Brown or Moss Green).

Incidentally, the back end of the other truck you can see in the photo is very likely the other German purchase the Finns made for their recovery operations, a Bussing NAG 4500A w/ Bilstein 3T crane...
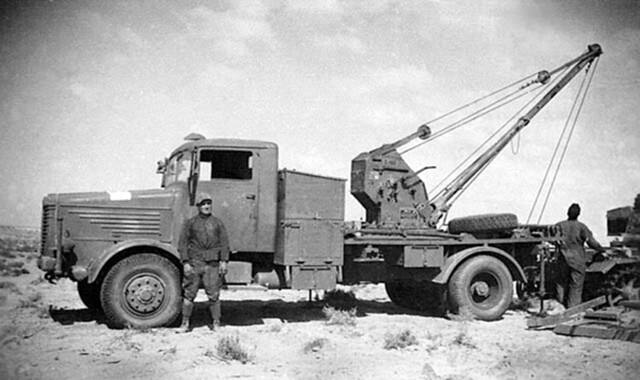

This was another Teutonic monster, a 4.5 tone 4x4 truck which - like the Famo - dwarfed other vehicles. I actually bought a die cast model of this as well and here are the models compared...
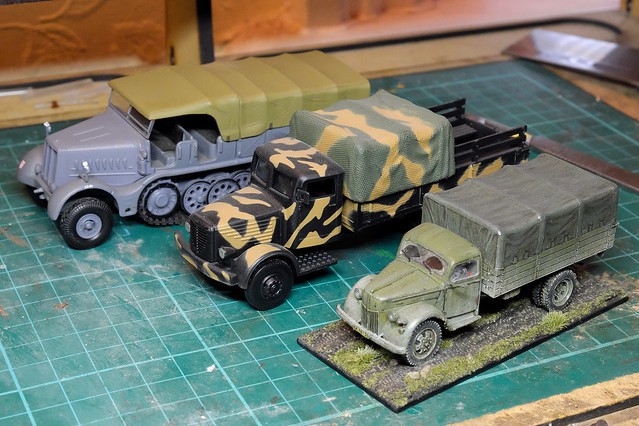

I had it in mind to convert the Bussing NAG into the recovery version with crane (the real version of which was capable of lifting 3 tons).

These stunning vehicles would make a smashing addition to my Finnish collection (although they aren't actually needed to fulfil the Rapid Fire wargame rules that I'm using as a guide to my collection). And I can't resist adding this last photo (source unknown) just to illustrate the sheer unbelievable size of these mighty beasts...
Hunor Model 1939 Ford V8 Truck - Part 2

I keep telling myself 'no more resin kits' and yet, here I am learning just why I swear I'll never do another!

There must be modellers who like resin kits, really there must...The sort of masochists who like wobbling loose teeth until they fall out, or like licking batteries. I guess, to be fair, resin short-run kits fill the dark void where plastic injection manufacturers do not want to tread. Where else would I get an obscure pre-WW2 commercial truck kit if not from resin magicians like Hunor?

Grudging acknowledgement of the important role resin manufacturers have to play in the hobby aside, this kit is already driving me mad...


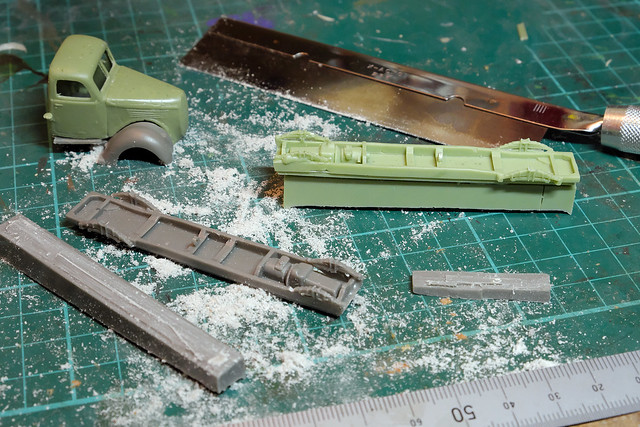
In the above picture, you can see the enormous lump of resin which is attached to the chassis frame as well as a second chassis I have already freed with a modelling saw (I am making two of these Ford kits). Resin isn't the easiest material to cut when it's so thick, but this hefty chunk is taking the mickey.

The reason I'm moaning is that, when you have to cut free delicate components like this it can be so easy to slip and cut or snap the item...So, I saw or cut slowly...


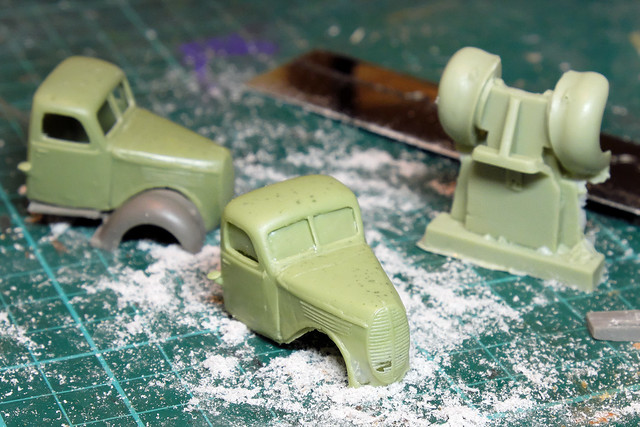
I'd already cut the truck cab floor from a small slab of resin (just about to start the second) and did some general flash removal. Unfortunately, Hunor's quality control isn't on the ball as you may notice that the radiator grill of the cab in the foreground is damaged...


The other niggle I have about having to cut off slabs of resin like this is that I'm not always sure where, exactly, I'm supposed to detach the component. With the cab's floor it was pretty obvious where to cut, but the chassis was less than clear and I may have to trim some more resin off after I have test fitted all the parts.

It's going to take me some time to safely detach all the parts from their resin imprisonment, so don't expect another update on this project any time soon!

(Just one last thing, I have been reminded that I should include a warning about resin dust. As you can see from my photos, cutting or sawing - or sanding - resin does produce a fair amount of dust. Please remember to wear a protective mask while doing this and clean up your work bench as you go, this stuff is not good for your lungs!)

Tuesday, 3 January 2017

Stash additions for January 2017


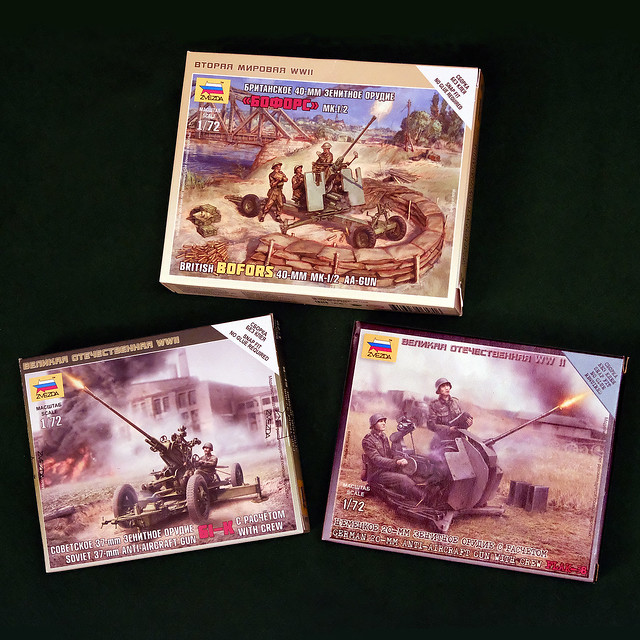
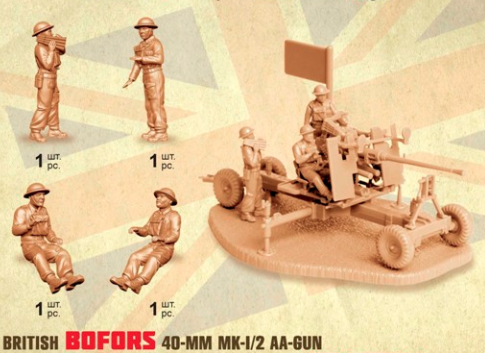
January is 'Anti-Aircraft Month'! All my 'Finnish' project builds are flak related (either AA guns, their crews or towing vehicles). Above Zvesda kits were delivered today, a lovely BEF Bofors set, Soviet 37mm gun set and little Flak 38 set.

The Finns seem to have been reasonably well equipped when it came to AA guns and there is a wonderful reference source over at JaegerPlatoon.Net, including everything from light anti-aircraft machine guns all the way up to the heavy flak guns: www.jaegerplatoon.net/AAMG.htm

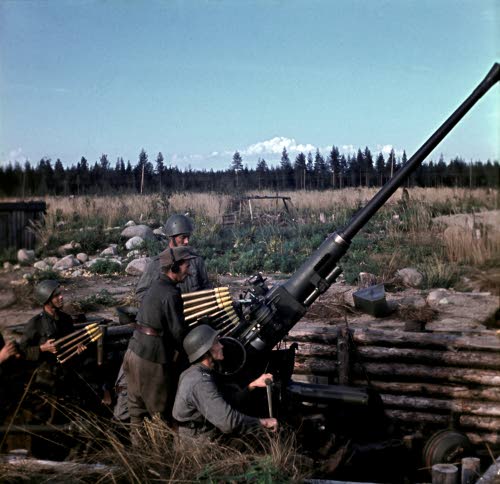
As usual, SA KUVA - the Finnish WW2 photo archive - is an excellent source
of reference photographs. Anti-Aircraft guns seemed to be a very popular subject
for propaganda purposes, so there is an abundance of really good material. If you
do a search for 'ilmatorjunta' - which I believe is Finnish for 'anti-aircraft', you
should come up trumps.
Like many other nations at the time, the mainstay of their AA inventory was the good old Bofors 40mm. Perhaps not surprising as Sweden is a near neighbour. The Finn's used the M/35 & M/39 Bofors, while very similar to the British Mk. I gun, the Finnish gun did not come equipped with a shield (so I will omit that component when I build the kit).

The Zvezda British Bofors set is actually very detailed and not what you would
term an 'easy build' (which many of their 'Art of Tactic' range are).
Actually, the reason I have also bought the Russian 37mm AA gun is so I can pinch it's crew and wheels! The Finnish Bofors has different wheels to its British counterpart, and the British gun crew are too different in their uniforms for me to convert, so the Russian AA crew will be substituted (probably with the addition of German helmets).

I have bought two of the Zvezda Bofors sets so that I can model the gun in both static and mobile modes.

As the war progressed and Finland swapped sides (!), they started to get more and more German equipment. Among this were a number of Flakvierling 38 (or Flak 38 for short) 2cm guns which the Finns designated as theItK/38.


The Zvesda Flak38 is a sweet little kit, with minimal parts but it looks terrific and I can use the German crew as is as they will pass for Finns when painted.

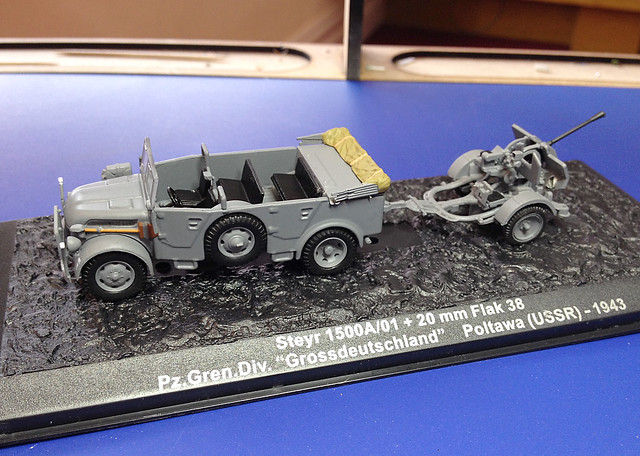
For the towed version (which, because I am using war game rules as my guidelines for this project, I will also need), I was lucky enough to pick up an example of this gun in its mobile configuration with a Deagostini Steyr 1500A/01 car I bought.

I bought this Steyr 1500A/Flak 38 set as I wanted the car to convert into a
Finnish Army command car. Handy.
So I just need to source a suitable Finnish vehicle as the tow (a light truck, like the Russian Gaz AA or Zis 5, which the Finns had in fairly large numbers).

Saturday, 31 December 2016

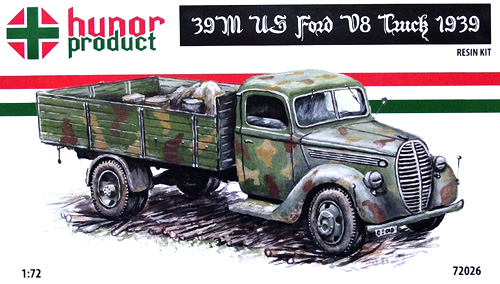
Hunor Model 1939 Ford V8 Truck - Part 1


First build for 2017 will be a resin kit by the Hungarian company Hunor. It's another truck for my Finnish Continuation War project and is, once again, a little obscure pre-WW2 design that was typical of the Finn's reliance on civilian and commercial vehicles that were imported from America.

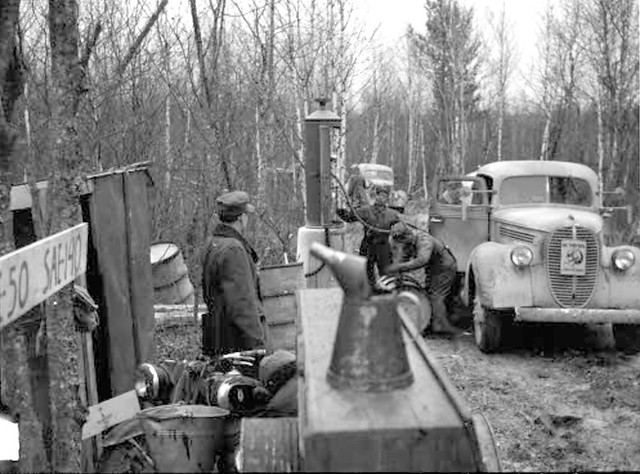
Nice photo of a Finnish Ford at what looks like a military fuel supply stop.
Dated 1941. Photo credit: SA KUVA
This will be my first Hunor model and despite unhappy memories of the last resin kit I made (by Zebrano) I am looking forward to this build as I have heard good things about Hunor.

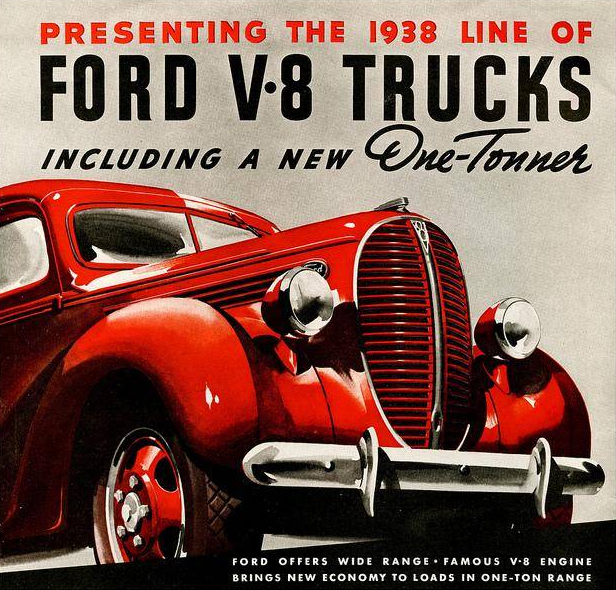
The 1939 Ford V8 truck is fairly typical of the lighter type of commercial flat-bed cargo vehicles of this time. In truth, it was only slightly bigger than a pick-up truck and shared the same cab design across the range, from van to truck...


While this format was prevalent and popular at the time it's suitability as a military prime mover may be questionable because of its light weight. But still, it's availability and the reliability of its V8 engine was what the Finn's sorely needed at the time. These trucks just kept on going, as can be seen in this 2015 video of an American family's Ford, which has been their farm truck since 1953...


One final historical note worth mentioning is that, the 1939 Ford V8 design is yet another one of those late 1930s American vehicle designs that was manufactured both in the USA and in Germany! I *think* the Finn's M39 Fords were US imports rather than products of Germany's Fordwerkes. (Apparently, they were produced in Germany from 1939 to 1941. Like the Ford V3000 V8s, the way to tell the American from the German version is that the US-made models had a split windscreen, while the German Fords had a one-piece windscreen.)

The Hunor kit
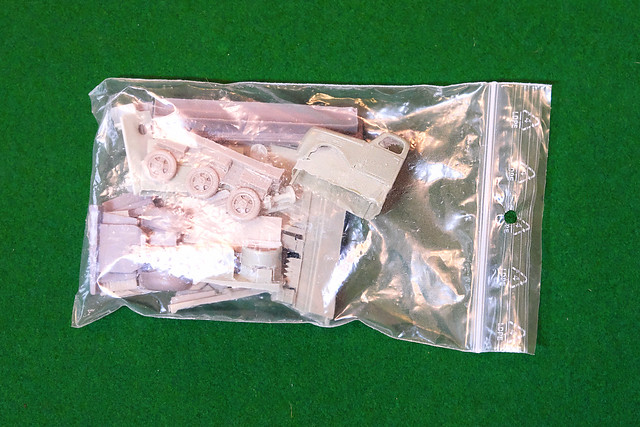
The kit comes in a nice cardboard box, but inside you will be met with some polystyrene packing and a plastic bag of parts...


While I guess it's hard to produce resin models on a sprue - like plastic kits - I always wince when I see all the delicate resin components squeezed into a loose bag like this. Fingers crossed for no broken parts!

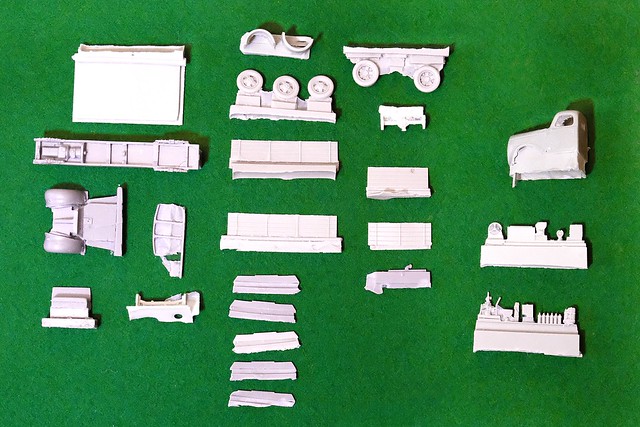
Luckily, everything seemed to be in order when I checked all the parts but there is quite a bit of flash and smaller detailed parts are attached to large blocks of resin. A lot of cutting and cleaning will be required...


One of the constant niggles (I have) with resin model manufacturers is the low quality of their printed instructions, Hunor seems to be no different...


Oh dear! Not only draw by an 8 year old child but also - when one checks the parts - a few operations are only very vaguely alluded too. For example, the flatbed supporting spars will need a lot of TLC lavished on them before they can be affixed to the underside of the flatbed.

I may be being picky, but when you consider the premium price one is being asked to pay for these kits (€35 plus shipping) you would think the least they could do is spend some time on better instructions!

Well, I guess the moral when dealing with resin kits is that it's all in the prep! So, I'll be spending quite some time preparing all the parts so that they are in a finished state ready for the assembly.

Friday, 30 December 2016

Starting afresh for 2017!

My recovery from illness has been a lot slower than I imagined, my hands have slowly begun to stop shaking which has precluded any model making or painting. But, things are starting to look up and I starting to plan ahead for a fresh start in 2017!


New Year's Resolution
Actually, the break has forced me to spend some time thinking about what I am doing with my modelling. Thus far, everything I have done has been a bit spontaneous, or eclectic or faltering as I undertook model-making in a very sporadic and unfocused manner.

2017, I have decided, will be very different. I now have a plan!

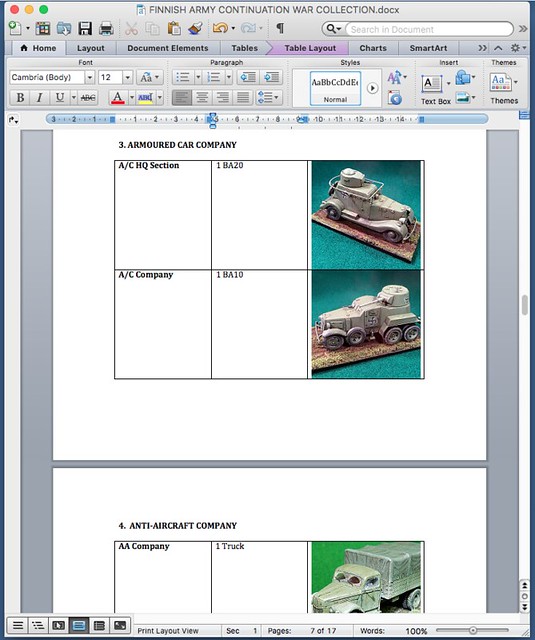
I am determined that this year will see me completing my Finnish Continuation War collection and I have even produced a Word document with a sort of road-map of how I will achieve this. This outlines everything I need to do to complete my collection using the Rapid Fire rules as a guideline for my Finnish army.

A proper outline document listing the models I have and the models
I still need in order to complete my Finnish army collection!

First Build for 2017
Looking at the gaps in my plan, I still need to build some more trucks. I never knew that a wargaming army composed of quite so many trucks, I naively imagined it was all the exciting stuff - like tanks and artillery - but I have discovered that a late 20th Century army doesn't so much 'march on its stomach' as ride around in a truck!

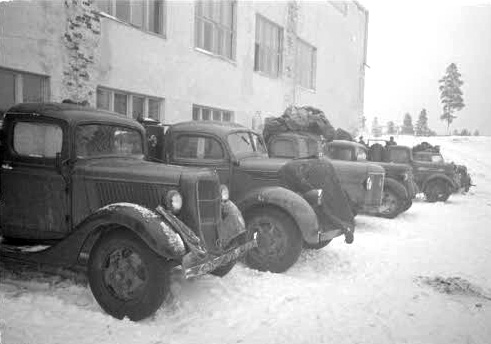
Not the best period photo of a Ford M39 (second from left) but still a very
interesting illustration of the eclectic nature of Finnish motor transport in 1942.
Every truck in this line-up is a different make and model!
So, the first model for 2017 will be a rather niche and potentially tricky resin Hunor 1/72 Ford Model 1939 V8 truck. This model was a little hard to get hold of and somewhat expensive, but it represents one of the less well-known vehicles that made up the Finnish WW2 inventory.  Like a lot of the Finn's motor pool at this time, the Ford M39 V8 was a pre-war import and probably a commercial civilian vehicle which was pressed into military service.


I have had a fair amount of bad experiences with resin builds (I'm looking at you Mr. Zebrano) but this is my first Hunor and they seem to have a fairly good reputation. This despite all the parts being supplied loose in a plastic bag!

Apologies, this video is in Russian (I think), but it does give you a good idea of what to expect in a Hunor box...


Let's hope this turns out to be a good start to the New Year - and I hope everyone has a happy and prosperous 2017!

Tuesday, 1 November 2016

What I've been up to!

Bit of a hiatus in the blogging and hobby-ing over the past two months. This was due to an unexpected trip to the hospital and a stay in Hull Royal Infirmary's ICU...

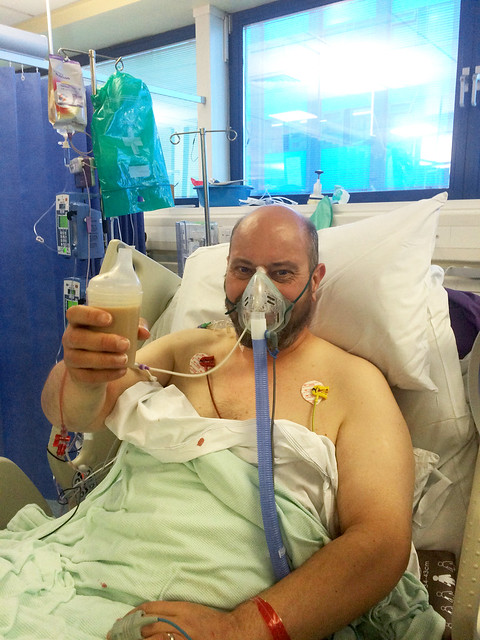
After two weeks in ICU I get my first cup of tea!
I am now home and recovering nicely and starting to look into picking up where I left off with my various hobby projects. It'll take me a while to remind myself exactly what I was up to (the downside of having so many hobbies), but - at the moment - I have a lot of time on my hands as I continue my recovery.

I'd just like to take this opportunity to express my gratitude to the wonderful nurses, doctors and auxiliary staff at Hull Royal Infirmary and my thankfulness that we are blessed with a National Health Service. Also, a big thank you to TESCOS of Hull - who's first aiders attended me and called the ambulance when I originally took ill, their prompt action undoubtedly contributed to my getting through this successfully.

Wednesday, 7 September 2016

Hobby Boss 1/72 Hawker Hurricane Mk. IIC - Part 7

Decal time!
As usual, I am dreading working with the Hobby Boss decals - they can be a nightmare.


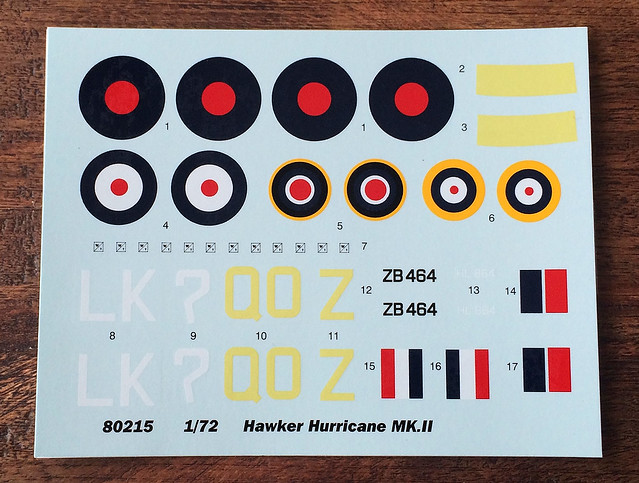
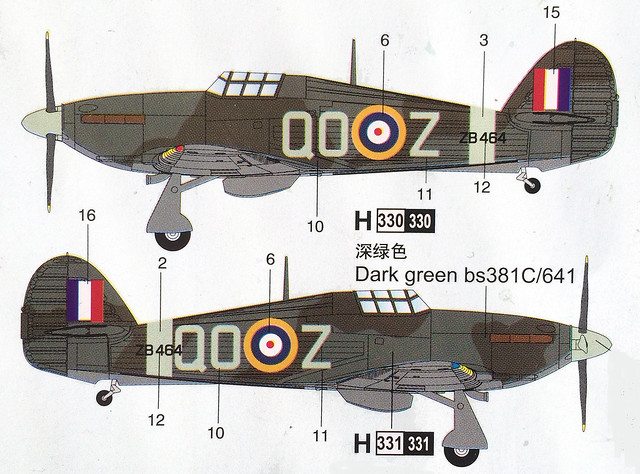
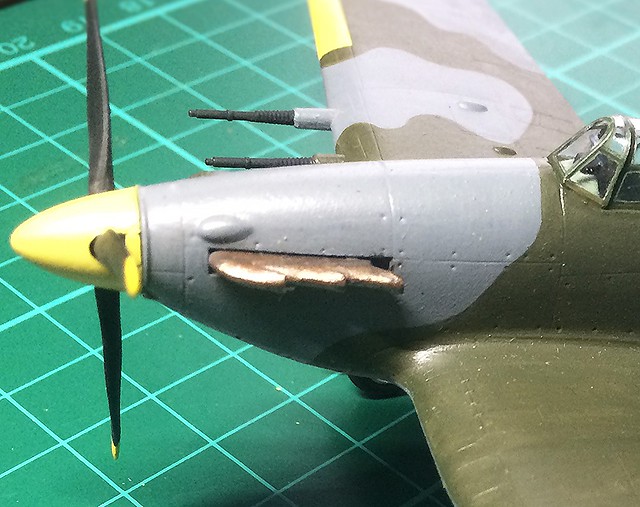
But before I even start I have a criticism! Take note of the 'Lemon Yellow' decals - the identification letters and fuselage band - these are completely the wrong colours for RAF aircraft of this period. They should, actually, be the RAF's 'Sky Type S' (a light blue-green shade of grey) and, ironically, Hobby Boss has this colour right in their colour instructions (note the propeller boss, aircraft ID letters and fuselage 'band')...


So, what I have done is to modify the colour of my propeller boss to match HB's incorrect 'lemon yellow' decals by painting it lemon yellow too...


Bit annoying, but cheaper than buying a set of third-party Hurricane decals in the correct colour. I'll just have to accept that the finished model will be that much less authentic. So, let's get on with applying the darn things...


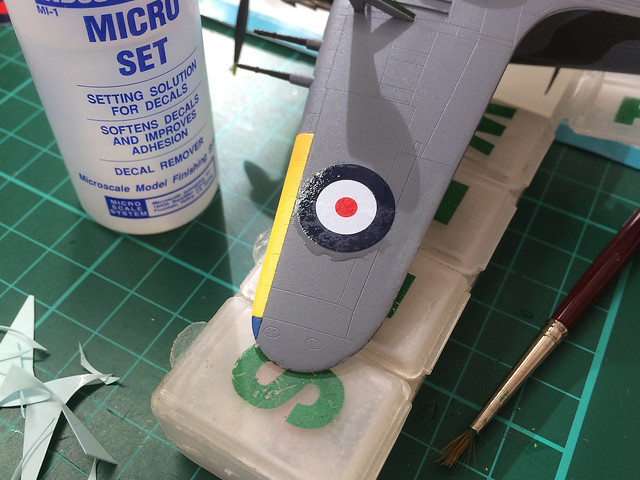
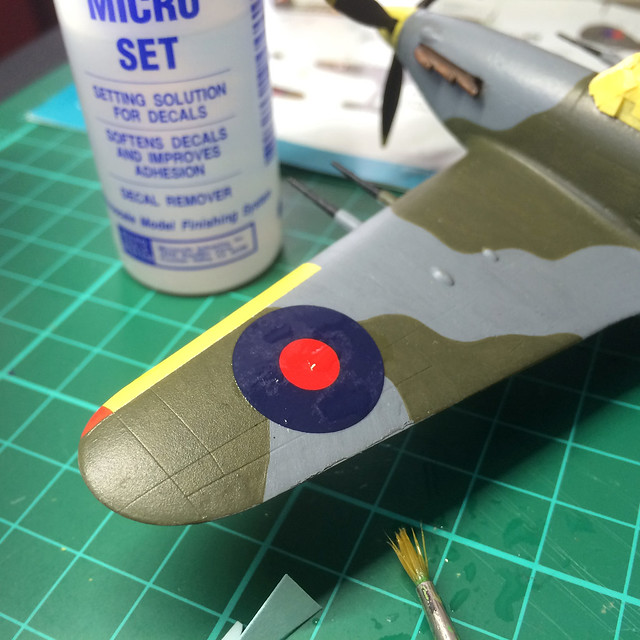
Microset solution really helps out and is a little less aggressive than Microsol. I've had these type of cheap Hobby Boss decals actually melt when trying to apply them using Microsol, so I'm erring on the side of caution here.

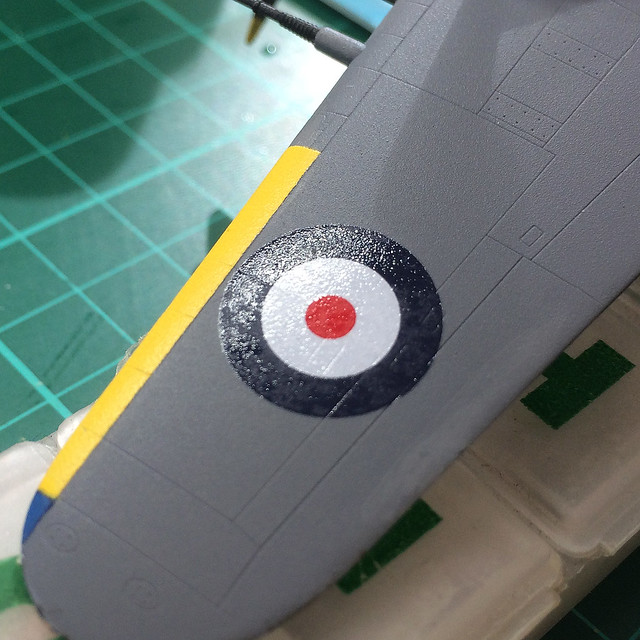
This worked pretty well, however, once applied the poor quality of the Hobby Boss decals became apparent...


Now, I had the same problem with the previous Hobby Boss model (their 'easy build' Spitfire Vb) and I found that applying a coat of spray varnish alleviated some of the 'wrinkliness' - it's the best you can do, they won't be perfect.


For me, the biggest challenge with military aircraft decals is the plane's ID letters. Lining them up and getting them to look 'straight' on the fuselage can be a wee bit difficult sometimes. But, then, I'm a bit of a fuss-pot and a worrier who will stare at something like this and convince myself it's not straight when it quite possibly is!

To add to my personal woes, Hobby Boss have provided a set of decals for the fuselage colour bands. Now, I could have (and maybe should have) dumped these and painted on the band instead, but I wanted to try out all the HB decals for this model, so here we go...


Honest;y, I don't know how aircraft modellers do it - it' took me ages to apply the ID letters and I still don't think they are straight! (This is why I like vehicles!)

The HB fuselage 'ring' decal is a little wobbly too, but that's more to do with their horrible two-part decal than my application. I did my best with it but will still end up straightening the edges using a brush and some paint. However, now these decals are on you can clearly see the inaccurate 'lemon yellow' colour I complained about earlier...And one more thing...

WARNING: As I have noted before with Hobby Boss 'Easy Build' series decals - these 'budget' decals do not work well with MICROSCALE'S MICRO SOL. It actually melts them!

Micro Set seems to work fine, but the more aggressive Micro Sol (designed to soften decals) caused the decals to 'bubble' and disintegrate with just a small application.