Yes, there are quite a few commercial solutions - like the ones from Deep Cut Studio and Fat Franks - but I wanted to keep this 'on the cheap' (the wife is watching my hobby spending like a hawk)! 😣
 |
| Deep Cut Studio's Roadway Tile Set - almost exactly what I wanted, but €25! |
Good old Terrain Tutor, he never lets you down. But I was a little unsure about how flat the roads were using TT's methods and was concerned as it does look like quite a lot of work. So, it seemed like the only way to find out was to knock up a quick test...
1... I cut the base out of 3mm foam board - though I'm not quite sure if that's exactly the same thing as the TT used - I think it is? (Is foam board the same thing as 'expanded PVC'?)

...And I reinforce the edges - to help prevent warping - with some lolly-sticks.
2... Next I cover the board with a thin layer of quick drying PollyFilla, I love using this plaster filler as it lends itself to making natural textures (I threw in a few bumps, just because)...

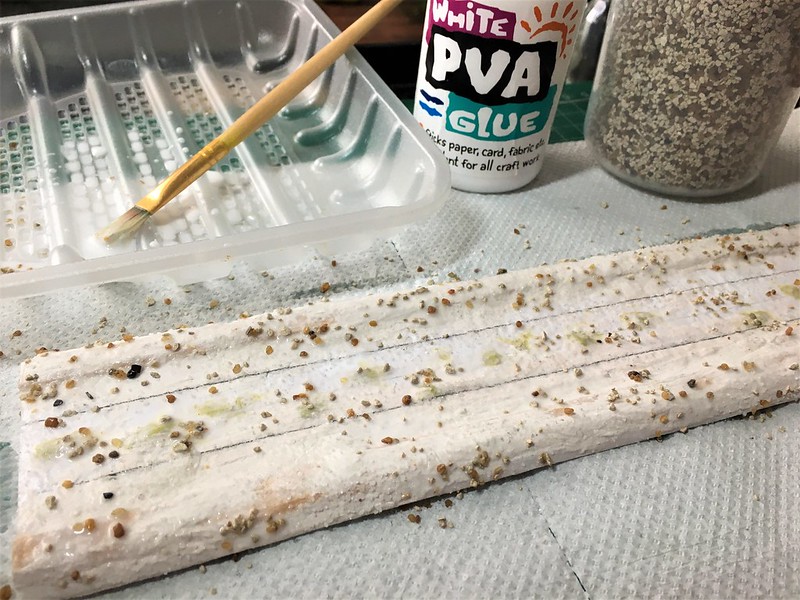
3... Using diluted PVA glue I stick lightly sprinkled fine sand and 'budgie grit' onto the textured base. It's a bit hard to know when to stop or how much grit to add, but it's a kinda 'less is more' situation...
4... Once the PVA is completely dry I try to create the texture of track lines - the groves in the dirt road made by wheels and tank-tracks - by spreading two thin lines of Pollyfilla the length of the road...

I then run a stick along the lines of filler to create - hopefully - the wheel track patterns. Were this 1/72 scale I would actually go to the length of rolling a spare wheel I have from one of my truck kits over the hardening filler to get a tyre pattern (as TT does in his video tutorial).
5... After yet another period of drying, I depart from TT's instructions and do what I normally do when making vehicle bases and that's to prime the textured base with black primer...

...End of Part 1!
I'll stop here before I move onto the painting and flocking of my road. But even at this incomplete stage I'm a little unhappy with the way this is going...
Overall, the road is thicker than I wanted - filler and texturing on top of 3mm foam board and lolly-stick has resulted in quite a tall roadway. Not huge, but when you remember that I originally had in mind a flat printed road mounted on a 1mm piece of card stock the 5mm tall structure I have now is a bit of a chunky monkey!
...That said, I am enjoying getting back into terrain making and it is fun! So let's see how it turns out.
No comments:
Post a Comment