Well, too late to change my ways now, so lets just see what happens. However, if you'd like to see and example of a more structured process for painting a 15mm IS-2, then have a look at the excellent Herbert Erpaderp's tutorial for some alternative ideas...
And now, on with my very unstructured method...
Base Coat/Priming
I begin with the one procedure that hasn't changed that much over all the vehicles I have made, and that is to prime the tank with a coat of Humbrol's 'Light Olive' Acrylic Aerosol. I've mentioned before that I like this colour as it can be easily modulated to become any of the WW2 Allied 'greens', from British Bronze, to US Olive Drab to Soviet 'Russian Green' (and even Finnish 'Moss Green').
To modify the base olive coat to something a little more deep and rich for Soviet armour I will be trying out a wash of Vallejo's Model Air 'Russian Green [71017]. This paint is really intended for airbrush use and is already pre-diluted so *should* work quite well as a wash (fingers crossed).
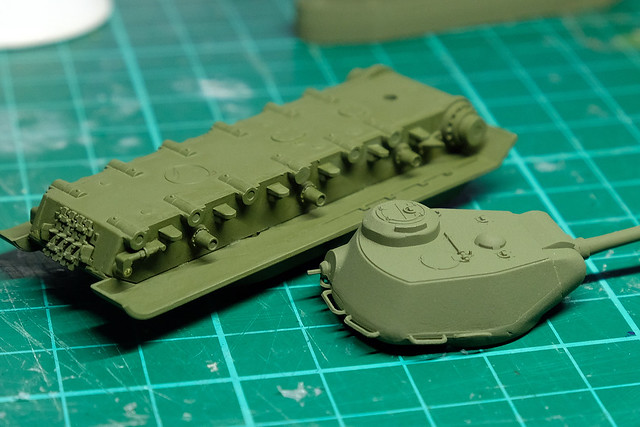 |
| The IS-2 hull (at back) has been modulated using Vallejo's Russian Green, while the turret is still in it's primer coat of light olive. |
It worked! ...Er, I'm not surprised at all. Cough. The difference is subtle, but a richer and deeper green. It is a little patchy and streaky (being a wash) but I like that as it adds some wear/fading effect to the overall appearance of the tank.
Note: I could also have achieved a similar effect more quickly by simply spraying Vallejo's Acrylic Russian Green Primer on to begin with. But, I can't actually find my bottle of this at the moment, plus I need to reacquaint myself with the workings of my airbrush before I take on a live project with it!
Highlighting and Shading
And so, moving on, I will try out Herbert Erpaderp's suggestion and give my base green a bit of a highlighting with some dry brushing. I'll simply mix some of the Russian Green with some lighter buff paint to produce my highlighting colour. Though, again, I will be going for a subtle effect...
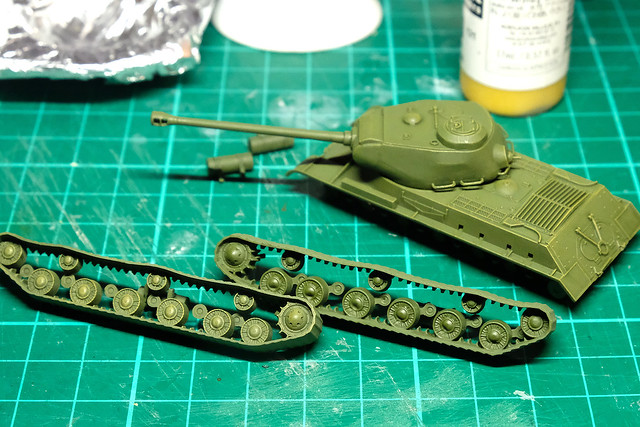 |
| It's very subtle, but the front set of tracks has been highlighted, while the rear set is just flat Russian Green. The hull and turret are highlighted. |
The paint I used was Vallejo's Model Color Yellow Ochre [913] as this gives a warmer and more 'sunny' highlight than using straight white. I built up the strength of the ochre, mixing it with the Russian Green paint, until it hit the strength that I was after.
Right...So, the moment of truth, will the shadow wash destroy the 3D highlighting effect I've just created? ------>
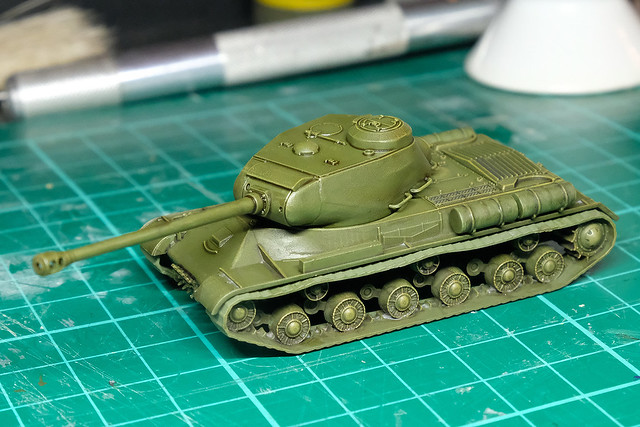 |
| The shading wash phase, at this scale this can also pass for pin-washing adding depth to panel lines and joints. Washing is a quicker way of creating depth than outlining each area edge with individually. |
It is - once again - very subtle so I guess if you wanted something more obvious the trick might be to exaggerate the highlight before applying the dulling wash. I'd do this by dry brushing with an even lighter shade of ochre (bordering on yellow).
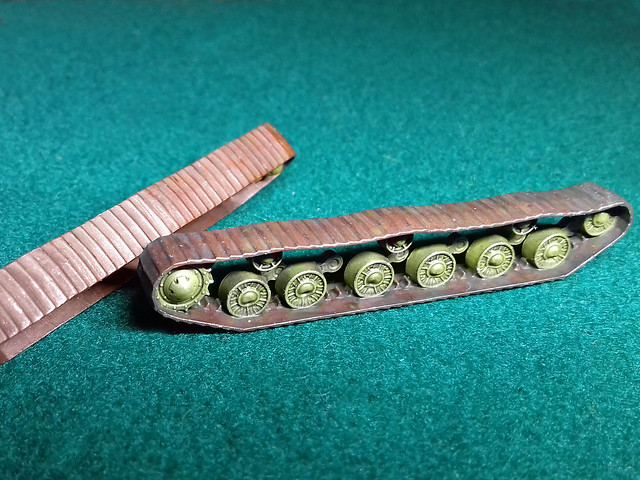
The Tracks
Now to to what is perhaps the least satisfying part of the Zvezda model, the tracks. The model has very simplified tracks with practically no tread pattern to speak of, just regularly spaced slats. The challenge here is to make something interesting out of these rather dull and uninspiring components.
The easiest 'cheat' is to disguise the lack of detail by slapping on a thick layer of 'mud' effect (which, I admit, I have resorted to doing before). But, we shall see...
First off, I mixed some Vallejo German Cam. Black Brown [822] with a spot of Vallejo Game Color Silver [052] to make a rusty steel colour. This will be my base coat for my tracks. That done, I'll give them a wash of good old reliable Agrax Earthshade mixed with a little Citadel Nuln Oil to give the tracks a greasy oily look.
 |
| Still a bit wet, but hopefully rusty steel looking. |
Hmmm, tempted to add a mud layer.
Well, that's the base coat painting done. I have some minor detail painting to do on some of the none green parts but otherwise it's onto the decals. Not that there are many (remember, no decals come with the Zvezda kit), the wartime IS-2s seem to have had little more than numbers unless they were a Guards unit.
Next: Decals and the Winter Camouflage.
No comments:
Post a Comment