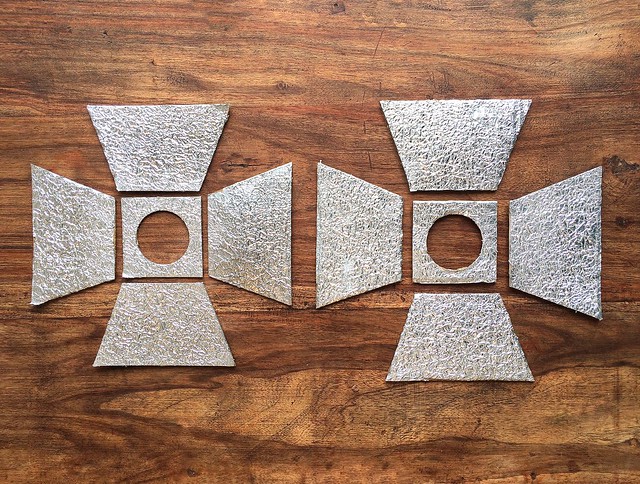
Now, I should mention - this being the first time I have tried using box cardboard as a construction material - that the first thing I learned is - go easy on the PVA!
The cardboard was more absorbent than I expected and it soaked the PVA up like a sponge. This lead to some floppy and soggy components which took a lot longer to dry out than expected. Too much PVA glue also caused the wet card to deform (I had to place some heavy books on them to flatten them out).
Despite this, I still think cardboard is the ideal medium for this project because of its light weight.
Next, I reconstructed the boxes...

Once again, I used parcel tape as the primary means to connect the components together. Once I am satisfied with the fit I will be gluing the parts permanently to one another (probably using a glue gun). At this point, the tape will help to hold things steady and in position while I glue one joint together at a time.
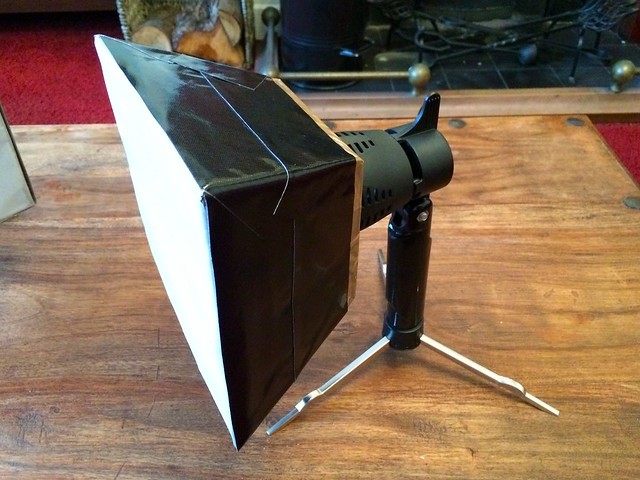
To make the boxes a little more sturdy I covered them in black 'Gorilla tape' (which is a pig and sticks to everything but the thing you want to stick it to). So, that done, it's time to test out my 'new' lamps...
As a test, I'm just going to use a two lamp set up to see what kind of spread and softness they produce (normally I might use I would use three or even more lamps depending on the lighting effect I want) but if I can get away with two, that would be terrific!
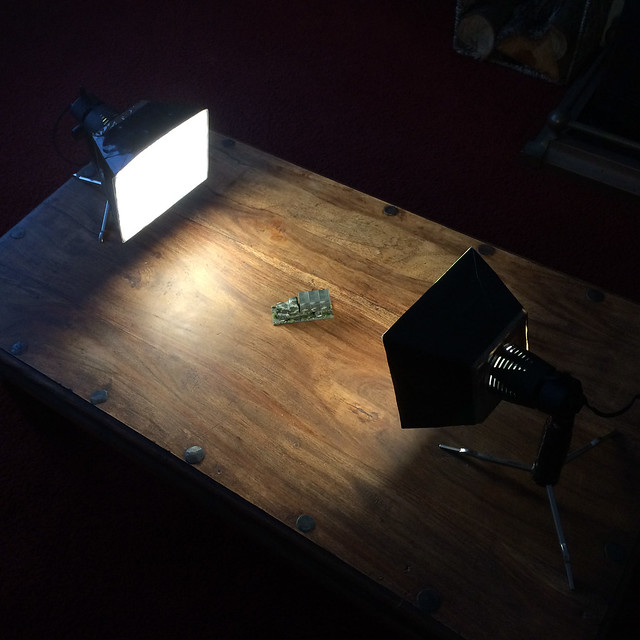
Not a bad spread. Before I made these 'soft boxes' - using LED bulbs - the halogen bulbs when intense mini-spot lights and were far too aggressive. They created a very hard light effect with high-contrast patches with deep shadows and blown-out highlights. But now...

Well, that's not a bad result. I haven't modified the exposure of light effect post (in Photoshop), this is 'as shot'. As you can see, the spread is fairly even and not too contrasty.
I'll count this project a success as I already happier with this snap (just using my iPhone) than I was with the last 'finished' model photo I took. And the best thing is that this didn't cost me a lot of money (at one point I was so disappointed with my photography I was seriously considering buying an expensive set of studio lamps).
Nice results Stephen!
ReplyDelete