 |
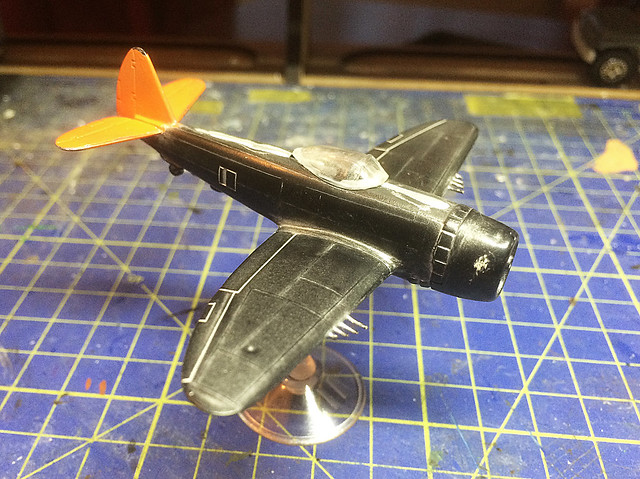
| Not looking very nice at the moment my P-47 has had it's disastrous first paint coat stripped back to the black primer coat. (I left the tail as that looked OK.) |
So here we are again, but with a less than pristine base coat (I tried my best to clean up the weary P-47 test model ). The Humbrol Metalcote tutorial that I found suggested that you prime with grey, so I decided to give that a go. I know from experience that a grey primer does help highlight any flaws in your model preparation and although I had already primed (with black) I wanted to follow the Humbrol instructions exactly. Here's the video, it's quite informative...
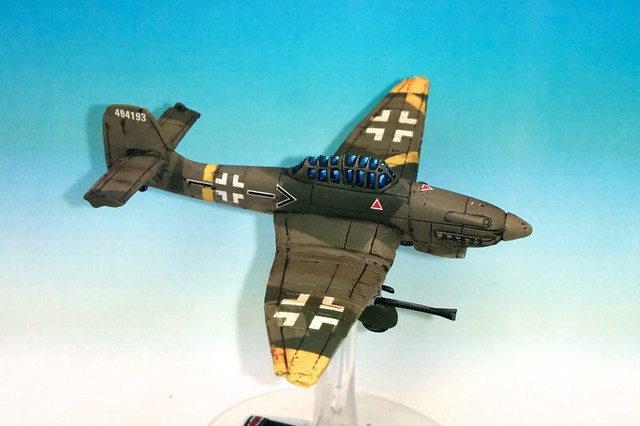
I went as far as to buy the proper Humbrol grey primer spray used in the video. I masked off the orange tail - as that looked alright - and I used this opportunity to attach the canopy this time. I have decided to spray the plane and canopy all in one and then paint the canopy. I have to say that the Revell canopy wasn't the best fit by any means and I had to resort to some filling to get the windshield to fit flush with the fuselage (but even so it was a bit of a bodge).

I'm a little unsure just how to paint the canopy - in the style of war gaming aircraft - as I don't have much experience in this technique. Most seem to go for a plain sky blue scheme, some others paint the canopy with a nicely shaded pattern with white at the edges to deep blue in the middle, or variations thereof...
 |
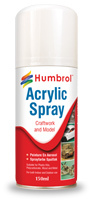
| Example of small model with a painted and shaded canopy scheme. Credit: Rust and the City Blog |
Anyway, onwards. In the end I decided to strip off the orange paint on the tail as well as I'm trying to make a clean start of things. The Humbrol Grey Acrylic Primer spray goes on very nicely, but even so I was nervous that any of the previous paint layers would spoil the new coat...
Not bad! Very happy with that, it does give me a nice smooth base for further coats and I was glad to see that my cleaning and sanding of the previous paint had not adversely affected this next stage. There were no noticeable blemishes or 'bumps' where bits of stubborn paint remained.
A good start. But now onto the Humbrol Metalcote. I watched the Humbrol tutorial several times and tried my best to follow the techniques shown in the video. Spraying from a can is always a bit of a lottery and quality of coverage can be effected by many factors; whether the can is new, whether the spray nozzle is clean, the distance at which you spray and the speed and regularity with which you spay.
Spray too close and the coat will be too thick (the Humbrol video recommends a distance of 20cm), spraying too long in one area has the same affect. Use an old can or a can with a old or dirty nozzle and you might get 'splutter'. A steady speed and spray pattern can also help produce a better coat - as commonly known, a couple of thinner coats is better than one thick coat...

I followed the spray pattern shown in the Humbrol video, two light passes over the model in one direction - allow this coat to dry for 30 minutes or so then spray another two light passes over the model in a cross-wise direction (so twice 'up and down' followed by twice 'left to right' for example).
It didn't look half bad, certainly a much better quality coverage than the Plasti-kote Bright Metallic paint that I first tried. Not too thick and nice and smooth.
At this point the Humbrol Metalcote is a dull silver but with flecks of reflective particles all over.
Next: Hopefully in the final part of my experiments I will be buffing up the Humbrol paint to produce a polished aluminium effect. Fingers crossed!
Looking forward to the outcome. Judging by the Humbrol video it looks hopeful. Good job tidying up the model too.
ReplyDelete