I have been using kitchen cling-film as a masking medium - it wraps round awkward shapes nicely and is self-adhesive making the process easy. However, after my bad experience with it during my Plati-kote experiment I have turned to an alternative material for masking...Kitchen tin-foil (so didn't go too far from the kitchen then)!
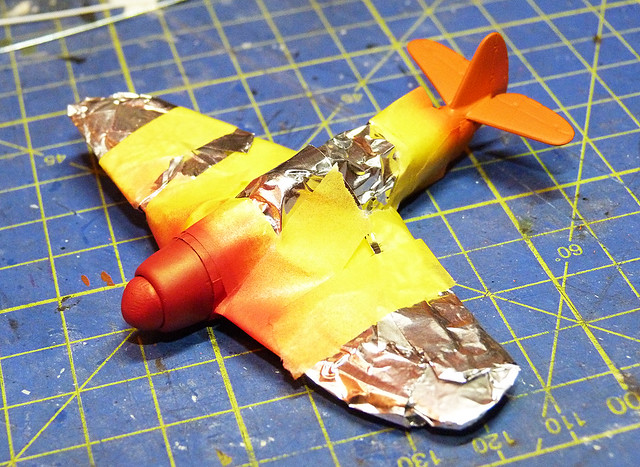
Like cling-film kitchen foil wraps around odd-shaped objects easily and quickly. Important as I find masking a tedious task. I just have to tape down the foil to hold it in place, though obviously on bigger models I wouldn't have to mask the whole model!
Anyway, we're back on track - my P-47 has an acceptable basic paint scheme...

It's amusing to think that if I hadn't been messing around experimenting with different paints and techniques I could have finished this kit in just a couple of days, instead of the drawn out saga it's ended up being. (I intend to test out this theory once I have completed this project as I bought several of the Revell MicroWings kits while they were on offer.)
Anyway, at this point of the modelling process I would be thinking of applying a coat of varnish - satin or gloss - of maybe even Pledge Klear prior to decaling. But how will Metalcote react to a coat of varnish?
According to what I have read Metalcote needs to be varnished as it drys with a light texture - like a matt coat - and so will have problems (like 'silvering') when the decals are applied. But this idea caused me some concern as I remember what happened when I tried using varnish during my earlier Plasti-kote experiment - it completely tarnished the shiny coat and left it a dull matt silver.
Therefore, I decided to try out a small area on the lower wing as a test patch for glossing...
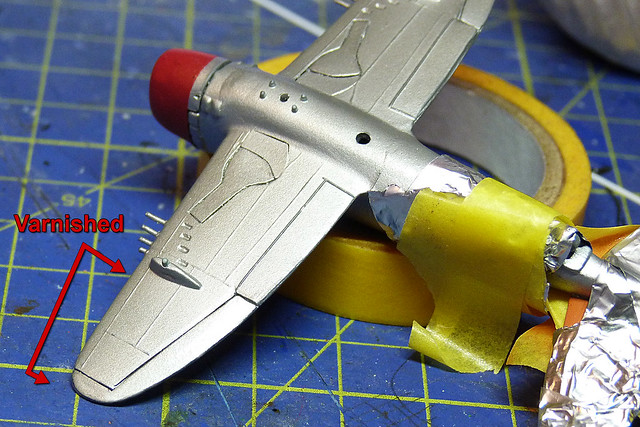 |
| What am I looking at? Well, the fact you can't see anythings is actually a good thing! The varnish hasn't discoloured the Metalcote silver. (Oh, and you can see the bodge I made of the retracted undercarriage - doesn't look too bad.) |
...So it's on with the next step which is the painting of the canopy.
I wanted to try a dark canopy - rather than a sky-blue one which some people prefer - and so started with a matt black base. Onto this I started painting on layers of deep blue artist's ink and leaving it to dry after each layer until I got a deep rich and translucent royal blue effect. Onto this I added a wash of white ink, and then another deep blue coat on top of this...
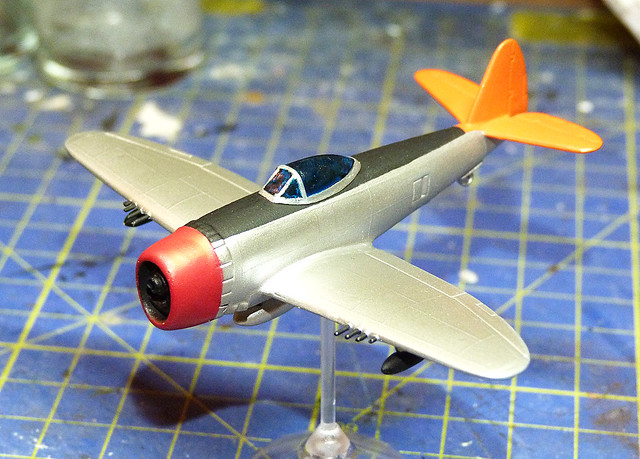
I'll let this coat dry again and have a further play with the canopy scheme as I think I can improve it. Once I'm happy with that it will be time to gloss varnish the whole model ready to add the decals.
That's looking very neat. Mine normally look like the first photo even when they're finished....
ReplyDelete