Monday, 23 February 2015

Zebrano Yag-6 re-ignited!

Having had my Zebrano Yag-6 on ice for a while (I'd had enough of bodging for the time being) I suddenly picked it up again today for some bizarre reason. I had thought it would take me longer to get over my initial encounter with this kit. Anyhoo, the irony was that this model was more than half-way complete.

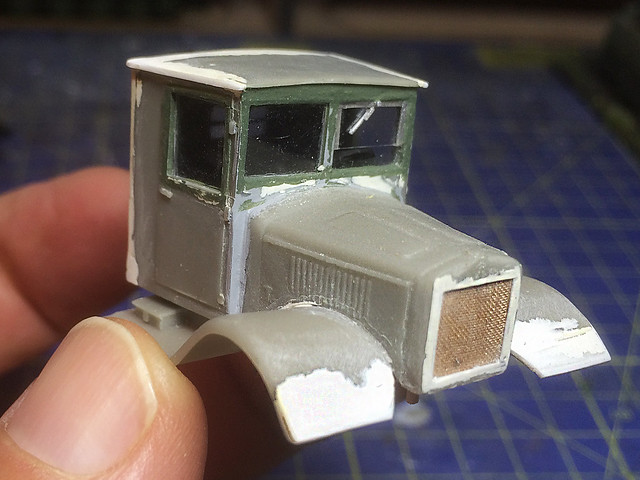
So, just to recap, I was working - at long length - on getting the cab into some sort of acceptable level of completion...

Note that I opted to remove Zebrano's original grille texture and replace it
with some nicer mesh material.
The photo illustrates quite vividly - by the amount of filler on display - the amount of renovation the Zebrano kit requires to bring it up to a reasonable condition. So, what, you might ask, would this model look like without all this additional work? Well, Zebrano have produced a finished example of their Yag-10 (the Yag-6's 3-axle variant) which may give you some clue...

Aside from the obviously ill-fitting cab the shape of the fenders are suspect, as is
the placement of the headlamps. My research points to the lamps being fixed to
the front of the chassis just behind the bumper. Neither have they opted to
include the distinctive driver's split windscreen.
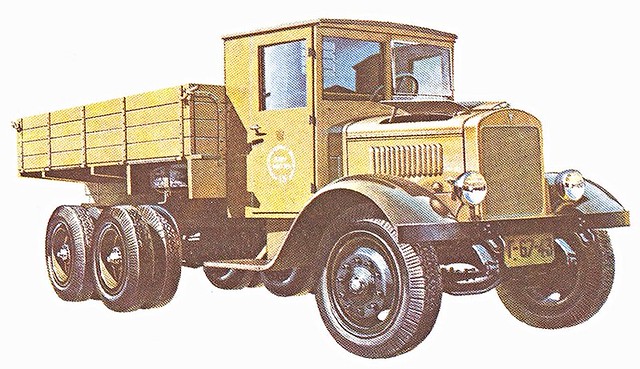
A rather nice illustration of the Yag-10 truck which serves to illustrate some of the
inaccuracies in the Zebrano kit. However, this appears to be an early variant with
nicely rounded fenders, at some point Yag seem to have replaced these with flat ones.
It's quite astounding that this is a publicity shot done by Zebrano themselves. Even at my modest level of modelling expertise I think I could make a better job. It doesn't really do much to sell the kit to a potential model maker, especially at the asking price! (Unfortunately I hadn't seen this photo before I bought the kit.) Anyway...Let's put the Zebrano bashing to one size and move on...

One of the annoying faults with the Zebrano kit was the missing flatbed hinges - these are the long rod-like hinges which allow the cargo-bed sides to drop down to allow easy loading. Of the five hinges that should have been part of the cargo-bed components all but one had broken off and mysteriously disappeared.

So, using the one remaining hinge as a template I had to make some simple replacement parts...

The hinge on the left is finished, the one on the right needs trimming down to size.
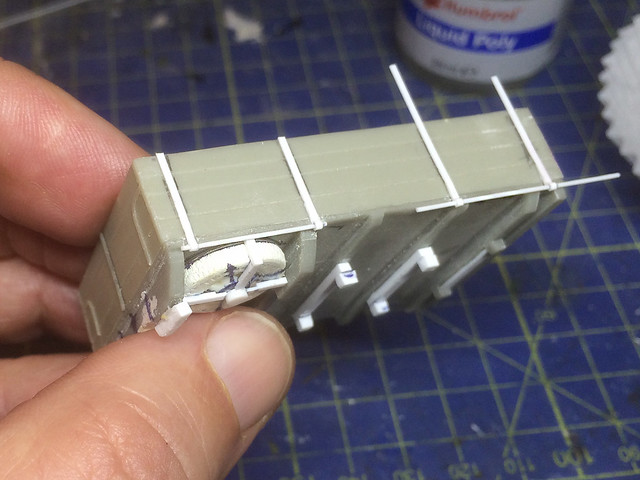
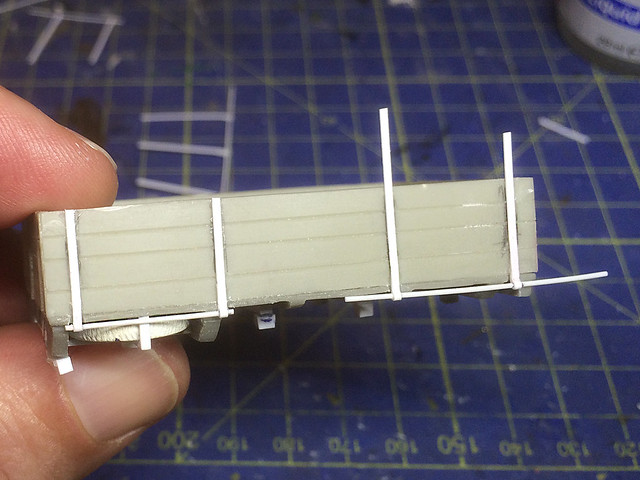
Here's just a quick shot which showsthe amount of additional work that I ended
up doing to the cargo-bed in total. The Grey is the original Zebrano resin kit, the
white is the repairs, modifications and additions I have made.
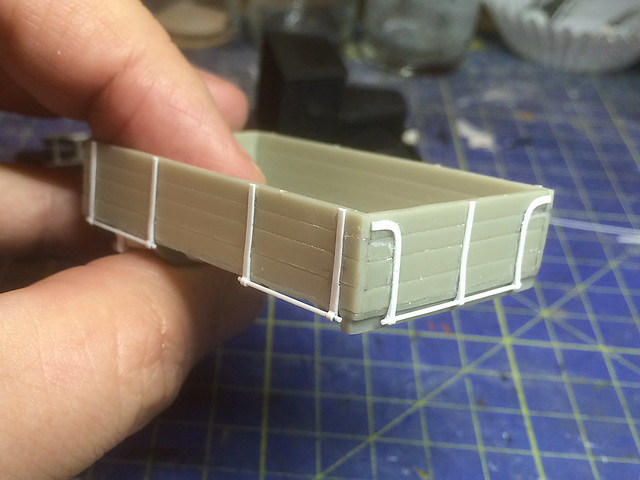
The finished hinges. Not brilliant but about in keeping with the level of detail
on the rest of the Zebrano model.
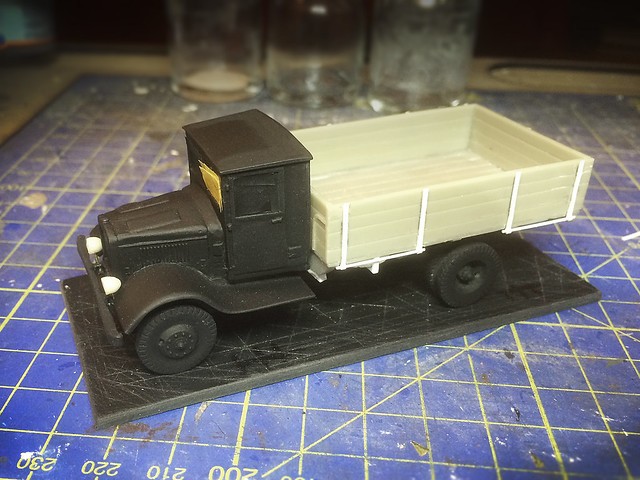
The next job was to start base coating/priming the model. I have decided to start with a black primer for a change as a lot of people swear by this method and I thought I'd try out a top coat of Vallejo's 'Russian Green' airbrushed over this.

As usual priming makes a model look neater. Hopefully painting will help
improve what is a mediocre model. We shall see.
Next: Finishing the black primer coat and then onto the base coat of Russian Green.

Thursday, 19 February 2015

Airfix 1/72 P-40 build - planning

Beginning my Airfix 1/72 Curtiss P-40 project - or rather my 'p-40s' project as I am building two of the Curtis Hawk variants that Airfix produces.


To quickly recap the background to this - I was curious about what the Curtiss '81-A-2' was and in it's relation to other variants in the P-40 family. As I pretty much covered the results of my research on this subject on my initial post for this project I will simply re-post the graphic I made to explain the early mark P-40 'family tree'...


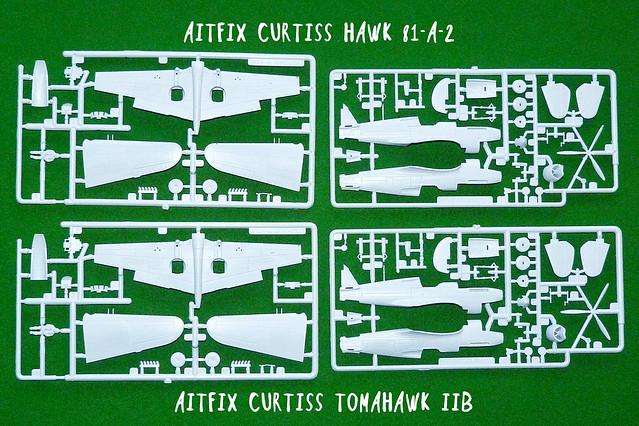
But, despite the clear model progression indicated by the Airfix box art the simple fact is they are, actually, the very same kit. So subtle were the differences in these two early P-40 variants that you would be hard pressed to tell the difference and Airfix took advantage of this.

Proof, were proof needed, that these two Airfix P-40s are indeed the same kit.
Anyway, this all isn't all that important. All that is important is that the general consensus in the modelling community is that this new Airfix tooling is a very nice kit and one of the better 1/72 scale early model P-40s on the market (these early models - which used the Allison V-1710 engine - are known as 'long nosed' P-40s).

My project plan...
OK, as interesting (if you are a geek like me) as these technicalities are the real question is why I bought the two models is they are actually the same? Well, I fancied having the two 'shark mouth' paint schemes for the P-40 - the RAF's 112 Squadron Tomahawk and the American volunteer 'Flying Tiger' P-40.

The decal/colour schemes that my two Airfix P-40s come with. Top is the
legendary 'Flying Tigers' scheme and below the RAF's 112 Squadron scheme.
(Trivia teaser - which came first?)
Something else I fancied doing was to build the kit 'out the box' with no mucking around with 'improvements' or third-part add-ons. Because this Airfix kit is one of their newer ones it seemed that I would have a better chance of being able to make the kit right out the box without having to resort to any kind of tinkering!

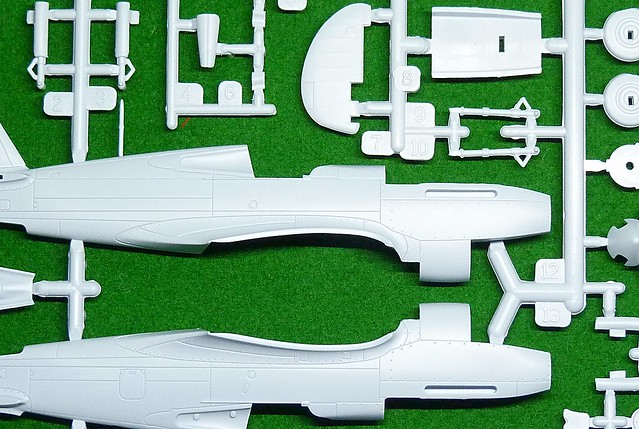
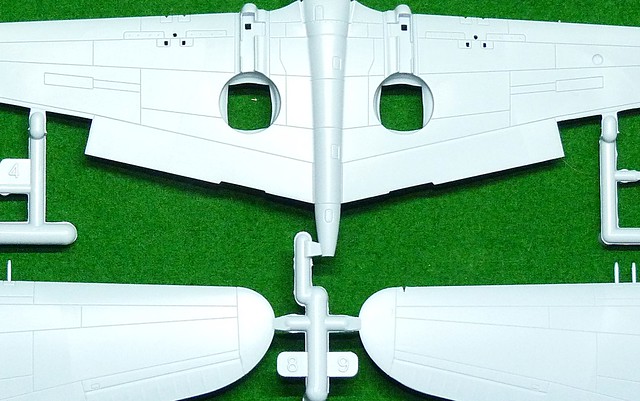
Quite crisp and only minor flash, the components are nicely done though more
advanced modellers may take exception to the comparatively deep panel line details.
This kit is intended as a 'starter kit' and is rated by Airfix as 'skill level: 1'. So the
rather exaggerated inscribed panel lines are intended to be helpful for the beginner
who may not be fluent in panel line painting techniques. 
BUT (there had to be one) I actually bought three of these Airfix P-40s as they were on offer (I really like the P-40). And so, as I had decided to use the two default decal schemes that came with the kits I would have to source an additional scheme for my third Hawk.

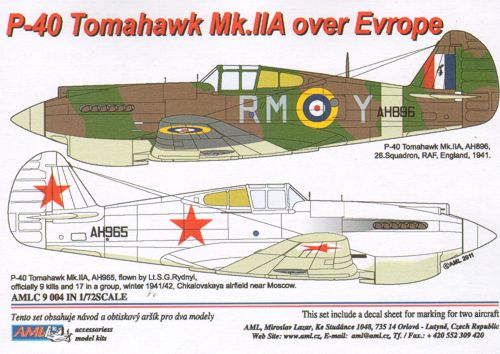
After a bit of research I plumped for a rare RAF scheme. Originally the RAF took delivery of some P-40s - Tomahawk Is and IIAs - and despite deciding the P-40 was not up to the job of fighting in the European theatre they pressed them into service in the UK as Army Cooperation aircraft. I liked the idea of doing one of these less well known Tomahawks (overshadowed as they were in Britain by the Spitfire and Hurricanes).


The third part decal set I sourced is by AML - 'P-40 Tomahawk IIA over Europe' -  and is available from Hannants for just £4.80. It may not be a striking as the shark-mouse schemes but it has a tidy understated charm of it's own. (It also has the benefit of including a couple of nice Soviet schemes which I may be tempted to try in the future.)

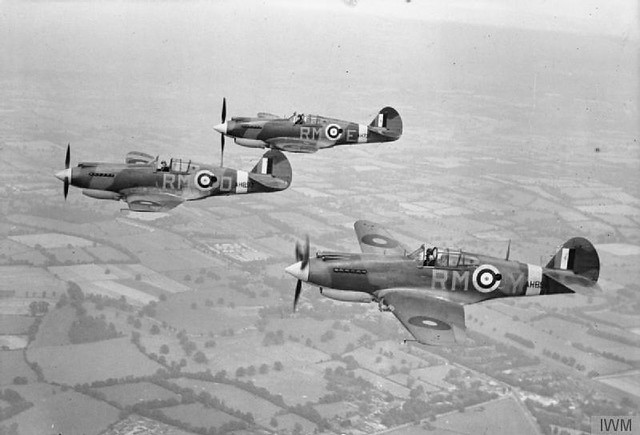
Tomahawks of No. 26 Squadron RAF based at Gatwick, Sussex, in flight. AH893 ‘RM-D’ and AH896 ‘RM-Y’ are Mark IIAs, while AH791 ‘RM-E’ is a Mark I. All Tomahawks based in the United Kingdom operated as low-level tactical reconnaissance aircraft with Army Co-operation Command, hence the oblique camera ports visible on the port fuselage side of these aircraft. Source: © Imperial War Museum
So there we go. That's the plan for my three Airfix P-40s - two OoB ('out of box') build with OoB decals and one OoB build with third part decals. The big question is can I restrain myself and keep the fleet of P-40s just to 3? ;)

Saturday, 14 February 2015

Revell 1/144 P-47 Republic Thunderbolt - Debrief


Finished! That was a LOT of time to do a little 1/144 scale 'easy build' kit. But experimental diversions aside what was the Revell Micro-Wings P-47 like to make?

I think the first thing to mention is this range of 1/144 Revell kits dates back to the 1970s and are re-issues of these venerable models. So, as you night expect, fit and quality aren't exactly up to today's expectations. To put it politely, component fit is somewhat vague.

Now, this might normally be something of an issue were it not for the fact that even at full price these little kits cost only £2.95 each. So, really, you have to give them some leeway in terms of value for money...These are not Eduard or Eastern Express 1/144 models - but neither is the price.

These little kits are ideal for beginners or even more experienced modellers who want to try out new techniques without ruining a full-sized and full-priced model. You just have to be aware that some amount of filling and sanding will be required if you want to complete these models with any degree of real satisfaction.


There are quite a few gaps in seams and an amount of flash to have to clean up. This is a little annoying as part of the whole premise behind these models is ease and quickness of completion. Even the most undemanding beginner will find some of the ill-fitting parts annoying.

Another frustrating aspect of these kits is that they seem to be designed *only* to be made with the landing gear down. This fits in with the lack of a pilot figure, as if the plane is meant to be parked on a runway and yet Revell supplies a 'in-flight' stand with the kit!

If - like me - you want to make the plane as an 'in flight' model you will have to modify the undercarriage arrangement and think about what you will do with the canopy...


With no cockpit detail of pilot your choice of modelling these planes in flying mode means they would look a little strange - I mean, who's flying the darn thing?

Anyway, this conundrum aside for a moment - let's talk about accuracy...

Even though - at just 1/144 scale - I suppose 'something has to go' by way of detail and bearing in mind these are not premium priced precision scale models you can't moan too much at some inaccuracies. Overall what you get is a small representation of a historic aeroplane that resembles the original sufficiently to satisfy the complete beginner. As these are the intended consumers for this range then I guess you could say 'job done' Revell.

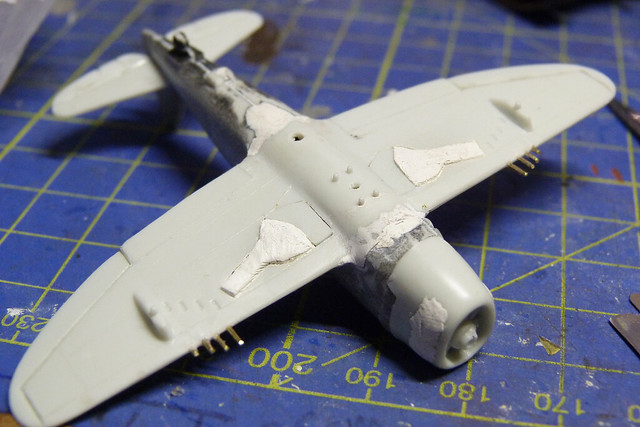
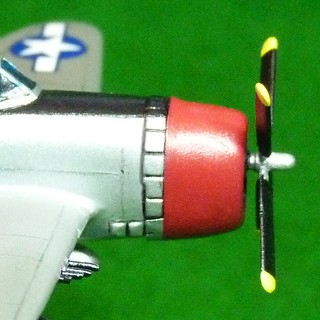
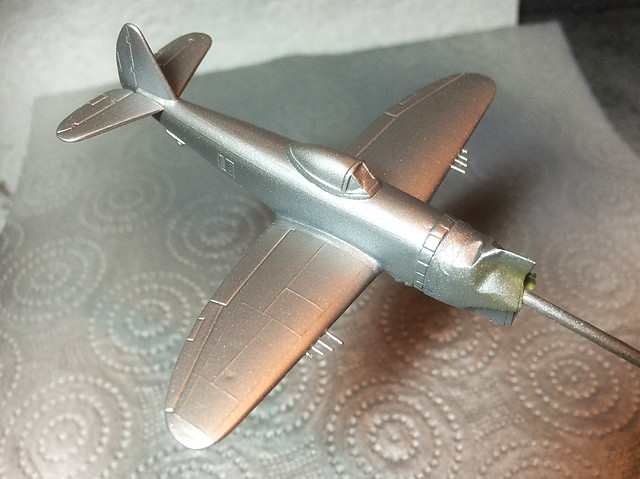
Left: Perhaps the biggest fault in the Revell model is the poor shape of the engine cowl.

From my point of view the three issues I would highlight are the mis-shaped engine cowl, the abysmal propeller and - least serious - the raised panel lines. In particular, as the P-47's 'nose' is one of it's notable features the fact that the shape is incorrect was a disappointment - it's just slightly out, but it niggled me.


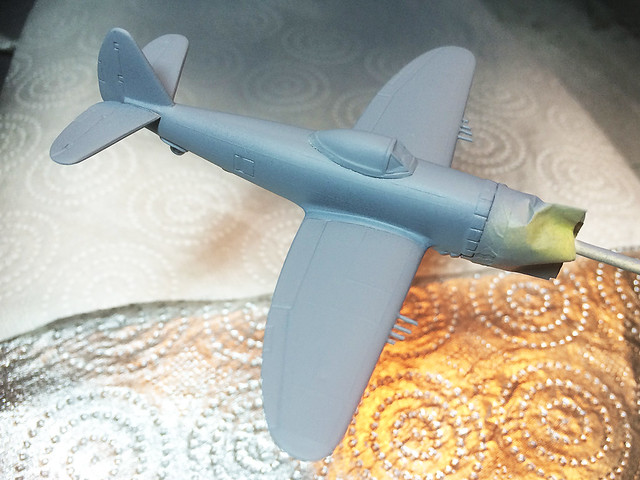
Having filled, sanded, modified and corrected the P-47 actually didn't look too bad once the base primer was applied. In the end I decided to paint the canopy, thus disguising the lack of a pilot!

Which brings up to the paint scheme...

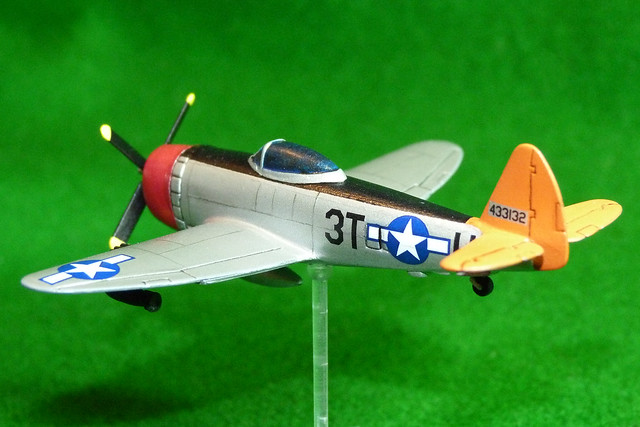
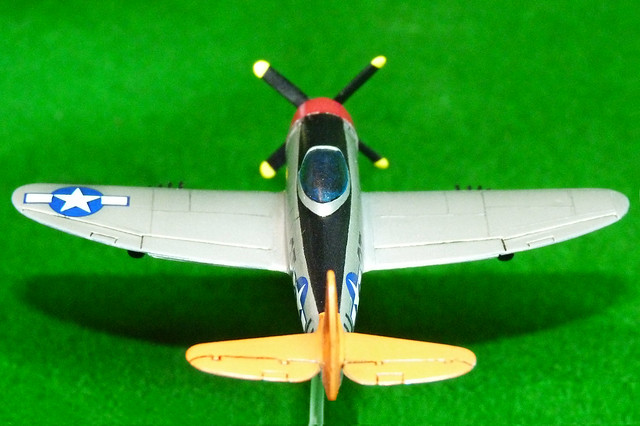
Revell just supplies a single colour/decal scheme for this Thunderbolt - it's pretty enough, though, and simple for the beginner to handle. Best of all the decals are of good quality and are printed well, in particular I was very please with how opaque the white areas were in the decals.


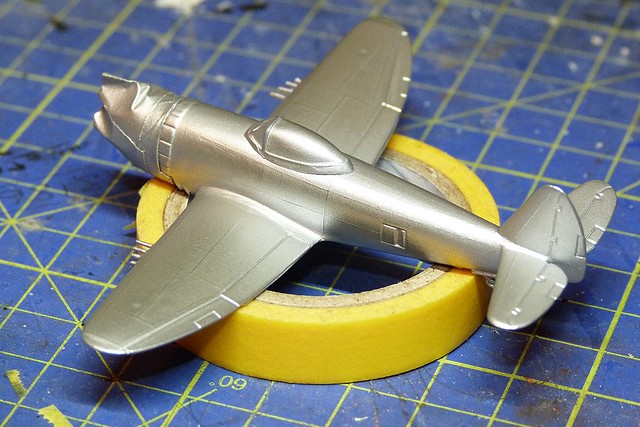
I laid down a coat of Humbrol's Aluminium Metalcote spray, this went on OK though - as an aerosol can paint - was quite textured and not as highly reflective as some of the specialist modelling metallic effects, like Alclad. But - again - for a beginner this is perhaps the easiest and cheapest way to get a bare metal finish on your kit.


As I said, the colour scheme is nice and simple for the beginner, large colour blocks that are easily masked for spraying or brush painting. Once these are done a gloss varnish will make the application of the decals easy.

And that, as they say, is about that. Easy really - an uncomplicated project (which I managed to make complicated - but that's me) and in the end a satisfactorily attractive end product.

(I didn't really bother with weathering - I just highlighted some of the panel lines by accentuating them with a graphite pencil. I also pin-washed the flaps and elevators. That's all.) 

I find myself actually inclined to recommend these Revell kits. They are fun and useful models, both for the beginner and more experience modeller, as they have something to offer either level of model-maker. Simplicity for beginner and a cheap and handy testbed for the more ambitious or meticulous modeller.
Friday, 13 February 2015

Revell 1/144 P-47 Republic Thunderbolt - Pt. 7

[Sub-title: Humbrol Polished Aluminium Metalcote experiment.]

Getting there (finally)! I've applied the decals which is always a nice stage to get to - it's like you've reached the summit of a hill and now it's the easy coasting to the end of the journey.

The Revell decals are very nice and slid off the backing paper very easily and lay on the surface without tearing. The colour was rich and - importantly - the white was nice and opaque. I used Microscale MicroSet to help attach the decals and conform to the raised panel lines of the kit.


Obviously there aren't a lot of decals and it didn't take long to apply them. The main problem I had with them - as usual - was getting them to sit straight, it takes me a while to position decals in what I think is 'level'. It's one of those things that's a matter of personal perspective (literally) and unfortunately, sometimes, when I look at decals I thought were straight the next day they don't appear as straight or level as I thought I had them!

Still, MicroSet is just as good at lifting decals for repositioning again as it is for adhering decals to the surface of your model. MicroSol, on the other hand - while softening decals to make them conform to deep ridges or lines in your model - does stick decals down more permanently or softens decals so much that they are in danger of disintegrating if you try to lift them off again (so if using MicoSol try hard to get it right the first time)!

And so...I'll give the model another light coat of Humbrol's acrylic Satin Varnish spray, just to help settle the decals onto the surface. Once it's dry I can think about pin-washing and weathering. Also, I'll starting to think about the dreadful propeller and what to do with it.

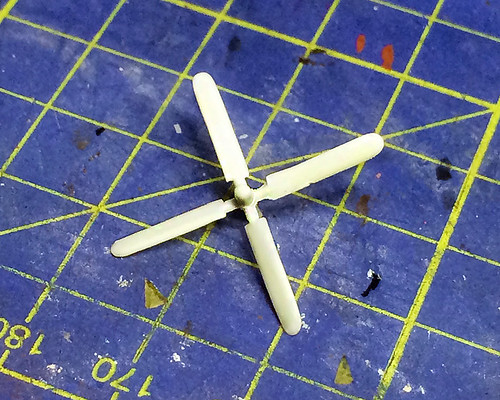
The prop is - to be honest - the worst part of the kit. It's so deformed and flash ridden that it's hardly recognisable as the P-47's distinctive 'paddle prop'.

The Thunderbolt series used - I believe - three different designs of prop and guess what? Yep, the Revell P-47 prop doesn't look exactly like any one of them! It vaguely resembles one of the Curtis designed 'paddle' props but the prop hub suggests the Hamilton prop - If I had to choose (and bearing in mind this is a P-47 'D' model) I'd say this was a badly done Curtis type prop.

I was very tempted to dispose of this part and instead make a fake 'rotating' prop out of a disc of transparent plastic (as this model is supposed to be in flight). I still may, it's - excuse the pun - 'up in the air' at the moment!

Bit of a shoddy 'snap' of the painted prop - painting has not
improved the look of it all that much!
Next: Last leg - as I decide how much post-production work to do (pin-washing, weathering, etc). Oh, and what to do about that darned prop!

Wednesday, 11 February 2015

February's stash additions

I'm a bit behind with my blogging as work is a bit hectic at the moment. I really meant to post up my recent purchases a week or so ago as I'm quite please with this month's haul. I finally managed to get a bit of time to myself so here we go...

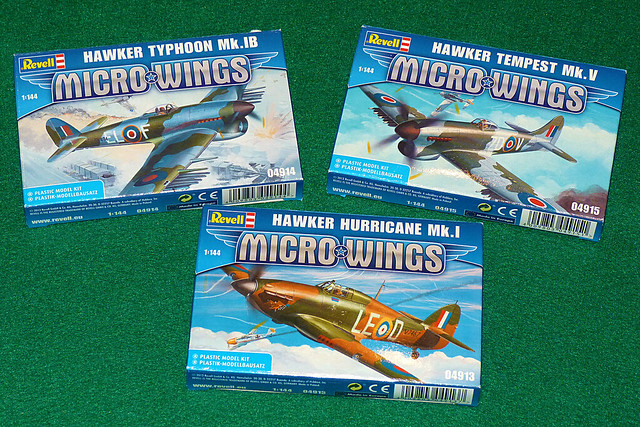
First the stash additions. I'm starting to cut back on buying kits as I have such a cue of projects that adding to it would just be silly. That said, I couldn't resist these 1/144 Revell Micro-Wings models as they are still on offer at my local store - just £1 each!


I'm finding these little kits excellent testbeds for trying out new techniques before I roll them out on proper projects. As my interest at the moment is RAF camouflage schemes and how to a paint them, these WW2 British fighters will be really handy (although the Hurricane is destined for either a Soviet of Finnish paint scheme).

And as I'm doing a few RAF schemes I thought it would be nice to buy a suitable paint set...


These Hataka (made in Poland) sets are new on the market and I really liked the idea of getting all the paints I needed in one handy little box. There are six paints that allow you to do RAF camo schemes for both early and late war.

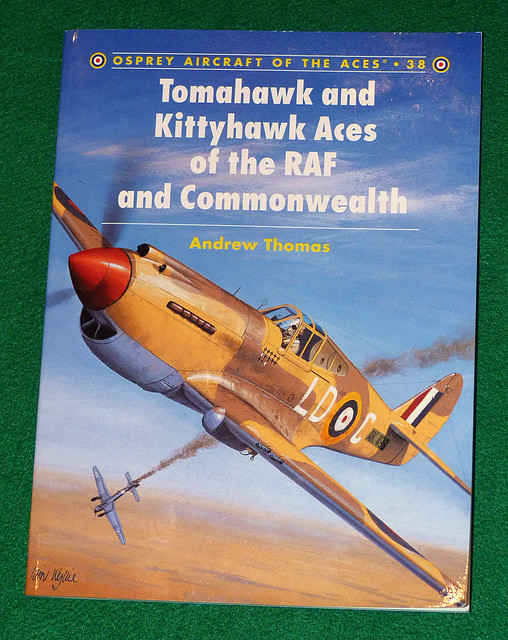
All this is in aid of my working up to tackling the lovely Airfix 1/72 Tomahawk IIB that I got for Christmas. The Airfix Tomahawk is a RAF Desert Airforce machine and unfortunately Hataka don't make a set for doing RAF desert schemes yet, but I want to practise airbrushing disruptive pattern camouflage. To help me research my Tomahawk I did buy Osprey's fascinating 'Tomahawk and Kittyhawk Aces of the RAF and Commonwealth'.

It's an excellent history of the Curtis P-40 fighter in RAF service and has some wonderful detail about the machines and their colour schemes.

This is all a bit of a big diversion from my Finnish Continuation War project but I am reading Derek Robinson's 'A Good Clean Fight' - which is in part about the Desert Airforce Tomahawks - and I'm really caught up in the theme at the moment. But I did buy some material intended to help me with my Finnish Army model making...

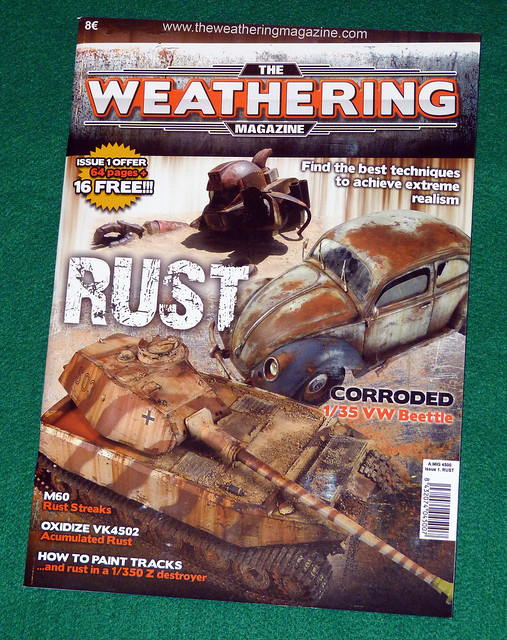
'The Weathering Magazine' covers one of my favourite weathering themes - rust. I really like painting beat-up and war weary vehicles and want to improve my skills in this area.

This magazine is largely based on the work by the legendary Mig Jimenez and features many of his own range of products, but the techniques are just as valid for most makes of weathering paints, powders and washes.

The photography is stunning and to be honest it is weathering porn!

I don't intend to subscribe to this mag on a regular basis but rather pick up those editions that are most relevant to the sort of weathering techniques that I am most interested in. Next month I will probably buy their issue about mud.

Unfortunately having looked through this magazine a couple of times I'm now desperate to try out some of the ideas so this may end up with me starting a brand new project just to go mad with the rust! (I'm so easily distracted!)


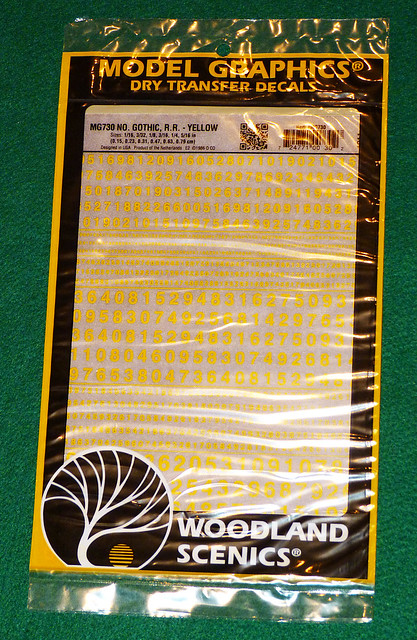
Anyway, the last of this months purchases was a sheet of dry transfer lettering by Woodland Scenics. It's a selection of gothic san-serif numerals in yellow and is intended for the numbers on my Finnish tanks. I believe these number transfers are really intended for scale model trains but they are ideal for my Finnish armoured company (especially as there is a real lack of specialist 1/72 Finnish WW2 armour decals on the market).

The sizes range from just a millimetre high to about 7.5mm tall and the weight of the font is akin to Helvetica Medium. They aren't perfect for my intended use - the actual Finnish tank numbers being somewhat more condensed (narrower) - but this is the best I could find.

It's £6 a sheet, which isn't exactly cheap, but then I will get rather a lot of tanks out of this with a great deal to spare! Next month I will probably buy the white letter version to go with this as my Finnish armour has white serial numbers too.

Correction: Typical! Hataka have just released an RAF African Campaign paint set. Ah well, too late now I have bought the closest Vallejo paint equivalents now. Still, for your reference...

Sunday, 8 February 2015

Revell 1/144 P-47 Republic Thunderbolt - Pt. 6

[Sub-title: Humbrol Polished Aluminium Metalcote experiment.]

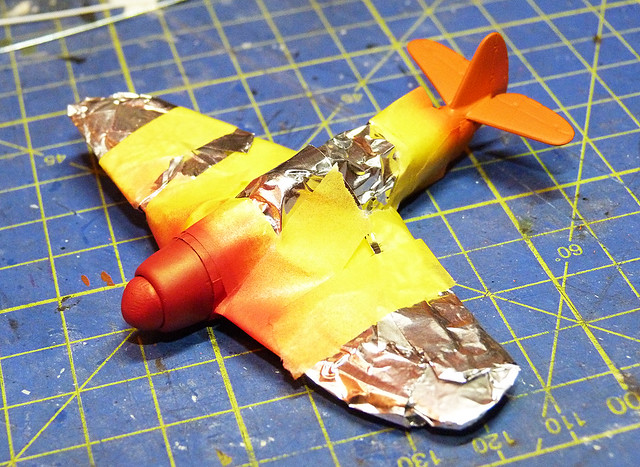
I have been using kitchen cling-film as a masking medium - it wraps round awkward shapes nicely and is self-adhesive making the process easy. However, after my bad experience with it during my Plati-kote experiment I have turned to an alternative material for masking...Kitchen tin-foil (so didn't go too far from the kitchen then)!


Like cling-film kitchen foil wraps around odd-shaped objects easily and quickly. Important as I find masking a tedious task. I just have to tape down the foil to hold it in place, though obviously on bigger models I wouldn't have to mask the whole model!

Anyway, we're back on track - my P-47 has an acceptable basic paint scheme...


It's amusing to think that if I hadn't been messing around experimenting with different paints and techniques I could have finished this kit in just a couple of days, instead of the drawn out saga it's ended up being. (I intend to test out this theory once I have completed this project as I bought several of the Revell MicroWings kits while they were on offer.)

Anyway, at this point of the modelling process I would be thinking of applying a coat of varnish - satin or gloss - of maybe even Pledge Klear prior to decaling. But how will Metalcote react to a coat of varnish?

According to what I have read Metalcote needs to be varnished as it drys with a light texture - like a matt coat - and so will have problems (like 'silvering') when the decals are applied. But this idea caused me some concern as I remember what happened when I tried using varnish during my earlier Plasti-kote experiment - it completely tarnished the shiny coat and left it a dull matt silver.
Therefore, I decided to try out a small area on the lower wing as a test patch for glossing...

What am I looking at? Well, the fact you can't see anythings is actually a good
thing! The varnish hasn't discoloured the Metalcote silver. (Oh, and you can see
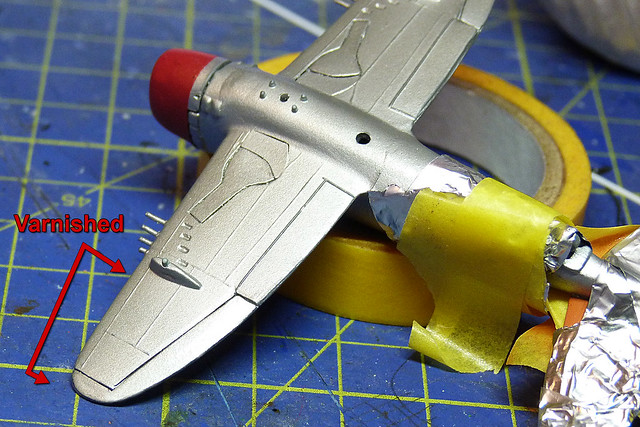
the bodge I made of the retracted undercarriage - doesn't look too bad.)
As you can see from the above picture Humbrol Gloss Varnish acrylic sprayed over Humbrol Aluminium Metalcote doesn't have a detrimental affect on the metallic coat at all. Super!
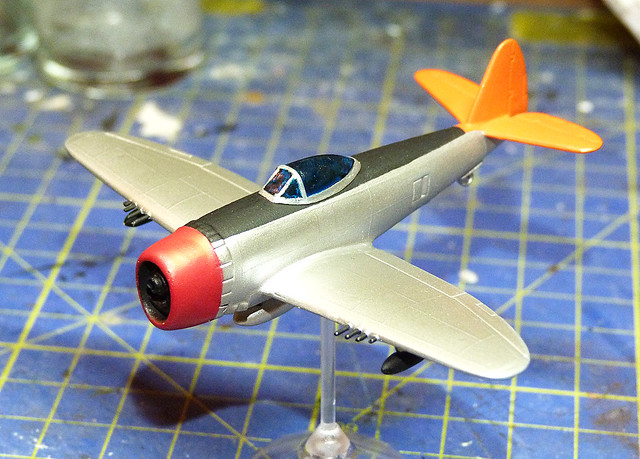
...So it's on with the next step which is the painting of the canopy.

I wanted to try a dark canopy - rather than a sky-blue one which some people prefer - and so started with a matt black base. Onto this I started painting on layers of deep blue artist's ink and leaving it to dry after each layer until I got a deep rich and translucent royal blue effect. Onto this I added a wash of white ink, and then another deep blue coat on top of this...


I'll let this coat dry again and have a further play with the canopy scheme as I think I can improve it. Once I'm happy with that it will be time to gloss varnish the whole model ready to add the decals.

Friday, 6 February 2015

Revell 1/144 P-47 Republic Thunderbolt - Pt. 5

[Sub-title: Humbrol Polished Aluminium Metalcote experiment.]

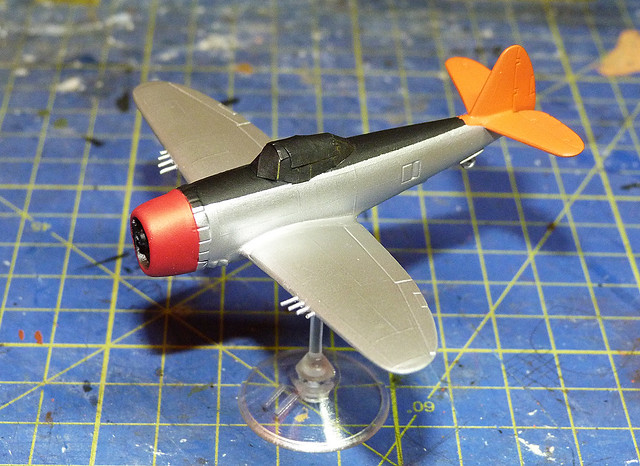
Well, I've polished up the Humbrol Metalcote and it looks OK. See what you think...


It's not a high reflection shine like the Plasti-kote was, but there again this actually worked!

Working with Humbrol Metalcote...
I followed the Humbrol Metacote video tutorial almost exactly - as far as I could tell - but I did not get the same results.

The video shows a result where the sample model did end up with a highly reflective metal shine. As you can see mine was more of a subdued shine, which is quite nice but not quite as good as the Humbrol example.

I found that my initial - perhaps overly cautious - light sprays of the Metalcote did not seem to be thick enough to stand up to the vigorous polish needed to make the paint really shine. So, I took a chance and repeated the process by adding a second round of sprayed coats. (The Humbrol video showed a single round of spray passes - that was a couple of light passes in one direction, covering the model, which were left to dry for half and hour, then followed by another series of light passes in a cross-wise direction. The model was then left to dry over night.)

By the way - don't be tempted to try using a Dremel, or similar hobby tool, to do the polishing. Even if - like me - you have what you think is the appropriate 'soft' polishing discs. My brother was concerned that the high-rev of the Dremel might actually 'melt' or damage the plastic of the kit, but it didn't - what it did do was over-polish and tarnish the Metalcote. It actually turned the Humbrol paint black! I'm afraid this is a job for a soft cloth and plenty of elbow grease.

After leaving my second model over-night again I started the hand-polishing and this time I did get more of a shine. The cloth does show that the polishing does remove a small amount of the paint which is why I reckon giving a double coat helps the process.


In fact, I am tempted to experiment further and give a scrap piece of plastic a triple coat to see what happens. My theory is that the hardier (i.e. 'thicker') the Metalcote application the more aggressively you can polish the paint without being in danger of completely removing the metallic paint. Worth a try.

What next?
Right, back to the model. I'm actually quite please with the actual modelling progress with this - even though all this experimentation has prolonged the actual time it has taken to make this little kit.

So, now I have to add the colour accents to the model; the red engine cowl, the orange tail and the black anti-dazzle panel on the top of the fuselage.

I have to start thinking about panel shading and 'weathering'. Do I panel shade? (In two minds.)

We shall see in part 6 of this extended experiment.

Sunday, 1 February 2015

Revell 1/144 P-47 Republic Thunderbolt - Pt. 4

[Sub-title: Humbrol Polished Aluminium Metalcote experiment.]

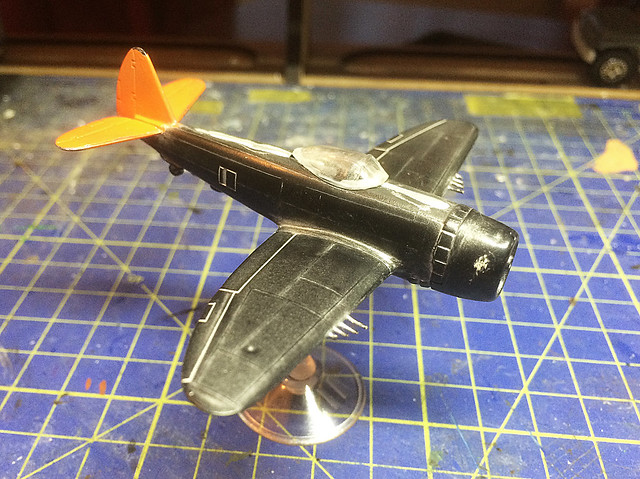
Not looking very nice at the moment my P-47 has had it's disastrous first paint
coat stripped back to the black primer coat. (I left the tail as that looked OK.)
Having had a bit of a 'time out' to lick my wounds I had a bit of a think and did some more research. My main reason for looking at something cheap and easily available like Plasti-kote was that all the other means of achieving a polished reflective metal paint coat seemed to be specialist modelling mediums that were fairly expensive, complicated to apply or hard to get hold of. But as the Plasti-kote was an abysmal 'fail' it was back to the drawing board.

Quite by chance I came across a product by Humbrol - of all people - called 'Metalcote' that seemed to fit the bill as being cheap, easy to use (just a couple of coats of spray) and wonders necver cease as it was available in one of my local stores. So it would seem churlish not to give the stuff a go!

So here we are again, but with a less than pristine base coat (I tried my best to clean up the weary P-47 test model ). The Humbrol Metalcote tutorial that I found suggested that you prime with grey, so I decided to give that a go. I know from experience that a grey primer does help highlight any flaws in your model preparation and although I had already primed (with black) I wanted to follow the Humbrol instructions exactly. Here's the video, it's quite informative...


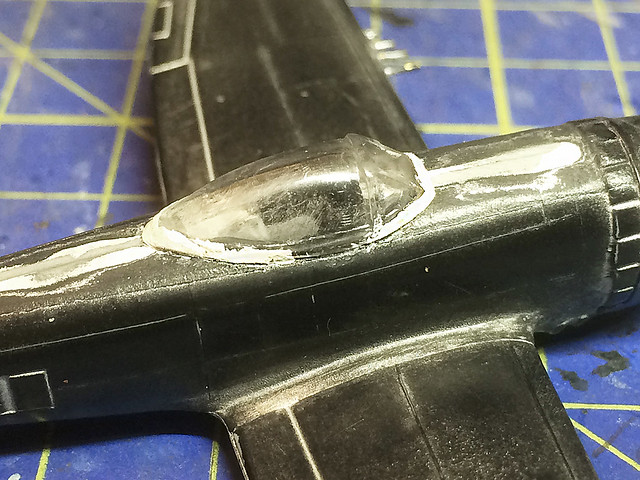
I went as far as to buy the proper Humbrol grey primer spray used in the video. I masked off the orange tail - as that looked alright - and I used this opportunity to attach the canopy this time. I have decided to spray the plane and canopy all in one and then paint the canopy. I have to say that the Revell canopy wasn't the best fit by any means and I had to resort to some filling to get the windshield to fit flush with the fuselage (but even so it was a bit of a bodge).


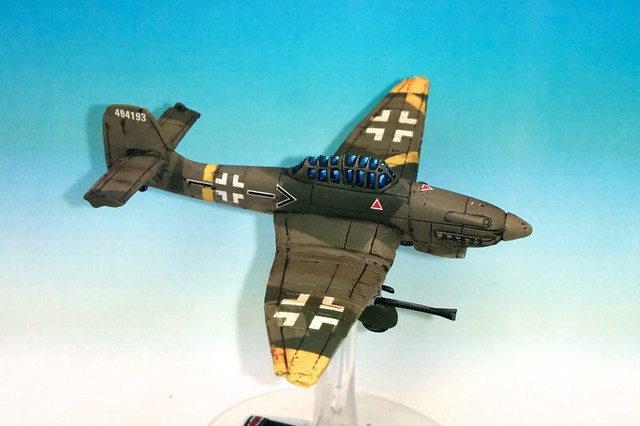
I'm a little unsure just how to paint the canopy - in the style of war gaming aircraft - as I don't have much experience in this technique. Most seem to go for a plain sky blue scheme, some others paint the canopy with a nicely shaded pattern with white at the edges to deep blue in the middle, or variations thereof...

Example of small model with a painted and shaded canopy scheme.
Credit: Rust and the City Blog
So this part will be a sort of experiment within an experiment!

Anyway, onwards. In the end I decided to strip off the orange paint on the tail as well as I'm trying to make a clean start of things. The Humbrol Grey Acrylic Primer spray goes on very nicely, but even so I was nervous that any of the previous paint layers would spoil the new coat...


Not bad! Very happy with that, it does give me a nice smooth base for further coats and I was glad to see that my cleaning and sanding of the previous paint had not adversely affected this next stage. There were no noticeable blemishes or 'bumps' where bits of stubborn paint remained.

A good start. But now onto the Humbrol Metalcote. I watched the Humbrol tutorial several times and tried my best to follow the techniques shown in the video. Spraying from a can is always a bit of a lottery and quality of coverage can be effected by many factors; whether the can is new, whether the spray nozzle is clean, the distance at which you spray and the speed and regularity with which you spay.

Spray too close and the coat will be too thick (the Humbrol video recommends a distance of 20cm), spraying too long in one area has the same affect. Use an old can or a can with a old or dirty nozzle and you might get 'splutter'. A steady speed and spray pattern can also help produce a better coat - as commonly known, a couple of thinner coats is better than one thick coat...


I followed the spray pattern shown in the Humbrol video, two light passes over the model in one direction - allow this coat to dry for 30 minutes or so then spray another two light passes over the model in a cross-wise direction (so twice 'up and down' followed by twice 'left to right' for example).

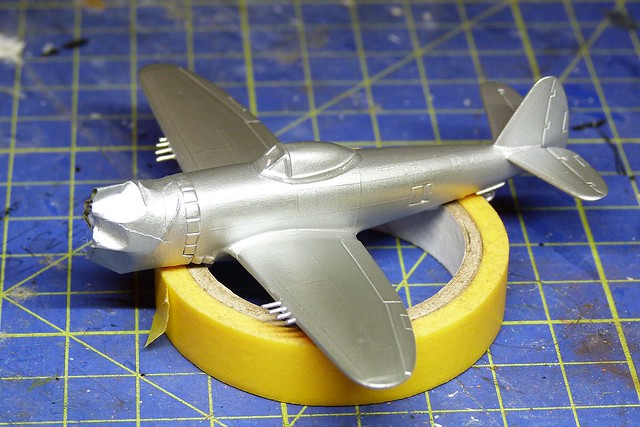
It didn't look half bad, certainly a much better quality coverage than the Plasti-kote Bright Metallic paint that I first tried. Not too thick and nice and smooth.

At this point the Humbrol Metalcote is a dull silver but with flecks of reflective particles all over.

Next: Hopefully in the final part of my experiments I will be buffing up the Humbrol paint to produce a polished aluminium effect. Fingers crossed!