Wednesday, 25 September 2013

Soldier Toy Makers 1942

Found this on the British Pathe site - wonderful stuff. Glad to hear that Harry Enfield is still working! ;)

Click on the picture below to go to the Pathe site and watch the video!

SOLDIER TOY MAKERS


Link: Soldier Toy Makers 1942

Wednesday, 11 September 2013

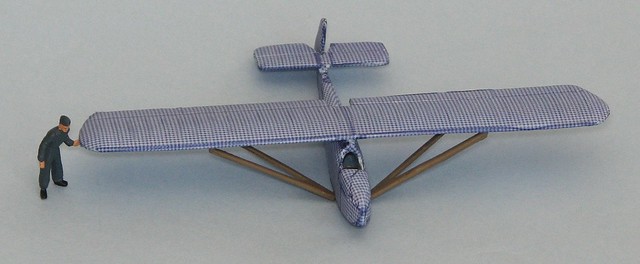
Featured work - 'Colditz Cock' by S. Bathy

I just had to feature this model as it's such a novel theme. The Colditz Cock was the glider built in secret by the British POWs held in Colditz Castle during WW2...

Click to enlarge

Another wonderful model by S. Bathy who's work I watch on Flickr.

You can read about the history of this fabulous glider on Wikipedia: Colditz Cock

Even the Germans must have admired this ambitious escape attempt!

Sunday, 11 August 2013

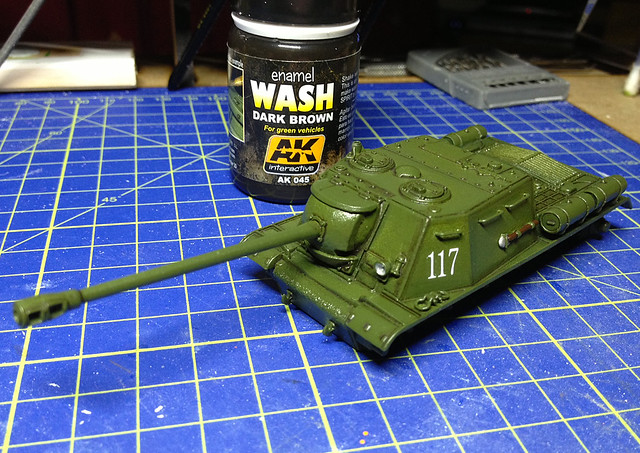
ISU-122 decal & pin-wash

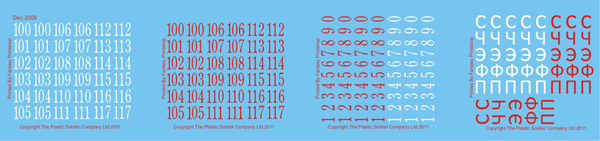
Having had to wait some time for the decals I wanted - some Soviet style numbers - I finally was able to get this project underway again. The decals I ordered were by Plastic Soldier Company and were generic Soviet armour markings that could be used on most types of WWII Red Army tanks...


These were quite cheap and I'm afraid it showed when they arrived as they were of that thick glossy type of decal that I have had bad experiences with in the past. Still, I persevered and used MICRO SET to adhere the decals and then once they had dried I did my best to bed them down smoothly with MICRO SOL.

MICRO SOL gently dissolves the carrier film of decals and settles them onto the model's surface. It is usually used to make transfers conform to uneven surface details - such as panel lines or raised surfaces - but in this case it served to thin the decal down so it wasn't so prominent.

Once done it was onto the pin-wash...


I used AK Interactive's enamel wash as I find it is of just the right consistency right out the bottle and I like the slightly greasy dark-green/brown colour it produces.

This is actually the very first stage in the weathering process as I start to create my war-weary and battered tank. So the next step is to start to lay on some lighter surface streaks and grime, then some scratches and rusty patches. Finally I will add some very light dry-brushing on the highlights and raised surfaces and then the chipping.

Tuesday, 30 July 2013

New tool - USB Hoover

Sounds daft, but keeping your workspace clean - especially when you sand, file and trim a lot - is quite essential. I spent a lot of time brushing away little bits and dust from my cutting mat - it really started to be a pain. But I've just bought a very cheap little tool that has solved this problem...


This little USB powered vacuum cleaner was just £1 from Poundland...And it works!

It collects all the dust and bits inside the front half of the gizmo - which detaches so you can empty it - and has a turbo overdrive button for stubborn bits.

I power it from my laptop, which I keep next to my worktray. It really is a no brainer purchase!

Thursday, 25 July 2013

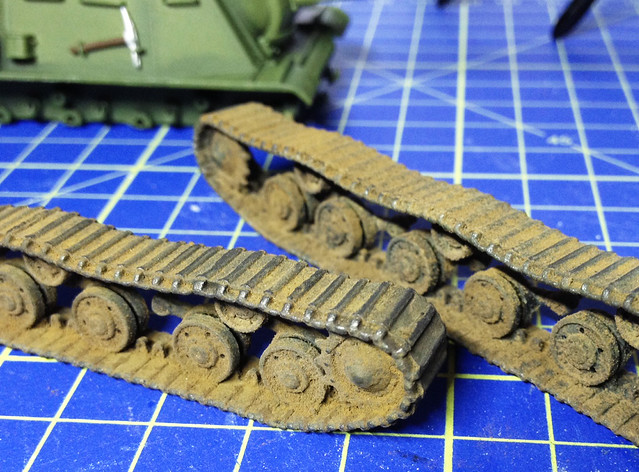
Muddy tracks - second go

I have already had a go at doing thickly muddied tank tracks, but the result wasn't altogether satisfactory...


You may have to take my word for it but the texture of the 'mud' I used - Tamiya's weathering sticks - wasn't quite right, especially for the 1/72 scale. I actually had one of my readers comment on this. But muddy tracks is such a basic technique in AFV modelling that I wanted to get this effect right, so I'm having a second go.

So, I did some research (referenced some YouTube videos) and plumped for a combination of tips on painting tracks supplied online and in a useful book I bought called 'Small-Scale Armour Modelling (Modelling Masterclass)' by Alex Clark..

A new product I am trying out - which I picked up in the ModelZone sale - is Vallejo's effects pigment. Normally I wouldn't buy this as it's expensive for what it is and a similar effect can be gotten cheaply by grinding up Conté crayons or pastels into dust. But this 'pre-potted' solution effectively saves me the messy grinding process!

Basically, my recipe for muddy tracks goes like this:

1. Start with a base coat of black on your tracks...
2. I then apply a very thinned wash of acrylic Khaki all over...
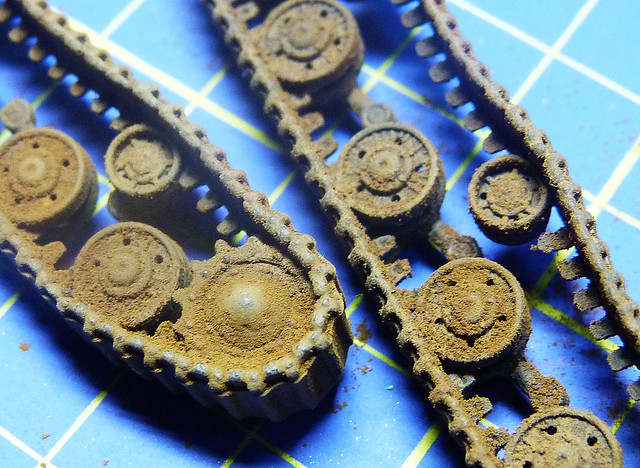
3. While the thinners is still slightly damp I dust the tracks down with a generous cloud of the pigment...


Alternating the effect
Now, I was going for a VERY muddy effect, but the 'mud' can be modulated to be less thick or a different colour mud to suit your chosen environment. I wanted a red clay type of mud so I used Vallejo's Natural Umber powder, but the powders come in a range of earth colours (likewise if you use the cheap Conté method you just choose the crayon colour you want).

What Scot's call 'clarted' in mud!
If you want a thinner layer of 'mud' you simply use less powder and you can also dust off any excess with a brush as the thinners dries off. 

Now remember, the powder is only held on by thinners, it is not fixed permanently. To do this you will have to give it a spray with something like matt varnish. At this point you can then add other track effects like metallic highlights or any additional washes that you might want...

A graphite pencil was used to give the metal tracks a metallic shine. Also, I
used some dark brown wash between the track links.
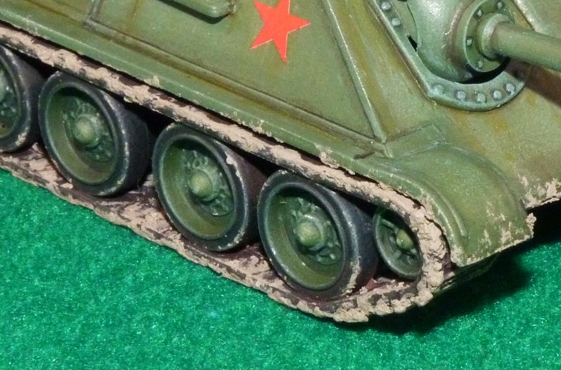
And there you go, heavily muddied tracks. A lot better effect this time than my first attempt with Tamiya weathering sticks. Importantly I think the effect matches the scale, and the 'clumps' of mud aren't too big.
You can review all the related posts in this project by clicking

Wednesday, 24 July 2013

ISU-122 Russian Green

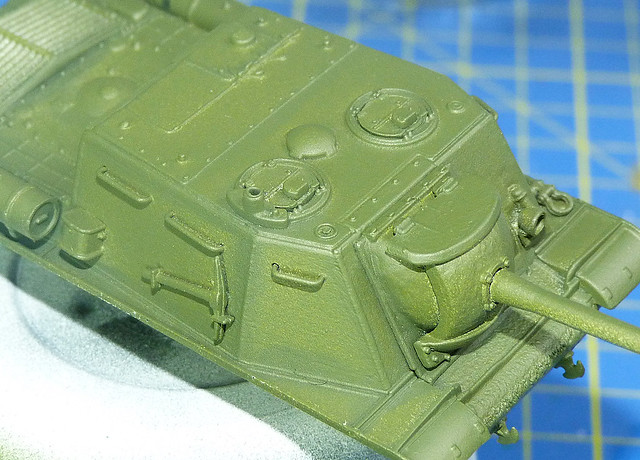
Well, here's the result of my pre-shading experiment...


There are faults, but I can just see the advantage of using pre-shading IF you want a display quality model (I would not go to this effort for a war gaming kit).

Now, hopefully what you will see is a darkening of the Russian Green top coat towards the edges of panels. A sort of graduation effect with lighter green at the centre of panels.

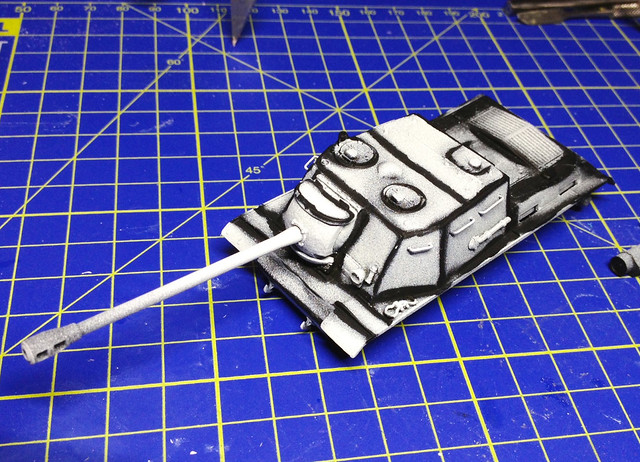
My mistake was banging down a thick layer of spray can white during the pre-shading stage (mainly because I have a couple of cans to use up). Now that I have used an airbrush I can tell the difference between the thickness of layers that the two methods produce - for a more subtle effect I will definitely airbrush the white pre-shading in future. Hopefully I will improve in my use of this technique as I get more practised in it.

One little success was the Russian Green paint I used for the top coat. This is Vallejo's Model Air Russian Green (71017) and as you can see it has that hint of yellow about it in the highlighted areas.

Next: Flat colour detailing (pick axe handel, etc) before glossing for decals.


You can review all the related posts in this project by clicking

Tuesday, 23 July 2013

ISU-122 pre-shaded

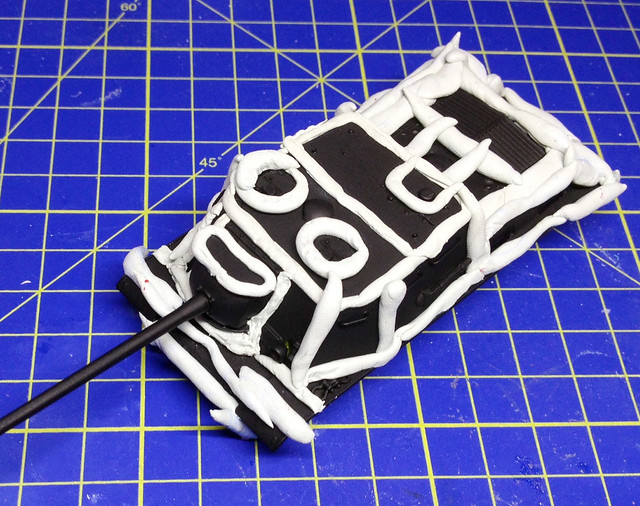
Before spraying the pre-shading layer I did some very quick masking using BluTack...


I remain somewhat skeptical about the worth of the technique at 1/72 - I think there may be other ways to achieve tonal variations - but let's see shall we?

I didn't see the point at putting a lot of care into the white layer, just so long as there was clear differentiation between the panel highlights and the black edges. This is just a proof of concept - if the general theory shows promise I will take greater care in future use of the technique...


Ready to go! And now an even greater challenge - my very first use of my 'new' airbrush!

...Fingers crossed! (My next post may either be a embarrassing record of failure or, hopefully, an interesting example of new technique learned!)